isaac gym(二)仿真setup(代码齐全)
目录
.1 Simulation Setup
.2 Creating a Simulation
2.1 Simulation Parameters
2.1.1 Up Axis
2.2 Creating a Ground Plane
.3 Loading Assets
.4 Environments and Actors
4.1 env
4.2 actors
4.3 Test
.5 Running the Simulation
.6 Adding a Viewer
编辑 .7 The Viewer GUI
.8 Custom Mouse/Keyboard Input
.9 Cleanup
编辑 .10 完整代码
续接上一章:issac gym安装与运行 (一)_啥也不是的py人的博客-CSDN博客
首先参考isaccgym自带的教程

.1 Simulation Setup
This facilitates efficient exchange of information between the core implementation written in C++ and client scripts written in Python
Isaac Gym uses flat data arrays to represent the state and controls of the simulation.
Isaac Gym uses flat data arrays to represent the state and controls of the simulation. This makes it easy to work with the data using common Python libraries like NumPy, which provides efficient methods to manipulate multidimensional arrays.
isaac gym可以操作矩阵,这就方便了用python来对其进行调用,或者说应用深度学习框架
运行后


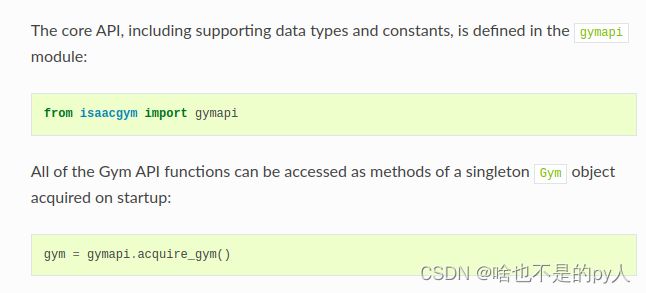
所有的Gym 的api函数都可以被作为启动时的单个Gym对象来访问的方法
.2 Creating a Simulation


2.1 Simulation Parameters
仿真参数设置
The simulation parameters allow you to configure the details of physics simulation. The settings may vary depending on the physics engine and the characteristics of the task to be simulated.

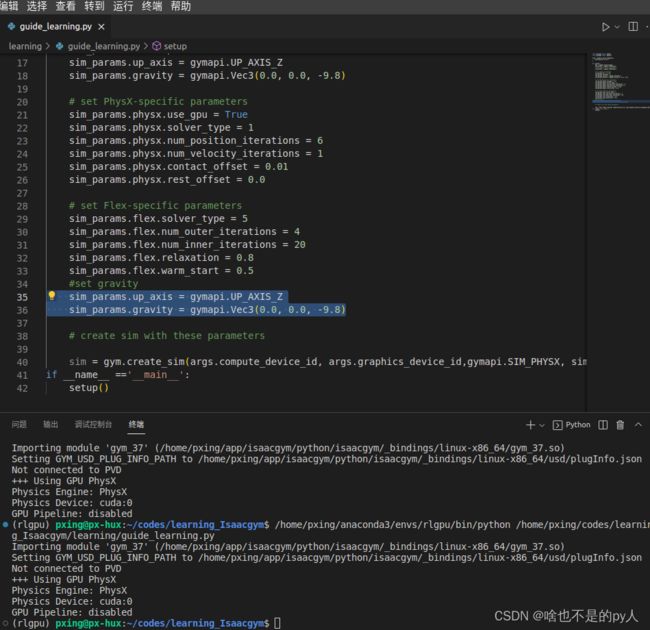
当设置完仿真参数后
调用了cuda

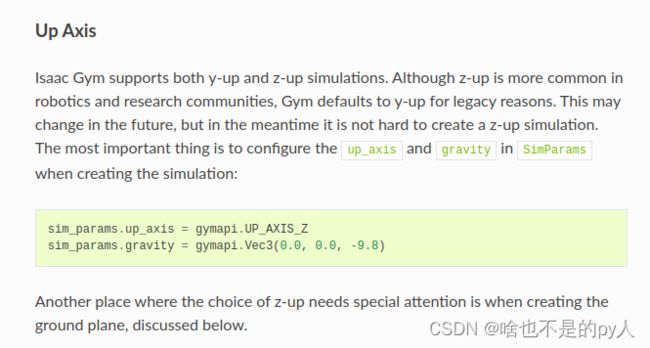
2.1.1 Up Axis
The most important thing is to configure the up_axis and gravity in SimParams when creating the simulation:
2.2 Creating a Ground Plane


.3 Loading Assets
提前把对应的urdf导入进来 
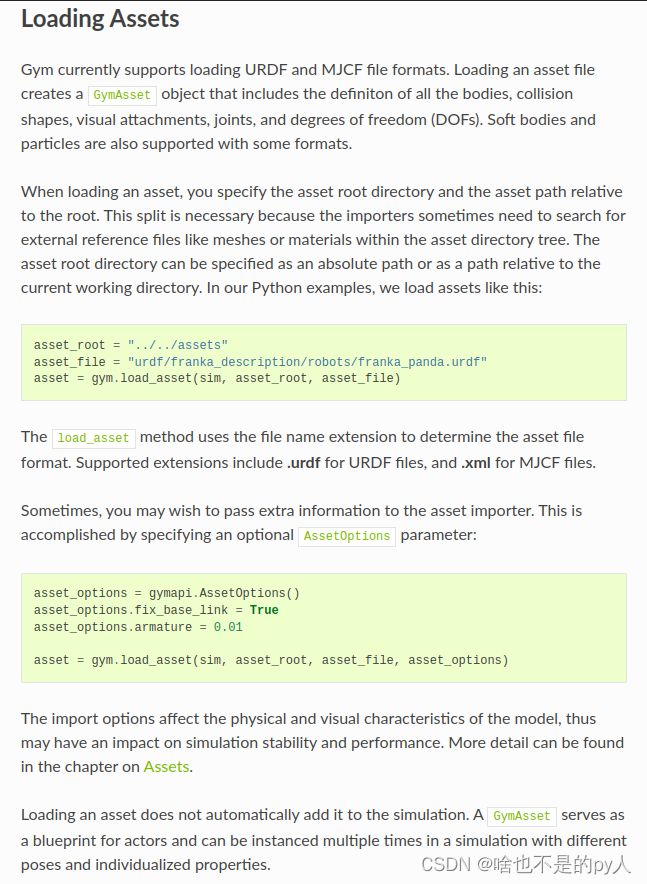
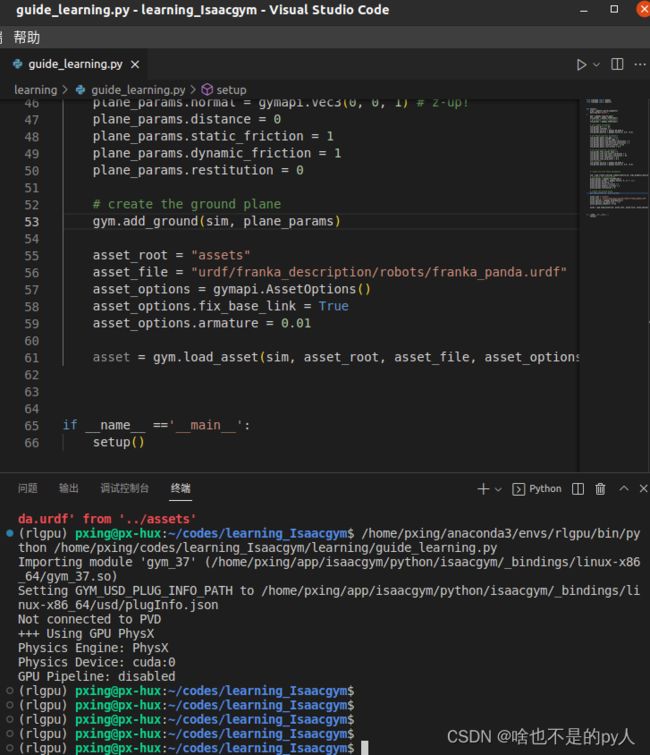
以上为isacc gym加载urdf的方式
.4 Environments and Actors
4.1 env

Getting the state of all envs and applying controls is done using a tensor-based API with PyTorch.
Before adding actors, you must create an environment:


新加的env在全局的坐标用二维坐标表示

4.2 actors

下图为math工具包
路径是examples/math.py


gym.create_actor最后两个参数0、1 are collision_group and collision_filter
collision_group 是一个整数,用于标识 actor 的身体将分配到的碰撞组。 只有属于同一个碰撞组的两个物体才会相互碰撞。 每个环境都有一个碰撞组是很常见的,在这种情况下,组 ID 对应于环境索引。 这可以防止不同环境中的参与者在物理上相互交互。 在某些情况下,您可能希望为每个环境设置多个碰撞组以进行更细粒度的控制。 值 -1 用于与所有其他组发生碰撞的特殊碰撞组。 这可用于创建可与所有环境中的参与者进行物理交互的“共享”对象
collision_filter 是一个位掩码,可让您过滤掉物体之间的碰撞。 如果两个物体的碰撞过滤器设置了公共位,则它们不会发生碰撞。 此值可用于过滤掉多体演员中的自碰撞或防止场景中某些类型的对象进行物理交互
4.3 Test


目前,用于设置环境的程序 API 有一些限制。 假设所有环境都按顺序创建和填充。 您创建一个环境并将所有actors添加到其中,然后创建另一个环境并将其所有actors添加到其中,依此类推。 完成一个环境的填充并开始填充下一个环境后,您将无法再向前一个环境添加actors。
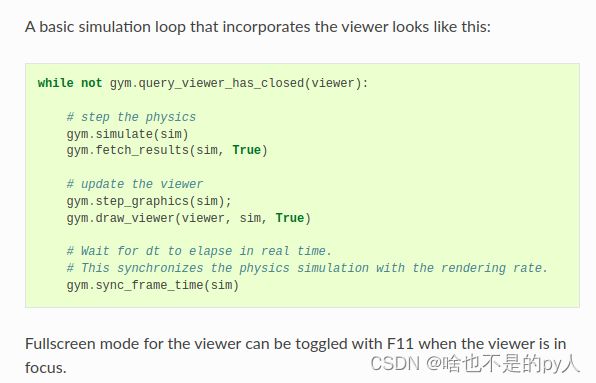
.5 Running the Simulation


.6 Adding a Viewer
默认情况下,模拟不会创建任何视觉反馈窗口。 这允许模拟在没有连接监视器的无头工作站或集群上运行。 然而,在开发和测试时,能够将模拟可视化是很有用的。 Isaac Gym 带有一个简单的集成查看器,可让您查看模拟中发生的事情。

如果您希望在查看器窗口关闭时终止模拟,您可以在 query_viewer_has_closed 方法上调节循环,该方法将在用户关闭窗口后返回 True。
 .7 The Viewer GUI
When a viewer is created, a simple graphical user interface will be shown on the left side of the screen. Display of the GUI can be toggled on and off with the ‘Tab’ key.
The GUI has 4 separate tabs: Actors, Sim, Viewer, and Perf.
The Actors tab provides the ability to select an environment and an actor within that environment. There are three separate sub-tabs for the currently selected actor.
The Bodies sub-tab gives information about the active actor’s rigid bodies. It also allows for changing the display color of the actor bodies and toggling the visualization of the body axes.
The DOFs sub-tab displays information about the active actor’s degrees-of-freedom. The DOF properties are editable using the user interface, put please note that this is an experimental feature.
The Pose Override sub-tab can be used to manually set the actor’s pose using its degrees of freedom. This feature, when enabled, overrides the pose and drive targets of the selected actor with values set in the user interface using sliders. It can be a useful utility for interactively exploring or manipulating the degrees of freedom of an actor.
The Sim tab shows the physics simulation parameters. The parameters vary by simulation type (PhysX or Flex) and can be modified by the user.
The Viewer tab allows customizing common visualization options. A noteworthy feature is the ability to toggle between viewing the graphical representation of bodies and the physical shapes that are used by the physics engine. This can be helpful when debugging physics behavior.
The Perf tab shows internally measured performance of gym. The top slider, “Performance Measurement Window” specifies a number of frames over which performance is measured. The frame rate reports the average frames per second (FPS) over the previous measurement window. The rest of the performance measures are reported as an average value per frame over the specified number of frames.
Frame Time is the total time from when one step begins to when the next step begins
Physics simulation time is the time the physics solver is running.
Physics Data Copy is the amount of time spent copying simulation results.
Idle time is time spent idling, usually within gym.sync_frame_time(sim).
Viewer Rendering Time is the time spent rendering and displaying the viewer
Sensor Image Copy time is the time spent copying sensor image data from the GPU to the CPU.
Sensor Image Rendering time is the time spent rendering camera sensors, not including viewer camera, into GPU buffers.
.8 Custom Mouse/Keyboard Input

.9 Cleanup

 .10 完整代码
from isaacgym import gymapi
from isaacgym import gymutil
import random


def setup():
    args = gymutil.parse_arguments(
    description="mytest",
)
    gym = gymapi.acquire_gym()
    sim_params = gymapi.SimParams()
    # get default set of parameters
    sim_params = gymapi.SimParams()

    # set common parameters
    sim_params.dt = 1 / 60
    sim_params.substeps = 2
    sim_params.up_axis = gymapi.UP_AXIS_Z
    sim_params.gravity = gymapi.Vec3(0.0, 0.0, -9.8)

    # set PhysX-specific parameters
    sim_params.physx.use_gpu = True
    sim_params.physx.solver_type = 1
    sim_params.physx.num_position_iterations = 6
    sim_params.physx.num_velocity_iterations = 1
    sim_params.physx.contact_offset = 0.01
    sim_params.physx.rest_offset = 0.0

    # set Flex-specific parameters
    sim_params.flex.solver_type = 5
    sim_params.flex.num_outer_iterations = 4
    sim_params.flex.num_inner_iterations = 20
    sim_params.flex.relaxation = 0.8
    sim_params.flex.warm_start = 0.5
    #set gravity
    sim_params.up_axis = gymapi.UP_AXIS_Z
    sim_params.gravity = gymapi.Vec3(0.0, 0.0, -9.8)


    # create sim with these parameters

    sim = gym.create_sim(args.compute_device_id, args.graphics_device_id,gymapi.SIM_PHYSX, sim_params)
    # configure the ground plane
    plane_params = gymapi.PlaneParams()
    plane_params.normal = gymapi.Vec3(0, 0, 1) # z-up!
    plane_params.distance = 0
    plane_params.static_friction = 1
    plane_params.dynamic_friction = 1
    plane_params.restitution = 0

    # create the ground plane
    gym.add_ground(sim, plane_params)


    '''loading assets'''
    asset_root = "assets"
    asset_file = "urdf/franka_description/robots/franka_panda.urdf"
    asset_options = gymapi.AssetOptions()
    asset_options.fix_base_link = True
    asset_options.armature = 0.01

    asset = gym.load_asset(sim, asset_root, asset_file, asset_options)

    '''loading environment'''
    spacing = 2.0
    lower = gymapi.Vec3(-spacing, 0.0, -spacing)
    upper = gymapi.Vec3(spacing, spacing, spacing)

    env = gym.create_env(sim, lower, upper, 8)

    '''actors create'''
    pose = gymapi.Transform()
    pose.p = gymapi.Vec3(0.0, 1.0, 0.0)
    pose.r = gymapi.Quat(-0.707107, 0.0, 0.0, 0.707107)#四元数表示
    #pose.r = gymapi.Quat.from_axis_angle(gymapi.Vec3(1, 0, 0), -0.5 * math.pi)
    #这是表示绕x旋转-90度数

    actor_handle = gym.create_actor(env, asset, pose, "MyActor", 0, 1)#actor必须放在指定env中

def test():
    args = gymutil.parse_arguments(
    description="mytest",
)
    gym = gymapi.acquire_gym()
    sim_params = gymapi.SimParams()
    # get default set of parameters
    sim_params = gymapi.SimParams()

    # set common parameters
    sim_params.dt = 1 / 60
    sim_params.substeps = 2
    sim_params.up_axis = gymapi.UP_AXIS_Z
    sim_params.gravity = gymapi.Vec3(0.0, 0.0, -9.8)

    # set PhysX-specific parameters
    sim_params.physx.use_gpu = True
    sim_params.physx.solver_type = 1
    sim_params.physx.num_position_iterations = 6
    sim_params.physx.num_velocity_iterations = 1
    sim_params.physx.contact_offset = 0.01
    sim_params.physx.rest_offset = 0.0

    # set Flex-specific parameters
    sim_params.flex.solver_type = 5
    sim_params.flex.num_outer_iterations = 4
    sim_params.flex.num_inner_iterations = 20
    sim_params.flex.relaxation = 0.8
    sim_params.flex.warm_start = 0.5
    #set gravity
    sim_params.up_axis = gymapi.UP_AXIS_Z
    sim_params.gravity = gymapi.Vec3(0.0, 0.0, -9.8)


    # create sim with these parameters

    sim = gym.create_sim(args.compute_device_id, args.graphics_device_id,gymapi.SIM_PHYSX, sim_params)
    # configure the ground plane
    plane_params = gymapi.PlaneParams()
    plane_params.normal = gymapi.Vec3(0, 0, 1) # z-up!
    plane_params.distance = 0
    plane_params.static_friction = 1
    plane_params.dynamic_friction = 1
    plane_params.restitution = 0

    # create the ground plane
    gym.add_ground(sim, plane_params)


    '''loading assets'''
    asset_root = "assets"
    asset_file = "urdf/franka_description/robots/franka_panda.urdf"
    asset_options = gymapi.AssetOptions()
    asset_options.fix_base_link = True
    asset_options.armature = 0.01

    asset = gym.load_asset(sim, asset_root, asset_file, asset_options)
    # set up the env grid
    num_envs = 64
    envs_per_row = 8
    env_spacing = 2.0
    env_lower = gymapi.Vec3(-env_spacing, 0.0, -env_spacing)
    env_upper = gymapi.Vec3(env_spacing, env_spacing, env_spacing)

    # cache some common handles for later use
    envs = []
    actor_handles = []

    # create and populate the environments
    for i in range(num_envs):
        env = gym.create_env(sim, env_lower, env_upper, envs_per_row)
        envs.append(env)#envs的索引和actors的一致这样就可以防止actors跟别的env碰撞

        height = random.uniform(1.0, 2.5)

        pose = gymapi.Transform()
        pose.p = gymapi.Vec3(0.0, height, 0.0)

        actor_handle = gym.create_actor(env, asset, pose, "MyActor", i, 1)
        actor_handles.append(actor_handle)
        '''viewer create'''
        cam_props = gymapi.CameraProperties()
        viewer = gym.create_viewer(sim, cam_props)


        num=0
        while not gym.query_viewer_has_closed(viewer):

            # step the physics
            gym.simulate(sim)
            gym.fetch_results(sim, True)

            # update the viewer
            gym.step_graphics(sim)
            gym.draw_viewer(viewer, sim, True)

            # Wait for dt to elapse in real time.
            # This synchronizes the physics simulation with the rendering rate.
            gym.sync_frame_time(sim)
            num+=1
            if num>10:
                print(num)
                gym.destroy_viewer(viewer)
                gym.destroy_sim(sim)


if __name__ =='__main__':
    #setup()
    test()