C++基础知识
api文档
0.前言
字节是由8个位所组成,可代表一个字符(A~Z)、数字(0~9)、或符号(,.?!%&+-*/),是内存储存数据的基本单位。
1 byte = 8 bit
1 KB = 1024 bytes
1 MB = 1024 KB
1 GB = 1024 MB 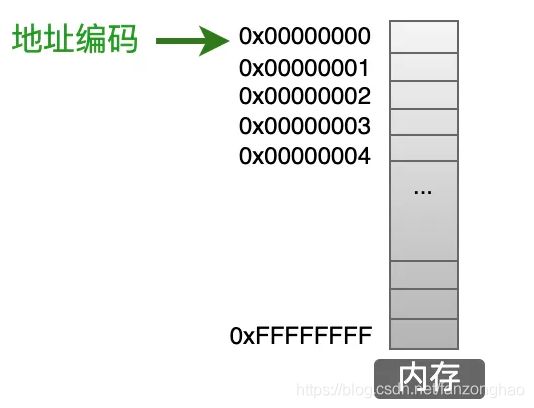
内存可以看成是由一行一行的地址连续组成的,可看出0xFFFFFFFF = 2^32 = 4Gb内存。
32 位、64 位,指的是计算机的 CPU 中寄存器的最大存储长度,如果寄存器中最大存储 32bit 的数据,就称之为 32 位系统。
CPU 通过 3 种总线把各组成部分联系在一起:地址总线、数据总线和控制总线。地址总线的宽度决定了 CPU 的寻址能力,也就是 CPU 能达到的最大地址范围。
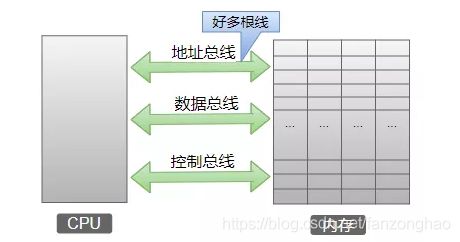
那么 CPU 想从内存中的某个地址空间上存取一个数据,那么 CPU 就需要在地址总线上输出这个存储单元的地址。假如地址总线的宽度是 8 位,能表示的最大地址空间就是 0xFF,也就是能找到内存中最大的存储单元是 0xFF这个格子(从 0 开始)。即使内存条的实际空间是 4Gb内存,CPU 也没法使用后面的内存地址空间。
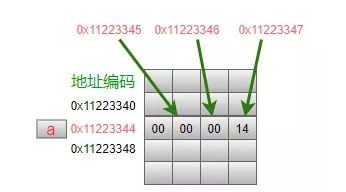
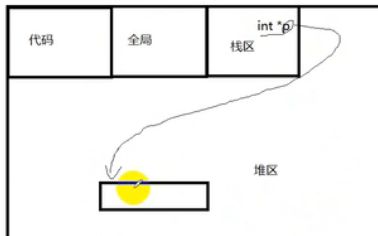
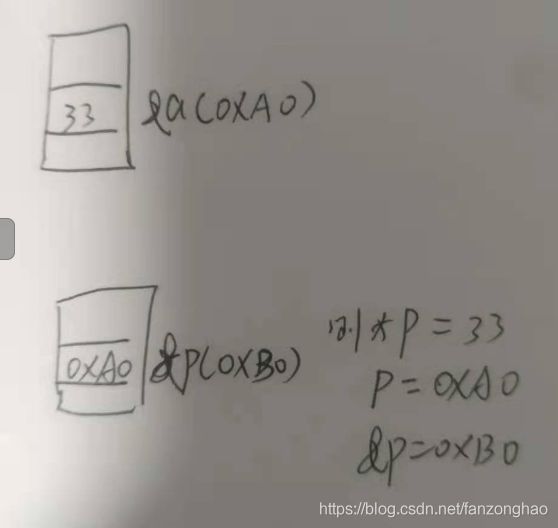
例如一个32位系统,占4个字节的a,在内存中存放如上,通过指针取*就能把a值取出来。
int *pa = a;
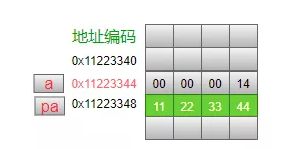
可看出pa存放的是a的地址。
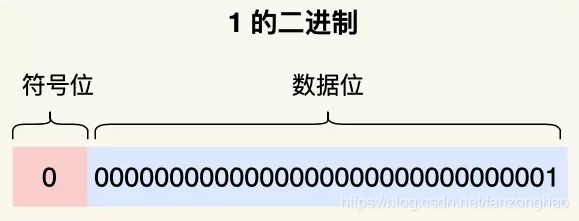
正数在计算机中存储的是二进制,而负数则是正数位的补码(取反+1),假如不是演示-2+1

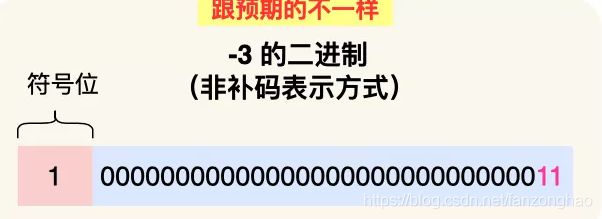 -2+1=-3,明显是错的
而换成补码
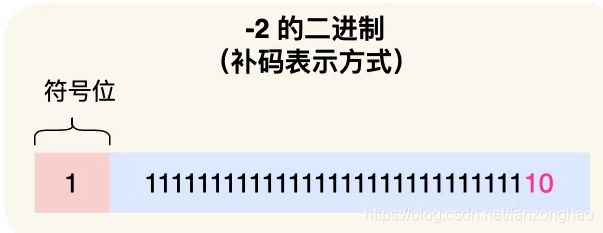
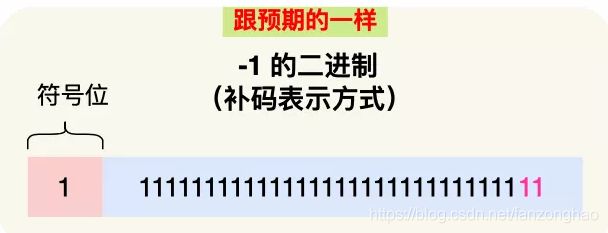 在减1取反就变为100000000000000...1结果就是-1。
一.堆栈区别
栈一般只有5M~10M很小,作存储变量用int double float等等,而堆内存很大,对于C语言是需要手动用malloc开辟以及free释放,对于C++需要用new开辟以及delete释放,,注意一定要匹配使用不要乱套.
对于非内部数据类型的对象而言,光用 maloc/free 无法满足动态对象的要求。
对象在创建的同时要自动执行构造函数,对象在消亡之前要自动执行析构函数。由于
malloc/free 是库函数而不是运算符,不在编译器控制权限之内,不能够把执行构造函数和析
构函数的任务强加于 malloc/free。因此 C++语言需要一个能完成动态内存分配和初始化工作
的运算符 new,以及一个能完成清理与释放内存工作的运算符 delete。注意 new/delete 不是
库函数。
c++面向对象三大特点:封装,继承和多态.
内存分配.
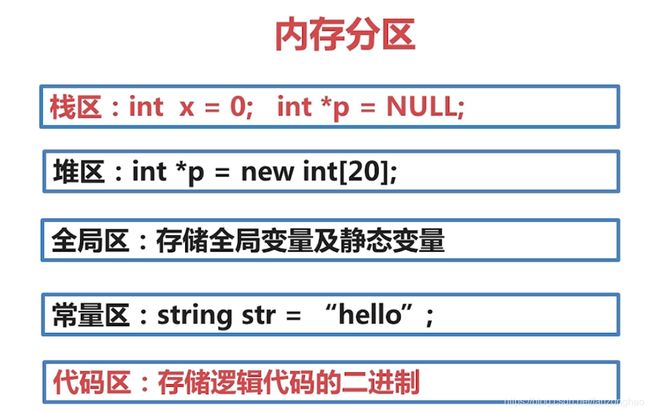
全局区: 内存在程序编译的时候就已经分配好,这块内存在程序的整个运行期间都存在。例如全局变量,static 变量,常量等。其生命周期由操作系统控制.
栈区由系统控制,在执行函数时,函数内局部变量的存储单元都可以在栈上创建,函数执行结束时这些存储单元自动被释放。存放函数的参数值,局部变量等。
堆区由程序员控制;类实例化之前是不占用堆和栈的,当实例化以后,采用不同方式就可以占用不用内存分区.
代码区:存储代码的二进制, 特点是只读 共享.
示例1,打印值在释放内存之前
#include
#include

int main ()
{
   int *p ;//在栈区

   p = (int *)malloc(sizeof(int));//malloc开辟sizeof(int)的内存,其在堆区,指针p 指向这段内存
   *p = 10000;

   printf("%d",*p);
   free(p);//释放分配的内存

   return 0;
} 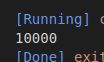
示例2,打印值在释放内存之后
#include
#include

int main ()
{
   int *p ;//在栈区

   p = (int *)malloc(sizeof(int));//malloc开辟sizeof(int)的内存,其在堆区,指针p 指向这段内存
   *p = 10000;


   free(p);//释放分配的内存
   printf("%d",*p);

   return 0;
} ![]()
更加鲁棒的写法添加内存分配异常和释放的处理,下面是申请一个指针和内存块的示例.
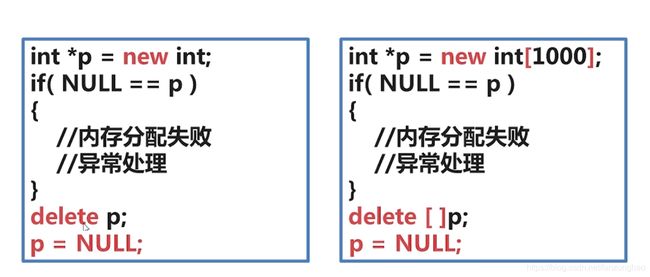
示例3: 申请整型内存示例
#include
#include
#include
void test(int &a, int &b);


int main ()
{
   int *p = new int(20);
   if(NULL==p)
      printf("QAQ");
   printf("%d\n",*p);
   delete p;
   p = NULL;
   // int *p = new int[1000];
   // int *a = new int[100];
   // if(NULL==p)
   //    printf("QAQ");
   // *p = {1,2,3};
   // delete []p;
   // p = NULL;


   return 0;
}

void test(int &a, int &b)
{
   int c=0;
   c =a;
   a= b;
   b=c;
}
示例4:申请数组块内存示例
#include
#include
#include
void test(int &a, int &b);


int main ()
{
   int *p = new int[1000];
   if(NULL==p)
      printf("QAQ");
   p[0]=10;
   p[1]=20;
   printf("%d\n%d\n",p[0],p[1]);
   delete []p;
   p = NULL;
   return 0;
}

void test(int &a, int &b)
{
   int c=0;
   c =a;
   a= b;
   b=c;
}

示例5:char类型内存块申请与释放示例
#include
#include
#include
#include
#include
using namespace std;
void test(int &a, int &b);


int main ()
{

   //在堆中申请100个char类型的内存
   char *str = new char[100];
    //拷贝Hello C++字符串到分配的堆中的内存中
	strcpy(str, "Hello imooc");
    //打印字符串
cout< ![]()
二.g++基础
g++ --version 查看版本
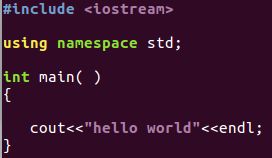
#include
using namespace std;
int main()
{
//hahha
cout<<"hello world"<
直接生成可执行程序test
g++ -o test test.cpp
![]()
深入解析生成可执行程序test的过程
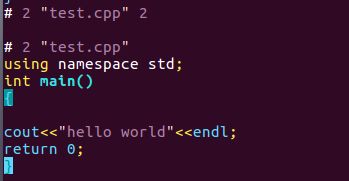
1.g++ -E test.cpp > test.i
这一步生成test.i进行预处理,做了宏的替换,注释的消除,可看见//hahha不见了
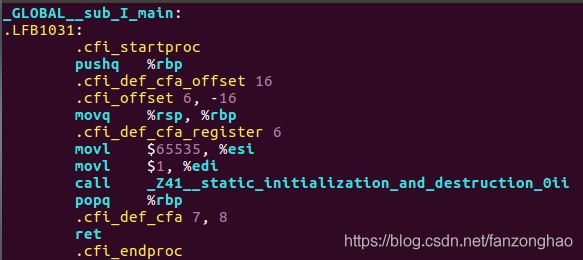
2.g++ -S test.cpp
这一步生成test.s,表示生成汇编指令
3.g++ -c test.cpp
这一步生成test.o,将汇编语言变成目标代码,生成目标文件,也就是二进制文件
4.g++ test.o -o test
链接目标代码生成可执行程序test
![]()
上述编译过程产生了下面的文件
![]()
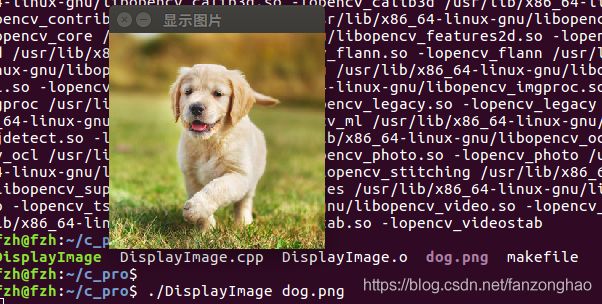
Makefile可以有效的减少大工程中需要编译和链接的文件,只编译和链接那些需要修改的文件,可以说使用Makefile,整个工程都可以完全自动化编译。
利用makefile对.cpp文件进行编译链接
DisplayImage.cpp
#include
#include
#include

//使用cv这个命名空间
using namespace cv;
using namespace std;
/*
 *一般有两种写法:
 *main( int argc, char* argv[])
 *main( int argc, char** argv)
 */
int main( int argc, char** argv )
{
  //建立一个Mat类型的变量image
  Mat image;
  /* API中有:
   * C++: Mat imread(const string& filename, int flags=1 )
   * 意思是返回Mat类型数据,第一个参数接受一个string类型的引用,
   * 第二个参数接受一个int类型的flags,一般都是1。
   */
  image = imread( argv[1], 1 );

  //当传的参数不是一个,或者图片没有数据则提示没有图片并退出程序
  if( argc != 2 || !image.data )
    {
      cout<<"没有该图片"<
编写makefile,在这里要注意opencv库和头文件
export PKG_CONFIG_PATH=$PKG_CONFIG_PATH:/home/fzh/usr/lib/pkgconfig

CXXFLAGS:=$(shell pkg-config --cflags --libs opencv)

DisplayIMage:DisplayImage.o
        g++ DisplayImage.o -o DisplayImage          $(CXXFLAGS)
DisplayImage.o:DisplayImage.cpp
        g++ -c DisplayImage.cpp -o DisplayImage.o   $(CXXFLAGS)
clean:
        rm *o  DisplayImage
执行make
./DisplayImage dog.png
利用Cmake对cmakelists.txt进行编辑,会自动生成makefile
cmake --version
安装cmake apt-get install cmake
1.编写CMakeLists.txt
cmake_minimum_required(VERSION 2.8)
project(DisplayImage)
find_package(Opencv REQUIRED)
add_executable(DisplayImage DisplayImage.cpp)
target_link_libraries(DisplayImage ${OpenCV_LIBS})
cmake .
进行编译
make生成DisplayImage
./DisplayImage dog.png
三,g++用法与命名空间和一些api和基础说明
1.g++用法
g++ -o hello hello.cpp
![]()
![]()
2.int argc, char** argv参数
#include
using namespace std;

int main(int argc, char** argv)
{
    cout << "You have entered " << argc
         << " arguments:" << "\n";

    for (int i = 0; i < argc; ++i)
        cout << argv[i] << "\n";

    return 0;
}
g++ -o main main.cpp

2.命名空间namespace,用来隔离相同名字的变量或者函数
#include
using namespace std;

namespace A
{
    int x=1;
    void fun()
    {
cout<<"A"< 
3.计时
#include
#include
#include
#include
#include
#include
#include
using namespace std;

int main()
{
auto start = std::chrono::system_clock::now();//开始时间
for (int i=0; i<1e6;i++){}
auto end = std::chrono::system_clock::now();//结束时间
std::cout << std::chrono::duration_cast(end - start).count() << "ms" << std::endl;
}
4-1.写入txt
fstream:读写操作
ifstream:读操作
ofstream:写操作
// 写入txt
#include
#include
#include
using namespace std;
int main() {
//创建流对象
ofstream ofs;
//打开文件
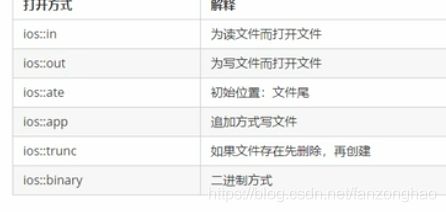
ofs.open("./test.txt", ios::out);//打开方式 ios::binary
if(ofs.fail()){
cout<<"打开文件失败"< 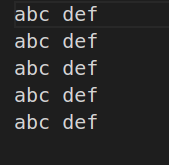
4-2. 读取txt
共有四种方式:
(1)用数组 会把空格 转行等当成 换行符
//读取txt
#include
#include
#include
using namespace std;
int main() {
    //创建流对象
    ifstream ifs;
    //打开文件
    ifs.open("./test.txt", ios::in);//打开方式 ios::binary
    if(ifs.fail()){
        cout<<"打开文件失败"<>buf) {
        cout << "===buf:===" << buf << endl;
    }
    //    关闭
    ifs.close();
}
好处是可以利用空格获取想要的信息
//创建流对象
ifstream ifs;
//打开文件
ifs.open("./test.txt", ios::in);//打开方式 ios::binary
if(ifs.fail()){
cout<<"打开文件失败"<> count;
cout<<"===count==="<> name >> dec >> size;
cout<<"===name==="<> hex >> res;
cout<<"===res==="< 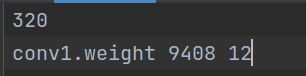 左边是txt内容,右边可以针对性的取出来.
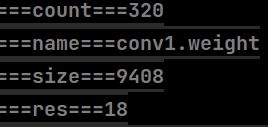
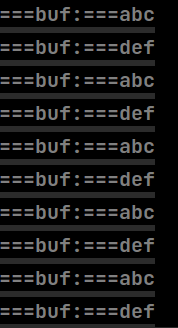
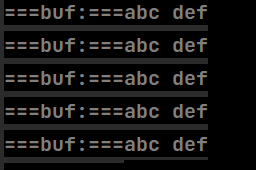
(2)用getline直接获取一行
//第二种: 就是一行一行进行读取 不会把空格当成换行符
    char buf[1024] = {0};
    while (ifs.getline(buf, sizeof(buf)/sizeof(buf[0]))){
        cout << "===buf:===" << buf << endl;
    }
(3)第三种 用string
//第三种:用string
string buf;
while (getline(ifs, buf)){
cout << "===buf:===" << buf << endl;
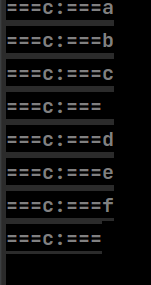
}(4)(不太推荐用) 只能一个字符一个字符读
  //第四种: (不太推荐用) 只能一个字符一个字符读
    char c;
    while ((c = ifs.get()) != EOF){
        cout << "===c:===" << c << endl;
    }
size获得二进制长度,将二进制中的卷积权重7*7*64*3=9408放入vector中
    string weightPath = "./resnet50/conv1.weight.wgt";
	int size = 0;
	ifstream file(weightPath, ios_base::binary);
	file.read((char*)&size, 4);//得到长度
	cout<<"===size:=="< weights(fp, fp + size);
	delete []floatWeights;
	floatWeights = NULL;
	file.close();

cout<<"=========weights.size():======"< 
5-1写入二进制
#include
#include
#include
#include
using namespace std;

class Person{
    public:
        char m_Name[64];
        int m_Age;
};
//二进制文件 写文件
int main() {
    //创建流对象
    ofstream ofs;
    //打开文件
    ofs.open("./person.txt", ios::binary);//打开方式 ios::binary
    if(ofs.fail()){
        cout<<"打开文件失败"<
5-2读取二进制
#include
#include
#include
#include
using namespace std;

class Person{
    public:
        char m_Name[64];
        int m_Age;
};

//二进制读文件
int main() {
    //1.创建流对象
    ifstream ifs;
    //2.打开文件
    ifs.open("./person.txt", ios::in | ios::binary);//打开方式 ios::binary
    if(ifs.fail()){
cout<<"打开文件失败"< 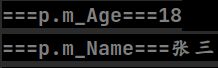
6.读取文件夹里的图片路径
测试文件夹下有3张图片
#include
#include
#include
#include
#include
#include
#include
#include
#include
#include
#include
#include
#include 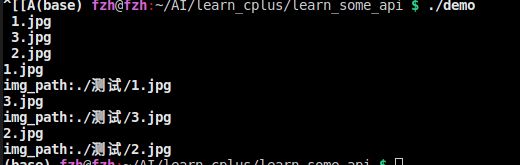
7.三目运算符
    int x = 11;
    int a = (x > 10)?1:0;
    cout<<"a:"< 10)?y=22:c=33;
    cout<<"y:"<
8.一次多个变量赋值
    int x = 11, y =10, z=100;
    cout<<"x:"<
9.枚举
举类型(enumeration)是 C++ 中的一种派生数据类型
    //枚举可以看成定义出一种新类型
    enum color {RED, BLACK};//默认是0开始
    color tvcolor = RED;
    cout<<"tv:"<
10.结构体
(1)结构体变量
其数据成员可看成都是public的,而类的成员默认是私有的。
struct Student
{
    bool gender;
    char name[20];
    int age;
    double score;
};
void show(Student &s){
    cout<<"这是:"<<(s.gender?"帅哥":"美女")<gender?"帅哥":"美女")<name<score<age = 10;
    s3->score = 60;
    strcpy(s3->name, "哈哈王");//拷贝
cout<<"s3->age:"<age<name:"<name< 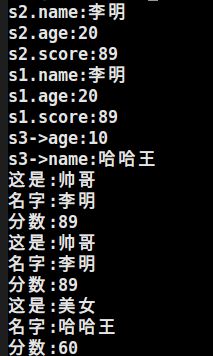
(2)结构体数组
struct Student
{
    bool gender;
    char name[20];
    int age;
    double score;
};
void show(Student &s){
cout<<"这是:"<<(s.gender?"帅哥":"美女")<gender?"帅哥":"美女")<name<score< 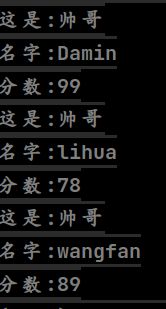
(3)结构体嵌套
#include
#include
using namespace std;

struct Student
{
    bool gender;
    string name;
    int age;
    double score;
};
//结构体嵌套
struct Teacher{
    int id;
    string name;
    int age;
    Student stu;

};
int main() {
    //创建嵌套结构体
    Student s = {true, "Damin", 11, 99};
    Teacher t = {111, "ChenHuan", 56, s};

    t.stu.name = "XiaoMin";
    Teacher *p = &t;
cout<<"==p->id:"<id<name:"<name<stu.name:"<stu.name< 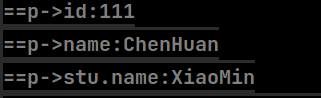
也可以这样写加上.
//创建嵌套结构体
    Student s = {.gender = true, .name = "Damin", .age=  11, .score = 99};
    Teacher t = {.id = 111, .name = "ChenHuan", .age = 56, .stu = s};

    t.stu.name = "XiaoMin";
    Teacher *p = &t;
cout<<"==p->id:"<id<name:"<name<stu.name:"<stu.name< 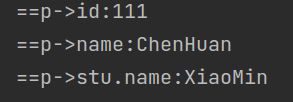
案例:对结构体数组里面的年龄排序
//
// Created by fzh on 2021/4/29.
//
#include
#include
using namespace std;
struct Hero
{
    string name;
    string gender;
    int age;
};

void bubbleSort(Hero heroArray[], int length){
    for(int i = 0; i < length - 1; i++){
        for(int j = 0; j heroArray[j + 1].age){
                Hero temp = heroArray[j];
                heroArray[j] = heroArray[j + 1];
                heroArray[j + 1] = temp;
            }
        }
    }
}

void prinHero(Hero heroArray[], int length){
for(int i=0; i 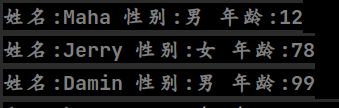
11.ifdef define等标识符作用
(1)用作debug
#ifdef 标识符
程序段1
#else
程序段2
#endif
其中#else部分也可以没有,即:
#ifdef
程序段1
#denif
示例:
	#define DEBUG 1;
//当标识符已经被定义过(一般是用#define命令定义),则对程序段1进行编译,否则就不编译。
#ifdef DEBUG
cout<<"程序段1:此处为debug程序"<![]()
当注释掉第一行以后,就不打印里面的信息了,适合debug使用.
(2)解决.h文件 宏定义重复使用
  #ifndef   _aaa_
  #define   _aaa_
  class   aaa
  {
  };
  #endif
12.cmake指令
(1) cmake_minimum_required()
cmake_minimum_required(VERSION 2.6)
设置cmake的最低版本需求
(2)project(resnet)
工程名称
(3)add_definitions()
add_definitions(-std=c++11)
支持c++11编译
(4)set()
用来显式的定义变量 例子 : SET (SRC_LST main.c other.c) 说明: 用变量代替值,例子中定义 SRC_LST 代替后面的字符串。
(5)find_package()
引入外部依赖包,用来自动查找配置构建工程所需的程序库。
find_package(OpenCV REQUIRED)
include_directories(OpenCV_INCLUDE_DIRS)
上面例子就是 :
当它找到OpenCV程序库之后,就会帮助我们预定义几个变量,OpenCV_FOUND、OpenCV_INCLUDE_DIRS、OpenCV_LIBRARY_DIRS、OpenCV_LIBRARIES,它们分别指是否找到OpenCV,OpenCV的头文件目录,OpenCV的库文件目录,OpenCV的所有库文件列表。接着我们就可以使用这些变量来配置了.
(6)ADD_EXECUTABLE()
add_executable(resnet50 ${PROJECT_SOURCE_DIR}/resnet50.cpp demo.cpp)
利用源码文件生成目标可执行程序。
(7)AUX_SOURCE_DIRECTORY()
作用是发现一个目录下所有的源代码文件并将列表存储在一个变量中,这个指令临时被用来自动构建源文件列表。
AUX_SOURCE_DIRECTORY(. SRC_LIST)
ADD_EXECUTABLE(main ${SRC_LIST})
(8)include_directories()
# tensorrt
include_directories(/usr/include/x86_64-linux-gnu/)
link_directories(/usr/lib/x86_64-linux-gnu/)
用来设置包含的头文件的路径。
(9)link_directories()
# tensorrt
include_directories(/usr/include/x86_64-linux-gnu/)
link_directories(/usr/lib/x86_64-linux-gnu/)
指令用来设置库文件的路径。
(10)target_link_libraries()
target_link_libraries(resnet50 nvinfer)
target_link_libraries(resnet50 cudart)
target_link_libraries(resnet50 ${OpenCV_LIBS})
用来设置需要的库文件
(11)CUDA_ADD_EXECUTABLE()
源码文件中有cuda程序时,使用该条指令编译生成目标可执行程序。
(12)add_definitions
add_definitions的功能和C/C++中的#define是一样的
具体的一个示例:
cmake_minimum_required(VERSION 2.6)

project(resnet)

add_definitions(-std=c++11)

option(CUDA_USE_STATIC_CUDA_RUNTIME OFF)
set(CMAKE_CXX_STANDARD 11)
set(CMAKE_BUILD_TYPE Debug)

find_package(OpenCV REQUIRED)
include_directories(OpenCV_INCLUDE_DIRS)

include_directories(${PROJECT_SOURCE_DIR}/include)
# include and link dirs of cuda and tensorrt, you need adapt them if yours are different
# cuda
include_directories(/usr/local/cuda/include)
link_directories(/usr/local/cuda/lib64)
# tensorrt
include_directories(/usr/include/x86_64-linux-gnu/)
link_directories(/usr/lib/x86_64-linux-gnu/)

#add_executable(resnet18 ${PROJECT_SOURCE_DIR}/resnet18.cpp)
#target_link_libraries(resnet18 nvinfer)
#target_link_libraries(resnet18 cudart)

add_executable(resnet50 ${PROJECT_SOURCE_DIR}/resnet50.cpp demo.cpp)
#add_executable(resnet50 ${PROJECT_SOURCE_DIR}/main.cpp Tensorrt.cpp)
target_link_libraries(resnet50 nvinfer)
target_link_libraries(resnet50 cudart)
target_link_libraries(resnet50 ${OpenCV_LIBS})
#add_executable(resnext50 ${PROJECT_SOURCE_DIR}/resnext50_32x4d.cpp)
#target_link_libraries(resnext50 nvinfer)
#target_link_libraries(resnext50 cudart)

add_definitions(-O2 -pthread)
13.智能指针
C++程序设计中使用堆内存是非常频繁的操作,堆内存的申请和释放都由程序员自己管理。程序员自己管理堆内存可以提高了程序的效率,但是整体来说堆内存的管理是麻烦的,C++11中引入了智能指针的概念,方便管理堆内存。使用普通指针,容易造成堆内存泄露(忘记释放),二次释放,程序发生异常时内存泄露等问题等,使用智能指针能更好的管理堆内存。
C++11 中引入了智能指针,同时还有一个模板函数 std::make_shared 可以返回一个指定类型的 std::shared_ptr.
    std::shared_ptr p1 = make_shared(10, '9');
    cout< p2 = make_shared("hello");
cout< 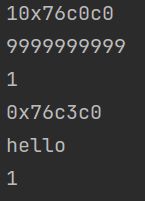
shared_ptr多个指针指向相同的对象。shared_ptr使用引用计数,每一个shared_ptr的拷贝都指向相同的内存。每使用他一次,内部的引用计数加1,每析构一次,内部的引用计数减1,减为0时,自动删除所指向的堆内存。shared_ptr内部的引用计数是线程安全的,但是对象的读取需要加锁。
-
初始化。智能指针是个模板类,可以指定类型,传入指针通过构造函数初始化。也可以使用make_shared函数初始化。不能将指针直接赋值给一个智能指针,一个是类,一个是指针。例如std::shared_ptr p4 = new int(1);的写法是错误的
-
拷贝和赋值。拷贝使得对象的引用计数增加1,赋值使得原对象引用计数减1,当计数为0时,自动释放内存。后来指向的对象引用计数加1,指向后来的对象
-
get函数获取原始指针
-
注意不要用一个原始指针初始化多个shared_ptr,否则会造成二次释放同一内存
-
注意避免循环引用,shared_ptr的一个最大的陷阱是循环引用,循环,循环引用会导致堆内存无法正确释放,导致内存泄漏。循环引用在weak_ptr中介绍。
    int a = 10;
    std::shared_ptr ptra = std::make_shared(a);
    std::shared_ptr ptra2(ptra); //copy
    std::cout << ptra.use_count() << std::endl;//对象的引用计数

    int b = 20;
    int *pb = &a;
    //std::shared_ptr ptrb = pb;  //error
    std::shared_ptr ptrb = std::make_shared(b);
    ptra2 = ptrb; //assign
    pb = ptrb.get(); //获取原始指针

    std::cout << ptra.use_count() << std::endl;
std::cout << ptrb.use_count() << std::endl; ![]()
14.统计耗时
//
// Created by fzh on 2021/6/22.
//
//#include
//#include
//#include
#include
#include
#include
#include
#include
#include
#include
#include
#include
typedef cv::Vec Vec5d;
using namespace std;
int main(int argc, char** argv)
{
gettimeofday( &t_start, NULL);
cout << __cplusplus << endl;
int k = 1e8;
while(k--);
gettimeofday(&t_end, NULL);
double delta_t = (t_end.tv_sec - t_start.tv_sec) +(t_end.tv_usec - t_start.tv_usec) / 1000000.0;
cout<<"delta_t:"< 四.指针与引用
1.引用不额外开辟空间 ;
2.引用在开发中经常用于函数的形参;
3.引用必须初始化,在初始化后,不可以改变;
4.指针是一个变量,只不过这个变量存储的是一个地址。
1.指针
1.1示例代码1(数值型指针)
(1)
#include
#include
#include
// void test(int *p);


int main()
{
   int a=33;
   int *p=NULL;
   p = &a;
   printf("&a=%d\n",&a);
   printf("*p=%d, p=%d, &p=%d",*p,p,&p);
   return 0;


}
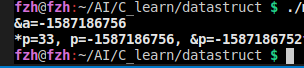
可看出指针p存放的是a的地址,&p才是自己的地址,而*p就是取p的地址的值也就是a的值.
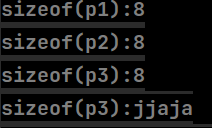
(2)查看指针所占空间:
    int a = 10;
    float b = 10.;
    string c = "jjaja";
    int *p1 = &a;
    float *p2 = &b;
    string *p3 = &c;
    cout << "sizeof(p1):" << sizeof(p1) << endl;
    cout << "sizeof(p2):" << sizeof(p2) << endl;
    cout << "sizeof(p3):" << sizeof(p3) << endl;
    cout << "sizeof(p3):" << *p3 << endl;
在64位系统上,任何类型的指针都占用8个字节.
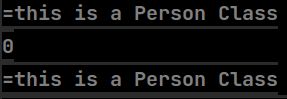
class Person{
    public:
        char m_Name[64];
        int m_age;
        void showClassName(){
            cout<<"=this is a Person Class"<m_age<showClassName();
    p1->PersonAge();

    Person *p2 = nullptr;
    p2->showClassName();
    p2->PersonAge(); //传入指针为空,还访问属性,所以报错 加上if 判断就鲁棒了
} 
(3)空指针
空指针:指针变量指向内存中编号为0的空间,其中0~255编号的空间是系统占用的,所以不能访问.
用途:初始化指针变量
注意:空指针指向的内存是不可访问的
    int *p1 = nullptr;
    cout << "sizeof(p1):" << sizeof(p1) << endl;
    cout << "p1:" << p1 << endl;
    cout << "p1:" << *p1 << endl;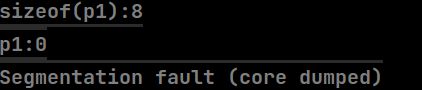
空指针访问成员函数
(4)野指针:
野指针:指针变量指向非法的空间
    int *p1 = (int *)0x110;
    cout << "sizeof(p1):" << sizeof(p1) << endl;
    cout << "p1:" << p1 << endl;
    cout << "p1:" << *p1 << endl;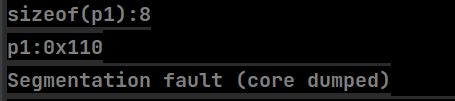
结论:空指针和野指针都不是我们申请的空间,不要随意访问.
(5)指向数组的指针
    int arr[10] = {1,2,3,4,5,6,7,8,9,10};
    int *p = arr;

    for(int i=0; i<10; i++){
        cout<<"===*p:"<<*p<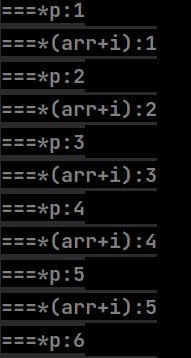
    int arr[10] = {2,2,3,5,19,6,7,8,9,10};
    int *p = arr;
    for(int i=0; i<10; i++){
        cout<< "==p[i]:" <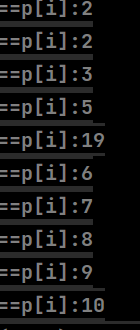
案例:冒泡排序
//
// Created by fzh on 2021/4/29.
//
#include
#include
using namespace std;
void bubbleSort(int* p, int length){
    for(int i = 0; i < length - 1; i++){
        for(int j = 0; j p[j + 1]){
// cout<<"==arr[j]:"< 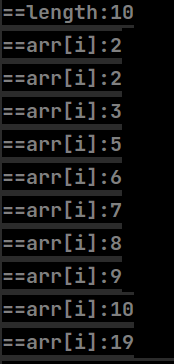
1.2示例代码2(数值型指针)
#include
#include
#include
// void test(int *p);

void test(int *p)
{
   *p = 23;
   return ;
}

int main ()
{
   int *p1=NULL;
   int a=2333;
   p1 = &a;
   // printf("p=%d",p);
   printf("*p1=%d, p1=%d, &p1=%d, &(*p1)=%d, a=%d, &a=%d\n",*p1,p1,&p1,&(*p1),a,&a);


   // p = (int *)malloc(sizeof(int));//malloc开辟sizeof(int)的内存,其在堆区,指针p 指向这段内存
   // *p = 10000;
   // test(&p);
   // // free(p);//释放分配的内存
   // printf("%d",*p);

   return 0;
}
![]()
1.3.指针变量赋值(数值型指针)
    float f = 5.5;
    float* pf = &f;
    float* pv = pf;
	cout<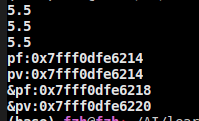
1.4指向指针的指针(数值型指针)
    //指向指针的指针
	float f = 5.5;
    float* pf = &f;
    float** pv = &pf;
	cout<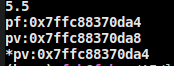
1.5指针数组
指针数组是一个数组,指的是数组中存放的是指针类型的元素,也就是存放的是每个数的地址,下面例子[]优先级高,先与ptr结合.
具体例子:int *p1[3];
#include
#include

using namespace std;

const int MAX = 3;

int main ()
{
    const int MAX = 4;
	int  var[MAX] = {10, 100, 200};
	int *ptr[MAX];

cout <<"==var:"< 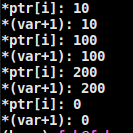
可看出数组名就代表这个数组的地址,也等于这个数组的第一个元素的地址;
#include
#include
#include
#include
#include
#include
#include
using namespace std;


int main ()
{

	const int MAX = 4;
	const char *names[MAX] = {
					"Zara Ali",
					"Hina Ali",
					"Nuha Ali",
					"Sara Ali",
	};
	for (int i = 0; i < MAX; i++)
	{
		cout << "Value of names[" << i << "] = ";
		cout << names[i] << endl;
		cout << names << endl;
		cout << *(names+i) << endl;
	}
	return 0;
}
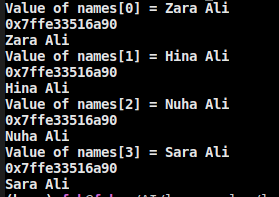
可看出数组名就代表这个数组的地址,也等于这个数组的第一个元素的地址;
指针数组里的指针指向数组
    const int MAX = 4;
	const int NUMS = 2;
	float  var[MAX] = {10, 100, 200};
	float *ptr[NUMS]; //指针数组存放指针的地址 而指针又指向一个新的数组
 	float *p;
	cout <<"==var:"<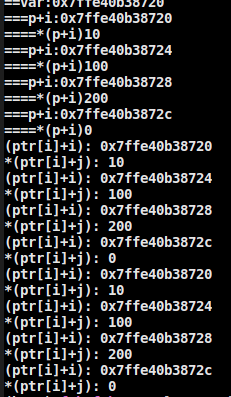
1.6 数组指针
数组指针,就是一个指向数组的指针。
具体例子:int (*p2)[3];
小括号让p2 与 * 结合,表示 p2 是一个指针,这个指针指向了一个数组,数组中有 3 个元素,每一个元素的类型是 int 型
    int a[3] = {1, 2, 3};
	int (*pa)[3] = &a;
	for (int i = 0; i < 3; i++)
    {
		cout << *(*pa + i) << endl;
}![]()
    int a[3][3] = {{1,2,3},
					{4,5,6},
					{7,8,9}}; // 二维数组
	int (*p0)[3] = NULL;   // p0是一个指针,指向一个数组
	int (*p1)[3] = NULL;   // p1是一个指针,指向一个数组
	int (*p2)[3] = NULL;   // p2是一个指针,指向一个数组
	p0 = &a[0];
	p1 = &a[1];
	p2 = &a[2];
	cout << *(*p0 + 0)<<" "<< *(*p0 + 1)<<" "<<*(*p0 + 2)<
1.7字符串表示方法
1.7.1 第一种写法 数组
char  str1[4] = { 'a', 'b', 'c', 'd' };
std::cout<<"str1:"<![]()
注意上述写法需要增加'\0'作为结尾,所以数组个数在其基础上加个1,或者直接写成字符串形式,[]里面不写数字。
    char  str2[5] = { 'a', 'b', 'c', 'd','\0'};
std::cout<<"str2:"<![]()
    char  str3[] =  "abcd";
    cout<<"str3:"<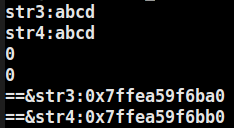
首先需要知道的是这里“==”比较的不是指向的内容,比较的是各个数组的地址。
对Array对象来说,是运行时在栈空间上分配的内存,
所以每个对象都是单独去申请内存,各自保存一份自己的abcd,
所以Array对象存储的地址也是不一样的,故结果是false;
要比对内容的话得用strcmp。
1.7.1 第二种写法 指针
    const char *p2 = "abcd";
    std::cout<<"p2:"<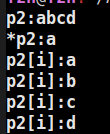
    const char *p2 = "abcd";
    std::cout<<"p2:"<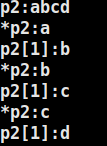
从上面例子可以看出打印p2显示的是字符串,是因为对cout进行了重载,打印字符指针时,是打印相应的字符内容。同时*p取的是第一个字符。对字符指针p2 +1时就是在对地址加1啦。
    char *p1 = "abcd";
    std::cout<<"p1:"<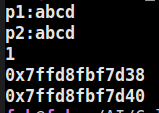
对指针对象来说,两个字符指针并没有分配相应的存储区,
是后面的abcd是以字符串常量的形式存在常量区,
然后把首地址的值赋值给了指针对象,
所以Pointer对象存储的地址应该来说是一样的,所以第二个结果是true;
1.7.2 转换过程
string 转char* char []
    string str1 = "abc";
    char *p1 = (char *) str1.data();
    cout<<"p1:"<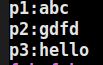
char*转 string
    const char *p1 = "abc";
    string p2;
    p2 = p1;
cout<<"p2:"<![]()
char [] 转string
    const char p1[] = "abc";
    string p2;
    p2 = p1;
cout<<"p2:"<![]()
char转int
    const char* p = "123";
	int b = atoi(p);
cout<<"===b:==="<![]()
string转int
    string a = "123";
	const char* b = a.c_str();
cout<![]()
在边界情况,需要判断
string numStr = "2147483648";//2**31
    long res = atol(numStr.c_str());
    cout<<"res:"< INT_MAX){
cout<<":"<<-1< 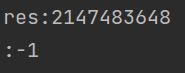
单char转int
'10' - '0'
int 转string
int n = 10;
string a = to_string(n);
cout<<"a:"<
1.8 void型指针(数值型指针)
关键字 void 并不是一个真正的数据类型,它体现的是一种抽象,指明不是任何一种类型,一般有 2 种使用场景:
-
函数的返回值和形参;
-
定义指针时不明确规定所指数据的类型,也就意味着可以指向任意类型
1.8.1指针类型相同的赋值
    int a = 20;
	int b = a;
	int *p1 = &a;
	int *p2 = p1;
cout <<"p1:" <![]()
1.8.2 指针类型转换(指定类型)
1.8.2.1 static_cast
其只能用于良性转换,这样的转换风险较低,一般不会发生什么意外,例如:
- 原有的自动类型转换,例如 short 转 int、int 转 double、const 转非 const、向上转型等;
- void 指针和具体类型指针之间的转换,例如
void *转int *、char *转void *等,而不能*float与*int转换。
    int i1;
    float f1 = 166.72;
    i1 = static_cast(f1);
    cout<<"i1:"<(f3);
cout<<"i2:"< ![]()
1.8.2.2 reinterpret_cast
reinterpret_cast 这种转换仅仅是对二进制位的重新解释,不会借助已有的转换规则对数据进行调整,非常简单粗暴,所以风险很高
其可以认为是 static_cast 的一种补充,一些 static_cast 不能完成的转换,就可以用 reinterpret_cast 来完成,例如两个具体类型指针之间的转换、int 和指针之间的转换(有些编译器只允许 int 转指针,不允许反过来)。
    int a = 20;
    float f = 21.222;
    float* f2 = &f;
	int b = a;
	int *p1 = &a;
	char *p2 = (char *) p1;
	int *p3 = (int *) p1;
	int *p4 = reinterpret_cast(p1);
    void *p5 = p1;
    int *p6 = reinterpret_cast(f2);
cout <<"p1:" < 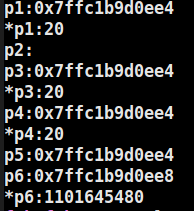
1.8.3 指针类型转换(void)
    int a = 20;
	int b = a;
	int *p1 = &a;
	void *p2 = p1;
cout <<"p1:" <![]()
    int a = 20;
	int b = a;
	int *p1 = &a;

	void *p2 = p1;
	int *p3 = (int *)p2;
	cout <<"p1:" << p1 << endl;
    cout <<"*p1:" << *p1 << endl;
	cout <<"p2:" << p2 << endl;
    // cout <<"*p2:" << *p2 << endl;//void型指针不能取值 有错 不能使用
	cout <<"p3:" << p3 << endl;
    cout <<"*p3:" << *p3 << endl;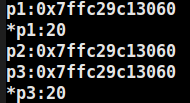
2.引用
2.1示例代码1--变量的引用
#include
#include
#include
// void test(int *p);


int main ()
{

   int a=2333;
   int &b = a;//引用必须初始化
   printf("b=%d\n",b);


   // p = (int *)malloc(sizeof(int));//malloc开辟sizeof(int)的内存,其在堆区,指针p 指向这段内存
   // *p = 10000;
   // test(&p);
   // // free(p);//释放分配的内存
   // printf("%d",*p);

   return 0;
}
![]()
2.2示例代码2--指针的引用
#include
#include
#include
// void test(int *p);


int main ()
{

   int a=10;
   int *b = &a;//引用必须初始化
   int *&c = b;
   *c = 1000;
   printf("a=%d\n",a);


   // p = (int *)malloc(sizeof(int));//malloc开辟sizeof(int)的内存,其在堆区,指针p 指向这段内存
   // *p = 10000;
   // test(&p);
   // // free(p);//释放分配的内存
   // printf("%d",*p);

   return 0;
}
![]()
2.3 示例代码3--引用做函数参数
#include
#include
#include
void test(int &a, int &b);


int main ()
{

   int a=10;
   int b=20;
   printf("a=%d,b=%d\n",a,b);
   test(a,b);
   printf("a=%d,b=%d\n",a,b);

   // p = (int *)malloc(sizeof(int));//malloc开辟sizeof(int)的内存,其在堆区,指针p 指向这段内存
   // *p = 10000;
   // test(&p);
   // // free(p);//释放分配的内存
   // printf("%d",*p);

   return 0;
}

void test(int &a, int &b)
{
   int c=0;
   c =a;
   a= b;
   b=c;
}

2.4 指针和引用定义函数交换值
1.指针交换
void swap(int *a, int *b)
{
	int temp=*a;
	*a = *b;
	*b= temp;
}
int main ()
{
	int a =10;
	int b =12;
	// swap(a, b);
	swap(&a, &b);
	std::cout<
2.引用交换
// //引用
void swap(int &a,int &b)
{
	int temp=a;
	a = b;
	b= temp;
}

int main ()
{
	int a =10;
	int b =12;
	swap(a, b);
	// swap(&a, &b);
	std::cout<
2.5const 用来控制变量是否能够变化
案例1:const 控制变量变为常量 所以赋值就会出错
#include
#include
#include
void test(int &a, int &b);


int main ()
{

   const int a=10;
   int b=20;
   // printf("a=%d,b=%d\n",a,b);
   // test(a,b);
   // printf("a=%d,b=%d\n",a,b);

   // p = (int *)malloc(sizeof(int));//malloc开辟sizeof(int)的内存,其在堆区,指针p 指向这段内存
   // *p = 10000;
   // test(&p);
   // // free(p);//释放分配的内存
   // printf("%d",*p);

   a = 30;
   b= 20;
   printf("a=%d,b=%d\n",a,b);


   return 0;
}

void test(int &a, int &b)
{
   int c=0;
   c =a;
   a= b;
   b=c;
}

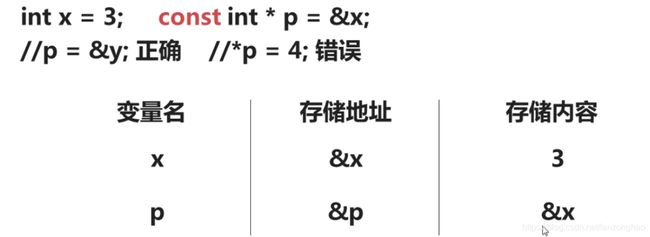
案例2:const 控制指针*p *p不能改变 (常量指针)
    float a = 111.;
    float b = 222.;
    const float *p = &a; //常量指针
    cout<<"before p"<< p <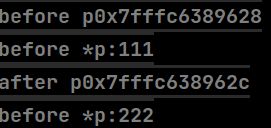

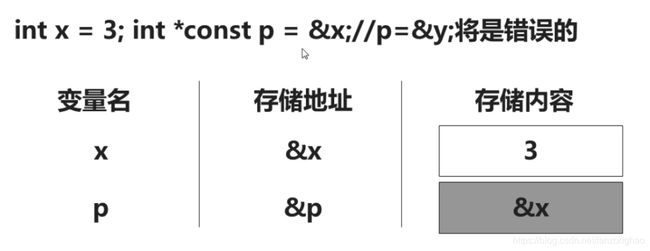
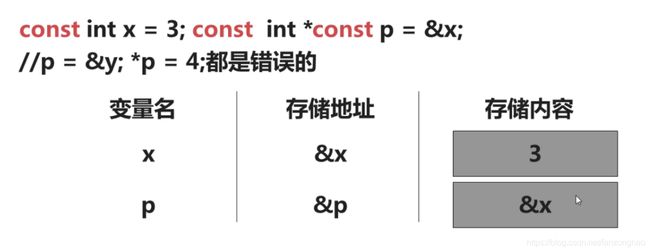
案例3:const 控制常量p p不能改变 (指针常量)
    float a = 111.;
    float b = 222.;
    float* const p = &a; //指针常量
    cout<<"before p"<< p <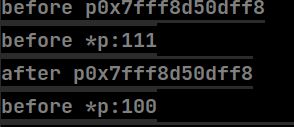
![]()
案例4:const控制指针*p与常量p,都不能变化
    float a = 111.;
    float b = 222.;
    const float* const p = &a; //指针常量
    cout<<"before p"<< p <
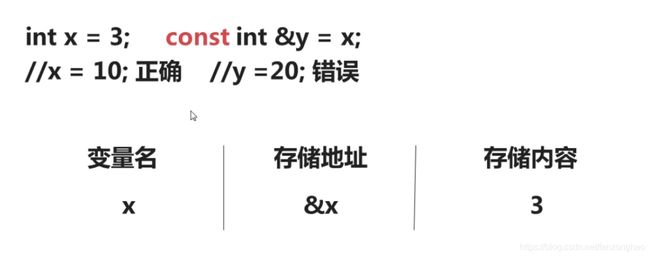
案例5:const控制引用y y不能变化
五,安装C++版的opencv
1.安装
sudo apt-get install libopencv-dev python-opencv
编译命令:
g++ -o main xxx.cpp `pkg-config --cflags --libs opencv`
`pkg-config --cflags --libs opencv`起到include opencv的作用
例如 g++ -o main globalmatting.cpp guidedfilter.cpp main.cpp `pkg-config --cflags --libs opencv`
然后在./main 输出结果
查看当前版本
pkg-config --modversion opencv
![]()
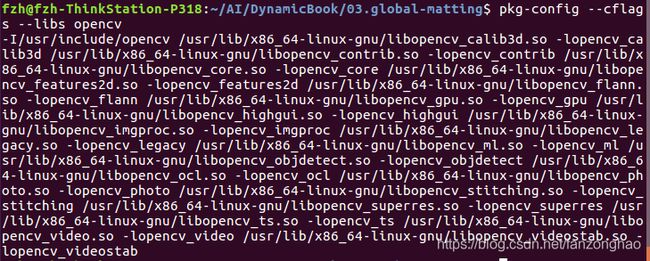
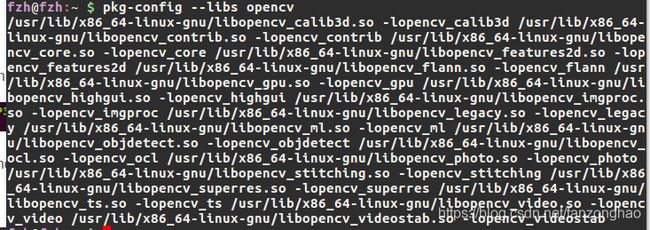
pkg-config --cflags opencv
查看include路径
![]()
pkg-config --libs opencv
查看要链接库
2.利用opencv读取与显示一张图片
#include
#include
#include

//使用cv这个命名空间
using namespace cv;
using namespace std;
/*
 *一般有两种写法:
 *main( int argc, char* argv[])
 *main( int argc, char** argv)
 */
int main( int argc, char** argv )
{
  //建立一个Mat类型的变量image
  Mat image;
  /* API中有:
   * C++: Mat imread(const string& filename, int flags=1 )
   * 意思是返回Mat类型数据,第一个参数接受一个string类型的引用,
   * 第二个参数接受一个int类型的flags,一般都是1。
   */
  image = imread( argv[1], 1 );

  //当传的参数不是一个,或者图片没有数据则提示没有图片并退出程序
  if( argc != 2 || !image.data )
    {
      cout<<"没有该图片"<
g++ -o test test.cpp `pkg-config --cflags --libs opencv`
![]()
./test input.jpg 则显示正常.
六,类
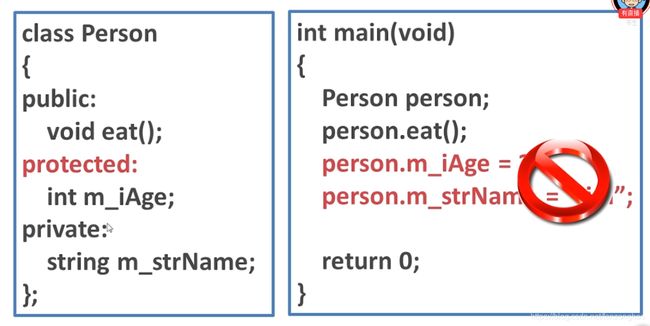
1.首先看一张图,类一般采用几个限定符进行修饰
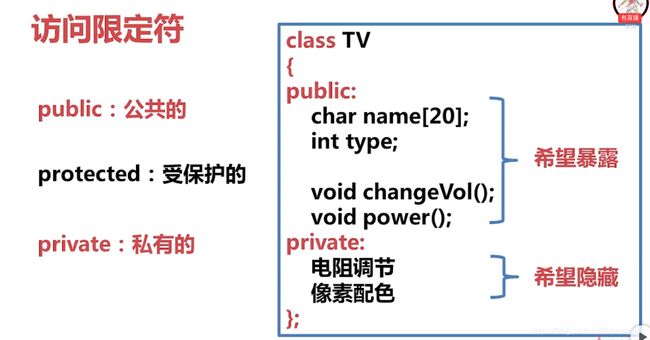
public:类内可以访问,类外可以访问;
protected:类内可以访问,类外不可以访问, 子类可以访问父类保护内容;
privtae:类内可以访问,类外不可以访问,子类不可以访问父类的私有内容;
1.1 代码示例
#include
using namespace std;
class Time
{
public:
    Time(int hour,int min,int sec)
    {   m_iHour = hour;
        m_iMinute = min;
        m_iSecond = sec;
    };
    ~Time(){};
public:
    int m_iHour;
protected:
    int m_iMinute;
private:
    int m_iSecond;
};


int main()
{
    Time time(3,12,4);
    cout<
可见private类型和protected类型不能由类外访问。
2.类的栈和堆两种实例化示例:

2.1 栈实例化代码:
#include
#include
#include
#include
#include
using namespace std;

class Point
{
  public:
    int x;
    int y;
    void prinx()
    {
cout< ![]()
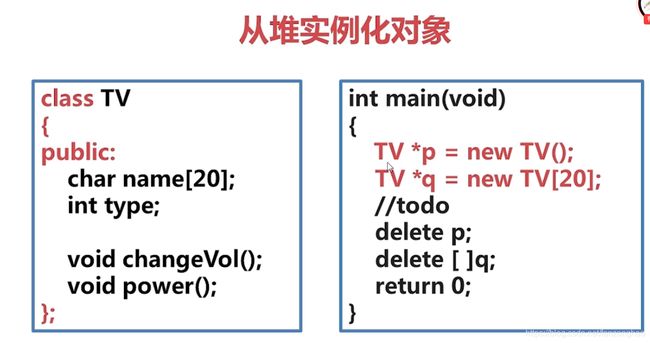
2.2 堆实例化代码:
#include
#include
#include
#include
#include
using namespace std;

class Point
{
  public:
    int x;
    int y;
    void prinx()
    {
        cout<x=100;
    p->y=200;
    p->prinx();
    p->priny();
    delete p;
    p=NULL;
    return 0;
}
![]()
3.属性封装
3.1 栈实例化
#include
#include
#include
#include
#include
#include
using namespace std;

class Student
{
    public:
        void setName(string _name)
        {
            m_strName = _name;
        }
        string getName()
        {
            return m_strName;
        }
        void setGender(string _gender)
        {
            m_strGender = _gender;
        }
        string getGender()
        {
            return m_strGender;
        }
        int GetScore()
        {
            return m_intScore;
        }
        void initScore()
        {
            m_intScore=0;
        }
        void study(int _score)
        {
            m_intScore+=_score;
        }

    private:
        string m_strName;
        string m_strGender;
        int m_intScore;
};

int main ()
{
    Student stu;
    stu.initScore();
    stu.setName("张三");
    stu.setGender("男");
    stu.study(10);
    stu.study(10);
cout< ![]()
3.2 堆实例化
#include
#include
using namespace std;

/**
  * 定义类:Student
  * 数据成员:m_strName
  * 数据成员的封装函数:setName()、getName()
  */
class Student
{
public:
    // 定义数据成员封装函数setName()
    void setName(string _name)
    {
        m_strName = _name;
    }


    // 定义数据成员封装函数getName()
    string getName()
    {
        return m_strName;
    }


//定义Student类私有数据成员m_strName
private:
    string m_strName;
};

int main()
{
    // 使用new关键字,实例化对象
	Student *str = new Student();
    // 设置对象的数据成员
	str->setName("哈哈哈");
    // 使用cout打印对象str的数据成员
cout<getName()< ![]()
4.类外定义
上述所示基本都是内类定义,也就是成员函数声明与定义是同时的,以下主要介绍类外定义,其中分为同文件类外定义与分文件类外定义两种.
4.1.同一个文件类外定义
特点:在一个.cpp文件里,对成员函数声明以及类外进行定义.
#include
#include
#include
using namespace std;

/**
  * 定义类:Student
  * 数据成员:m_strName
  * 数据成员的封装函数:setName()、getName()
  */
class Teacher
{
public:

    void setName(string _name);
    string getName();

    void setGender(string _gender);
    string getGender();

    void setAge(int _age);
    int getAge();

    void teach();

//定义Student类私有数据成员m_strName
private:
    string m_strName;
    string m_strGender;
    int m_intAge;

};

void Teacher::setName(string _name)
{
    m_strName = _name;
}
string Teacher::getName()
{
    return m_strName;
}

void Teacher::setAge(int _age)
{
     m_intAge=_age;
}
int Teacher::getAge()
{
    return m_intAge;
}

void Teacher::setGender(string _gender)
{
    m_strGender = _gender;
}
string Teacher::getGender()
{
    return m_strGender;
}
void Teacher::teach()
{
    cout<<"正在上课....."<setName("小明");
    t2->setGender("男");
    t2->setAge(20);
    cout<getName()<<" "<getGender()<< " "<getAge()<teach();
    delete t2;
    t2=NULL;
	return 0;
} 
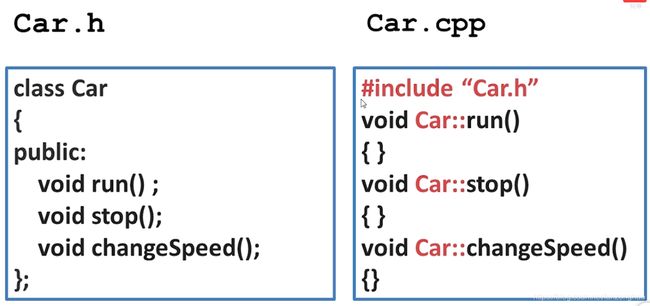
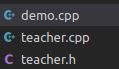
4.2分文件类外定义
一个.h头文件声明类和成员函数,一个.cpp函数包含相应.h并对成员函数进行定义.
文件代码截图:
![]()
teacher.h代码
#include
#include
#include
#include
using namespace std;

class Teacher
{
public:

    void setName(string _name);
    string getName();

    void setGender(string _gender);
    string getGender();

    void setAge(int _age);
    int getAge();

    void teach();

//定义Student类私有数据成员m_strName
private:
    string m_strName;
    string m_strGender;
    int m_intAge;

};
teacher.cpp代码
#include
#include
#include
#include "teacher.h"
using namespace std;
/**
* 定义类:Student
* 数据成员:m_strName
* 数据成员的封装函数:setName()、getName()
*/
void Teacher::setName(string _name)
{
m_strName = _name;
}
string Teacher::getName()
{
return m_strName;
}
void Teacher::setAge(int _age)
{
m_intAge=_age;
}
int Teacher::getAge()
{
return m_intAge;
}
void Teacher::setGender(string _gender)
{
m_strGender = _gender;
}
string Teacher::getGender()
{
return m_strGender;
}
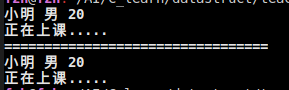
void Teacher::teach()
{
cout<<"正在上课....."<setName("小明");
t2->setGender("男");
t2->setAge(20);
cout<getName()<<" "<getGender()<< " "<getAge()<teach();
delete t2;
t2=NULL;
return 0;
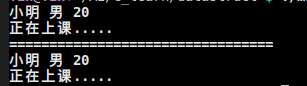
} 打印结果:
5.构造函数
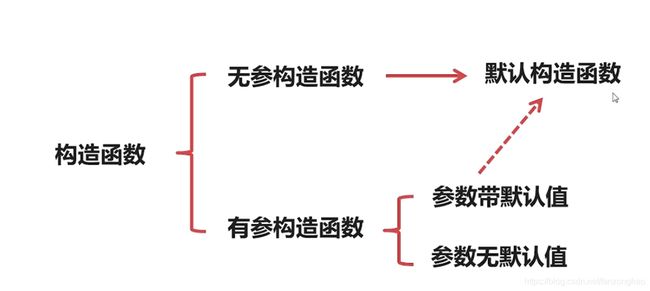
对象实例化时被自动调用,构造函数与类同名,可以进行重载,实例化时仅用到一个,没有定义构造函数时,系统自动定义.
5.1全写在一起
#include

using namespace std;

class Line
{
   public:
      void setLength( double len );
      double getLength( void );
      Line(double len);  // 这是构造函数

   private:
      double length;
};


// 成员函数定义,包括构造函数
Line::Line( double len)
{
    cout << "Object is being created, length = " << len << endl;
    length = len;
}

void Line::setLength( double len )
{
    length = len;
}

double Line::getLength( void )
{
    return length;
}
// 程序的主函数
int main( )
{
   Line line(10.0);

   // 获取默认设置的长度
cout << "Length of line : " << line.getLength() < ![]()
5.2 更优雅做法
teacher.h
#include
#include
#include
#include
using namespace std;

class Teacher
{
public:
    Teacher();//无参构造函数声明
    Teacher(string name, int age);//有参构造函数声明
    void setName(string _name);
    string getName();

    void setGender(string _gender);
    string getGender();

    void setAge(int _age);
    int getAge();

    void teach();

//定义Student类私有数据成员m_strName
private:
    string m_strName;
    string m_strGender;
    int m_intAge;

};


//无参构造函数定义
// Teacher::Teacher()
// {
//     m_strName = "Jim";
//     m_intAge =  20;
//     cout<<"Teacher()"<
teacher.cpp
#include
#include
#include
#include "teacher.h"
using namespace std;


//无参构造函数定义
Teacher::Teacher()
{
    m_strName = "Jim";
    m_intAge =  20;
    cout<<"Teacher()"<setName("小明");
//     t2->setGender("男");
//     t2->setAge(20);
//     cout<getName()<<" "<getGender()<< " "<getAge()<teach();
//     delete t2;
//     t2=NULL;
// 	return 0;
// }
demo.cpp
#include
#include
#include
#include "teacher.h"
using namespace std;
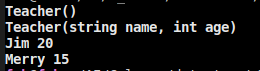
int main()
{
Teacher t1;
Teacher t2("Merry",15);
cout< 执行: g++ -o demo demo.cpp teacher.cpp
./demo 生成
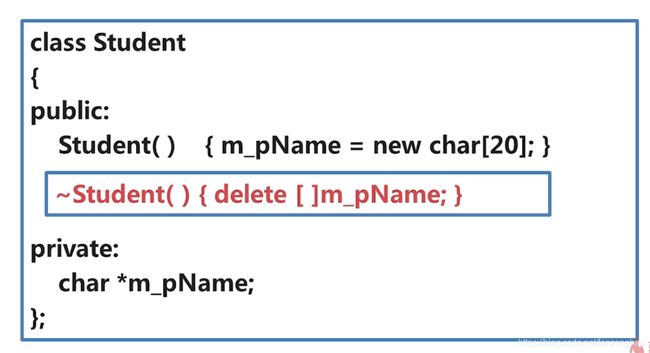
6.析构函数
其是类的一种特殊的成员函数,在删除创建的对象时执行。析构函数的名称与类的名称是完全相同的,只是在前面加了个波浪号(~)作为前缀,它不会返回任何值,也不能带有任何参数,所以不能重载。析构函数有助于在跳出程序(比如关闭文件、释放内存等)前释放资源。
例如下面的在对象销毁之前,释放堆中资源.
6.1 例子
#include

using namespace std;

class Line
{
   public:
      void setLength( double len );
      double getLength( void );
      Line(double len);  // 这是构造函数
      ~Line();  // 这是析构函数声明

   private:
      double length;
};


// 成员函数定义,包括构造函数
Line::Line( double len)
{
    cout << "Object is being created, length = " << len << endl;
    length = len;
}
// 析构函数
Line::~Line(void)
{
    cout << "Object is being deleted" << endl;
}

void Line::setLength( double len )
{
    length = len;
}

double Line::getLength( void )
{
    return length;
}
// 程序的主函数
int main( )
{
   Line line(10.0);

   // 获取默认设置的长度
cout << "Length of line : " << line.getLength() < 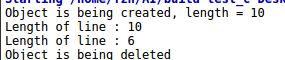
6.2初始化列表
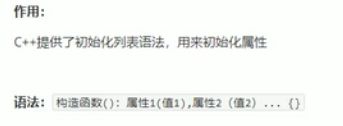
目的就是实例化时对构造函数进行传参;
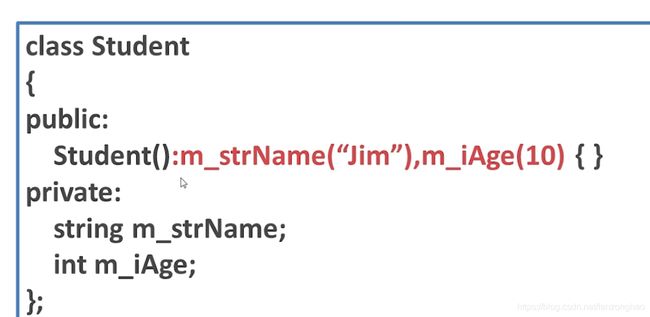
特点:
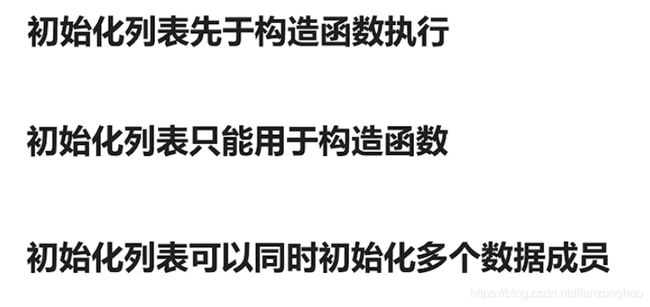
必须用初始化列表示例,如下就会报错
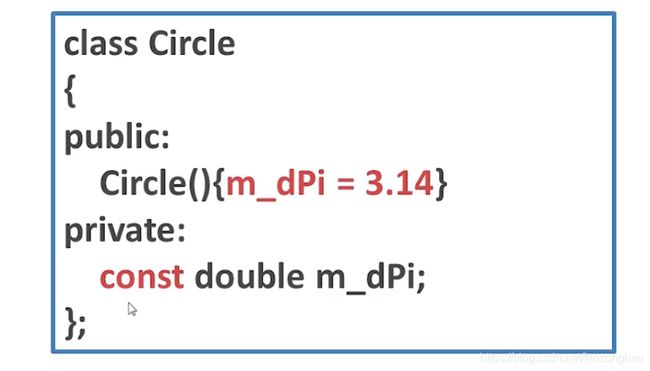
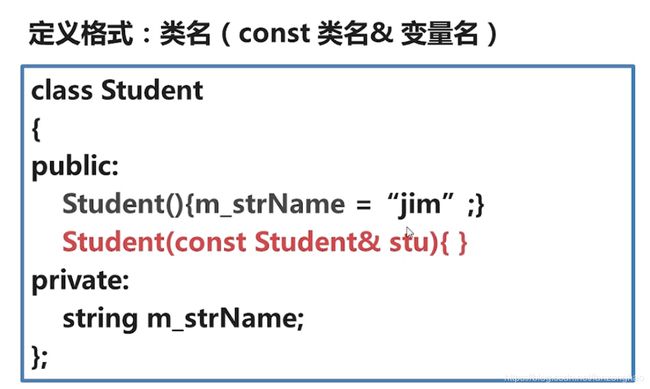
6.3 拷贝构造函数
(1)使用一个已经创建完毕的对象来初始化对象
(2)值传递的方式给函数传参
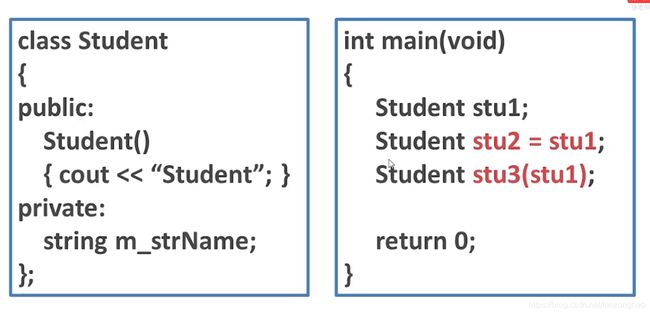
第一种方式案例:如图所示只会调用一次构造函数,因为;另外两个实例化对象调用的是拷贝构造函数.
#include
#include
using namespace std;

class Student
{

public:
    Student()
    {
cout<<"Student()"< ![]()
第二种方式案例:
#include
#include
using namespace std;

class Person{
    public:
        Person(){
cout<<"调用默认构造函数"< 
拷贝构造函数定义形式: 其实就是const修饰引用
分别有栈实例化,堆实例化,利用对象实例化调用拷贝构造函数
teacher.h
#include
#include
#include
#include
using namespace std;

class Teacher
{
public:
    // Teacher();//无参构造函数声明
    Teacher(string name="jim", int age=1);//有参构造函数声明
    Teacher(const Teacher &tea);//拷贝构造函数
    ~Teacher();//析构函数
    void setName(string _name);
    string getName();

    void setGender(string _gender);
    string getGender();

    void setAge(int _age);
    int getAge();

    int getMax();

    void teach();

//定义Student类私有数据成员m_strName
private:
    string m_strName;
    string m_strGender;
    int m_intAge;
    // const int m_iMax;

};


//无参构造函数定义
// Teacher::Teacher()
// {
//     m_strName = "Jim";
//     m_intAge =  20;
//     cout<<"Teacher()"<
teacher.cpp
#include
#include
#include
#include "teacher.h"
using namespace std;


// //无参构造函数定义
// Teacher::Teacher()
// {
//     m_strName = "Jim";
//     m_intAge =  20;
//     cout<<"Teacher()"<setName("小明");
//     t2->setGender("男");
//     t2->setAge(20);
//     cout<getName()<<" "<getGender()<< " "<getAge()<teach();
//     delete t2;
//     t2=NULL;
// 	return 0;
// }
demo.cpp
#include
#include
#include
#include "teacher.h"
using namespace std;


int main()
{
    //栈实例化
    Teacher t1;
    // Teacher t2("Merry",15);
    cout<<"==================="<
可依次看见对象销毁调用析构函数的过程.

七.string的一些基础知识
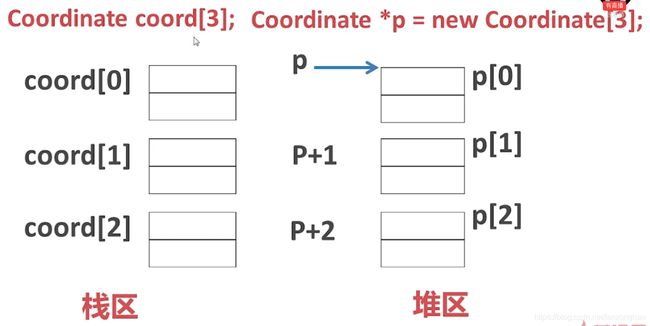
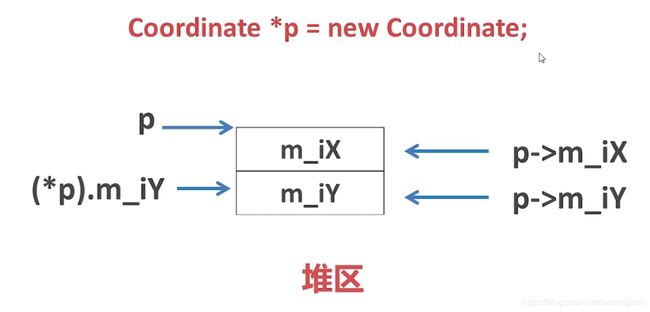
八.对象数组
目的:例如一个班50个学生,就不需实例化50个;下图是栈堆实例化对象的示例
代码示例:
文件夹代码结构:
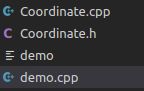
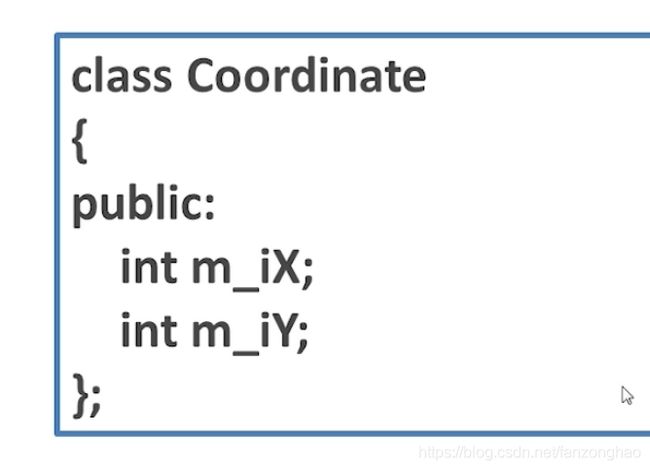
Coordinate.h 代码
class Coordinate
{
    public:
        Coordinate();
        ~Coordinate();
    public:
        int m_iX;
        int m_iY;
};
Coordinate.cpp 代码
#include
#include "Coordinate.h"
using namespace std;
Coordinate::Coordinate()
{
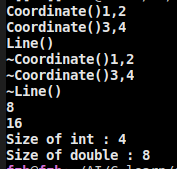
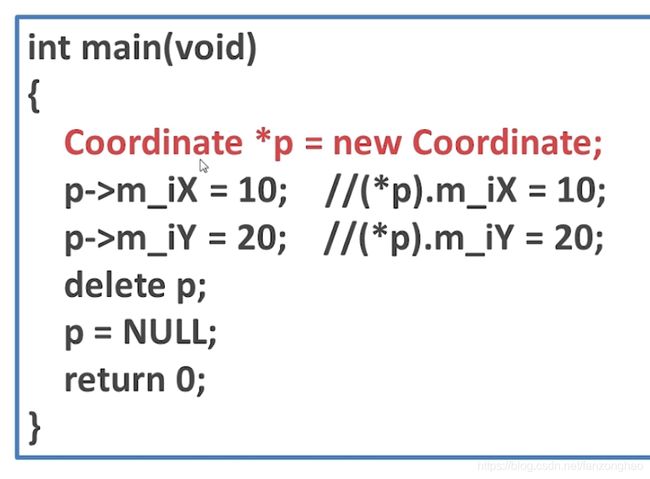
cout<<"Coordinate"< demo.cpp 代码
栈和堆两种实例化对象的示例,注意的是堆的比较麻烦,在对指针进行加操作以后,在打印值以及销毁时要注意,对数数组销毁要加[],否则只销毁第一个也就是调用第一个的析构函数,导致后面的会报错.
#include
#include "Coordinate.h"
using namespace std;
int main(void)
{
Coordinate coor[3];//栈中实现 对象数组
coor[0].m_iX = 3;
coor[0].m_iY = 5;
cout<<"========================"<m_iX = 3;
p->m_iY = 5;
// //或者这样写
// p[0].m_iX = 3;
// p[0].m_iY = 5;
p++;
p->m_iX = 11;
p->m_iY = 13;
p++;
p->m_iX = 13;
p->m_iY = 14;
for(int i=0;i<3;i++)
{
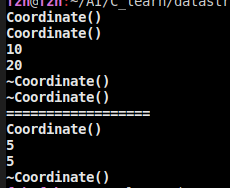
cout<<"coor_x:"<m_iX<m_iY< 执行:g++ -o demo demo.cpp Coordinate.cpp
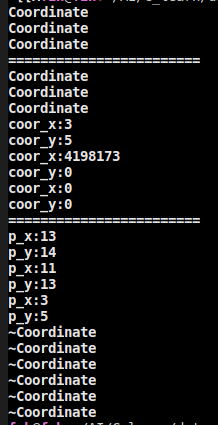
可看出对象数组调用构造函数,打印值,调用析构函数销毁时的过程.
九.对象成员以及对象成员指针
9.1对象成员
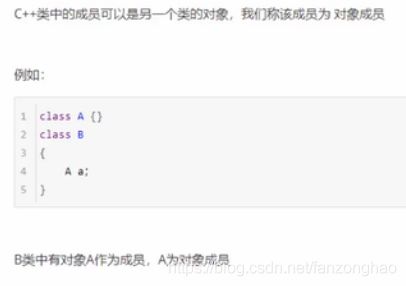
对象里面包含对象,比如线对象包含点对象,实例化时先实例化点在实例化线,销毁就反过来.
代码示例1:
文件夹代码: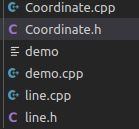
Coordinate.h
class Coordinate
{
    public:
        Coordinate();
        ~Coordinate();
        void setX(int x);
        int getX();
        void setY(int y);
        int getY();
    private:
        int m_iX;
        int m_iY;
};
Coordinate.cpp
#include
#include "Coordinate.h"
using namespace std;

Coordinate::Coordinate()
{
    cout<<"Coordinate"<
line.h
#include "Coordinate.h"
class Line
{
    public:
        Line();
        ~Line();
        void setA(int x, int y);
        void setB(int x, int y);
        void printInfo();
    private:
        Coordinate m_coorA;
        Coordinate m_coorB;;
};
line.cpp
#include "line.h"
#include
using namespace std;

Line::Line()
{
    cout<<"Line()"<
demo.cpp
#include
#include "line.h"
using namespace std;

int main(void)
{

    Line *l= new Line();

    delete l;
    l=NULL;

    return 0;
}
执行:
g++ -o demo demo.cpp line.cpp Coordinate.cpp
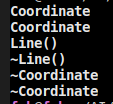
可看出实例化时确实是先调用点(局部)构造函数,在调用线(全局)构造函数,而销毁时相反.
代码示例2:目的看的更清楚先调用A在调用B,销毁时先销毁B,在销毁A
Coordinate.h
class Coordinate
{
    public:
        Coordinate(int x,int y);
        ~Coordinate();
        void setX(int x);
        int getX();
        void setY(int y);
        int getY();
    private:
        int m_iX;
        int m_iY;
};
Coordinate.cpp
#include
#include "Coordinate.h"
using namespace std;

Coordinate::Coordinate(int x,int y)
{

    m_iX = x;
    m_iY = y;
    cout<<"Coordinate()"<
line.h
#include "Coordinate.h"
class Line
{
    public:
        Line(int x1, int y1, int x2, int y2);
        ~Line();
        void setA(int x, int y);
        void setB(int x, int y);
        void printInfo();
    private:
        Coordinate m_coorA;
        Coordinate m_coorB;;
};
line.cpp
#include "line.h"
#include
using namespace std;

Line::Line(int x1,int y1,int x2, int y2):m_coorA(x1, y1),m_coorB(x2, y2)//初始化列表
{
cout<<"Line()"< 
demo.cpp
#include
#include "line.h"
using namespace std;

int main(void)
{

    Line *l= new Line(1,2,3,4);
    cout<<"=================="<printInfo();
    cout<<"=================="<
执行:
g++ -o demo demo.cpp line.cpp Coordinate.cpp
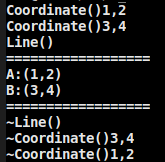
可看出:实例化时先调用A点的构造函数在调用B点的构造函数,最后调用线的构造函数,而销毁的时候反着过来.
9.2对象成员指针
Coordinate.h
class Coordinate
{
    public:
        Coordinate(int x,int y);
        ~Coordinate();
    //     void setX(int x);
        int getX();
    //     void setY(int y);
        int getY();
    private:
        int m_iX;
        int m_iY;
};
Coordinate.cpp
#include
#include "Coordinate.h"
using namespace std;

Coordinate::Coordinate(int x,int y)
{
    m_iX = x;
    m_iY = y;
    cout<<"Coordinate()"<
line.h
#include "Coordinate.h"
class Line
{
    public:
        Line(int x1, int y1, int x2, int y2);
        ~Line();
        // void setA(int x, int y);
        // void setB(int x, int y);
        void printInfo();
    private:
        Coordinate *m_coorA;//对象指针
        Coordinate *m_coorB;;//对象指针
};
line.cpp
#include "line.h"
#include
using namespace std;

Line::Line(int x1,int y1,int x2, int y2)
{
    m_coorA = new Coordinate(x1, y1);
    m_coorB = new Coordinate(x2, y2);
    cout<<"Line()"<getX()<<","<getY()<<")"<getX()<<","<getY()<<")"<
demo.cpp
#include
#include "line.h"
using namespace std;

int main(void)
{

    Line *p = new Line(1,2,3,4);

    delete p;
    p = NULL;

    cout<
执行 g++ -o demo demo.cpp line.cpp Coordinate.cpp
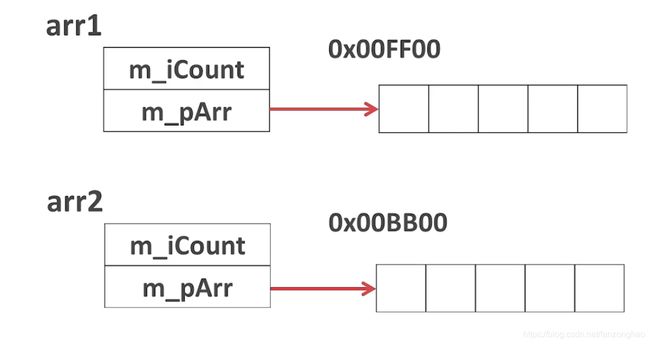
十.深浅拷贝
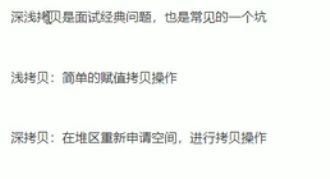
1.浅拷贝
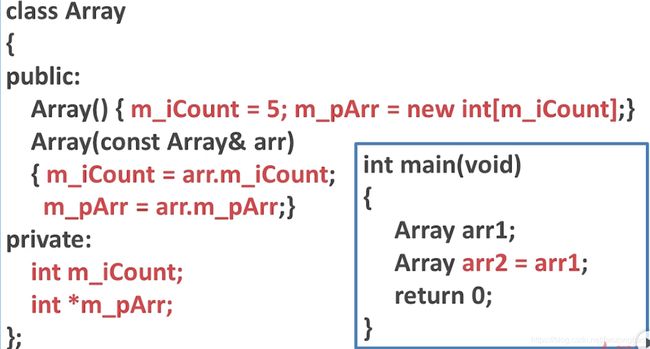

问题:内存是同一块,这样就会重复销毁一次,有内存崩溃的风险.希望指针指向不同内存(也就是堆区数据由程序员开辟,也需要程序员释放).也就是深拷贝,所以需要重新实现拷贝构造函数,在堆区开辟空间自己来.
浅拷贝普通变量代码:
首先看文件夹代码结构:

Array.h代码
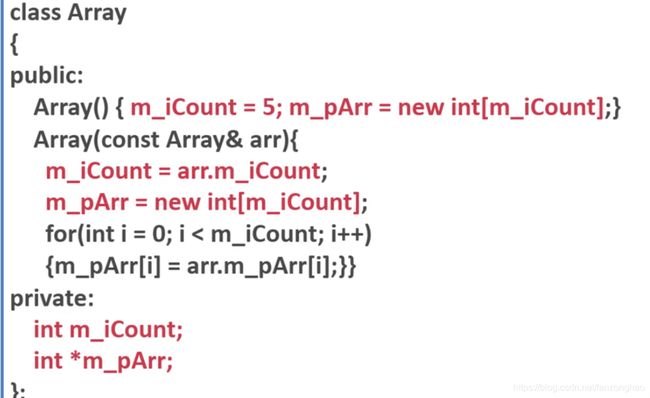
class Array
{
    public:
        Array();
        Array(const Array &arr);
        ~Array();
        void setCount(int count);
        int getCount();

    private:
        int m_iCount;
};
Array.cpp代码
#include
#include "Array.h"

using namespace std;

Array::Array()
{
    cout<<"构造函数Array调用"<
demp.cpp
#include
#include "Array.h"

using namespace std;

int main()
{
    Array arr1;
    arr1.setCount(5);

    Array arr2(arr1);//调用拷贝构造函数

    cout<<"arr1.getCount()"<
执行 g++ -o ./demo ./demo.cpp ./Array.cpp
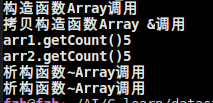
可看出arr1的m_iCount赋值给了arr2.
2.深拷贝
Array.h
class Array
{
    public:
        Array(int count);
        Array(const Array &arr);
        ~Array();
        void setCount(int count);
        int getCount();
        void printAddr();
        void printArr();

    private:
        int m_iCount;
        int *m_pArr;
};
Array.cpp
#include
#include "Array.h"

using namespace std;

Array::Array(int count)
{
    m_iCount = count;
    m_pArr = new int[m_iCount];
    for(int i=0;i
可看出在拷贝构造函数时new了一个指针,同时将arr的值进行拷贝
demo.cpp
#include
#include "Array.h"

using namespace std;

int main()
{
    Array arr1(5);
    // arr1.setCount(5);

    Array arr2(arr1);//调用拷贝构造函数

    arr1.printAddr();
    arr2.printAddr();

    arr1.printArr();
    arr2.printArr();

    cout<<"arr1.getCount()"<
g++ -o ./demo ./demo.cpp ./Array.cpp
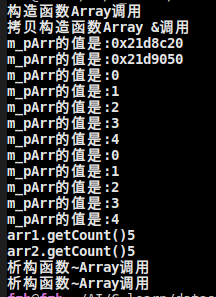
可看出两个指针是指向不同地址的,这样在销毁时就不会出问题了.
十一.对象指针
也就是指针指向对象
左边不常用,右边更常用.
Coordinate.h
class Coordinate
{
    public:
        Coordinate();
        ~Coordinate();
    public:
        int m_iX;
        int m_iY;
};
Coordinate.cpp
#include
#include "Coordinate.h"
using namespace std;

Coordinate::Coordinate()
{
    cout<<"Coordinate()"<
demo.cpp
#include
#include "Coordinate.h"
using namespace std;

int main(void)
{

    Coordinate *coord1= new Coordinate;
    Coordinate *coord2= new Coordinate;

    coord1->m_iX = 5;
    coord1->m_iY = 10;

    coord2->m_iX = 5;
    coord2->m_iY = 10;


    cout<m_iX+coord2->m_iX<m_iY+coord2->m_iY<m_iX = 5;//注意是点号
    coord4->m_iY = 10;//注意是点号
    cout<
g++ -o ./demo ./demo.cpp Coordinate.cpp
注意看对象指针的操作方式
const修饰成员函数和对象:
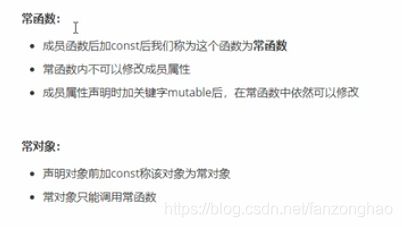
class Person{
    public:
        char m_Name[64];
        int m_age;
        //修饰的是this的指向, 让指针指向的值不可以修改
        void showPerson() const{
            m_B = 100;
        }
        int m_A;
        mutable int m_B; //添加mutable以后,在常函数中依然可以修改
};
int main() {
    Person *p1 = new Person();
    p1->showPerson();
    cout<<"===p1->m_B:"<m_B<
十二.this 指针

this指针的本质是指针常量
class Person{
    public:
        int m_age;
        static string m_Name;
        void func(){

        };
};

void test06(){
    //c++
    Person p;
    cout<< "sizeof(p):" << sizeof(p) << endl;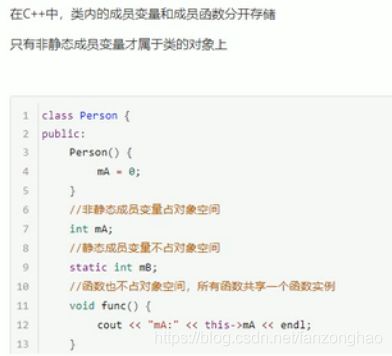
}![]()
可看出静态成员和成员函数不占对象空间,而非。
空对象(无成员函数和成员变量)所占空间为1个字节,是为了区分空对象占内存的位置,每个空对象应该有独一无二的内存地址。
this指针:指向对象自身数据的指针,其本身是对象的地址;函数的逻辑代码二进制存在代码区;每次调用成员函数都需要this指针,编译器替我们干了this这件事情.
this指针作用1:解决形参和成员变量同名.
class Person{
    public:
        Person(int age){
            this->age = age;
        };
        char m_Name[64];
        int age;

};
int main() {
    Person p(12);
cout<![]()
this指针作用2:返回对象本身用*this
(1)引用方式返回
class Person{
    public:
        Person(int age){
            this->age = age;
        };
        char m_Name[64];
        int age;
        Person& PersonAddAge(Person &p){
            this->age += p.age;
            //this 指向p2的指针, *this就是p2对象本身
            return *this;
        }

};
int main() {
    Person p1(12);
    cout<<"===p1.age:"<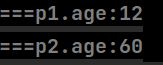
(2)值方式返回
class Person{
    public:
        Person(int age){
            this->age = age;
        };
        char m_Name[64];
        int age;
//        //返回引用
//        Person& PersonAddAge(Person &p){
//            this->age += p.age;
//            //this 指向p2的指针, *this就是p2对象本身
//            return *this;
//        }
        //返回值
        Person PersonAddAge(Person &p){
            //重建了一个对象 就不是原先的p2了
        this->age += p.age;
        return *this;
    }

};
int main() {
    Person p1(12);
    cout<<"===p1.age:"<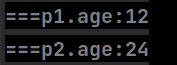
this指针作用3:如下所示,不同对象调用的是同一个函数,来返回数据成员,而不会混乱就是this指针的功劳(个人感觉有点类似python的self).
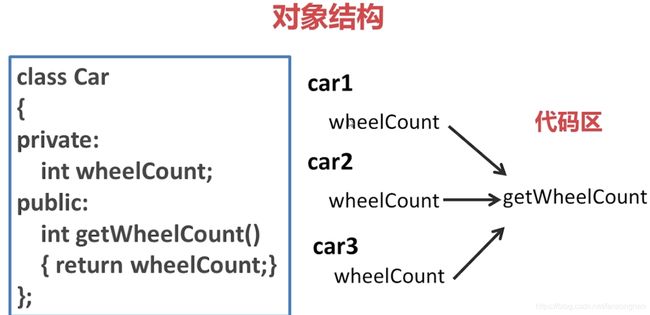
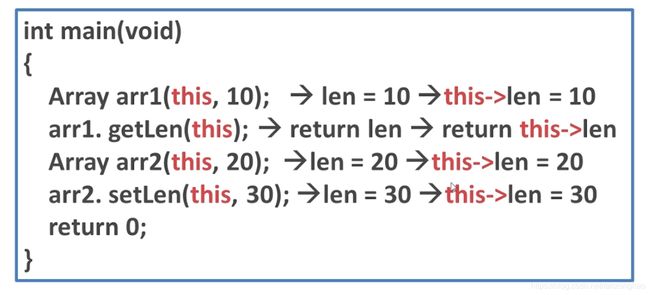 等效于
等效于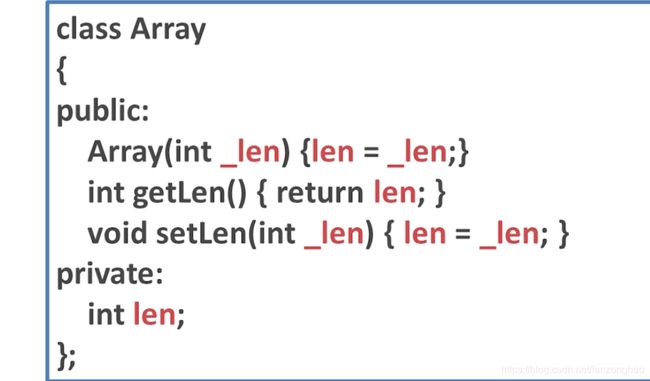
代码示例1:
Array.h
class Array
{
    public:
        Array(int len);
        ~Array();
        void setLen(int len);
        int getLen();
        void printInfo();

    private:
        int len;
};
Array.cpp
#include
#include "Array.h"
using namespace std;
Array::Array(int len)
{
this->len = len;
cout<<"构造函数Array调用"<len = len;
}
int Array::getLen()
{
return this->len;
}
void Array::printInfo()
{
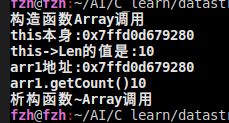
cout<<"this本身:"<Len的值是:"<len< demo.cpp
#include
#include "Array.h"

using namespace std;

int main()
{
    Array arr1(10);


    arr1.printInfo();
    cout<<"arr1地址:"<<&arr1<
执行 g++ -o ./demo demo.cpp Array.cpp
十三.继承
1.继承的几种方式
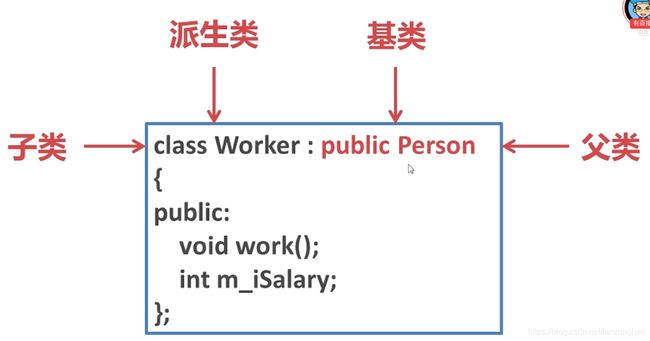
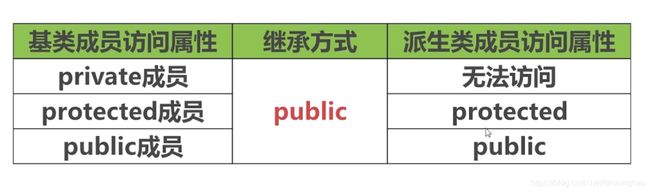
继承方式为public时,三种父类成员访问属性与子类的访问属性表.
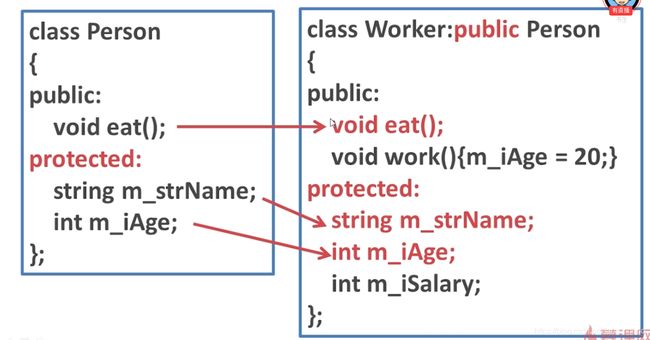
父类的public归子类的public,父类的protected归子类的protected.
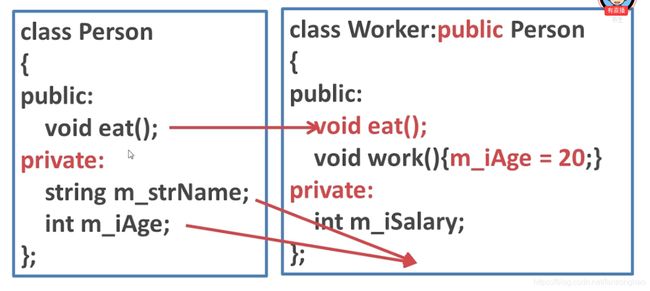
公有继承:父类的public归子类的public,父类的private不归子类.
保护继承:
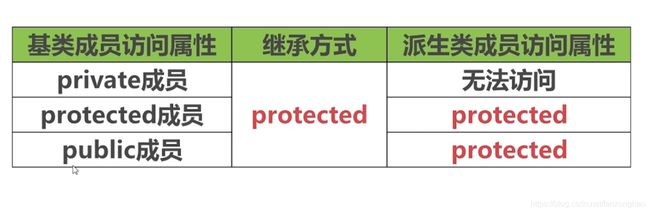
私有继承:
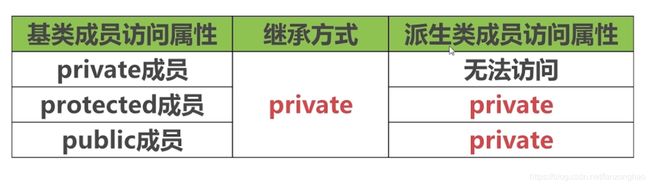
2.公有继承代码示例
下面是公有继承代码演示:
代码文件夹:
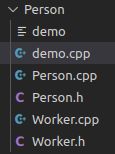
Person.h
#include
#include

using namespace std;

class Person
{
public:
    Person();
    ~Person();
    void eat();
    string m_strName;
    int m_iAge;
};
Person.cpp
#include "Person.h"
#include

using namespace std;

Person::Person()
{
    cout<<"Person()"<
Worker.h
#include "Person.h"
#include
class Worker:public Person //继承person
{
    public:
        Worker();
        ~Worker();
        void work();
        int m_iSalary;
};
Worker.cpp
#include
#include "Worker.h"

using namespace std;


Worker::Worker()
{
    cout<<"Worker()"<
demo.cpp
#include
#include "Worker.h"

using namespace std;


int main()
{
    Worker *p = new Worker();

    p->m_strName = "worker_jim";
    p->m_iAge = 10;

    p->eat();
    p->m_iSalary=100;
    p->work();

    delete p;
    p=NULL;
    return 0;
} 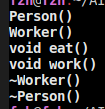
可看出继承是先调用父类的构造函数,在调用自己的构造函数,销毁时先调用自身析构函数,在调用父类析构函数.
3.继承同名成员处理方式
class Base{
public:
    Base(){
        m_A = 100;
    }
    int m_A;
    void func(){
        cout<<"Base func"<
十四.子类对象与父类对象赋值关系(Is A问题)
特点:子类对象当中的数据成员赋值给父类对象对应的数据成员
1.子类对象和父类对象初始化,赋值等
Person.h
#include
using namespace std;
class Person
{
public:
    Person(string name = "Person_jim");
    ~Person();
    void play();
protected:
    string m_strName;
};
Person.cpp
#include "Person.h"
#include
using namespace std;
Person::Person(string name)
{
m_strName = name;
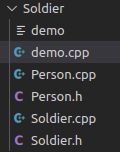
cout<<"Person()"< Soldier.h
#include "Person.h"
#include
class Soldier:public Person
{
public:
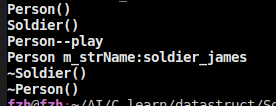
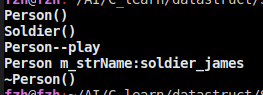
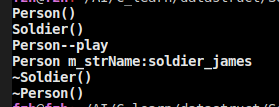
Soldier(string name = "soldier_james",int age=20);
~Soldier();
void work();
protected:
int m_iAge;
};
Soldier.cpp
#include "Soldier.h"
#include
using namespace std;
Soldier::Soldier(string name, int age)
{
m_strName = name;
m_iAge = age;
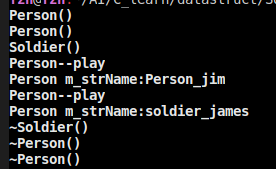
cout<<"Soldier()"< 第一种正常对象实例化:
#include "Soldier.h"
#include
using namespace std;


int main()
{
    Person p0;
    p0.play();

    //子类对象当中的数据成员赋值给父类对象对应的数据成员
    // Soldier soldier;
    // Person p1 = soldier;//子类初始化父类的对象
    // p1.play();


    // // 子类对象当中的数据成员赋值给父类对象对应的数据成员
    // Soldier soldier;
    // Person p2;
    // p2 = soldier;//子类直接赋值给父类对象
    // p2.play();

    // // //子类对象当中的数据成员赋值给父类对象对应的数据成员
    // Soldier soldier;
    // Person *p3 = &soldier;//父类指针指向子类对象
    // p3->play();


    // Person *p4 = new Soldier;//父类的指针指向堆中的子类对象,发现子类的析构函数没有调用也就是内存没有销毁
    // p4->play();
    // delete p4;
    // p4 =NULL;


    return 0;
}
g++ -o ./demo ./demo.cpp Soldier.cpp Person.cpp
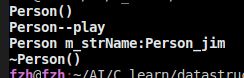
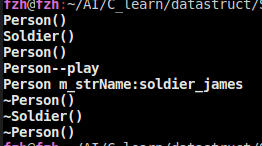
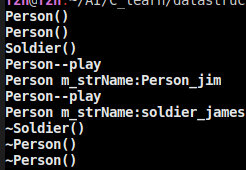
第二种:子类初始化父类的对象
#include "Soldier.h"
#include
using namespace std;
int main()
{
// Person p0;
// p0.play();
// 子类对象当中的数据成员赋值给父类对象对应的数据成员
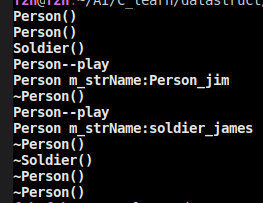
Soldier soldier;
Person p1 = soldier;//子类初始化父类的对象
p1.play();
// // 子类对象当中的数据成员赋值给父类对象对应的数据成员
// Soldier soldier;
// Person p2;
// p2 = soldier;//子类直接赋值给父类对象
// p2.play();
// // //子类对象当中的数据成员赋值给父类对象对应的数据成员
// Soldier soldier;
// Person *p3 = &soldier;//父类指针指向子类对象
// p3->play();
// Person *p4 = new Soldier;//父类的指针指向堆中的子类对象,发现子类的析构函数没有调用也就是内存没有销毁
// p4->play();
// delete p4;
// p4 =NULL;
return 0;
} 
第三种:子类直接赋值给父类对象
#include "Soldier.h"
#include
using namespace std;


int main()
{
    // Person p0;
    // p0.play();

    // // 子类对象当中的数据成员赋值给父类对象对应的数据成员
    // Soldier soldier;
    // Person p1 = soldier;//子类初始化父类的对象
    // p1.play();


    // 子类对象当中的数据成员赋值给父类对象对应的数据成员
    Soldier soldier;
    Person p2;
    p2 = soldier;//子类直接赋值给父类对象
    p2.play();

    // // //子类对象当中的数据成员赋值给父类对象对应的数据成员
    // Soldier soldier;
    // Person *p3 = &soldier;//父类指针指向子类对象
    // p3->play();


    // Person *p4 = new Soldier;//父类的指针指向堆中的子类对象,发现子类的析构函数没有调用也就是内存没有销毁
    // p4->play();
    // delete p4;
    // p4 =NULL;


    return 0;
} 
第四种:父类指针指向子类对象
#include "Soldier.h"
#include
using namespace std;


int main()
{
    // Person p0;
    // p0.play();

    // // 子类对象当中的数据成员赋值给父类对象对应的数据成员
    // Soldier soldier;
    // Person p1 = soldier;//子类初始化父类的对象
    // p1.play();


    // 子类对象当中的数据成员赋值给父类对象对应的数据成员
    // Soldier soldier;
    // Person p2;
    // p2 = soldier;//子类直接赋值给父类对象
    // p2.play();

    // //子类对象当中的数据成员赋值给父类对象对应的数据成员
    Soldier soldier;
    Person *p3 = &soldier;//父类指针指向子类对象
    p3->play();


    // Person *p4 = new Soldier;//父类的指针指向堆中的子类对象,发现子类的析构函数没有调用也就是内存没有销毁
    // p4->play();
    // delete p4;
    // p4 =NULL;


    return 0;
} 
2.父类指针指向堆中的子类对象
父类的指针指向堆中的子类对象,用delete删除父类指针时,发现子类的析构函数没有调用,只会调用父类的析构函数,也就是有内存没有销毁,此时就要用虚析构函数来销毁内存关键字是virtual.
#include "Soldier.h"
#include
using namespace std;


int main()
{


    Person *p4 = new Soldier;//父类的指针指向堆中的子类对象,发现子类的析构函数没有调用也就是内存没有销毁
    p4->play();
    delete p4;
    p4 =NULL;


    return 0;
} 
需要将Person.h和Soldier.h析构函数前面加上virtual,就能正常销毁了.
3.继承中三种传递参数的体现
3.1传递对象
#include "Soldier.h"
#include
using namespace std;

void test1(Person p)//会出现临时对象
{
    p.play();
}

void test2(Person &p)//引用 不会出现临时对象
{
    p.play();
}
void test3(Person *p)//指针 也不会出现临时对象
{
    p->play();
}
int main()
{


    Person p;
    Soldier s;
    test1(p);
    test1(s);

    // Person p;
    // Soldier s;
    // test2(p);
    // test2(s);

    // Person p;
    // Soldier s;
    // test3(&p);
    // test3(&s);


    return 0;
} 
可看出直接传对象会多销毁一个~Person().
3.2 传递引用
3.2.1 利用栈实例化对象
#include "Soldier.h"
#include
using namespace std;

void test1(Person p)//会出现临时对象
{
    p.play();
}

void test2(Person &p)//引用 不会出现临时对象
{
    p.play();
}
void test3(Person *p)//指针 也不会出现临时对象
{
    p->play();
}
int main()
{


    // Person p;
    // Soldier s;
    // test1(p);
    // test1(s);

    Person p;
    Soldier s;
    test2(p);
    test2(s);

    // Person p;
    // Soldier s;
    // test3(&p);
    // test3(&s);


    return 0;
} 
会发现与上面相比没有临时对象,也不会多销毁Person对象
3.2.2 利用堆实例化对象
#include "Soldier.h"
#include
using namespace std;

void test1(Person p)//会出现临时对象
{
    p.play();
}

void test2(Person &p)//引用 不会出现临时对象
{
    p.play();
}
void test3(Person *p)//指针 也不会出现临时对象
{
    p->play();
}
int main()
{


    // Person p;
    // Soldier s;
    // test1(p);
    // test1(s);

    Person *p = new Person();
    Soldier *s = new Soldier();
    test2(*p);
    test2(*s);

    delete p;
    p = NULL;
    delete s;
    s = NULL;
    // Person p;
    // Soldier s;
    // test2(p);
    // test2(s);

    // Person p;
    // Soldier s;
    // test3(&p);
    // test3(&s);


    return 0;
}
会发现与3.1相比没有临时对象,也不会多销毁Person对象
3.3传递指针
3.3.1 利用栈实例化对象
#include "Soldier.h"
#include
using namespace std;

void test1(Person p)//会出现临时对象
{
    p.play();
}

void test2(Person &p)//引用 不会出现临时对象
{
    p.play();
}
void test3(Person *p)//指针 也不会出现临时对象
{
    p->play();
}
int main()
{


    // Person p;
    // Soldier s;
    // test1(p);
    // test1(s);

    // Person p;
    // Soldier s;
    // test2(p);
    // test2(s);

    Person p;
    Soldier s;
    test3(&p);
    test3(&s);


    return 0;
} 
会发现与3.1相比没有临时对象,也不会多销毁Person对象.
3.3.2用堆实例化对象
#include "Soldier.h"
#include
using namespace std;

void test1(Person p)//会出现临时对象
{
    p.play();
}

void test2(Person &p)//引用 不会出现临时对象
{
    p.play();
}
void test3(Person *p)//指针 也不会出现临时对象
{
    p->play();
}
int main()
{


    // Person p;
    // Soldier s;
    // test1(p);
    // test1(s);

    Person *p = new Person();
    Soldier *s = new Soldier();
    test3(p);
    test3(s);

    delete p;
    p = NULL;
    delete s;
    s = NULL;
    // Person p;
    // Soldier s;
    // test2(p);
    // test2(s);

    // Person p;
    // Soldier s;
    // test3(&p);
    // test3(&s);


    return 0;
}
会发现与3.1相比没有临时对象,也不会多销毁Person对象.
由上面三个函数的调用可见,采用引用和指针不会产生临时对象,效率会更高.
十五.多重继承和多继承
1.多重继承
简单理解就是:几代人的继承
Person.h
#include
using namespace std;
class Person
{
public:
    Person(string name = "Person_jim");
    virtual ~Person();
    void play();
protected:
    string m_strName;
};
Person.cpp
#include "Person.h"
#include
// using namespace std;

Person::Person(string name)
{
    m_strName = name;
    std::cout<<"Person()"<
Soldier.h
#include "Person.h"
#include
class Soldier:public Person
{

    public:
        Soldier(string name = "soldier_james",int age=20);
        virtual ~Soldier();
        void work();

    protected:
        int m_iAge;

};
Soldier.cpp
#include "Soldier.h"
#include
using namespace std;

Soldier::Soldier(string name, int age)
{
    m_strName = name;
    m_iAge = age;
    cout<<"Soldier()"<
Infantry.h
#include "Soldier.h"
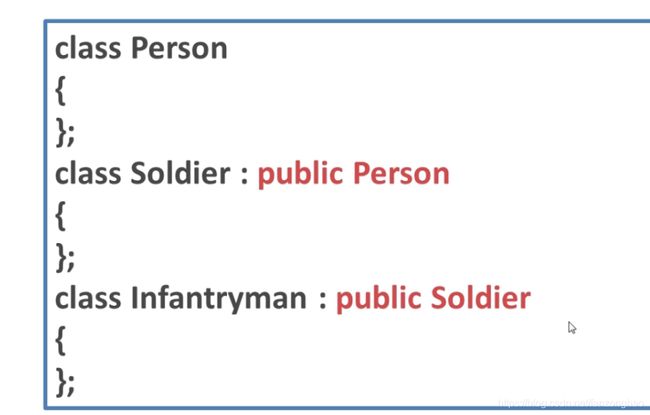
class Infantry:public Soldier//多重继承
{
public:
Infantry(string name = "infantry Jack", int age =30);
~Infantry();
void attack();
};
Infantry.cpp
#include
#include "Infantry.h"
using namespace std;

Infantry::Infantry(string name, int age)
{
    m_strName = name;
    m_iAge = age;
    cout<<"Infantry"<
demo.cpp
#include
#include "Infantry.h"

void test1(Person p)
{
    p.play();
}


void test2(Person &p)
{
    p.play();
}

void test3(Person *p)
{
    p->play();
}


int main()
{
    Infantry infantry;

    test1(infantry);
    test2(infantry);
    test3(&infantry);

    return 0;
}
CMakeLists.txt
cmake_minimum_required(VERSION 3.4.1)
project(Infantry)

#add_executable(demo hello.cpp) # 生成可执行文件
#add_library(demo hello.cpp)
set(SRC_LIST demo.cpp Person.cpp Soldier.cpp Infantry.cpp)
add_executable(demo ${SRC_LIST})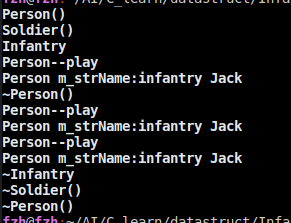
多重继承说明构造函数从祖先开始,析构函数从自身开始.
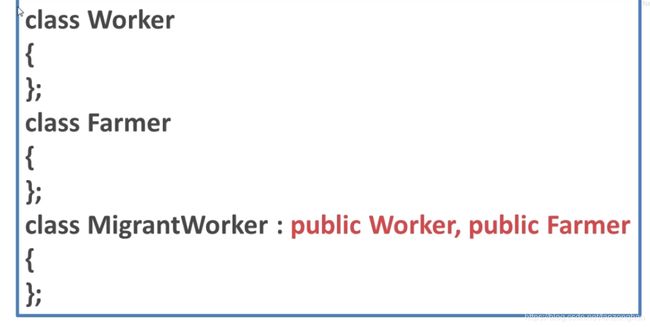
2.多继承
简单理解就是一个人的多重身份
Worker.h
#include
#include
class Worker
{
    public:
        Worker(std::string code="001");
        virtual ~Worker();
        void carry();
    protected:
        std::string m_strCode;
};
Worker.cpp
#include
#include "Worker.h"
#include

Worker::Worker(std::string code)
{
    m_strCode = code;
    std::cout<<"Worker()"<
Farmer.h
#include
#include
class Farmer
{
    public:
        Farmer(std::string name="Farm Jack");
        virtual ~Farmer();
        void sow();
    protected:
        std::string m_strName;
};
Farmer.cpp
#include
#include "Farmer.h"
#include

 Farmer:: Farmer(std::string name)
{
    m_strName = name;
    std::cout<<"Farmer()"<
MigrantWorker.h
#include "Farmer.h"
#include "Worker.h"
#include
#include
class MigrantWorker:public Worker, public Farmer ///农民工  多继承
{
    public:
        MigrantWorker(std::string name, std::string code);
        virtual ~MigrantWorker();
};
MigrantWorker.cpp
#include "MigrantWorker.h"
#include

MigrantWorker::MigrantWorker(std::string name, std::string code):Farmer(name),Worker(code)//初始化列表
{
    std::cout<<"MigrantWorker()"<
demo.cpp
#include
#include "MigrantWorker.h"


int main()
{
    MigrantWorker *p = new MigrantWorker("Damin", "100");
    p->carry();
    p->sow();
    delete p;
    p = NULL;
    return 0;
}
CMakeLists.txt
cmake_minimum_required(VERSION 3.4.1)
project(Infantry)


set(SRC_LIST demo.cpp Farmer.cpp Worker.cpp MigrantWorker.cpp)
add_executable(demo ${SRC_LIST})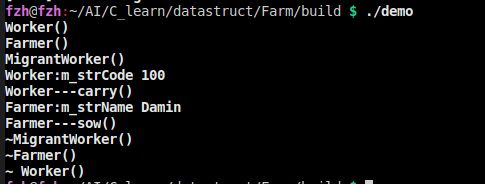
十六.虚继承
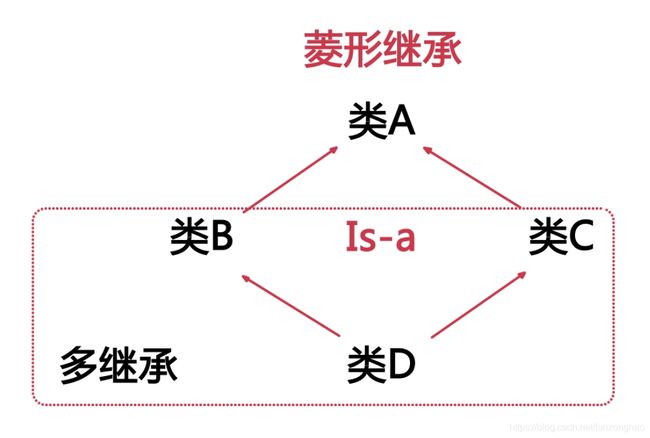
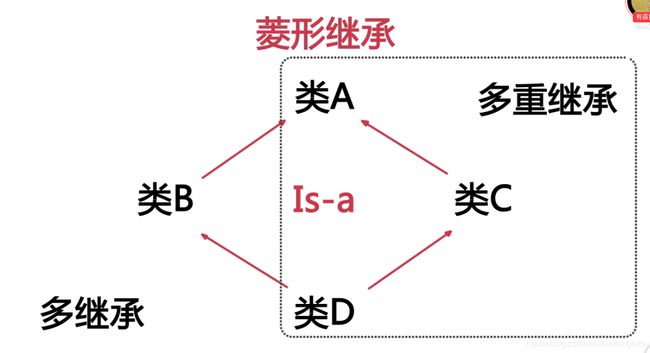
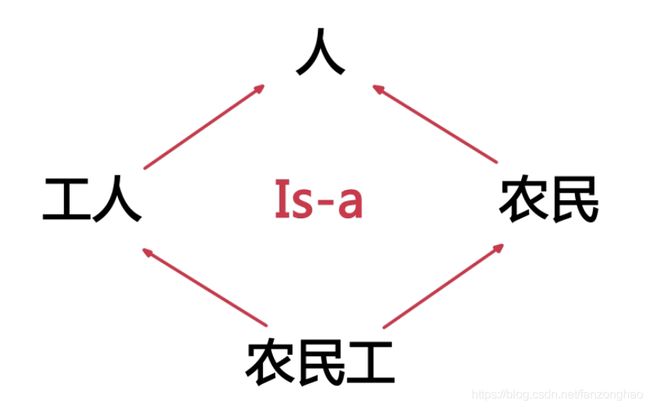
虚继承要解决的问题:例如上述菱形继承中的,D从B和C多继承,从A,C多重继续,最终的基类都是A,那么这样的话,D就拥有两份A的数据成员,显然是不行的.
例子:
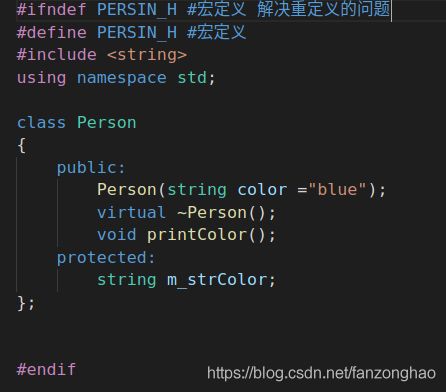
1.Peson.h 加宏定义解决Person被Worker和Farmer重定义
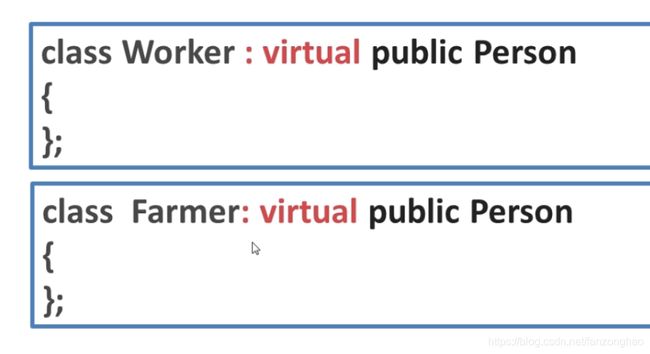
2,加Virtual关键字,以后Worker和Farmer就作为农民工的虚基类.
这样的话,MigrantWorker以后就只含有一份Person的数据.

采用了上述手段以后从子类传入的参数,就不会修改最顶层父类的参数了,也就是虚继承子类不能传值给父类.
Person.h
#ifndef PERSON_H #宏定义 解决重定义的问题
#define PERSON_H #宏定义
#include
using namespace std;

class Person
{
    public:
        Person(string color ="blue");
        virtual ~Person();
        void printColor();
    protected:
        string m_strColor;
};


#endif
Person.cpp
#include
#include "Person.h"

using namespace std;

Person::Person(string color)
{
    m_strColor = color;
    cout<<"Person()"<
Farmer.h
#include
#include "Person.h"

using namespace std;

class Farmer:virtual public Person
{
    public:
        Farmer(string name="Jack", string color="blue");
        virtual ~Farmer();
        void sow();
    protected:
        string m_strName;
};
Farmer.cpp
#include
#include "Farmer.h"
#include

using namespace std;

Farmer::Farmer(string name, string color):Person("Farmer "+color)
{
    m_strName = name;
    cout<<"Farmer()"<
Worker.h
#include
#include "Person.h"

using namespace std;

class Worker:virtual public Person
{
    public:
        Worker(string code="001",string colr="blue");
        virtual ~Worker();
        void carry();
    protected:
        string m_strCode;
};
Worker.cpp
#include
#include "Worker.h"
#include
using namespace std;

Worker::Worker(string code, string color):Person("Worker "+color)//初始化列表
{
    m_strCode = code;
    cout<<"Worker()"<
MigrantWorker.h
#include "Worker.h"
#include "Farmer.h"
#include
#include
using namespace std;

class MigrantWorker:public Farmer,public Worker
{
    public:
        MigrantWorker(string name, string code, string color);
        ~MigrantWorker();
};
MigrantWorker.cpp
#include "MigrantWorker.h"
#include
#include

MigrantWorker::MigrantWorker(string name,string code, string color):Farmer(name,color),Worker(code, color)
{
    cout<<"MigrantWorker()"<
demo.cpp
#include
#include "MigrantWorker.h"

int main()
{
    MigrantWorker *p = new MigrantWorker("Merry", "200", "yellow");
    p->Farmer::printColor();
    p->Worker::printColor();
    delete p;
    p=NULL;
    return 0;
}
CMakeLists.txt
cmake_minimum_required(VERSION 3.4.1)
project(MigrantPerson)


set(SRC_LIST demo.cpp Person.cpp Worker.cpp Farmer.cpp MigrantWorker.cpp)
add_executable(demo ${SRC_LIST})
mkdir build
cd build
cmake ..
make
./demo
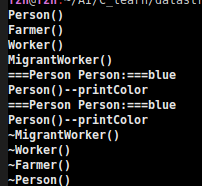
可看出加Virtual关键字以后,color是blue而不是传入的yellow,同时只拥有一份最顶层Person的数据成员了也就是虚继承子类不能传值给父类.
十七.虚函数(多态)
相同对象接到不同命令(静态多态或者早绑定)或者不同对象接收到同一命令(动态多态或晚绑定),执行不同的动作就是多态.而动态多态就要用到虚函数.
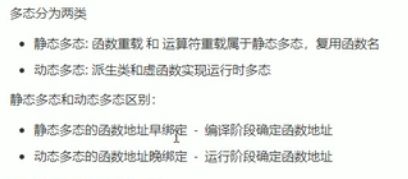
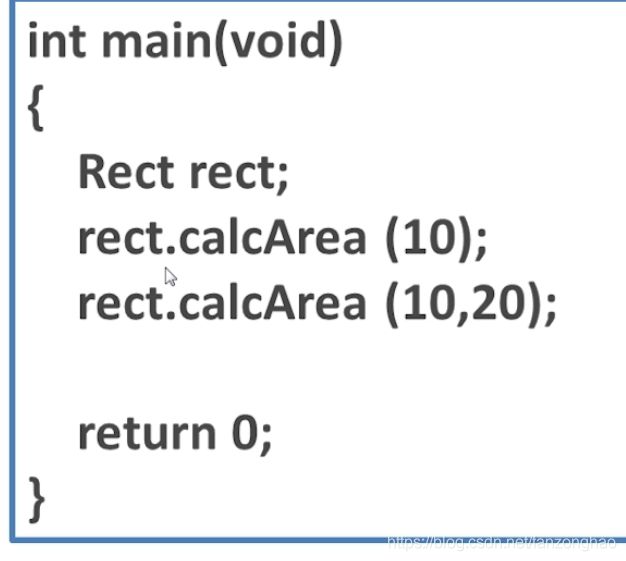
1.静态多态
2.动态多态
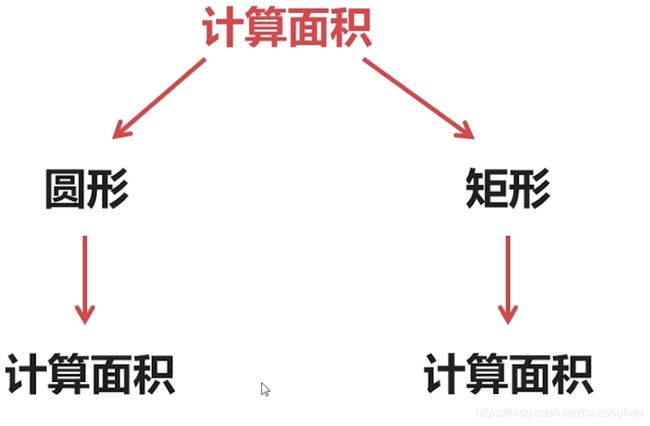
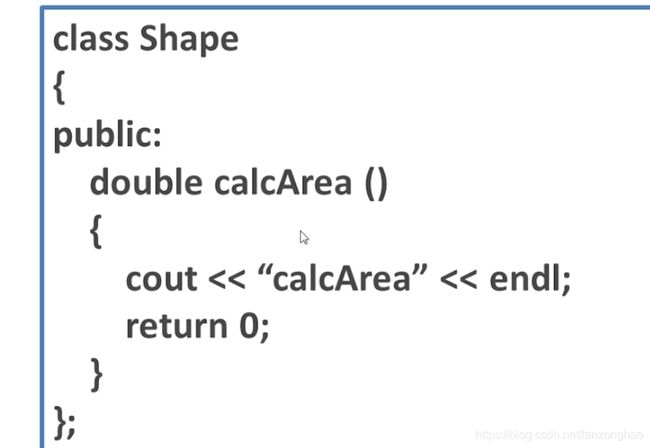
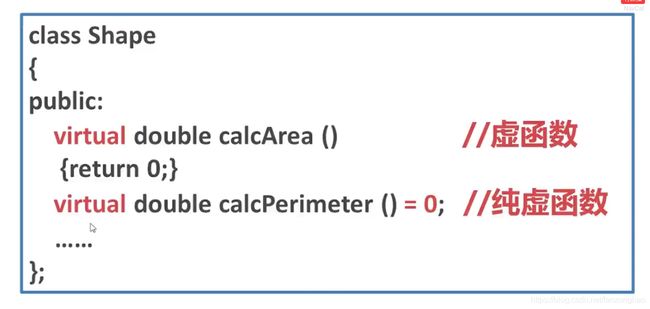
继承的类会有不同计算面积的函数,如下所示,只不过这个示例执行的都是父类计算面积的函数,所以引入虚函数解决这个问题,也就是在每个计算函数前面添加virtual关键字.


shape.h
#ifndef SHAPE_H //宏定义 避免重复包含
#define SHAPE_H
#include
using namespace std;
class Shape
{
    public:
        Shape();
        ~Shape();
        virtual double calcArea();
};

#endif
shape.cpp
#include
#include "Shape.h"
using namespace std;
Shape::Shape()
{
    cout<<"Shape()"<
Rect.h
#ifndef RECT_H //宏定义 避免重复包含
#define RECT_H
#include
#include "Shape.h"
using namespace std;

class Rect:public Shape
{
    public:
        Rect(double w, double h);
        ~Rect();
        virtual double calcArea();
    protected:
        double m_w,m_h;

};

#endif
Rect.cpp
#include
#include "Rect.h"
using namespace std;

Rect::Rect(double w, double h)
{
     cout<<"Rect()"<
Circle.h
#ifndef CIRCLE_H //宏定义 避免重复包含
#define CIRCLE_H
#include
#include "Shape.h"
using namespace std;

class Circle:public Shape
{
    public:
        Circle(double r);
        ~Circle();
        virtual double calcArea();
    protected:
        double m_dR;

};

#endif
Circle.cpp
#include
#include "Circle.h"
using namespace std;

Circle::Circle(double r)
{
     cout<<"Circle()"<
demo.cpp
#include "Circle.h"
#include "Rect.h"
#include
using namespace std;
int main()
{
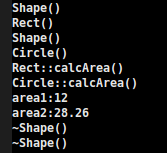
Shape *shape1 = new Rect(3,4);
Shape *shape2 = new Circle(3);
double area1;
double area2;
area1 = shape1->calcArea();
area2 = shape2->calcArea();
cout<<"area1:"< CMakeLists.txt
cmake_minimum_required(VERSION 3.4.1)
project(Area)


set(SRC_LIST demo.cpp Shape.cpp Rect.cpp Circle.cpp)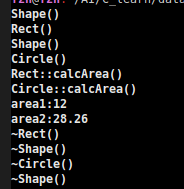
add_executable(demo ${SRC_LIST})注意到从父类到子类的每个动态多态的函数加上virtual关键字就可以调用每个子类的相应函数了.
注意观察,因为delete调用的是父类的析构函数,子类的析构函数没有调用也就是内存没有销毁,此时就要用虚析构函数来销毁内存,关键字是virtual,在每一个类析构函数前面加上virtual.打印结果如下所示.
十八.虚析构函数
作用:销毁子类的的内存,解决内存泄露的问题,上面例子出现的例子已经举例了.
总结:
#include
#include
#include
#include
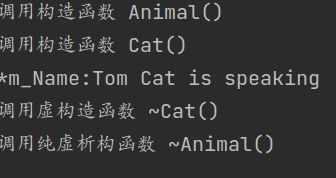
#include 注意的是纯虚析构函数是需要实现的,因为需要释放资源。
下面是不能用virtual关键字修饰的
1.不能修饰普通函数
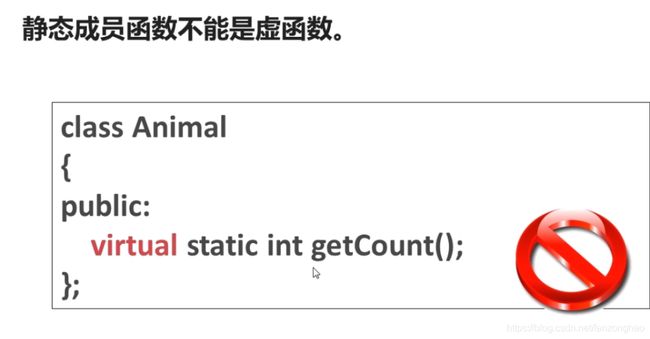
2.不能修饰静态成员函数

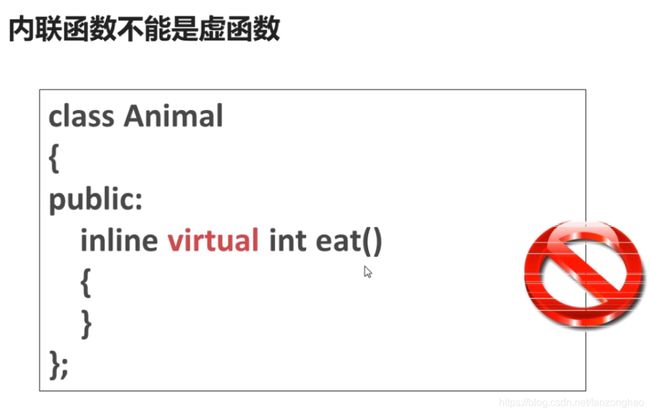
3.不能修饰inline 内联函数
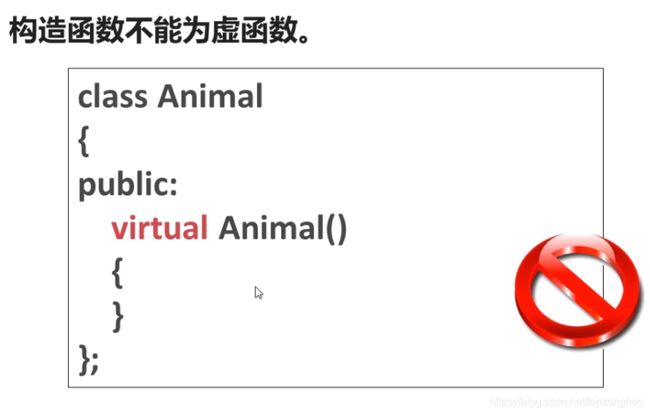
4.不能修饰构造函数
十九.纯虚函数
1.特点
(1).有virtual 修饰;
(2).没有函数体;
(3).函数名后面加=0
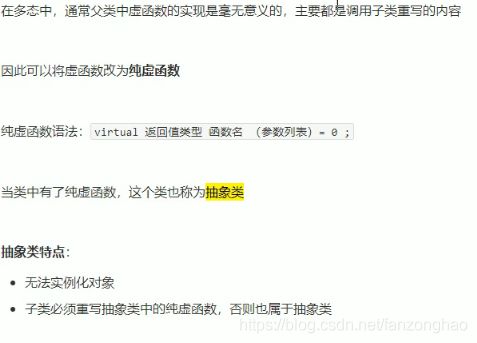
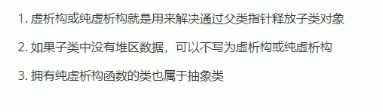
含有纯虚函数的类叫做抽象类,由于有纯虚函数,所以抽象类不能实例化对象,抽象类的子类也可能(注意是可能,实现完了纯虚函数就不是了)是抽象类;

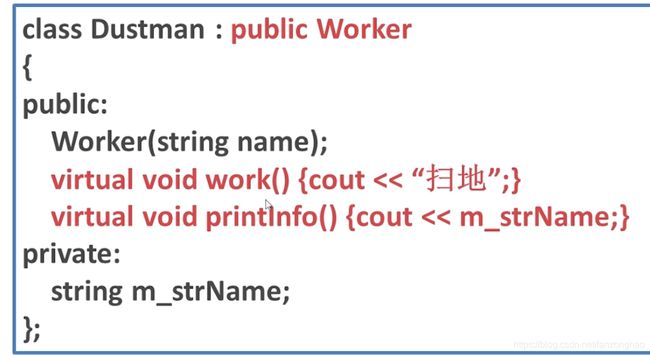
父类是抽象类 子类是抽象类 子类不是抽象类,也就是纯虚函数都做了实现
代码:
Person.h
#ifndef PERSON_H
#define PERSON_H
#include
using namespace std;
class Person
{
public:
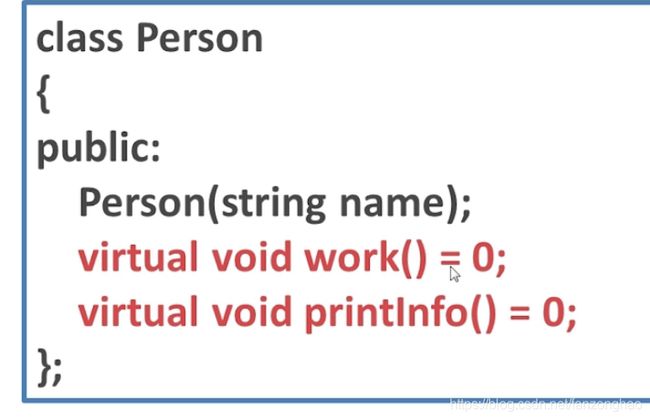
Person(string name);//构造函数
virtual void work()=0;//纯虚函数
virtual ~Person();//虚析构函数
private:
string m_strName;
};
#endif Person.cpp
#include "Person.h"
#include

Person::Person(string name)
{
    m_strName = name;
}

Person::~Person()
{
}
Worker.h
#ifndef WORKER_H
#define WORKER_H

#include
#include "Person.h"
using namespace std;

class Worker:public Person
{
    public:
        Worker(string name, int age);
        virtual void work()=0;
        virtual ~Worker();
    private:
        int m_iAge;
};

#endif
Worker.cpp
#include
#include
#include "Worker.h"
using namespace std;

Worker::Worker(string name,int age):Person(name)
{
    m_iAge = age;
}

Worker::~Worker()
{
}

// void Worker::work()
// {
//     cout<<"work"<
Dustman.h
#ifndef DUSTMAN_H
#define DUSTMAN_H

#include
#include "Worker.h"
using namespace std;

class Dustman:public Worker
{
    public:
        Dustman(string name, int age);
        virtual void work();
        virtual ~Dustman();
};

#endif
Dustman.cpp
#include
#include
#include "Dustman.h"
using namespace std;
Dustman::Dustman(string name,int age):Worker(name,age)
{
cout<<"Dustman()"< CMakeLists.txt
cmake_minimum_required(VERSION 3.4.1)
project(Dustman)
set(SRC_LIST demo.cpp Person.cpp Worker.cpp Dustman.cpp)
add_executable(demo ${SRC_LIST})
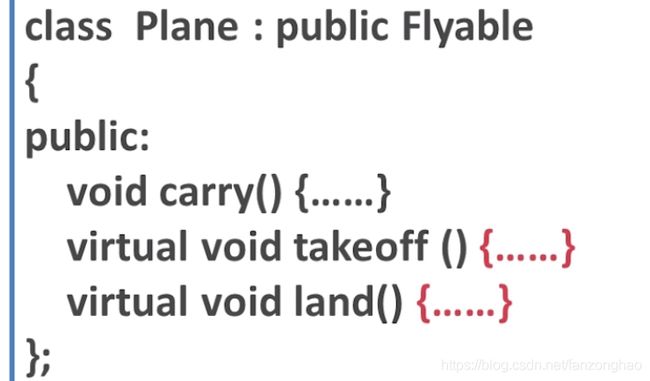
二十.接口类
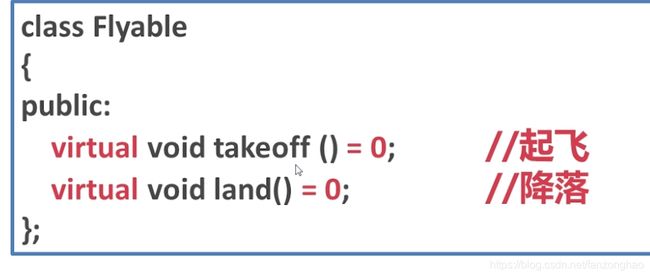
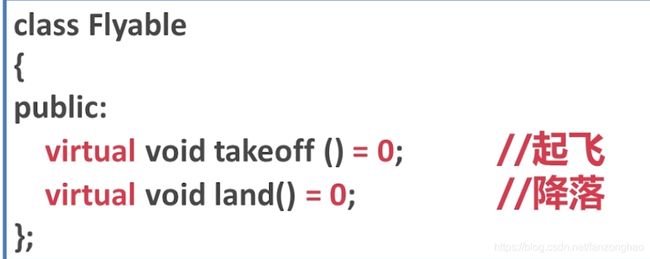
定义:如果一个类只有成员函数,同时成员函数都是纯虚函数,那么这样的类称为接口类。由于有纯虚函数,和抽象类一样不能实例化对象
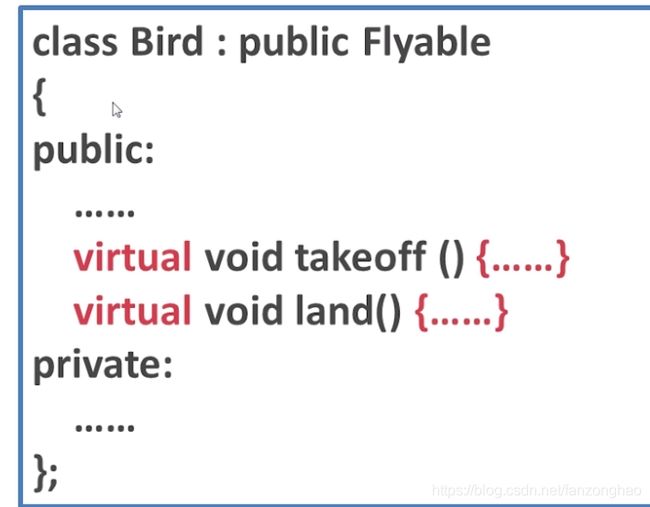
Flyable.h 接口类没有实现的方法所以没有.cpp
#ifndef FLYABLE_H
#define FLYABLE_H
#include
//接口类
class Flyable
{
public:
virtual void takeoff()=0;//纯虚函数
virtual void land()=0;//纯虚函
};
#endif
Plane.h
#ifndef PLANE_H
#define PLANE_H
#include
#include
#include "Flyable.h"
using namespace std;
class Plane//:public Flyable
{
public:
Plane(string code);
// virtual void takeoff();
// virtual void land();
void prinfCode();
~Plane(){};
private:
string m_strCode;
};
#endif Plane.cpp
#include
#include "Plane.h"
using namespace std;
Plane::Plane(string code)
{
m_strCode =code;
}
// void Plane::takeoff()
// {
// cout<<"Plane--takeoff"< FighterPlane.h
#ifndef FIGHTERPLANE_H
#define FIGHTERPLANE_H
#include
#include
#include "Plane.h"
#include "Flyable.h"
using namespace std;
class FighterPlane:public Plane, public Flyable
{
public:
FighterPlane(string code);
virtual void takeoff();
virtual void land();
};
#endif FighterPlane.cpp
#include
#include "FighterPlane.h"
using namespace std;
FighterPlane::FighterPlane(string code):Plane(code)
{
}
void FighterPlane::takeoff()
{
cout<<"FighterPlane--takeoff"< demo.cpp
#include
#include "FighterPlane.h"
using namespace std;
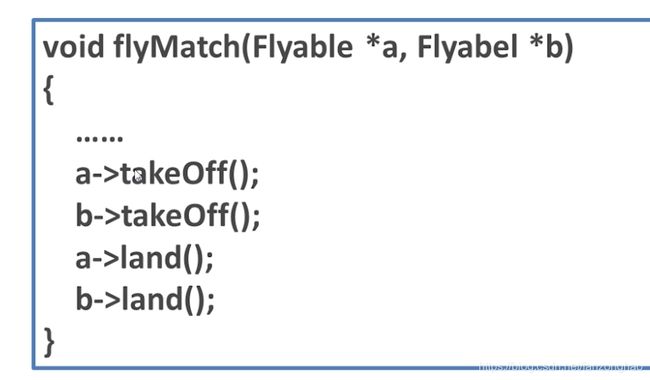
void flyMatch(Flyable *f1,Flyable *f2)
{
f1->takeoff();
f2->land();
f1->takeoff();
f2->land();
}
// void flyMatch(Plane *f1,Plane *f2)
// {
// f1->prinfCode();
// f2->prinfCode();
// }
int main()
{
// Plane p1("001");
// Plane p2("002");
// p1.prinfCode();
// p2.prinfCode();
// flyMatch(&p1 ,&p2);
// FighterPlane p1("001");
// FighterPlane p2("002");
// p1.prinfCode();
// p2.prinfCode();
// flyMatch(&p1 ,&p2);
FighterPlane *p1 = new FighterPlane("001");
FighterPlane *p2 = new FighterPlane("002");
p1->prinfCode();
p2->prinfCode();
flyMatch(p1 ,p2);
return 0;
} CMakeLists.txt
cmake_minimum_required(VERSION 3.4.1)
project(fly)
set(SRC_LIST demo.cpp Plane.cpp FighterPlane.cpp)
add_executable(demo ${SRC_LIST})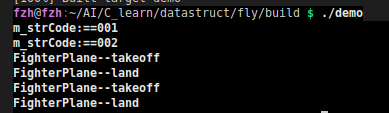
二十一.RTTI(运行时类型自动识别)

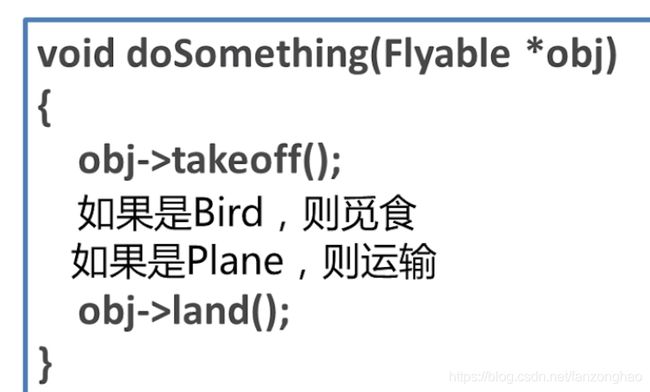
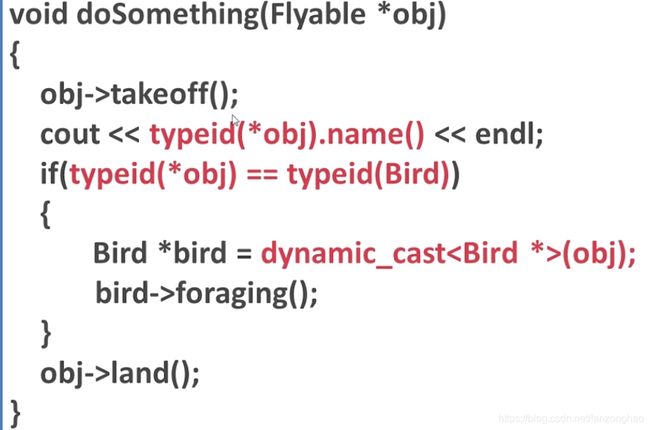
obj就可以自动转换成Bird对象类型。
可见主要使用了dynamic_cast和typeid。
dynamic_cast的注意事项:
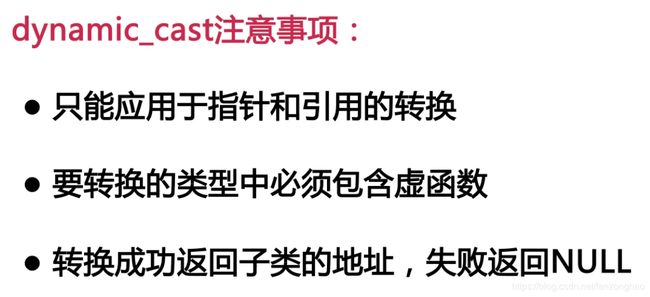
typeid注意事项:
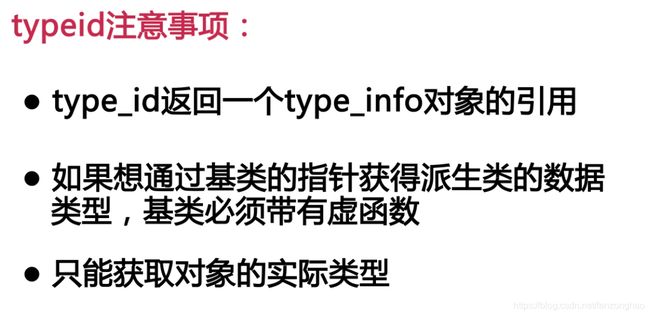
Flyable.h
#ifndef FLYABLE_H
#define FLYABLE_H
class Flyable
{
public:
virtual void takeoff()=0;//纯虚函数
virtual void land()=0;//纯虚函数
};
#endifBird.h
#ifndef BIRD_H
#define BIRD_H
#include "Flyable.h"
#include
#include
using namespace std;
class Bird:public Flyable
{
public:
Bird();
void foraging();
virtual void takeoff();//虚函数
virtual void land();//虚函数
virtual ~Bird();
};
#endif Bird.cpp
#include
#include
#include "Bird.h"
using namespace std;
Bird::Bird()
{
cout<<"Bird::Bird()"<foraging"<takeoff"<land"< Plane.h
#ifndef PLANE_H
#define PLANE_H
#include "Flyable.h"
#include
#include
using namespace std;
class Plane:public Flyable
{
public:
Plane();
void carry();
virtual void takeoff();//虚函数
virtual void land();//虚函数
virtual ~Plane();
};
#endif Plane.cpp
#include
#include
#include "Plane.h"
using namespace std;
Plane::Plane()
{
cout<<"Plane::Plane()"<carry"<takeoff"<land"< demo.cpp 查看typeid
#include
#include
#include "Bird.h"
#include "Plane.h"
using namespace std;
void dosomething(Flyable *obj)//传入对象指针
{
cout<<"===typeid(*obj).name():"<takeoff();
if (typeid(*obj) == typeid(Bird))//RTTI 运行时类型自动识别
{
Bird *bird = dynamic_cast(obj);
bird->foraging();
}
if (typeid(*obj) == typeid(Plane))//RTTI 运行时类型自动识别
{
Plane *plane = dynamic_cast(obj);
plane->carry();
}
obj->land();
}
int main()
{
double i=1;
cout<<"===typeid(i).name():"< CMakeLists.txt
cmake_minimum_required(VERSION 3.4.1)
project(rtti)
add_definitions(-std=c++11)
set(TARGET_NAME "rtti")
option(CUDA_USE_STATIC_CUDA_RUNTIME OFF)
set(CMAKE_CXX_STANDARD 11)
set(CMAKE_BUILD_TYPE Debug)
set(SRC_LIST demo.cpp Bird.cpp Plane.cpp)
add_executable(demo ${SRC_LIST})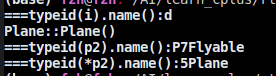
可见typeid还是比较准确的
demo.cpp 初始化Bird对象
#include
#include
#include "Bird.h"
#include "Plane.h"
using namespace std;
void dosomething(Flyable *obj)//传入对象指针
{
cout<<"===typeid(*obj).name():"<takeoff();
if (typeid(*obj) == typeid(Bird))//RTTI 运行时类型自动识别
{
Bird *bird = dynamic_cast(obj);
bird->foraging();
}
if (typeid(*obj) == typeid(Plane))//RTTI 运行时类型自动识别
{
Plane *plane = dynamic_cast(obj);
plane->carry();
}
obj->land();
}
int main()
{
// double i=1;
// cout<<"===typeid(i).name():"< 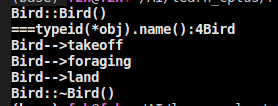
demo.cpp 父类指针指向子类对象
#include
#include
#include "Bird.h"
#include "Plane.h"
using namespace std;
void dosomething(Flyable *obj)//传入对象指针
{
cout<<"===typeid(*obj).name():"<takeoff();
if (typeid(*obj) == typeid(Bird))//RTTI 运行时类型自动识别
{
Bird *bird = dynamic_cast(obj);
bird->foraging();
}
if (typeid(*obj) == typeid(Plane))//RTTI 运行时类型自动识别
{
Plane *plane = dynamic_cast(obj);
plane->carry();
}
obj->land();
}
int main()
{
// double i=1;
// cout<<"===typeid(i).name():"< 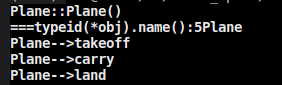
这种会有问题只有构造没有销毁, 因为没有析构函数的实现 Flyable只是接口类
二十二.异常
try ...catch
C++中使用throw抛出异常,通过catch捕获异常
例子1:
demo.cpp
#include
#include
#include
using namespace std;
/**
* 定义函数division
* 参数整型dividend、整型divisor
*/
int division(int dividend, int divisor)
{
if(0 == divisor)
{
// 抛出异常,字符串“除数不能为0”
throw string("除数不能为0");
}
else
{
return dividend / divisor;
}
}
int main(void)
{
int d1 = 0;
int d2 = 0;
int r = 0;
cin >> d1;
cin >> d2;
// 使用try...catch...捕获异常
try
{
division(d1,d2);
}
catch(string &str)
{
cout< g++ -o ./demo demo.cpp

例子2:
Exception.h
#ifndef EXCEPTION_H
#define EXCEPTION_H
class Exception
{
public:
virtual void printException();
virtual ~Exception(){};
};
#endifException.cpp
#include "Exception.h"
#include
using namespace std;
void Exception::printException()
{
cout<<"Exception::printException()"< IndexException.h
#ifndef INDEX_EXCEPTION_H
#define INDEX_EXCEPTION_H
#include "Exception.h"
class IndexException:public Exception
{
public:
virtual void printException();
};
#endifIndexException.cpp
#include "IndexException.h"
#include
using namespace std;
void IndexException::printException()
{
cout<<"提示:下标越界"< demo.cpp
#include
#include
#include "IndexException.h"
using namespace std;
void test()
{
// throw 10;
// float a = 10.1;
// throw a;
throw IndexException();
}
int main()
{
try
{
test();
}
catch(float &e)
{
cout<<"e:"< CMakeLists.txt
cmake_minimum_required(VERSION 3.4.1)
project(Exception)
set(SRC_LIST demo.cpp Exception.cpp IndexException.cpp)
add_executable(demo ${SRC_LIST})二十三.模板篇:友元函数
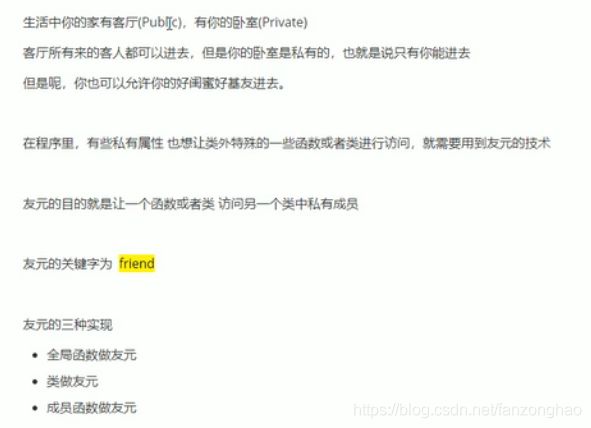

友元函数包括友元全局函数和友元成员函数,用friend修饰,要传入类的对象,引用或者指针,更建议用引用或者指针效率更高,也就是通过友元函数能访问对象的私有成员或者保护成员,风险就是破坏了这种封装性。
1.友元全局函数
添加friend关键字
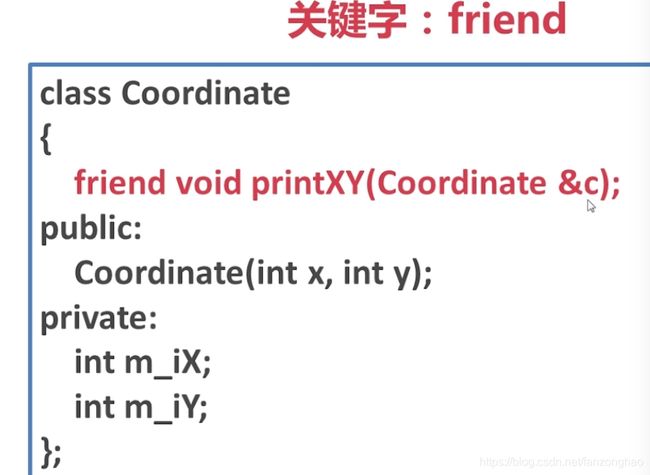
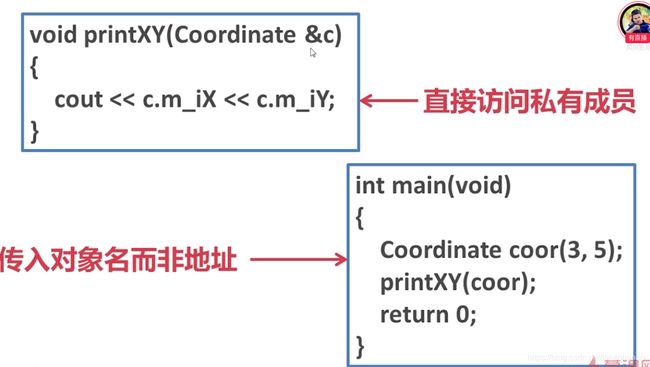
2.友元成员函数
注意区别,将circle的成员函数加上friend关键字作为自己的友元成员函数
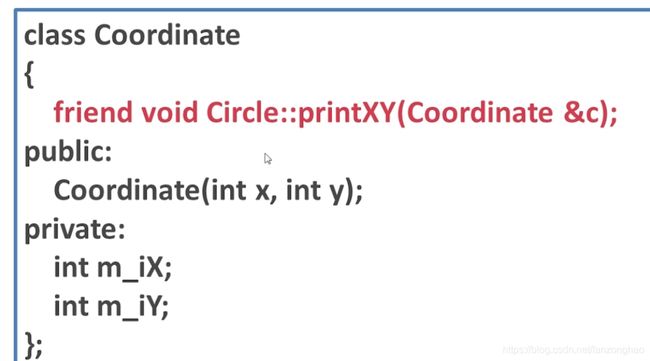
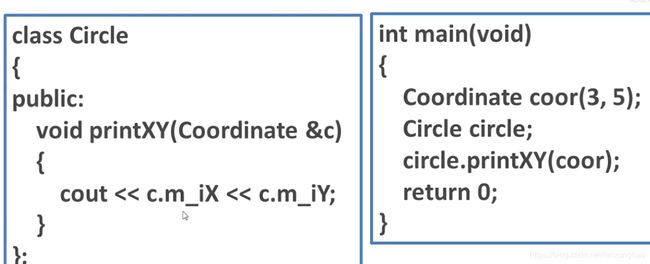
3.友元全局函数代码示例:
3.1 Time.h
#ifndef TIME_H
#define TIME_H
#include
using namespace std;
class Time
{
friend void printTime(Time &t);
public:
Time(int hour, int min, int sec);
~Time();
private:
int m_iHour;
int m_iMinute;
int m_iSecond;
};
#endif
3.2 Time.cpp
#include
#include "Time.h"
using namespace std;
Time::Time(int hour, int min, int sec)
{
m_iHour = hour;
m_iMinute = min;
m_iSecond = sec;
}
Time::~Time()
{
cout<<"~Time()"< 3.3 demo.cpp
#include
#include "Time.h"
using namespace std;
void printTime(Time &t)//利用friend关键字 变为友元函数
{
cout< ![]()
可见变为友元函数后可以访问私有成员.
4.友元成员函数代码示例:
4.1 Time.h
#ifndef TIME_H
#define TIME_H
#include
#include "Match.h"
using namespace std;
class Time
{
friend void Match::printTime(Time &t);
public:
Time(int hour, int min, int sec);
~Time();
private:
int m_iHour;
int m_iMinute;
int m_iSecond;
};
#endif
4.2 Time.cpp
#include
#include "Time.h"
using namespace std;
Time::Time(int hour, int min, int sec)
{
m_iHour = hour;
m_iMinute = min;
m_iSecond = sec;
}
Time::~Time()
{
cout<<"~Time()"< 4.3 Match.h
#ifndef MATCH_H
#define MATCH_H
#include
using namespace std;
class Time;
class Match
{
public:
void printTime(Time &t);//
};
#endif
4.4 Match.cpp
#include
#include "Time.h"
#include "Match.h"
using namespace std;
void Match::printTime(Time &t)
{
cout< 4.5 demo.cpp
#include
#include "Time.h"
#include "Match.h"
using namespace std;
int main()
{
//演示友元成员函数
Time t(10,11,2);
Match m;
m.printTime(t);
return 0;
} ![]()
可见变为友元成员函数后可以访问私有成员.
二十四.模板篇-友元类
friend修饰.
如下所示就称Circle是Coordinate的友元,所以Circle对象就能访问Coordinate的成员
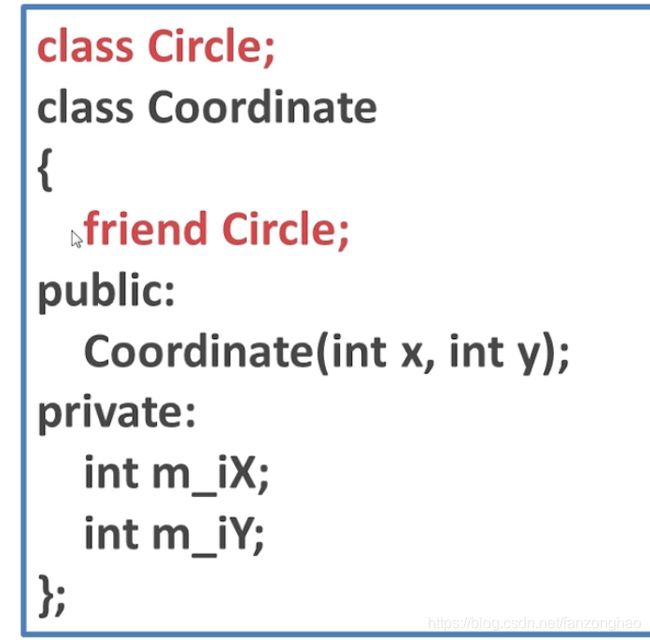
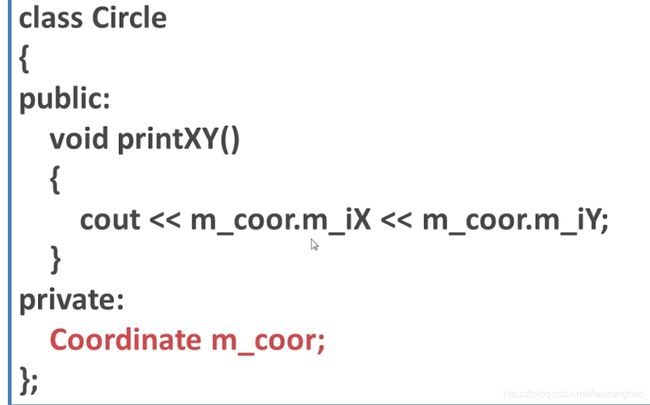
友元类的特点:不可传递指的是B是A,C的朋友,但AC不一定是朋友.单向性指的是A是B的朋友,但B不一定是A的朋友.形式指的是有友元函数和友元类.
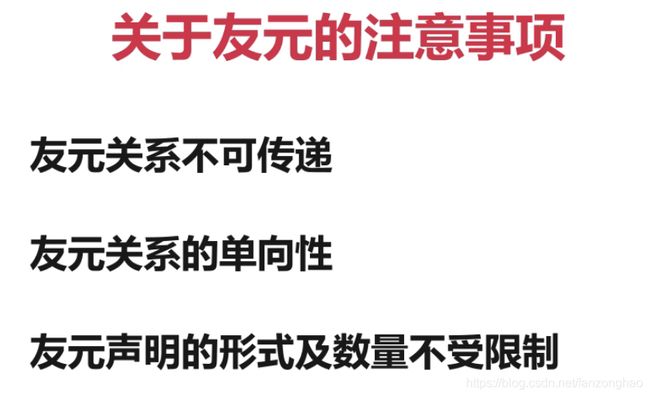
代码:
Time.h
#ifndef TIME_H
#define TIME_H
#include
using namespace std;
class Match;//先声明 为了编译过去 另一个文件在进行定义
class Time
{
friend Match;//Watch类是Time类的友元
public:
Time(int hour, int min, int sec);
~Time();
private:
void printTime();
int m_iHour;
int m_iMinute;
int m_iSecond;
};
#endif
Time.cpp
#include
#include "Time.h"
using namespace std;
Time::Time(int hour, int min, int sec)
{
m_iHour = hour;
m_iMinute = min;
m_iSecond = sec;
}
Time::~Time()
{
cout<<"~Time()"< Match.h
#ifndef MATCH_H
#define MATCH_H
#include
#include "Time.h"
using namespace std;
class Match
{
public:
Match(int hour, int min, int sec);
void testTime();
private:
Time m_tTimer;
};
#endif
Match.cpp
#include
// #include "Time.h"
#include "Match.h"
using namespace std;
Match::Match(int hour, int min, int sec):m_tTimer(hour,min,sec)
{
}
void Match::testTime()
{
m_tTimer.printTime();
cout< demo.cpp
#include
#include "Time.h"
#include "Match.h"
using namespace std;
int main()
{
//演示友元类
Match m(10,11,2);
m.testTime();
return 0;
} 
可看出Time是Match的友元,所以Match的对象可以调用Time的成员.
二十五. 静态

static一个作用是隐藏,加了static,就会对其它源文件隐.
同时static变量存放在静态存储区,所以它具备持久性和默认值0.
用做class修饰的话,主要包括静态数据成员与静态成员函数,用static修饰.
静态数据成员:不依赖于类的实例化对象,随着类的产生而产生,实例化一般是单独存在的,需要类内声明,类外定义。
静态成员函数不能返回数据成员,因为数据成员依赖于实例化对象,所以对象没有实例就返回数据成员会报错.
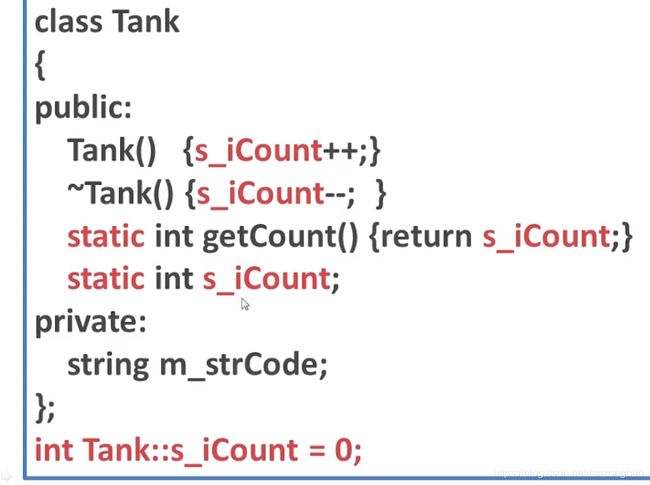
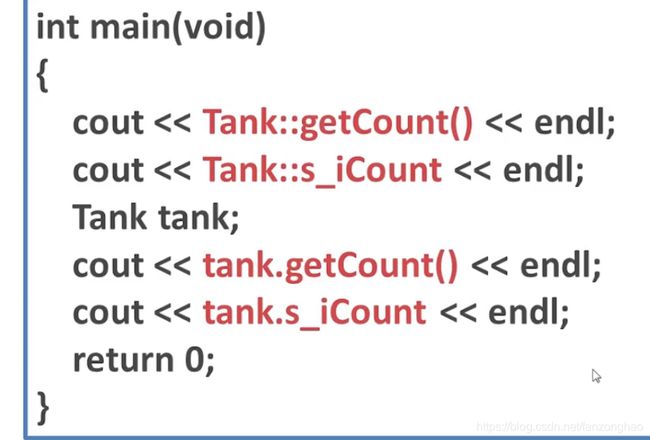
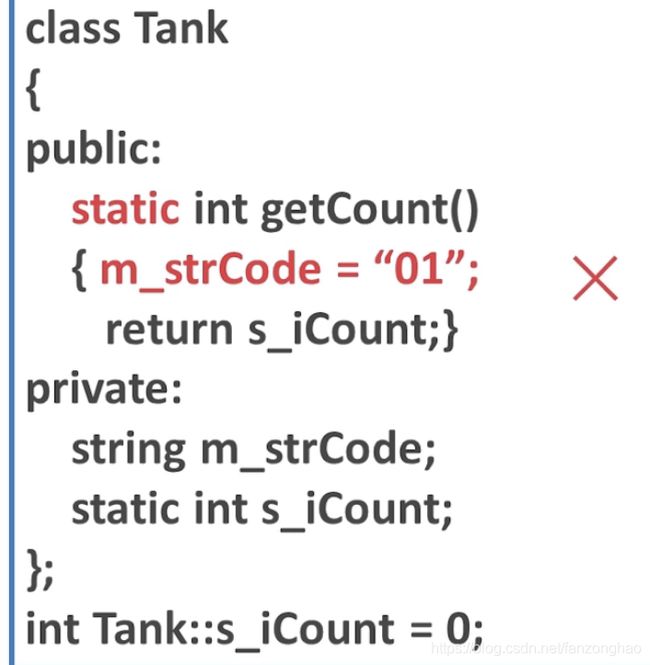
注意:
1.静态数据成员必须初始化;
2.静态成员函数不能调用非静态成员函数和非静态数据成员,但是非静态成员函数是可以调用静态成员函数和静态数据成员的;
3.静态数据成员只有一份,不依赖对象而存在.
代码:
Tank.h
#ifndef TANK_H
#define TANK_H
class Tank
{
public:
Tank(char code);
~Tank();
void fire();
static int getCount();//静态成员函数
private:
static int s_iCount;//静态数据成员
char m_cCode;
};
#endifTank.cpp
#include
#include "Tank.h"
using namespace std;
int Tank::s_iCount=0;
Tank::Tank(char code)
{
m_cCode = code;
s_iCount++;
cout<<"Tank()"< demo.cpp
#include
#include "Tank.h"
using namespace std;
int main()
{
cout<<"Tank::getCount():"< CMakeLists.txt
cmake_minimum_required(VERSION 3.4.1)
project(Infantry)
set(SRC_LIST demo.cpp Tank.cpp)
add_executable(demo ${SRC_LIST})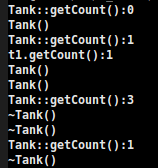
二十六.运算符重载
给原有运算符赋予新的功能,本质就是函数重载,用关键字operator修饰;
例如数字的加号,在字符串就变成了拼接;
1.一元运算符重载
一元运算符重载包括成员函数重载和友元函数重载;
1.1-运算符重载(成员函数重载方式)
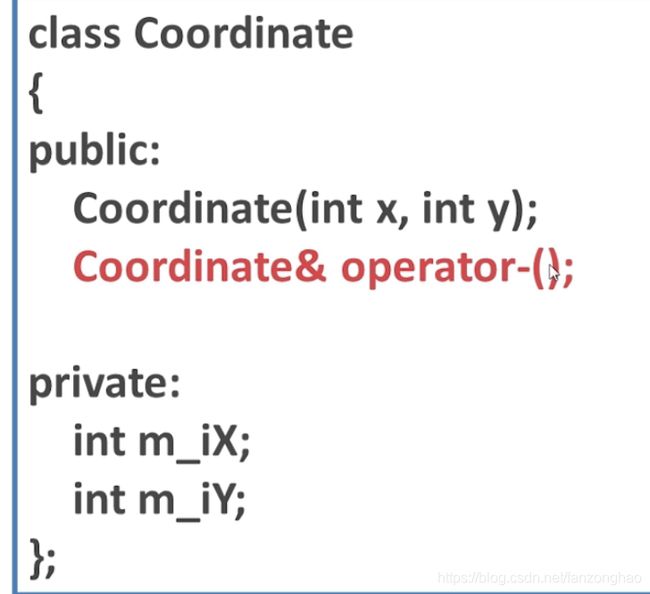
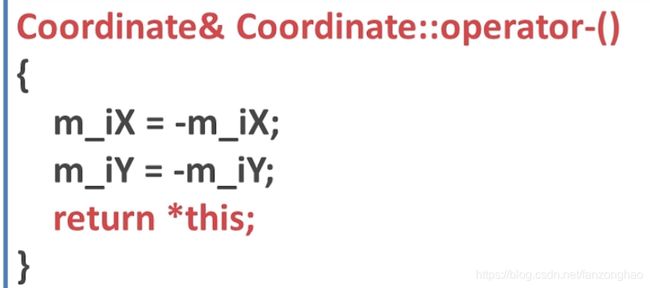

代码:
Coordinate.h
#ifndef COORDINATE_H
#define COORDINATE_H
#include
using namespace std;
class Coordinate
{
public:
Coordinate(int x, int y);
Coordinate &operator-();
int getX();
int getY();
~Coordinate();
private:
int m_iX;
int m_iY;
};
#endif
Coordinate.cpp
#include
#include "Coordinate.h"
using namespace std;
Coordinate::Coordinate(int x,int y)
{
m_iX = x;
m_iY = y;
}
int Coordinate::getX()
{
return m_iX;
}
int Coordinate::getY()
{
return m_iY;
}
Coordinate &Coordinate::operator-()
{
m_iX = -m_iX;
m_iY = -m_iY;
return *this;
}
Coordinate::~Coordinate()
{
cout<<"~Coordinate()"< demo.cpp
#include "Coordinate.h"
#include
using namespace std;
int main()
{
Coordinate coor1(1,3);
cout< 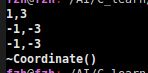
1.2-运算符重载(友元函数重载方式)
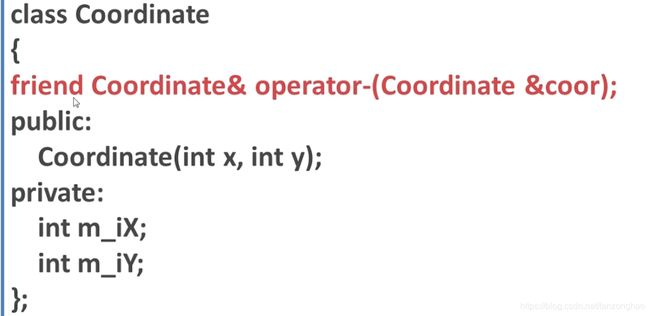
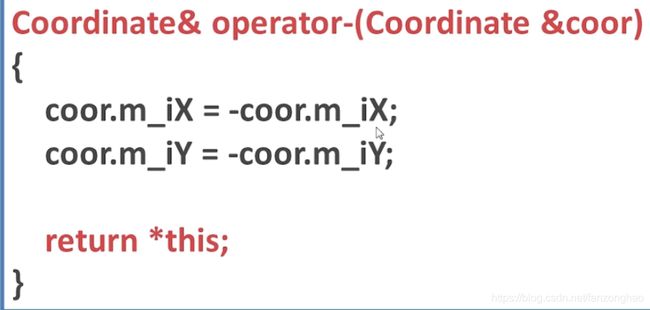
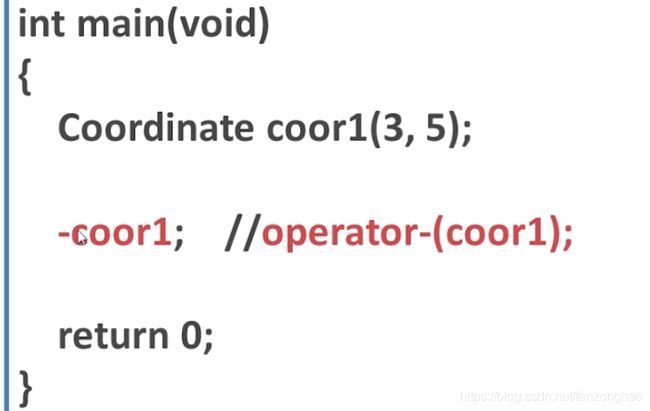
注意这里有误:*this 换成coor
代码:
Coordinate.h
#ifndef COORDINATE_H
#define COORDINATE_H
#include
using namespace std;
class Coordinate
{
friend Coordinate &operator-(Coordinate &coor);
public:
Coordinate(int x, int y);
// Coordinate &operator-();
int getX();
int getY();
~Coordinate();
private:
int m_iX;
int m_iY;
};
#endif
Coordinate.cpp
#include
#include "Coordinate.h"
using namespace std;
Coordinate::Coordinate(int x,int y)
{
m_iX = x;
m_iY = y;
}
int Coordinate::getX()
{
return m_iX;
}
int Coordinate::getY()
{
return m_iY;
}
// Coordinate &Coordinate::operator-()
// {
// m_iX = -m_iX;
// m_iY = -m_iY;
// return *this;
// }
Coordinate &operator-(Coordinate &coor)
{
coor.m_iX = -coor.m_iX;
coor.m_iY = -coor.m_iY;
return coor;
}
Coordinate::~Coordinate()
{
cout<<"~Coordinate()"< demo.cpp
#include "Coordinate.h"
#include
using namespace std;
int main()
{
Coordinate coor1(1,3);
cout< 
1.3前置++ 运算符重载(成员函数重载方式)
先递增在返回结果
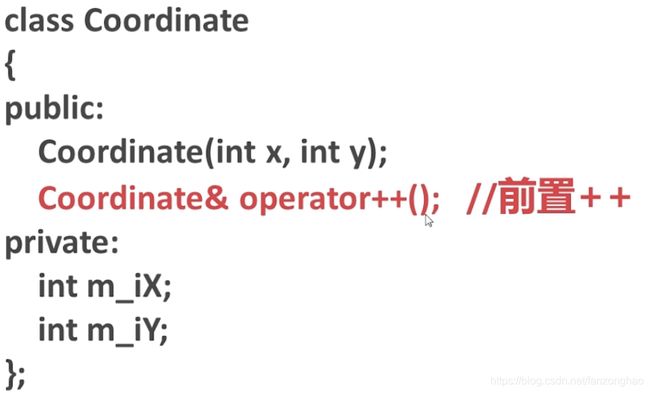
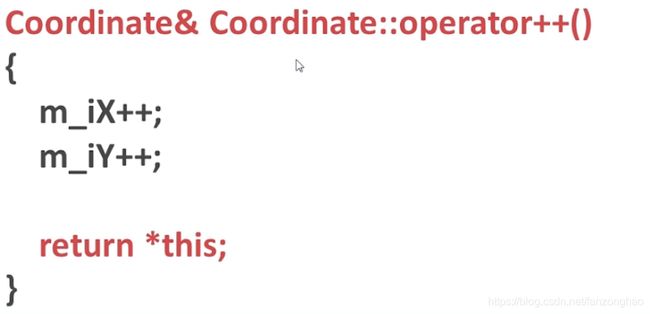
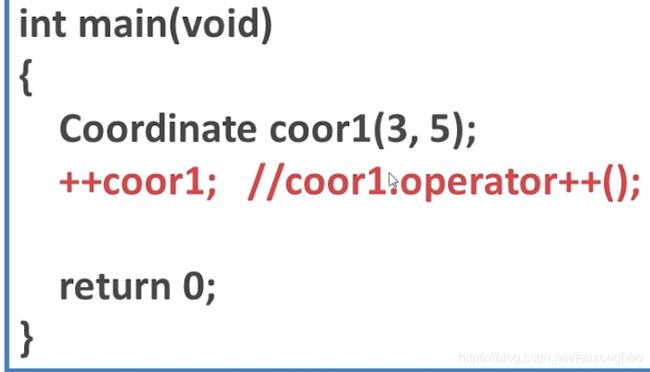
Coordinate.h
#ifndef COORDINATE_H
#define COORDINATE_H
#include
using namespace std;
class Coordinate
{
// friend Coordinate &operator-(Coordinate &coor);
public:
Coordinate(int x, int y);
// Coordinate &operator-();
Coordinate &operator++();
int getX();
int getY();
~Coordinate();
private:
int m_iX;
int m_iY;
};
#endif
Coordinate.cpp
#include
#include "Coordinate.h"
using namespace std;
Coordinate::Coordinate(int x,int y)
{
m_iX = x;
m_iY = y;
}
int Coordinate::getX()
{
return m_iX;
}
int Coordinate::getY()
{
return m_iY;
}
Coordinate &Coordinate::operator++()
{
m_iX++;
m_iY++;
return *this;
}
// Coordinate &operator-(Coordinate &coor)
// {
// coor.m_iX = -coor.m_iX;
// coor.m_iY = -coor.m_iY;
// return coor;
// }
Coordinate::~Coordinate()
{
cout<<"~Coordinate()"< demo.cpp
#include "Coordinate.h"
#include
using namespace std;
int main()
{
Coordinate coor1(1,3);
cout< 
1.4后置++ 运算符重载(成员函数重载方式)
先返回结果在递增
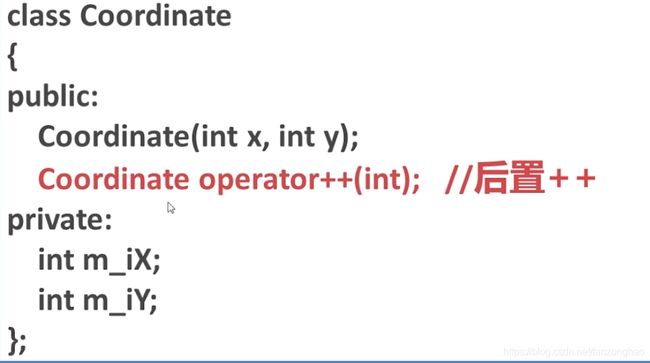
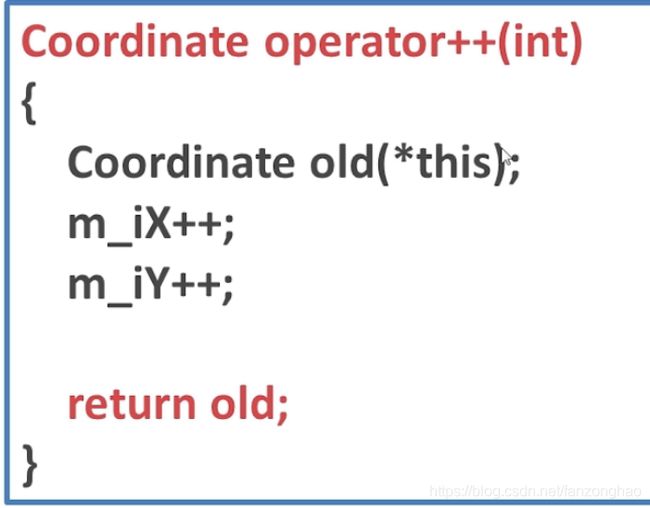
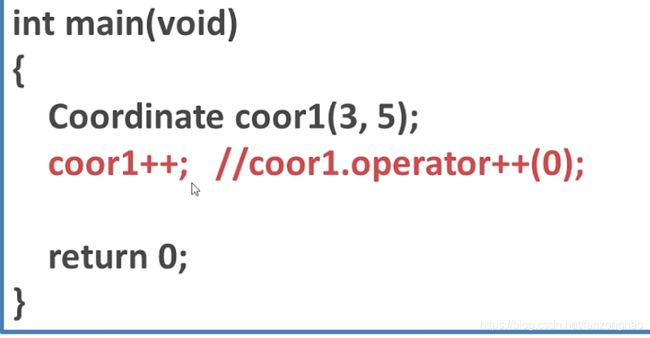
注意的是int 是占位符号 用于区分前置和后置,就可以实现前置和后置的多态。
Coordinate.h
#ifndef COORDINATE_H
#define COORDINATE_H
#include
using namespace std;
class Coordinate
{
// friend Coordinate &operator-(Coordinate &coor);
public:
Coordinate(int x, int y);
// Coordinate &operator-();
// Coordinate &operator++(); //前置++
Coordinate operator++(int);
int getX();
int getY();
~Coordinate();
private:
int m_iX;
int m_iY;
};
#endif
Coordinate.cpp
#include
#include "Coordinate.h"
using namespace std;
Coordinate::Coordinate(int x,int y)
{
m_iX = x;
m_iY = y;
}
int Coordinate::getX()
{
return m_iX;
}
int Coordinate::getY()
{
return m_iY;
}
// Coordinate &Coordinate::operator++()//前置++实现
// {
// m_iX++;
// m_iY++;
// return *this;
// }
Coordinate Coordinate::operator++(int)
{
Coordinate old(*this);//调用默认拷贝构造函数
this->m_iX++;
this->m_iY++;
return old;
}
// Coordinate &operator-(Coordinate &coor)
// {
// coor.m_iX = -coor.m_iX;
// coor.m_iY = -coor.m_iY;
// return coor;
// }
Coordinate::~Coordinate()
{
cout<<"~Coordinate()"< demo.cpp
#include "Coordinate.h"
#include
using namespace std;
int main()
{
Coordinate coor1(1,3);
cout< 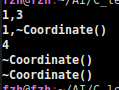
1.5前置++ 和后置++对比
class Coordinate
{
friend ostream& operator<<(ostream& out, Coordinate coor) ;
public:
Coordinate(){
m_num = 0;
};
//前置 ++
Coordinate &operator++(){
m_num++;
return *this;
};
//后置 ++
Coordinate operator++(int){
Coordinate temp = *this;
m_num++;
return temp;
};
private:
int m_num;
};
ostream& operator<<(ostream& out, Coordinate coor){
out<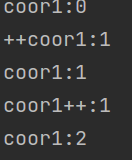
1.6赋值运算符重载
编译器默认提供的是浅拷贝,对于成员变量是在堆区的变量,那么释放的时候就会导致程序崩溃,所以需要重载赋值运算符
class Person{
public:
Person(int age){
m_Age = new int(age);
}
int* m_Age;
Person& operator=(Person& p){
if(m_Age != NULL){
delete m_Age;
m_Age = NULL;
}
this->m_Age = new int(*p.m_Age);
return *this;
}
~Person(){
if(m_Age != NULL){
delete m_Age;
m_Age = NULL;
}
}
};
//
//ostream& operator<<(ostream& cout, Person& p){//benzhi operator<<(cout, p) jianhua cout<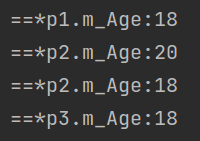
2.二元运算符重载
二元运算符重载包括成员函数重载和友元函数重载;
2.1+号重载 包含全局函数重载,成员函数重载
(1)成员函数重载
class Person{
public:
int m_A;
int m_B;
//成员函数重载 + 号
Person PersonAddPerson(Person& p){
Person temp;
temp.m_A = this->m_A + p.m_A;
temp.m_B = this->m_B + p.m_B;
return temp;
}
//利用operator+ 可以简写成对象相加
Person operator+(Person& p){
Person temp;
temp.m_A = this->m_A + p.m_A;
temp.m_B = this->m_B + p.m_B;
return temp;
}
};
//全局函数重载 + 号
//Person operator+(Person& p1, Person& p2){
// Person temp;
// temp.m_A = p1.m_A + p2.m_A;
// temp.m_B = p1.m_B + p2.m_B;
// return temp;
//}
void test06(){
Person p1;
p1.m_A = 10;
p1.m_B = 20;
Person p2;
p2.m_A = 20;
p2.m_B = 30;
Person p3 = p1.PersonAddPerson(p2);
cout<<"==p3.m_A:"<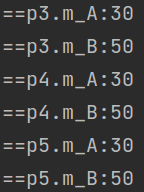
(2)全局函数重载
class Person{
public:
int m_A;
int m_B;
//chengyuanhanshuchongzai + hao
Person PersonAddPerson(Person& p){
Person temp;
temp.m_A = this->m_A + p.m_A;
temp.m_B = this->m_B + p.m_B;
return temp;
}
};
//全局函数重载+号
Person operator+(Person& p1, Person& p2){
Person temp;
temp.m_A = p1.m_A + p2.m_A;
temp.m_B = p1.m_B + p2.m_B;
return temp;
}
void test06(){
Person p1;
p1.m_A = 10;
p1.m_B = 20;
Person p2;
p2.m_A = 20;
p2.m_B = 30;
Person p3 = p1.PersonAddPerson(p2);
cout<<"==p3.m_A:"<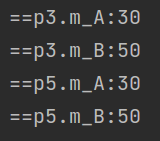
2.2 +号成员函数重载
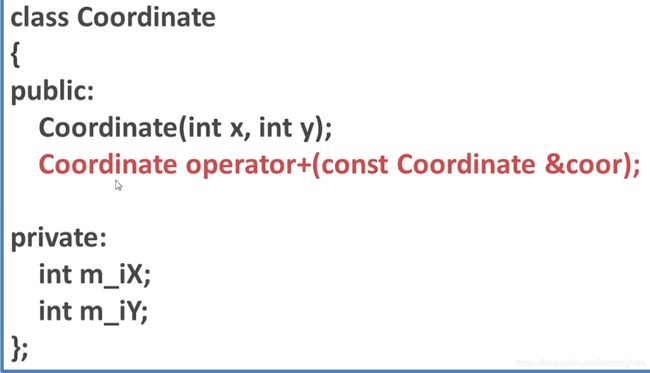

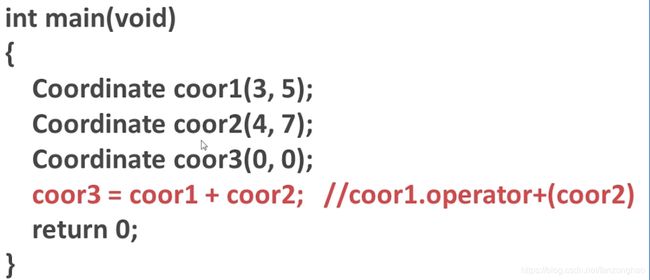
Coordinate.h
#ifndef COORDINATE_H
#define COORDINATE_H
#include
using namespace std;
class Coordinate
{
friend Coordinate &operator-(Coordinate &coor);
public:
Coordinate(int x, int y);
// Coordinate &operator-();
// Coordinate &operator++(); //前置++
// Coordinate operator++(int);
Coordinate operator+(Coordinate &c);
int getX();
int getY();
~Coordinate();
private:
int m_iX;
int m_iY;
};
#endif
Coordinate.cpp
#include
#include "Coordinate.h"
using namespace std;
Coordinate::Coordinate(int x,int y)
{
m_iX = x;
m_iY = y;
}
int Coordinate::getX()
{
return m_iX;
}
int Coordinate::getY()
{
return m_iY;
}
Coordinate &operator-(Coordinate &coor)
{
coor.m_iX = -coor.m_iX;
coor.m_iY = -coor.m_iY;
return coor;
}
Coordinate Coordinate::operator+(Coordinate &c)
{
Coordinate temp(0,0);
temp.m_iX = this->m_iX+c.m_iX;
temp.m_iY = this->m_iY+c.m_iY;
return temp;
}
Coordinate::~Coordinate()
{
cout<<"~Coordinate()"< demo.cpp
#include "Coordinate.h"
#include
using namespace std;
int main()
{
Coordinate coor1(1,3);
Coordinate coor2(1,3);
Coordinate coor3(0,0);
coor3 = coor1+coor2;
cout< 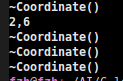
2.3 +号友元函数重载
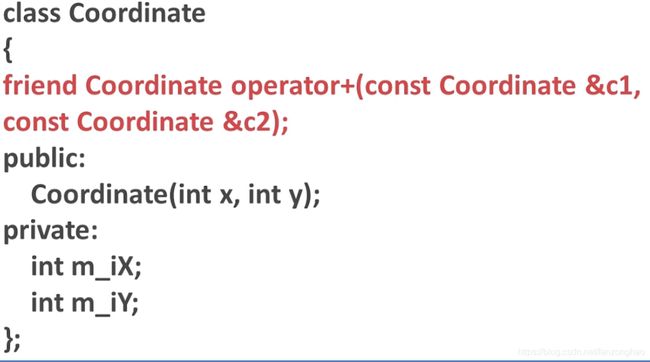
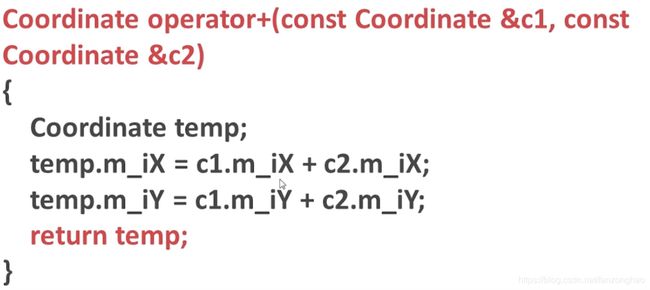
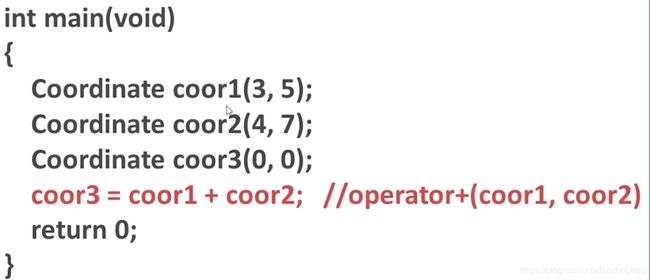
Coordinate.h
#ifndef COORDINATE_H
#define COORDINATE_H
#include
using namespace std;
class Coordinate
{
friend Coordinate &operator-(Coordinate &coor);
friend Coordinate operator+(Coordinate c1, Coordinate c2);
public:
Coordinate(int x, int y);
// Coordinate &operator-();
// Coordinate &operator++(); //前置++
// Coordinate operator++(int);
// Coordinate operator+(Coordinate &c);
int getX();
int getY();
~Coordinate();
private:
int m_iX;
int m_iY;
};
#endif
Coordinate.cpp
#include
#include "Coordinate.h"
using namespace std;
Coordinate::Coordinate(int x,int y)
{
m_iX = x;
m_iY = y;
}
int Coordinate::getX()
{
return m_iX;
}
int Coordinate::getY()
{
return m_iY;
}
Coordinate &operator-(Coordinate &coor)
{
coor.m_iX = -coor.m_iX;
coor.m_iY = -coor.m_iY;
return coor;
}
Coordinate operator+(Coordinate c1,Coordinate c2)
{
Coordinate temp(0,0);
temp.m_iX = c1.m_iX+c2.m_iX;
temp.m_iX = c1.m_iY+c2.m_iY;
return temp;
}
/
Coordinate::~Coordinate()
{
cout<<"~Coordinate()"< demo.cpp
#include "Coordinate.h"
#include
using namespace std;
int main()
{
Coordinate coor1(1,3);
Coordinate coor2(1,3);
Coordinate coor3(0,0);
coor3 = coor1+coor2;
cout< 
2.3 <<(输出符合)友元函数重载
由于第一个对象是ostream对象的,而不是对象本身的,所以不能用成员函数重载,只能用全局函数重载
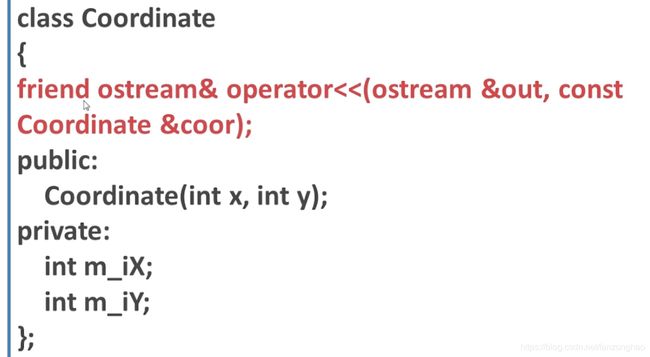
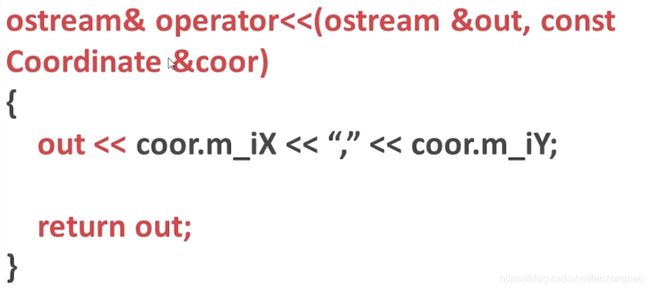
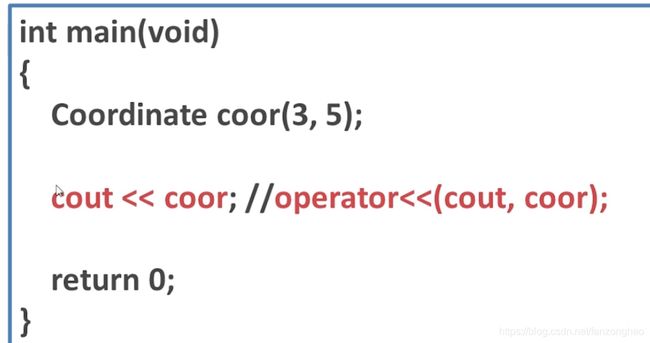
Coordinate.h
#ifndef COORDINATE_H
#define COORDINATE_H
#include
using namespace std;
class Coordinate
{
friend Coordinate &operator-(Coordinate &coor);
friend Coordinate operator+(Coordinate c1, Coordinate c2);
friend ostream &operator<<(ostream &output, Coordinate &coorc1);
public:
Coordinate(int x, int y);
// Coordinate &operator-();
// Coordinate &operator++(); //前置++
// Coordinate operator++(int);
// Coordinate operator+(Coordinate &c);
int getX();
int getY();
~Coordinate();
private:
int m_iX;
int m_iY;
};
#endif
Coordinate.cpp
#include
#include "Coordinate.h"
using namespace std;
Coordinate::Coordinate(int x,int y)
{
m_iX = x;
m_iY = y;
}
int Coordinate::getX()
{
return m_iX;
}
int Coordinate::getY()
{
return m_iY;
}
Coordinate &operator-(Coordinate &coor)
{
coor.m_iX = -coor.m_iX;
coor.m_iY = -coor.m_iY;
return coor;
}
Coordinate operator+(Coordinate c1,Coordinate c2)
{
Coordinate temp(0,0);
temp.m_iX = c1.m_iX+c2.m_iX;
temp.m_iX = c1.m_iY+c2.m_iY;
return temp;
}
ostream &operator<<(ostream &output, Coordinate &coorc1)
{
output< demo.cpp
#include "Coordinate.h"
#include
using namespace std;
int main()
{
Coordinate coor1(1,3);
Coordinate coor2(1,3);
Coordinate coor3(0,0);
coor3 = coor1+coor2;
cout< 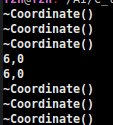
class Person{
public:
int m_A;
int m_B;
};
ostream& operator<<(ostream& cout, Person& p){//本质 operator<<(cout, p) 简写 cout<![]()
2.4[]成员函数重载
只能用成员函数重载,因为第一个参数一定是this指针,来传入索引,才能获得对象中的成员
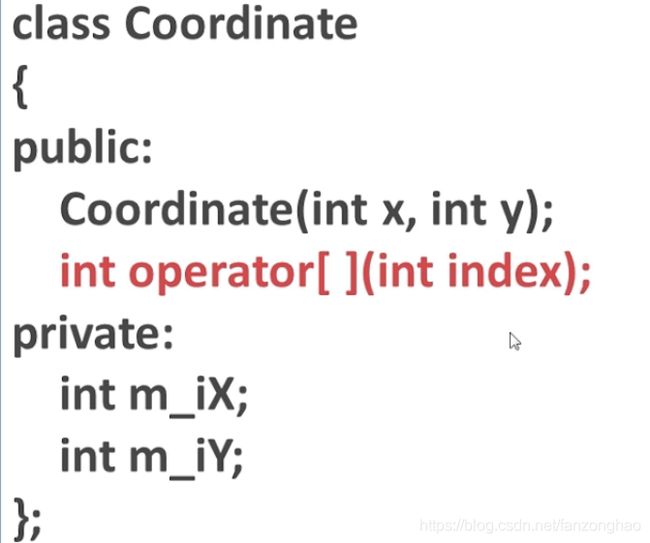
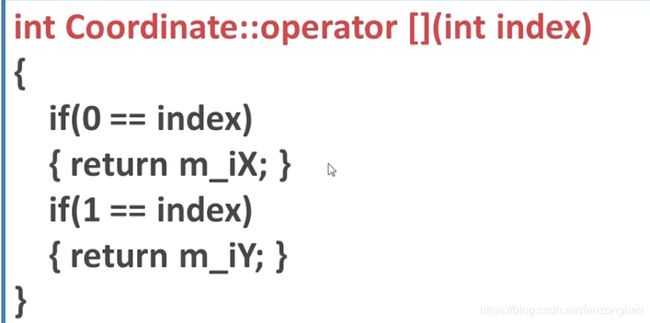
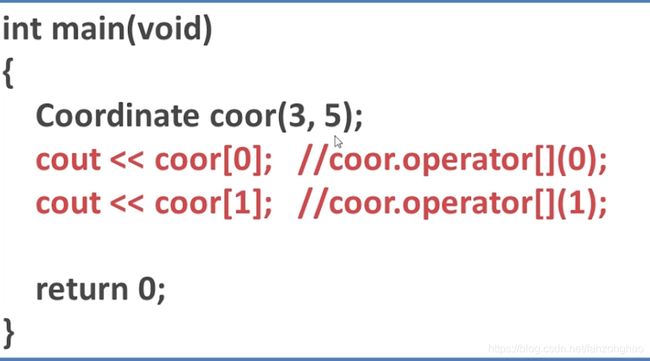
Coordinate.h
#ifndef COORDINATE_H
#define COORDINATE_H
#include
using namespace std;
class Coordinate
{
friend Coordinate &operator-(Coordinate &coor);
friend Coordinate operator+(Coordinate c1, Coordinate c2);
friend ostream &operator<<(ostream &output, Coordinate &coorc1);
public:
Coordinate(int x, int y);
// Coordinate &operator-();
// Coordinate &operator++(); //前置++
// Coordinate operator++(int);
// Coordinate operator+(Coordinate &c);
int operator[](int index);
int getX();
int getY();
~Coordinate();
private:
int m_iX;
int m_iY;
};
#endif
Coordinate.cpp
#include
#include "Coordinate.h"
using namespace std;
Coordinate::Coordinate(int x,int y)
{
m_iX = x;
m_iY = y;
}
int Coordinate::getX()
{
return m_iX;
}
int Coordinate::getY()
{
return m_iY;
}
int Coordinate::operator[](int index)
{
if(0==index)
{
return m_iX;
}
if(1==index)
{
return m_iY;
}
}
Coordinate &operator-(Coordinate &coor)
{
coor.m_iX = -coor.m_iX;
coor.m_iY = -coor.m_iY;
return coor;
}
Coordinate operator+(Coordinate c1,Coordinate c2)
{
Coordinate temp(0,0);
temp.m_iX = c1.m_iX+c2.m_iX;
temp.m_iX = c1.m_iY+c2.m_iY;
return temp;
}
// Coordinate Coordinate::operator+(Coordinate &c)
// {
// Coordinate temp(0,0);
// temp.m_iX = this->m_iX+c.m_iX;
// temp.m_iY = this->m_iY+c.m_iY;
// return temp;
// }
ostream &operator<<(ostream &output, Coordinate &coorc1)
{
output< demo.cpp
#include "Coordinate.h"
#include
using namespace std;
int main()
{
Coordinate coor1(1,3);
Coordinate coor2(1,3);
Coordinate coor3(0,0);
coor3 = coor1+coor2;
cout< 2.5关系运算符重载
class Person{
public:
Person(string name, int age){
m_Name = name;
m_Age = age;
}
int m_Age;
string m_Name;
bool operator==(Person& p){
if(this->m_Name == p.m_Name && this->m_Age == p.m_Age){
return true;
}
return false;
}
};
void test06(){
Person p1("pony",12);
Person p2("pony",12);
if(p1 == p2){
cout<<"equal!"<2.6仿函数(重载小括号)
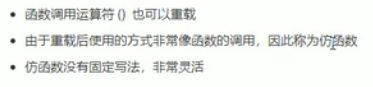
class MyPrint{
public:
void operator()(string test){
cout<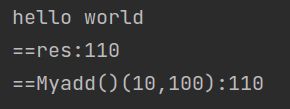
二十七.函数模板与类模板
二十八.标准模板库(STL)
参考:
C++远征之模板篇_C++视频教程-慕课网