springcloud之eureka项目搭建
eureka是什么?
eureka是netflix开的的一套服务发现框架。在框架中的主要核心角色有,服务发现,服务注册和服务提供。
eureka服务集群搭建
1.项目结构
2. 新建父级项目,父级项目pom文件,版本统一
  4.0.0

  com.xx.job
  spring-cloud-demo
  pom
  1.0-SNAPSHOT

    spring-cloud-payment8081
      order-consumer80
      cloud-common
    eureka-server7001
      eureka-server7002
      spring-cloud-payment8082


    UTF-8
    2.3.3.RELEASE
    Hoxton.SR12
    5.1.47
    2.0.6
    1.2.6
    1.18.20
    1.0-SNAPSHOT
    2.2.6.RELEASE


        org.springframework.boot
        spring-boot-dependencies
        ${spring.version}
        pom
        import


        org.springframework.cloud
        spring-cloud-dependencies
        ${springCloud.version}
        pom
        import


        mysql
        mysql-connector-java
        ${mysql.version}
        pom
        import


        org.mybatis
        mybatis-spring
        ${mybatis.version}
        pom
        import


        com.alibaba
        druid
        ${druid.version}


        org.projectlombok
        lombok
        ${lombak.veraion}
        provided


        org.springframework.cloud
        spring-cloud-starter-netflix-eureka-server
        ${eureka.version}
        pom
        import


        org.springframework.cloud
        spring-cloud-starter-netflix-eureka-client
        ${eureka.version}
        pom
        import
2.新建eureka注册中心(eureka-server7001),注册中心pom
        spring-cloud-demo
        com.xx.job
        1.0-SNAPSHOT

    4.0.0

    eureka-server7001

    eureka-server7001


        UTF-8
        8
        8


            org.springframework.boot
            spring-boot-starter-web


            org.springframework.cloud
            spring-cloud-starter-netflix-eureka-server


            junit
            junit
            test


            org.springframework.boot
            spring-boot-starter-actuator
3.注册中心yml文件配置
server:
  port: 7001

spring:
  application:
    name: eureka-server7001

eureka:
  instance:
    hostname: localhost #eureka服务端实例名称

  client:
    # false表示不向注册中心注册自己
    register-with-eureka: true
    # false 表示自己就是注册中心,我的职责是给你的维护服务实例,并不需要去检索服务
    fetch-registry: false
    service-url:
      defaultZone: http://${eureka.instance.hostname}:7002/eureka/
4.注册中心启动类
@SpringBootApplication
@EnableEurekaServer //注册中心注解
public class EurekaServer7001 {
    public static void main(String[] args) {
        SpringApplication.run(EurekaServer7001.class,args);
    }
}
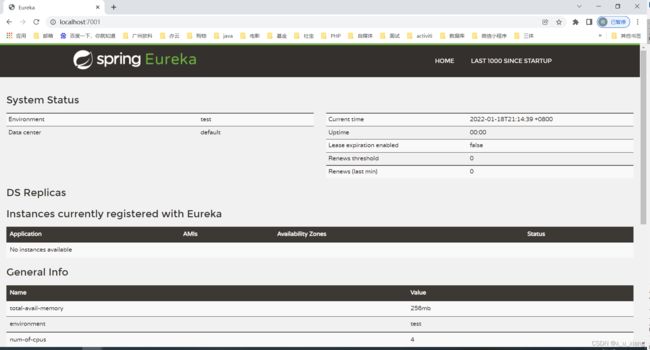
5.启动之后,访问127.0.0.1:7001出现以下页面就是注册配置好了(多个注册中心配置相同,改一下端口号就好了)。
6.eureka注册中心配置注意点:如果我们有多个注册中心,要向其它注册中心注册自己例如:
我有三个注册中心,7001,7002,7003。7002要向7001和7003注册自己,只需要在defaultZone属性中添加相应的地址就可以了。
    service-url:
      defaultZone: http://localhost:7001/eureka,http://localhost:7003/eureka
eureka服务提供者搭建
1.新建maven项目(spring-cloud-payment8081),pom文件
        spring-cloud-demo
        com.xx.job
        1.0-SNAPSHOT

    4.0.0

    spring-cloud-payment8081


        UTF-8
        8
        8


            com.xx.job
            cloud-common
            ${project.version}


            junit
            junit
            4.11


            org.springframework.boot
            spring-boot-starter-web


            org.springframework.boot
            spring-boot-starter-actuator


            mysql
            mysql-connector-java


            org.mybatis.spring.boot
            mybatis-spring-boot-starter
            2.0.0


            com.alibaba
            druid


            org.projectlombok
            lombok


            org.springframework.cloud
            spring-cloud-starter-netflix-eureka-client
2.写yml文件
server:
  port: 8081

spring:
  application:
    name: spring-cloud-payment
  datasource:
    type: com.alibaba.druid.pool.DruidDataSource
    driver-class-name: com.mysql.cj.jdbc.Driver
    username: root
    password: 123456
    url: jdbc:mysql://127.0.0.1:3306/spring-cloud?serverTimezone=UTC&useUnicode=true&characterEncoding=utf-8


eureka:
  instance:
    instance-id: spring-cloud-payment8001
  client:
    #表示是否将自己注册进EurekaServer,默认为true
    register-with-eureka: true
    # 是否从EurekaServer抓取已有的注册信息,默认为毛白前,单节点无所谓,集群必须设置为true,才能配合ribbon使用负载均衡
    fetch-registry: true
    service-url:
      defaultZone: http://localhost:7001/eureka,http://localhost:7002/eureka

mybatis:
  type-aliases-package: com.xx.job.entity # xml匹配包
  mapper-locations: classpath:mapper/*.xml # xml放的位置
3.编写启动类-----然后启动
@EnableEurekaClient // eureka客户端注解
@SpringBootApplication
public class SpringCloudDemo8081 {

    public static void main(String[] args) {
        SpringApplication.run(SpringCloudDemo8081.class,args);
    }
}
4.刷新7001注册中心我们可以看到多了一个应用
5.多个服务提供者,基本相同改一下端口号就可以。其中的业务代码可以自己写,跟平常的springboot一样。
服务消费方项目搭建
1.新建项目(order-consumer80),pom文件
        spring-cloud-demo
        com.xx.job
        1.0-SNAPSHOT

    4.0.0
    order-consumer80
    order-consumer80


        UTF-8
        8
        8


            com.xx.job
            cloud-common
            1.0-SNAPSHOT


            org.springframework.boot
            spring-boot-starter-actuator


            junit
            junit
            4.11
            test


            org.springframework.boot
            spring-boot-starter-web


            org.projectlombok
            lombok


            org.springframework.cloud
            spring-cloud-starter-netflix-eureka-client
2.yml文件编写
server:
  port: 81
spring:
  application:
    name: order-consumer80
eureka:
  client:
    register-with-eureka: true
    fetch-registry: true
    service-url:
      defaultZone: http://localhost:7001/eureka,http://localhost:7002/eureka
3.启动类编写
@EnableDiscoveryClient
@EnableEurekaClient
@SpringBootApplication
public class OrderConsumer80 {
    public static void main(String[] args) {
        SpringApplication.run(OrderConsumer80.class,args);
    }
}
4.服务消费方有一点不同,我们需要调用服务提供者的接口。 我们这里使用RestTemplate进行服务调用,所以要向spring容器中注入RestTemplate。代码:
import org.springframework.cloud.client.loadbalancer.LoadBalanced;
import org.springframework.context.annotation.Bean;
import org.springframework.context.annotation.Configuration;
import org.springframework.web.client.RestTemplate;

@Configuration
public class ApplicationConfig {

    @Bean
    @LoadBalanced // 多个服务提供者可以轮询调用
    public RestTemplate restTemplate(){
        return new RestTemplate();
    }

}
5.客户端控制层代码
import com.xx.job.common.CommonResult;
import com.xx.job.entity.Payment;
import org.springframework.beans.factory.annotation.Autowired;
import org.springframework.cloud.client.ServiceInstance;
import org.springframework.cloud.client.discovery.DiscoveryClient;
import org.springframework.http.ResponseEntity;
import org.springframework.web.bind.annotation.*;
import org.springframework.web.client.RestTemplate;

import java.util.List;

@RestController
@RequestMapping("/consumer")
public class ConsumerController {

    public static final String URI = "http://SPRING-CLOUD-PAYMENT";

    @Autowired
    private RestTemplate restTemplate;
    @Autowired
    private DiscoveryClient discoveryClient;

    @GetMapping("/selectById/{id}")
    public CommonResult selectById(@PathVariable Long id){
        ResponseEntity forEntity = restTemplate.getForEntity(URI + "/payment/selectById/" + id, CommonResult.class);
        CommonResult body = forEntity.getBody();
        return body;
    }

    @GetMapping("/insert")
    public CommonResult insert( Payment payment){
        ResponseEntity forEntity = restTemplate.postForEntity(URI + "/payment/insert", payment, CommonResult.class);
        return forEntity.getBody();
    }

    @GetMapping("/discovery")
    public Object discoveryClient(){
        List services = discoveryClient.getServices();
        services.forEach(x->{
            System.out.println(x);
        });

        List instances = discoveryClient.getInstances("SPRING-CLOUD-PAYMENT");
        instances.forEach(x->{
            System.out.println(x.getHost());
            System.out.println(x.getInstanceId());
            System.out.println(x.getPort());
            System.out.println(x.getServiceId());
            System.out.println(x.getUri());
            System.out.println(x.getMetadata());
            System.out.println(x.getScheme());
            System.out.println("------------------------");
        });

        return discoveryClient;
    }
}
6.启动服务消费者。在eureka初始页面看到就加一个应用就成功了。
git地址:spring-cloud-demo: spring-cloud-demo试例


