vue中关于mavon-editor的使用
1、npm 下载 mavon-editor
npm install mavon-editor --save
2、引入
 import Vue from 'vue'
    import mavonEditor from 'mavon-editor'
    import 'mavon-editor/dist/css/index.css'
    // use
    Vue.use(mavonEditor)
    new Vue({
        'el': '#main',
        data() {
            return { value: '' }
        }
    })
3、上传图片回显
<template>
  <div class="mavonEditor">
    <no-ssr>
      <mavon-editor :toolbars="markdownOption" v-model="handbook"/>
    </no-ssr>
  </div>
</template>
<script>
export default {
  data() {
    return {
      markdownOption: {
        bold: true, // 粗体
        ... // 更多配置
      },
      handbook: "#### how to use mavonEditor in nuxt.js"
    };
  }
};
</script>

<style scoped>
.mavonEditor {
  width: 100%;
  height: 100%;
}
</style>
4、图片上传与回显
前端
imgAdd (pos, file) {
      // 第一步.将图片上传到服务器.
      var formdata = new FormData()
      formdata.append('file', file)
      // console.log(formdata.getAll())
      this.uploadImage('http://127.0.0.1:9000/test/addOneImg', formdata).then(data => {
        console.log(data.url)
        this.$refs.md.$img2Url(pos, data.url)
      })
    }
这里是将添加的图片上传到服务器上保存,然后返回url来替代原来的位置。
后端
@PostMapping("addOneImg")
    public Object addOneImg(@RequestParam(value = "file",required = true) MultipartFile file, HttpServletRequest request)
    {
        SimpleDateFormat dateFormat = new SimpleDateFormat("yyyyMMdd");
        String filepath = dateFormat.format(new Date());
        String uploadpath = "/files/";
        String baseFolder = uploadpath + filepath;
        File file2 = new File(baseFolder);

        if(!file2.exists()){
            boolean mkdir = file2.mkdirs();
            System.out.println(file2.getAbsolutePath());
            System.out.println(mkdir);
        }
        System.out.println(file2.getAbsolutePath());
        String imageName = UUIDUtils.getUUID() + file.getOriginalFilename().replace(" ","");
        File file1 = new File(baseFolder, imageName);
        HashMap<String, Object> data;
        try {
//            file.transferTo(file1);
            FileCopyUtils.copy(file.getBytes(),file1);
            data = new HashMap<>();
            data.put("url","http://localhost:9000" + baseFolder + "/" + imageName);
            data.put("msg","ok");
        } catch (IOException e) {
            e.printStackTrace();
            return null;
        }
        return data;
    }
这里做了一个地址映射
@Configuration
public class WebMvcConfig implements WebMvcConfigurer{

    @Value("spring.servlet.multipart.location")
    private String path;

    @Override
    public void addResourceHandlers(ResourceHandlerRegistry registry) {
        registry.addResourceHandler("/files/**").addResourceLocations("file:C:/files/");
    }
也就是说访问http://localhost:9000/files/xxx/xxx.jpg会映射到
file:C/files/xxx/xxx.jpg,这样可以将保存在磁盘的文件通过映射的方式获取。
4、markdown和html格式保存和获取
前端
save (value, render) {
      console.log(render)
      this.postRequest('http://127.0.0.1:9000/blob/saveBlob', {
        id: '006',
        value: value,
        htmlText: render
      })
    }
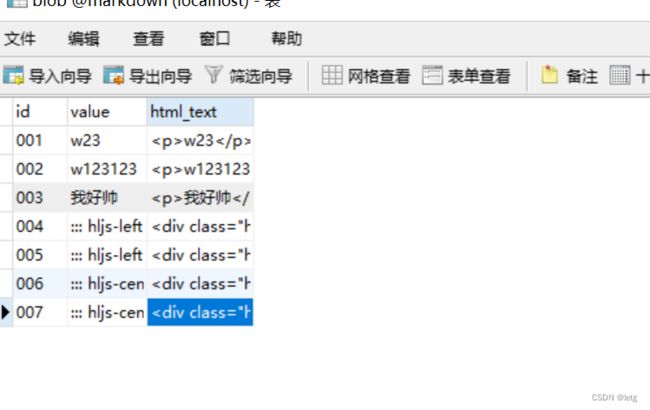
这里的value为md格式的数据,render为html格式的文档
测试:
上传
重点:
在图片上传时使用的是formdat,不需要用qs进行stringfy
import qs from 'qs'
// 请求拦截器
axios.interceptors.request.use(config => {
  if (config.method === 'post' && config.data.constructor !== FormData) {
    config.data = qs.stringify(config.data)
  }
  console.log(config.data)
  return config
})


