基于Maven方式创建Spring MVC项目
一、基于Maven方式创建Spring MVC项目
点击Create New Project。
点击左侧菜单栏中的Maven按钮,然后点击Next即可。

给项目起一个GroupId和ArtifactId,版本号默认即可。
由于我之前创建过SpringMVC项目,所以这里,我把ArtifactId的值改为SpringMVC-demo。
在打开的pom.xml文件中添加项目打包方式。
添加项目依赖。
<dependencies>

    <dependency>
        <groupId>org.springframeworkgroupId>
        <artifactId>spring-webmvcartifactId>
        <version>5.3.1version>
    dependency>


    <dependency>
        <groupId>ch.qos.logbackgroupId>
        <artifactId>logback-classicartifactId>
        <version>1.2.3version>
    dependency>


    <dependency>
        <groupId>javax.servletgroupId>
        <artifactId>javax.servlet-apiartifactId>
        <version>3.1.0version>
        <scope>providedscope>
    dependency>


    <dependency>
        <groupId>org.thymeleafgroupId>
        <artifactId>thymeleaf-spring5artifactId>
        <version>3.0.12.RELEASEversion>
    dependency>
dependencies>
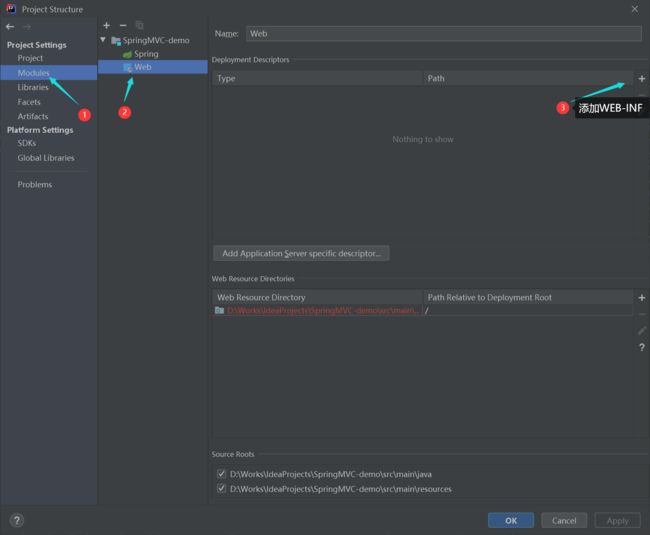
添加web.xml配置文件,注意该文件在WEB-INF目录下。而我们发现并没有WEB-INF目录,那么我们就需要自己去创建该目录。首先在main目录下创建webapp目录,然后按ctrl+alt=shift+s,然后点击Modules找到Web,然后点击右边的加号,把web.xml添加进来。这里需要注意路径问题,需要增加src\main\webapp\来指定路径。
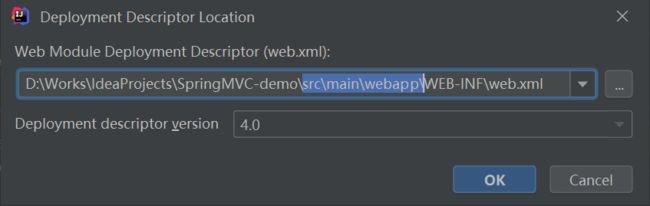
编写web.xml配置文件。
<web-app xmlns="http://xmlns.jcp.org/xml/ns/javaee"
         xmlns:xsi="http://www.w3.org/2001/XMLSchema-instance"
         xsi:schemaLocation="http://xmlns.jcp.org/xml/ns/javaee http://xmlns.jcp.org/xml/ns/javaee/web-app_4_0.xsd"
         version="4.0">


    <servlet>
        <servlet-name>DispatcherServletservlet-name>
        <servlet-class>org.springframework.web.servlet.DispatcherServletservlet-class>
        <init-param>
            <param-name>contextConfigLocationparam-name>
            <param-value>classpath:SpringMVC.xmlparam-value>
        init-param>
        <load-on-startup>1load-on-startup>
    servlet>
    <servlet-mapping>
        <servlet-name>DispatcherServletservlet-name>
        <url-pattern>/url-pattern>
    servlet-mapping>
web-app>
在src\main\java目录下创建类top.lukeewin.mvc.controller.HelloController。
在resources目录下创建SpringMVC.xml配置文件。
<beans xmlns="http://www.springframework.org/schema/beans"
       xmlns:xsi="http://www.w3.org/2001/XMLSchema-instance"
       xmlns:context="http://www.springframework.org/schema/context"
       xsi:schemaLocation="http://www.springframework.org/schema/beans
                           http://www.springframework.org/schema/beans/spring-beans.xsd
                           http://www.springframework.org/schema/context
                           http://www.springframework.org/schema/context/spring-context.xsd">


    <context:component-scan base-package="top.lukeewin.mvc.controller"/>


    <bean id="viewResolver" class="org.thymeleaf.spring5.view.ThymeleafViewResolver">
        <property name="order" value="1"/>
        <property name="characterEncoding" value="UTF-8"/>
        <property name="templateEngine">
            <bean class="org.thymeleaf.spring5.SpringTemplateEngine">
                <property name="templateResolver">
                    <bean class="org.thymeleaf.spring5.templateresolver.SpringResourceTemplateResolver">


                        <property name="prefix" value="/WEB-INF/templates/"/>


                        <property name="suffix" value=".html"/>
                        <property name="templateMode" value="HTML5"/>
                        <property name="characterEncoding" value="UTF-8" />
                    bean>
                property>
            bean>
        property>
    bean>
beans>
在HelloController中编写方法。
import org.springframework.stereotype.Controller;
import org.springframework.web.bind.annotation.RequestMapping;

@Controller
public class HelloController {

    @RequestMapping("/")
    public String hello() {
        return "hello";
    }
}
解释:
- 需要把该类添加到IOC容器中,所以需要加上注解@Controlller,前提是开启了上下文扫描功能。
- 使用@RequestMapping("/")规定请求访问路径的映射,如果符合,就去调用该方法。
- 返回值类型一般为String类型。
- 返回值是缺省了前后缀的字符串类型所对应的文件,例如这里的hello,对应的是/webapp/WEB-INF/templates/hello.html文件。
在WEB-INF目录下创建templates目录,用来存放静态页面。创建hello.html页面。
DOCTYPE html>
<html lang="zh" xmlns:th="http://www.thymeleaf.org">
<head>
    <meta charset="UTF-8">
    <title>Titletitle>
head>
<body>
Hello World !
body>
html>
注意:这里添加了xmlns:th="http://www.thymeleaf.org"。
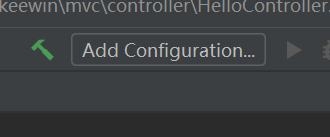
二、配置Tomcat
点击右上角的Add Configuration。
点击加号,选择Tomcat Server,然后选择Local。


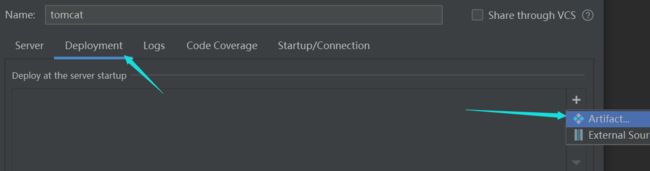
解释:
- war模式这种可以称之为是发布模式,看名字也知道,这是先打成war包,再发布;
- war exploded模式是直接把文件夹、jsp页面 、classes等等移到Tomcat 部署文件夹里面,进行加载部署。因此这种方式支持热部署,一般在开发的时候也是用这种方式。

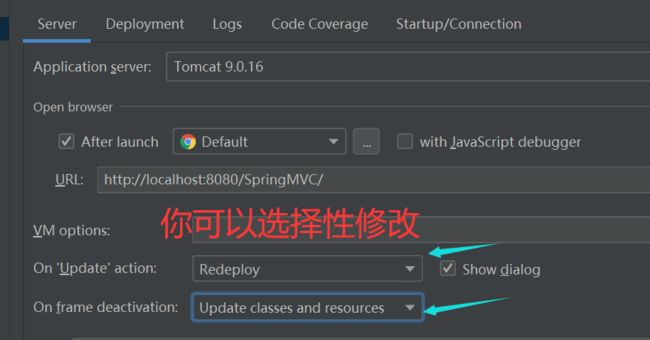
最后要记得点击Apply和OK。
三、测试
点击运行Tomcat,当我们看到如下图所示的结果时,说明成功了。

更多内容欢迎访问我的个人博客