吴恩达深度学习 2.3 改善深层神经网络-超参数调试和Batch Norm
1. 知识点
- 超参数的选择
有一些超参数,在一个范围内进行均匀随机取值,比如神经网络层数、神经元个数。
有一些超参数,需要在更小的范围内随机取值,比如,学习率需要在0.001至0.01间进行均匀随机取值。
- 神经网络中激活值的归一化Batch Norm
由激活输入z计算期望、方差。
用期望和方差标准化z,![]() 。
。
平移![]() ,
,![]() 。
。
- 在神经网络中使用Batch Norm
- Batch Norm梯度下降:
![]() 也是模型参数,需要和w、b一样用梯度更新。
也是模型参数,需要和w、b一样用梯度更新。
- Batch Norm为什么起作用(没咋看明白??)
- 在测试数据上使用Batch Norm
测试时,对每一个测试样本进行预测,不需要计算期望和方差。将训练时得到的均值和方差代入进行计算,对测试样本进行预测。
- softmax回归:将多分类任务的输出转换为种个类别可能的概率。
- softmax损失函数
假如 ![]() 则
则![]() ,最小化
,最小化![]() ,需要
,需要![]() 尽可能地大。
尽可能地大。
- softmax的梯度下降
![]() 。
。
2. 应用实例:用tensorflow搭建浅层神经网络预测手势(0〜5)的分类
- 实现思路:
tensorflow的使用方法:先定义常量、变量、占位符,再引入会话(session)运行。
前向传播,进行两层线性运算和激活,得到Z3。
将标签值Y,转换为独热向量。
用Z3和标签Y(独热)计算成本。
用tf.train.AdamOptimizer()进行训练,并用训练结果验证准确率
#引入tensorflow
import numpy as np
import h5py
import matplotlib.pyplot as plt
import tensorflow as tf
from tensorflow.python.framework import ops
import tf_utils
import time

#%matplotlib inline #如果你使用的是jupyter notebook取消注释
np.random.seed(1)
#创建一个tf会话
y_hat = tf.constant(36,name="y_hat")            #定义y_hat为固定值36
y = tf.constant(39,name="y")                    #定义y为固定值39

loss = tf.Variable((y-y_hat)**2,name="loss" )   #为损失函数创建一个变量

init = tf.global_variables_initializer()        #运行之后的初始化(ession.run(init))
                                                #损失变量将被初始化并准备计算
with tf.Session() as session:                   #创建一个session并打印输出
    session.run(init)                           #初始化变量
    print(session.run(loss))                    #打印损失值
9
a = tf.constant(2)
b = tf.constant(10)
c = tf.multiply(a,b)

print(c)
Tensor("Mul:0", shape=(), dtype=int32)
sess = tf.Session()
print(sess.run(c))
20
#利用feed_dict来改变x的值
x = tf.placeholder(tf.int64,name="x")
print(sess.run(2 * x,feed_dict={x:3}))
sess.close()
6
#用tensorflow做线性计算
def linear_function():
    """
    实现一个线性功能:
        初始化W,类型为tensor的随机变量,维度为(4,3)
        初始化X,类型为tensor的随机变量,维度为(3,1)
        初始化b,类型为tensor的随机变量,维度为(4,1)
    返回:
        result - 运行了session后的结果,运行的是Y = WX + b

    """

    np.random.seed(1) #指定随机种子

    X = np.random.randn(3,1)
    W = np.random.randn(4,3)
    b = np.random.randn(4,1)

    Y = tf.add(tf.matmul(W,X),b) #tf.matmul是矩阵乘法
    #Y = tf.matmul(W,X) + b #也可以以写成这样子

    #创建一个session并运行它
    sess = tf.Session()
    result = sess.run(Y)

    #session使用完毕,关闭它
    sess.close()

    return result
print("result = " + str(linear_function()))result = [[-2.15657382] [ 2.95891446] [-1.08926781] [-0.84538042]]
#tf.sigmoid()
def sigmoid(z):
    """
    实现使用sigmoid函数计算z

    参数:
        z - 输入的值,标量或矢量

    返回:
        result - 用sigmoid计算z的值

    """

    #创建一个占位符x,名字叫“x”
    x = tf.placeholder(tf.float32,name="x")

    #计算sigmoid(z)
    sigmoid = tf.sigmoid(x)

    #创建一个会话,使用方法二
    with tf.Session() as sess:
        result = sess.run(sigmoid,feed_dict={x:z})

    return result
print ("sigmoid(0) = " + str(sigmoid(0)))
print ("sigmoid(12) = " + str(sigmoid(12)))
sigmoid(0) = 0.5 sigmoid(12) = 0.9999938
#axis=0 纵向独热,axis=-1 横向独热
def one_hot_matrix(lables,C):
    """
    创建一个矩阵,其中第i行对应第i个类号,第j列对应第j个训练样本
    所以如果第j个样本对应着第i个标签,那么entry (i,j)将会是1

    参数:
        lables - 标签向量
        C - 分类数

    返回:
        one_hot - 独热矩阵

    """

    #创建一个tf.constant,赋值为C,名字叫C
    C = tf.constant(C,name="C")

    #使用tf.one_hot,注意一下axis
    one_hot_matrix = tf.one_hot(indices=lables , depth=C , axis=0)

    #创建一个session
    sess = tf.Session()

    #运行session
    one_hot = sess.run(one_hot_matrix)

    #关闭session
    sess.close()

    return one_hot
labels = np.array([1,2,3,0,2,1])
one_hot = one_hot_matrix(labels,C=4)
print(str(one_hot))
[[0. 0. 0. 1. 0. 0.] [1. 0. 0. 0. 0. 1.] [0. 1. 0. 0. 1. 0.] [0. 0. 1. 0. 0. 0.]]
def ones(shape):
    """
    创建一个维度为shape的变量,其值全为1

    参数:
        shape - 你要创建的数组的维度

    返回:
        ones - 只包含1的数组
    """

    #使用tf.ones()
    ones = tf.ones(shape)

    #创建会话
    sess = tf.Session()

    #运行会话
    ones = sess.run(ones)

    #关闭会话
    sess.close()

    return ones
print ("ones = " + str(ones([3])))ones = [1. 1. 1.]
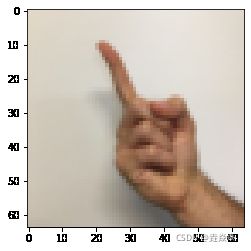
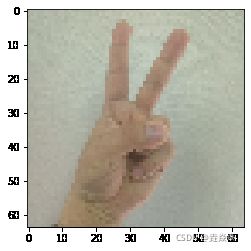
X_train_orig , Y_train_orig , X_test_orig , Y_test_orig , classes = tf_utils.load_dataset()index = 11
plt.imshow(X_train_orig[index])
print("Y = " + str(np.squeeze(Y_train_orig[:,index])))Y = 1
X_train_flatten = X_train_orig.reshape(X_train_orig.shape[0],-1).T #每一列就是一个样本
X_test_flatten = X_test_orig.reshape(X_test_orig.shape[0],-1).T

#归一化数据
X_train = X_train_flatten / 255
X_test = X_test_flatten / 255

#转换为独热矩阵
Y_train = tf_utils.convert_to_one_hot(Y_train_orig,6)
Y_test = tf_utils.convert_to_one_hot(Y_test_orig,6)

print("训练集样本数 = " + str(X_train.shape[1]))
print("测试集样本数 = " + str(X_test.shape[1]))
print("X_train.shape: " + str(X_train.shape))
print("Y_train.shape: " + str(Y_train.shape))
print("X_test.shape: " + str(X_test.shape))
print("Y_test.shape: " + str(Y_test.shape))
训练集样本数 = 1080
测试集样本数 = 120
X_train.shape: (12288, 1080)
Y_train.shape: (6, 1080)
X_test.shape: (12288, 120)
Y_test.shape: (6, 120)
def create_placeholders(n_x,n_y):
    """
    为TensorFlow会话创建占位符
    参数:
        n_x - 一个实数,图片向量的大小(64*64*3 = 12288)
        n_y - 一个实数,分类数(从0到5,所以n_y = 6)

    返回:
        X - 一个数据输入的占位符,维度为[n_x, None],dtype = "float"
        Y - 一个对应输入的标签的占位符,维度为[n_Y,None],dtype = "float"

    提示:
        使用None,因为它让我们可以灵活处理占位符提供的样本数量。事实上,测试/训练期间的样本数量是不同的。

    """

    X = tf.placeholder(tf.float32, [n_x, None], name="X")
    Y = tf.placeholder(tf.float32, [n_y, None], name="Y")

    return X, Y
X, Y = create_placeholders(12288, 6)
print("X = " + str(X))
print("Y = " + str(Y))
X = Tensor("X_4:0", shape=(12288, ?), dtype=float32)
Y = Tensor("Y_2:0", shape=(6, ?), dtype=float32)
W1 = tf.get_variable("W1", [25,12288], initializer = tf.contrib.layers.xavier_initializer(seed = 1))
b1 = tf.get_variable("b1", [25,1], initializer = tf.zeros_initializer())
#定义参数变量
def initialize_parameters():
"""
初始化神经网络的参数,参数的维度如下:
W1 : [25, 12288]
b1 : [25, 1]
W2 : [12, 25]
b2 : [12, 1]
W3 : [6, 12]
b3 : [6, 1]
返回:
parameters - 包含了W和b的字典
"""
tf.set_random_seed(1) #指定随机种子
W1 = tf.get_variable("W1",[25,12288],initializer=tf.contrib.layers.xavier_initializer(seed=1))
b1 = tf.get_variable("b1",[25,1],initializer=tf.zeros_initializer())
W2 = tf.get_variable("W2", [12, 25], initializer = tf.contrib.layers.xavier_initializer(seed=1))
b2 = tf.get_variable("b2", [12, 1], initializer = tf.zeros_initializer())
W3 = tf.get_variable("W3", [6, 12], initializer = tf.contrib.layers.xavier_initializer(seed=1))
b3 = tf.get_variable("b3", [6, 1], initializer = tf.zeros_initializer())
parameters = {"W1": W1,
"b1": b1,
"W2": W2,
"b2": b2,
"W3": W3,
"b3": b3}
return parameters
tf.reset_default_graph() #用于清除默认图形堆栈并重置全局默认图形。

with tf.Session() as sess:
    parameters = initialize_parameters()
    print("W1 = " + str(parameters["W1"]))
    print("b1 = " + str(parameters["b1"]))
    print("W2 = " + str(parameters["W2"]))
    print("b2 = " + str(parameters["b2"]))
W1 =b1 = W2 = b2 =
def forward_propagation(X,parameters):
    """
    实现一个模型的前向传播,模型结构为LINEAR -> RELU -> LINEAR -> RELU -> LINEAR -> SOFTMAX

    参数:
        X - 输入数据的占位符,维度为(输入节点数量,样本数量)
        parameters - 包含了W和b的参数的字典

    返回:
        Z3 - 最后一个LINEAR节点的输出

    """

    W1 = parameters['W1']
    b1 = parameters['b1']
    W2 = parameters['W2']
    b2 = parameters['b2']
    W3 = parameters['W3']
    b3 = parameters['b3']

    Z1 = tf.add(tf.matmul(W1,X),b1)        # Z1 = np.dot(W1, X) + b1
    #Z1 = tf.matmul(W1,X) + b1             #也可以这样写
    A1 = tf.nn.relu(Z1)                    # A1 = relu(Z1)
    Z2 = tf.add(tf.matmul(W2, A1), b2)     # Z2 = np.dot(W2, a1) + b2
    A2 = tf.nn.relu(Z2)                    # A2 = relu(Z2)
    Z3 = tf.add(tf.matmul(W3, A2), b3)     # Z3 = np.dot(W3,Z2) + b3


    return Z3
tf.reset_default_graph() #用于清除默认图形堆栈并重置全局默认图形。
with tf.Session() as sess:
    X,Y = create_placeholders(12288,6)
    parameters = initialize_parameters()
    Z3 = forward_propagation(X,parameters)
    print("Z3 = " + str(Z3))
Z3 = Tensor("Add_2:0", shape=(6, ?), dtype=float32)
def compute_cost(Z3,Y):
    """
    计算成本

    参数:
        Z3 - 前向传播的结果
        Y - 标签,一个占位符,和Z3的维度相同

    返回:
        cost - 成本值


    """
    logits = tf.transpose(Z3) #转置
    labels = tf.transpose(Y)  #转置

    cost = tf.reduce_mean(tf.nn.softmax_cross_entropy_with_logits(logits=logits,labels=labels))

    return cost
tf.reset_default_graph()

with tf.Session() as sess:
    X,Y = create_placeholders(12288,6)
    parameters = initialize_parameters()
    Z3 = forward_propagation(X,parameters)
    cost = compute_cost(Z3,Y)
    print("cost = " + str(cost))
WARNING:tensorflow:From:17: softmax_cross_entropy_with_logits (from tensorflow.python.ops.nn_ops) is deprecated and will be removed in a future version. Instructions for updating: Future major versions of TensorFlow will allow gradients to flow into the labels input on backprop by default. See `tf.nn.softmax_cross_entropy_with_logits_v2`. cost = Tensor("Mean:0", shape=(), dtype=float32)
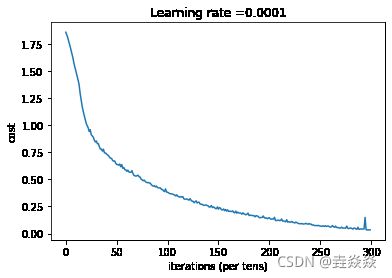
def model(X_train,Y_train,X_test,Y_test,
		learning_rate=0.0001,num_epochs=1500,minibatch_size=32,
		print_cost=True,is_plot=True):
    """
    实现一个三层的TensorFlow神经网络:LINEAR->RELU->LINEAR->RELU->LINEAR->SOFTMAX

    参数:
        X_train - 训练集,维度为(输入大小(输入节点数量) = 12288, 样本数量 = 1080)
        Y_train - 训练集分类数量,维度为(输出大小(输出节点数量) = 6, 样本数量 = 1080)
        X_test - 测试集,维度为(输入大小(输入节点数量) = 12288, 样本数量 = 120)
        Y_test - 测试集分类数量,维度为(输出大小(输出节点数量) = 6, 样本数量 = 120)
        learning_rate - 学习速率
        num_epochs - 整个训练集的遍历次数
        mini_batch_size - 每个小批量数据集的大小
        print_cost - 是否打印成本,每100代打印一次
        is_plot - 是否绘制曲线图

    返回:
        parameters - 学习后的参数

    """
    ops.reset_default_graph()                #能够重新运行模型而不覆盖tf变量
    tf.set_random_seed(1)
    seed = 3
    (n_x , m)  = X_train.shape               #获取输入节点数量和样本数
    n_y = Y_train.shape[0]                   #获取输出节点数量
    costs = []                               #成本集

    #给X和Y创建placeholder
    X,Y = create_placeholders(n_x,n_y)

    #初始化参数
    parameters = initialize_parameters()

    #前向传播
    Z3 = forward_propagation(X,parameters)

    #计算成本
    cost = compute_cost(Z3,Y)

    #反向传播,使用Adam优化
    optimizer = tf.train.AdamOptimizer(learning_rate=learning_rate).minimize(cost)

    #初始化所有的变量
    init = tf.global_variables_initializer()

    #开始会话并计算
    with tf.Session() as sess:
        #初始化
        sess.run(init)

        #正常训练的循环
        for epoch in range(num_epochs):

            epoch_cost = 0  #每代的成本
            num_minibatches = int(m / minibatch_size)    #minibatch的总数量
            seed = seed + 1
            minibatches = tf_utils.random_mini_batches(X_train,Y_train,minibatch_size,seed)

            for minibatch in minibatches:

                #选择一个minibatch
                (minibatch_X,minibatch_Y) = minibatch

                #数据已经准备好了,开始运行session
                _ , minibatch_cost = sess.run([optimizer,cost],feed_dict={X:minibatch_X,Y:minibatch_Y})

                #计算这个minibatch在这一代中所占的误差
                epoch_cost = epoch_cost + minibatch_cost / num_minibatches

            #记录并打印成本
            ## 记录成本
            if epoch % 5 == 0:
                costs.append(epoch_cost)
                #是否打印:
                if print_cost and epoch % 100 == 0:
                        print("epoch = " + str(epoch) + "    epoch_cost = " + str(epoch_cost))

        #是否绘制图谱
        if is_plot:
            plt.plot(np.squeeze(costs))
            plt.ylabel('cost')
            plt.xlabel('iterations (per tens)')
            plt.title("Learning rate =" + str(learning_rate))
            plt.show()

        #保存学习后的参数
        parameters = sess.run(parameters)
        print("参数已经保存到session。")

        #计算当前的预测结果
        correct_prediction = tf.equal(tf.argmax(Z3),tf.argmax(Y))

        #计算准确率
        accuracy = tf.reduce_mean(tf.cast(correct_prediction,"float"))

        print("训练集的准确率:", accuracy.eval({X: X_train, Y: Y_train}))
        print("测试集的准确率:", accuracy.eval({X: X_test, Y: Y_test}))

        return parameters
#开始时间
start_time = time.clock()
#开始训练
parameters = model(X_train, Y_train, X_test, Y_test)
#结束时间
end_time = time.clock()
#计算时差
print("CPU的执行时间 = " + str(end_time - start_time) + " 秒" )
/usr/local/lib/python3.7/site-packages/ipykernel_launcher.py:2: DeprecationWarning: time.clock has been deprecated in Python 3.3 and will be removed from Python 3.8: use time.perf_counter or time.process_time insteadepoch = 0 epoch_cost = 1.8557019450447774 epoch = 100 epoch_cost = 1.0170298435471274 epoch = 200 epoch_cost = 0.7335465089841322 epoch = 300 epoch_cost = 0.5731161959243543 epoch = 400 epoch_cost = 0.4686809818853032 epoch = 500 epoch_cost = 0.3812687162196997 epoch = 600 epoch_cost = 0.3137524791739203 epoch = 700 epoch_cost = 0.2537418621959108 epoch = 800 epoch_cost = 0.20365255642117874 epoch = 900 epoch_cost = 0.16651481254534287 epoch = 1000 epoch_cost = 0.1459768818634929 epoch = 1100 epoch_cost = 0.10742292982159239 epoch = 1200 epoch_cost = 0.08645546571774913 epoch = 1300 epoch_cost = 0.05932939137247475 epoch = 1400 epoch_cost = 0.05213054461461124参数已经保存到session。 训练集的准确率: 0.9990741 测试集的准确率: 0.725 CPU的执行时间 = 566.1009369999999 秒/usr/local/lib/python3.7/site-packages/ipykernel_launcher.py:6: DeprecationWarning: time.clock has been deprecated in Python 3.3 and will be removed from Python 3.8: use time.perf_counter or time.process_time instead
import matplotlib.pyplot as plt # plt 用于显示图片
import matplotlib.image as mpimg # mpimg 用于读取图片
import numpy as np

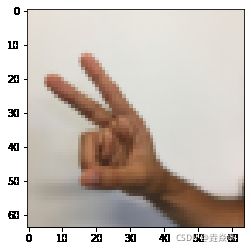
#这是博主自己拍的图片
my_image1 = "5.png"                                            #定义图片名称
fileName1 = "datasets/fingers/" + my_image1                      #图片地址
image1 = mpimg.imread(fileName1)                               #读取图片
plt.imshow(image1)                                             #显示图片
my_image1 = image1.reshape(1,64 * 64 * 3).T                    #重构图片
my_image_prediction = tf_utils.predict(my_image1, parameters)  #开始预测
print("预测结果: y = " + str(np.squeeze(my_image_prediction)))
WARNING:tensorflow:From /Users/shucl/wuenda/week6/tf_utils.py:84: The name tf.placeholder is deprecated. Please use tf.compat.v1.placeholder instead. WARNING:tensorflow:From /Users/shucl/wuenda/week6/tf_utils.py:89: The name tf.Session is deprecated. Please use tf.compat.v1.Session instead. 预测结果: y = 5
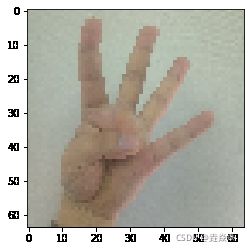
my_image1 = "4.png"

fileName1 = "datasets/fingers/" + my_image1

image1 = mpimg.imread(fileName1)

plt.imshow(image1)

my_image1 = image1.reshape(1,64 * 64 * 3).T

my_image_prediction = tf_utils.predict(my_image1, parameters)

print("预测结果: y = " + str(np.squeeze(my_image_prediction)))
预测结果: y = 2
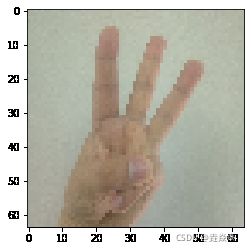
my_image1 = "3.png"

fileName1 = "datasets/fingers/" + my_image1

image1 = mpimg.imread(fileName1)

plt.imshow(image1)

my_image1 = image1.reshape(1,64 * 64 * 3).T

my_image_prediction = tf_utils.predict(my_image1, parameters)

print("预测结果: y = " + str(np.squeeze(my_image_prediction)))
预测结果: y = 2
my_image1 = "2.png"

fileName1 = "datasets/fingers/" + my_image1

image1 = mpimg.imread(fileName1)

plt.imshow(image1)

my_image1 = image1.reshape(1,64 * 64 * 3).T

my_image_prediction = tf_utils.predict(my_image1, parameters)

print("预测结果: y = " + str(np.squeeze(my_image_prediction)))
预测结果: y = 1
my_image1 = "1.png"

fileName1 = "datasets/fingers/" + my_image1

image1 = mpimg.imread(fileName1)

plt.imshow(image1)

my_image1 = image1.reshape(1,64 * 64 * 3).T

my_image_prediction = tf_utils.predict(my_image1, parameters)

print("预测结果: y = " + str(np.squeeze(my_image_prediction)))
预测结果: y = 1
#卷积
import numpy as np
import h5py
import matplotlib.pyplot as plt

%matplotlib inline
plt.rcParams['figure.figsize'] = (5.0, 4.0)
plt.rcParams['image.interpolation'] = 'nearest'
plt.rcParams['image.cmap'] = 'gray'

#ipython很好用,但是如果在ipython里已经import过的模块修改后需要重新reload就需要这样
#在执行用户代码前,重新装入软件的扩展和模块。
%load_ext autoreload
#autoreload 2:装入所有 %aimport 不包含的模块。
%autoreload 2

np.random.seed(1)      #指定随机种子
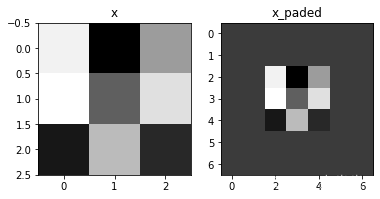
def zero_pad(X,pad):
    """
    把数据集X的图像边界全部使用0来扩充pad个宽度和高度。

    参数:
        X - 图像数据集,维度为(样本数,图像高度,图像宽度,图像通道数)
        pad - 整数,每个图像在垂直和水平维度上的填充量
    返回:
        X_paded - 扩充后的图像数据集,维度为(样本数,图像高度 + 2*pad,图像宽度 + 2*pad,图像通道数)

    """

    X_paded = np.pad(X,(
                        (0,0),       #样本数,不填充
                        (pad,pad),   #图像高度,你可以视为上面填充x个,下面填充y个(x,y)
                        (pad,pad),   #图像宽度,你可以视为左边填充x个,右边填充y个(x,y)
                        (0,0)),      #通道数,不填充
                        'constant', constant_values=0)      #连续一样的值填充

    return X_paded
np.random.seed(1)
x = np.random.randn(4,3,3,2)
x_paded = zero_pad(x,2)
#查看信息
print ("x.shape =", x.shape)
print ("x_paded.shape =", x_paded.shape)
#print("x=",x)
#print("x_paded=",x_paded)
print ("x[1, 1] =", x[1, 1])
print ("x_paded[1, 1] =", x_paded[1, 1])

print("x=",x)
print("x[0,:,:,0]=",x[0,:,:,0])

#绘制图
fig , axarr = plt.subplots(1,2)  #一行两列
axarr[0].set_title('x')
axarr[0].imshow(x[0,:,:,0])
#axarr[0].imshow(x[0,:,:,1])
axarr[1].set_title('x_paded')
axarr[1].imshow(x_paded[0,:,:,0])
x.shape = (4, 3, 3, 2)
x_paded.shape = (4, 7, 7, 2)
x[1, 1] = [[ 0.90085595 -0.68372786]
 [-0.12289023 -0.93576943]
 [-0.26788808  0.53035547]]
x_paded[1, 1] = [[0. 0.]
 [0. 0.]
 [0. 0.]
 [0. 0.]
 [0. 0.]
 [0. 0.]
 [0. 0.]]
x= [[[[ 1.62434536 -0.61175641]
   [-0.52817175 -1.07296862]
   [ 0.86540763 -2.3015387 ]]

  [[ 1.74481176 -0.7612069 ]
   [ 0.3190391  -0.24937038]
   [ 1.46210794 -2.06014071]]

  [[-0.3224172  -0.38405435]
   [ 1.13376944 -1.09989127]
   [-0.17242821 -0.87785842]]]


 [[[ 0.04221375  0.58281521]
   [-1.10061918  1.14472371]
   [ 0.90159072  0.50249434]]

  [[ 0.90085595 -0.68372786]
   [-0.12289023 -0.93576943]
   [-0.26788808  0.53035547]]

  [[-0.69166075 -0.39675353]
   [-0.6871727  -0.84520564]
   [-0.67124613 -0.0126646 ]]]


 [[[-1.11731035  0.2344157 ]
   [ 1.65980218  0.74204416]
   [-0.19183555 -0.88762896]]

  [[-0.74715829  1.6924546 ]
   [ 0.05080775 -0.63699565]
   [ 0.19091548  2.10025514]]

  [[ 0.12015895  0.61720311]
   [ 0.30017032 -0.35224985]
   [-1.1425182  -0.34934272]]]


 [[[-0.20889423  0.58662319]
   [ 0.83898341  0.93110208]
   [ 0.28558733  0.88514116]]

  [[-0.75439794  1.25286816]
   [ 0.51292982 -0.29809284]
   [ 0.48851815 -0.07557171]]

  [[ 1.13162939  1.51981682]
   [ 2.18557541 -1.39649634]
   [-1.44411381 -0.50446586]]]]
x[0,:,:,0]= [[ 1.62434536 -0.52817175  0.86540763]
 [ 1.74481176  0.3190391   1.46210794]
 [-0.3224172   1.13376944 -0.17242821]]
def conv_single_step(a_slice_prev,W,b):
    """
    在前一层的激活输出的一个片段上应用一个由参数W定义的过滤器。
    这里切片大小和过滤器大小相同

    参数:
        a_slice_prev - 输入数据的一个片段,维度为(过滤器大小,过滤器大小,上一通道数)
        W - 权重参数,包含在了一个矩阵中,维度为(过滤器大小,过滤器大小,上一通道数)
        b - 偏置参数,包含在了一个矩阵中,维度为(1,1,1)

    返回:
        Z - 在输入数据的片X上卷积滑动窗口(w,b)的结果。
    """

    s = np.multiply(a_slice_prev,W) + b

    Z = np.sum(s)

    return Z
np.random.seed(1)

#这里切片大小和过滤器大小相同
a_slice_prev = np.random.randn(4,4,3)
W = np.random.randn(4,4,3)
b = np.random.randn(1,1,1)
print("W=",W)
print("a=",a_slice_prev)
print("b=",b)

Z = conv_single_step(a_slice_prev,W,b)

print("Z = " + str(Z))
W= [[[ 0.12015895  0.61720311  0.30017032]
  [-0.35224985 -1.1425182  -0.34934272]
  [-0.20889423  0.58662319  0.83898341]
  [ 0.93110208  0.28558733  0.88514116]]

 [[-0.75439794  1.25286816  0.51292982]
  [-0.29809284  0.48851815 -0.07557171]
  [ 1.13162939  1.51981682  2.18557541]
  [-1.39649634 -1.44411381 -0.50446586]]

 [[ 0.16003707  0.87616892  0.31563495]
  [-2.02220122 -0.30620401  0.82797464]
  [ 0.23009474  0.76201118 -0.22232814]
  [-0.20075807  0.18656139  0.41005165]]

 [[ 0.19829972  0.11900865 -0.67066229]
  [ 0.37756379  0.12182127  1.12948391]
  [ 1.19891788  0.18515642 -0.37528495]
  [-0.63873041  0.42349435  0.07734007]]]
a= [[[ 1.62434536 -0.61175641 -0.52817175]
  [-1.07296862  0.86540763 -2.3015387 ]
  [ 1.74481176 -0.7612069   0.3190391 ]
  [-0.24937038  1.46210794 -2.06014071]]

 [[-0.3224172  -0.38405435  1.13376944]
  [-1.09989127 -0.17242821 -0.87785842]
  [ 0.04221375  0.58281521 -1.10061918]
  [ 1.14472371  0.90159072  0.50249434]]

 [[ 0.90085595 -0.68372786 -0.12289023]
  [-0.93576943 -0.26788808  0.53035547]
  [-0.69166075 -0.39675353 -0.6871727 ]
  [-0.84520564 -0.67124613 -0.0126646 ]]

 [[-1.11731035  0.2344157   1.65980218]
  [ 0.74204416 -0.19183555 -0.88762896]
  [-0.74715829  1.6924546   0.05080775]
  [-0.63699565  0.19091548  2.10025514]]]
b= [[[-0.34385368]]]
Z = -23.16021220252078
def conv_forward(A_prev, W, b, hparameters):
    """
    实现卷积函数的前向传播

    参数:
        A_prev - 上一层的激活输出矩阵,维度为(m, n_H_prev, n_W_prev, n_C_prev),(样本数量,上一层图像的高度,上一层图像的宽度,上一层过滤器数量)
        W - 权重矩阵,维度为(f, f, n_C_prev, n_C),(过滤器大小,过滤器大小,上一层的过滤器数量,这一层的过滤器数量)
        b - 偏置矩阵,维度为(1, 1, 1, n_C),(1,1,1,这一层的过滤器数量)
        hparameters - 包含了"stride"与 "pad"的超参数字典。

    返回:
        Z - 卷积输出,维度为(m, n_H, n_W, n_C),(样本数,图像的高度,图像的宽度,过滤器数量)
        cache - 缓存了一些反向传播函数conv_backward()需要的一些数据
    """

    #获取来自上一层数据的基本信息
    (m , n_H_prev , n_W_prev , n_C_prev) = A_prev.shape

    #获取权重矩阵的基本信息
    ( f , f ,n_C_prev , n_C ) = W.shape

    #获取超参数hparameters的值
    stride = hparameters["stride"]
    pad = hparameters["pad"]

    #计算卷积后的图像的宽度高度,参考上面的公式,使用int()来进行板除
    n_H = int(( n_H_prev - f + 2 * pad )/ stride) + 1
    n_W = int(( n_W_prev - f + 2 * pad )/ stride) + 1

    #使用0来初始化卷积输出Z
    Z = np.zeros((m,n_H,n_W,n_C))

    #通过A_prev创建填充过了的A_prev_pad
    A_prev_pad = zero_pad(A_prev,pad)

    for i in range(m):                              #遍历样本
        a_prev_pad = A_prev_pad[i]                  #选择第i个样本的扩充后的激活矩阵
        for h in range(n_H):                        #在输出的垂直轴上循环
            for w in range(n_W):                    #在输出的水平轴上循环
                for c in range(n_C):                #循环遍历输出的通道
                    #定位当前的切片位置
                    vert_start = h * stride         #竖向,开始的位置
                    vert_end = vert_start + f       #竖向,结束的位置
                    horiz_start = w * stride        #横向,开始的位置
                    horiz_end = horiz_start + f     #横向,结束的位置
                    #切片位置定位好了我们就把它取出来,需要注意的是我们是“穿透”取出来的,
                    #自行脑补一下吸管插入一层层的橡皮泥就明白了
                    a_slice_prev = a_prev_pad[vert_start:vert_end,horiz_start:horiz_end,:]
                    #执行单步卷积
                    Z[i,h,w,c] = conv_single_step(a_slice_prev,W[: ,: ,: ,c],b[0,0,0,c])

    #数据处理完毕,验证数据格式是否正确
    assert(Z.shape == (m , n_H , n_W , n_C ))

    #存储一些缓存值,以便于反向传播使用
    cache = (A_prev,W,b,hparameters)

    return (Z , cache)
np.random.seed(1)

A_prev = np.random.randn(10,4,4,3)
W = np.random.randn(2,2,3,8)
b = np.random.randn(1,1,1,8)

hparameters = {"pad" : 2, "stride": 1}

Z , cache_conv = conv_forward(A_prev,W,b,hparameters)

print("np.mean(Z) = ", np.mean(Z))
print("cache_conv[0][1][2][3] =", cache_conv[0][1][2][3])
np.mean(Z) =  0.15585932488906465
cache_conv[0][1][2][3] = [-0.20075807  0.18656139  0.41005165]
def pool_forward(A_prev,hparameters,mode="max"):
    """
    实现池化层的前向传播

    参数:
        A_prev - 输入数据,维度为(m, n_H_prev, n_W_prev, n_C_prev)
        hparameters - 包含了 "f" 和 "stride"的超参数字典
        mode - 模式选择【"max" | "average"】

    返回:
        A - 池化层的输出,维度为 (m, n_H, n_W, n_C)
        cache - 存储了一些反向传播需要用到的值,包含了输入和超参数的字典。
    """

    #获取输入数据的基本信息
    (m , n_H_prev , n_W_prev , n_C_prev) = A_prev.shape

    #获取超参数的信息
    f = hparameters["f"]
    stride = hparameters["stride"]

    #计算输出维度
    n_H = int((n_H_prev - f) / stride ) + 1
    n_W = int((n_W_prev - f) / stride ) + 1
    n_C = n_C_prev

    #初始化输出矩阵
    A = np.zeros((m , n_H , n_W , n_C))

    for i in range(m):                              #遍历样本
        for h in range(n_H):                        #在输出的垂直轴上循环
            for w in range(n_W):                    #在输出的水平轴上循环
                for c in range(n_C):                #循环遍历输出的通道
                    #定位当前的切片位置
                    vert_start = h * stride         #竖向,开始的位置
                    vert_end = vert_start + f       #竖向,结束的位置
                    horiz_start = w * stride        #横向,开始的位置
                    horiz_end = horiz_start + f     #横向,结束的位置
                    #定位完毕,开始切割
                    a_slice_prev = A_prev[i,vert_start:vert_end,horiz_start:horiz_end,c]

                    #对切片进行池化操作
                    if mode == "max":
                        A[ i , h , w , c ] = np.max(a_slice_prev)
                    elif mode == "average":
                        A[ i , h , w , c ] = np.mean(a_slice_prev)

    #池化完毕,校验数据格式
    assert(A.shape == (m , n_H , n_W , n_C))

    #校验完毕,开始存储用于反向传播的值
    cache = (A_prev,hparameters)

    return A,cache
np.random.seed(1)
A_prev = np.random.randn(2,4,4,3)
hparameters = {"f":4 , "stride":1}

A , cache = pool_forward(A_prev,hparameters,mode="max")
A, cache = pool_forward(A_prev, hparameters)
print("mode = max")
print("A =", A)
print("----------------------------")
A, cache = pool_forward(A_prev, hparameters, mode = "average")
print("mode = average")
print("A =", A)
mode = max
A = [[[[1.74481176 1.6924546  2.10025514]]]


 [[[1.19891788 1.51981682 2.18557541]]]]
----------------------------
mode = average
A = [[[[-0.09498456  0.11180064 -0.14263511]]]


 [[[-0.09525108  0.28325018  0.33035185]]]]
def conv_backward(dZ,cache):
    """
    实现卷积层的反向传播

    参数:
        dZ - 卷积层的输出Z的 梯度,维度为(m, n_H, n_W, n_C)
        cache - 反向传播所需要的参数,conv_forward()的输出之一

    返回:
        dA_prev - 卷积层的输入(A_prev)的梯度值,维度为(m, n_H_prev, n_W_prev, n_C_prev)
        dW - 卷积层的权值的梯度,维度为(f,f,n_C_prev,n_C)
        db - 卷积层的偏置的梯度,维度为(1,1,1,n_C)

    """
    #获取cache的值
    (A_prev, W, b, hparameters) = cache

    #获取A_prev的基本信息
    (m, n_H_prev, n_W_prev, n_C_prev) = A_prev.shape

    #获取dZ的基本信息
    (m,n_H,n_W,n_C) = dZ.shape

    #获取权值的基本信息
    (f, f, n_C_prev, n_C) = W.shape

    #获取hparaeters的值
    pad = hparameters["pad"]
    stride = hparameters["stride"]

    #初始化各个梯度的结构
    dA_prev = np.zeros((m,n_H_prev,n_W_prev,n_C_prev))
    dW = np.zeros((f,f,n_C_prev,n_C))
    db = np.zeros((1,1,1,n_C))

    #前向传播中我们使用了pad,反向传播也需要使用,这是为了保证数据结构一致
    A_prev_pad = zero_pad(A_prev,pad)
    dA_prev_pad = zero_pad(dA_prev,pad)

    #现在处理数据
    for i in range(m):
        #选择第i个扩充了的数据的样本,降了一维。
        a_prev_pad = A_prev_pad[i]
        da_prev_pad = dA_prev_pad[i]

        for h in range(n_H):
            for w in range(n_W):
                for c in range(n_C):
                    #定位切片位置
                    vert_start = h
                    vert_end = vert_start + f
                    horiz_start = w
                    horiz_end = horiz_start + f

                    #定位完毕,开始切片
                    a_slice = a_prev_pad[vert_start:vert_end,horiz_start:horiz_end,:]

                    #切片完毕,使用上面的公式计算梯度
                    da_prev_pad[vert_start:vert_end, horiz_start:horiz_end,:] += W[:,:,:,c] * dZ[i, h, w, c]
                    dW[:,:,:,c] += a_slice * dZ[i,h,w,c]
                    db[:,:,:,c] += dZ[i,h,w,c]
        #设置第i个样本最终的dA_prev,即把非填充的数据取出来。
        dA_prev[i,:,:,:] = da_prev_pad[pad:-pad, pad:-pad, :]

    #数据处理完毕,验证数据格式是否正确
    assert(dA_prev.shape == (m, n_H_prev, n_W_prev, n_C_prev))

    return (dA_prev,dW,db)
np.random.seed(1)
#初始化参数
A_prev = np.random.randn(10,4,4,3)
W = np.random.randn(2,2,3,8)
b = np.random.randn(1,1,1,8)
hparameters = {"pad" : 2, "stride": 1}

#前向传播
Z , cache_conv = conv_forward(A_prev,W,b,hparameters)
#反向传播
dA , dW , db = conv_backward(Z,cache_conv)
print("dA_mean =", np.mean(dA))
print("dW_mean =", np.mean(dW))
print("db_mean =", np.mean(db))
dA_mean = 9.608990675868995
dW_mean = 10.581741275547566
db_mean = 76.37106919563735
def create_mask_from_window(x):
    """
    从输入矩阵中创建掩码,以保存最大值的矩阵的位置。

    参数:
        x - 一个维度为(f,f)的矩阵

    返回:
        mask - 包含x的最大值的位置的矩阵
    """
    mask = x == np.max(x)

    return mask
np.random.seed(1)
x = np.random.randn(2,3)
mask = create_mask_from_window(x)
print("x = " + str(x))
print("mask = " + str(mask))x = [[ 1.62434536 -0.61175641 -0.52817175] [-1.07296862 0.86540763 -2.3015387 ]] mask = [[ True False False] [False False False]]
def distribute_value(dz,shape):
    """
    给定一个值,为按矩阵大小平均分配到每一个矩阵位置中。

    参数:
        dz - 输入的实数
        shape - 元组,两个值,分别为n_H , n_W

    返回:
        a - 已经分配好了值的矩阵,里面的值全部一样。

    """
    #获取矩阵的大小
    (n_H , n_W) = shape

    #计算平均值
    average = dz / (n_H * n_W)

    #填充入矩阵
    a = np.ones(shape) * average

    return a
dz = 2
shape = (2,2)

a = distribute_value(dz,shape)
print("a = " + str(a))
a = [[0.5 0.5] [0.5 0.5]]
def pool_backward(dA,cache,mode = "max"):
    """
    实现池化层的反向传播

    参数:
        dA - 池化层的输出的梯度,和池化层的输出的维度一样
        cache - 池化层前向传播时所存储的参数。
        mode - 模式选择,【"max" | "average"】

    返回:
        dA_prev - 池化层的输入的梯度,和A_prev的维度相同

    """
    #获取cache中的值
    (A_prev , hparaeters) = cache

    #获取hparaeters的值
    f = hparaeters["f"]
    stride = hparaeters["stride"]

    #获取A_prev和dA的基本信息
    (m , n_H_prev , n_W_prev , n_C_prev) = A_prev.shape
    (m , n_H , n_W , n_C) = dA.shape

    #初始化输出的结构
    dA_prev = np.zeros_like(A_prev)

    #开始处理数据
    for i in range(m):
        a_prev = A_prev[i]
        for h in range(n_H):
            for w in range(n_W):
                for c in range(n_C):
                    #定位切片位置
                    vert_start = h
                    vert_end = vert_start + f
                    horiz_start = w
                    horiz_end = horiz_start + f

                    #选择反向传播的计算方式
                    if mode == "max":
                        #开始切片
                        a_prev_slice = a_prev[vert_start:vert_end,horiz_start:horiz_end,c]
                        #创建掩码
                        mask = create_mask_from_window(a_prev_slice)
                        #计算dA_prev
                        dA_prev[i,vert_start:vert_end,horiz_start:horiz_end,c] += np.multiply(mask,dA[i,h,w,c])

                    elif mode == "average":
                        #获取dA的值
                        da = dA[i,h,w,c]
                        #定义过滤器大小
                        shape = (f,f)
                        #平均分配
                        dA_prev[i,vert_start:vert_end, horiz_start:horiz_end ,c] += distribute_value(da,shape)
    #数据处理完毕,开始验证格式
    assert(dA_prev.shape == A_prev.shape)

    return dA_prev
np.random.seed(1)
A_prev = np.random.randn(5, 5, 3, 2)
hparameters = {"stride" : 1, "f": 2}
A, cache = pool_forward(A_prev, hparameters)
dA = np.random.randn(5, 4, 2, 2)

dA_prev = pool_backward(dA, cache, mode = "max")
print("mode = max")
print('mean of dA = ', np.mean(dA))
print('dA_prev[1,1] = ', dA_prev[1,1])
print()
dA_prev = pool_backward(dA, cache, mode = "average")
print("mode = average")
print('mean of dA = ', np.mean(dA))
print('dA_prev[1,1] = ', dA_prev[1,1])
mode = max mean of dA = 0.14571390272918056 dA_prev[1,1] = [[ 0. 0. ] [ 5.05844394 -1.68282702] [ 0. 0. ]] mode = average mean of dA = 0.14571390272918056 dA_prev[1,1] = [[ 0.08485462 0.2787552 ] [ 1.26461098 -0.25749373] [ 1.17975636 -0.53624893]]
import math
import numpy as np
import h5py
import matplotlib.pyplot as plt
import matplotlib.image as mpimg
import tensorflow as tf
from tensorflow.python.framework import ops

import cnn_utils

%matplotlib inline
np.random.seed(1)
index = 6
plt.imshow(X_train_orig[index])
print ("y = " + str(np.squeeze(Y_train_orig[:, index])))y = 2
X_train = X_train_orig/255.
X_test = X_test_orig/255.
Y_train = cnn_utils.convert_to_one_hot(Y_train_orig, 6).T
Y_test = cnn_utils.convert_to_one_hot(Y_test_orig, 6).T
print ("number of training examples = " + str(X_train.shape[0]))
print ("number of test examples = " + str(X_test.shape[0]))
print ("X_train shape: " + str(X_train.shape))
print ("Y_train shape: " + str(Y_train.shape))
print ("X_test shape: " + str(X_test.shape))
print ("Y_test shape: " + str(Y_test.shape))
conv_layers = {}
number of training examples = 1080 number of test examples = 120 X_train shape: (1080, 64, 64, 3) Y_train shape: (1080, 6) X_test shape: (120, 64, 64, 3) Y_test shape: (120, 6)
def create_placeholders(n_H0, n_W0, n_C0, n_y):
    """
    为session创建占位符

    参数:
        n_H0 - 实数,输入图像的高度
        n_W0 - 实数,输入图像的宽度
        n_C0 - 实数,输入的通道数
        n_y  - 实数,分类数

    输出:
        X - 输入数据的占位符,维度为[None, n_H0, n_W0, n_C0],类型为"float"
        Y - 输入数据的标签的占位符,维度为[None, n_y],维度为"float"
    """
    X = tf.placeholder(tf.float32,[None, n_H0, n_W0, n_C0])
    Y = tf.placeholder(tf.float32,[None, n_y])

    return X,Y
X , Y = create_placeholders(64,64,3,6)
print ("X = " + str(X))
print ("Y = " + str(Y))
X = Tensor("Placeholder_5:0", shape=(?, 64, 64, 3), dtype=float32)
Y = Tensor("Placeholder_6:0", shape=(?, 6), dtype=float32)
def initialize_parameters():
    """
    初始化权值矩阵,这里我们把权值矩阵硬编码:
    W1 : [4, 4, 3, 8]
    W2 : [2, 2, 8, 16]

    返回:
        包含了tensor类型的W1、W2的字典
    """
    tf.set_random_seed(1)

    W1 = tf.get_variable("W1",[4,4,3,8],initializer=tf.contrib.layers.xavier_initializer(seed=0))
    W2 = tf.get_variable("W2",[2,2,8,16],initializer=tf.contrib.layers.xavier_initializer(seed=0))

    parameters = {"W1": W1,
                  "W2": W2}

    return parameters
tf.reset_default_graph()
with tf.Session() as sess_test:
parameters = initialize_parameters()
init = tf.global_variables_initializer()
sess_test.run(init)
print("W1 = " + str(parameters["W1"].eval()[1,1,1]))
print("W2 = " + str(parameters["W2"].eval()[1,1,1]))
sess_test.close()W1 = [ 0.00131723 0.1417614 -0.04434952 0.09197326 0.14984085 -0.03514394 -0.06847463 0.05245192] W2 = [-0.08566415 0.17750949 0.11974221 0.16773748 -0.0830943 -0.08058 -0.00577033 -0.14643836 0.24162132 -0.05857408 -0.19055021 0.1345228 -0.22779644 -0.1601823 -0.16117483 -0.10286498]
def forward_propagation(X,parameters):
    """
    实现前向传播
    CONV2D -> RELU -> MAXPOOL -> CONV2D -> RELU -> MAXPOOL -> FLATTEN -> FULLYCONNECTED

    参数:
        X - 输入数据的placeholder,维度为(输入节点数量,样本数量)
        parameters - 包含了“W1”和“W2”的python字典。

    返回:
        Z3 - 最后一个LINEAR节点的输出

    """
    W1 = parameters['W1']
    W2 = parameters['W2']

    #Conv2d : 步伐:1,填充方式:“SAME”
    Z1 = tf.nn.conv2d(X,W1,strides=[1,1,1,1],padding="SAME")
    #ReLU :
    A1 = tf.nn.relu(Z1)
    #Max pool : 窗口大小:8x8,步伐:8x8,填充方式:“SAME”
    P1 = tf.nn.max_pool(A1,ksize=[1,8,8,1],strides=[1,8,8,1],padding="SAME")

    #Conv2d : 步伐:1,填充方式:“SAME”
    Z2 = tf.nn.conv2d(P1,W2,strides=[1,1,1,1],padding="SAME")
    #ReLU :
    A2 = tf.nn.relu(Z2)
    #Max pool : 过滤器大小:4x4,步伐:4x4,填充方式:“SAME”
    P2 = tf.nn.max_pool(A2,ksize=[1,4,4,1],strides=[1,4,4,1],padding="SAME")

    #一维化上一层的输出
    P = tf.contrib.layers.flatten(P2)

    #全连接层(FC):使用没有非线性激活函数的全连接层
    Z3 = tf.contrib.layers.fully_connected(P,6,activation_fn=None)

    return Z3
tf.reset_default_graph()
np.random.seed(1)

with tf.Session() as sess_test:
    X,Y = create_placeholders(64,64,3,6)
    parameters = initialize_parameters()
    Z3 = forward_propagation(X,parameters)

    init = tf.global_variables_initializer()
    sess_test.run(init)

    a = sess_test.run(Z3,{X: np.random.randn(2,64,64,3), Y: np.random.randn(2,6)})
    print("Z3 = " + str(a))

    sess_test.close()
WARNING:tensorflow:From /usr/local/lib/python3.7/site-packages/tensorflow/contrib/layers/python/layers/layers.py:1634: flatten (from tensorflow.python.layers.core) is deprecated and will be removed in a future version. Instructions for updating: Use keras.layers.flatten instead. Z3 = [[ 1.4416982 -0.24909668 5.4504995 -0.2618962 -0.20669872 1.3654671 ] [ 1.4070847 -0.02573182 5.08928 -0.4866991 -0.4094069 1.2624853 ]]
def compute_cost(Z3,Y):
    """
    计算成本
    参数:
        Z3 - 正向传播最后一个LINEAR节点的输出,维度为(6,样本数)。
        Y - 标签向量的placeholder,和Z3的维度相同

    返回:
        cost - 计算后的成本

    """

    cost = tf.reduce_mean(tf.nn.softmax_cross_entropy_with_logits(logits=Z3,labels=Y))

    return cost
tf.reset_default_graph()
with tf.Session() as sess_test:
np.random.seed(1)
X,Y = create_placeholders(64,64,3,6)
parameters = initialize_parameters()
Z3 = forward_propagation(X,parameters)
cost = compute_cost(Z3,Y)
init = tf.global_variables_initializer()
sess_test.run(init)
a = sess_test.run(cost,{X: np.random.randn(4,64,64,3), Y: np.random.randn(4,6)})
print("cost = " + str(a))
sess_test.close()
cost = 4.6648703
def model(X_train, Y_train, X_test, Y_test, learning_rate=0.009,
         num_epochs=100,minibatch_size=64,print_cost=True,isPlot=True):
    """
    使用TensorFlow实现三层的卷积神经网络
    CONV2D -> RELU -> MAXPOOL -> CONV2D -> RELU -> MAXPOOL -> FLATTEN -> FULLYCONNECTED

    参数:
        X_train - 训练数据,维度为(None, 64, 64, 3)
        Y_train - 训练数据对应的标签,维度为(None, n_y = 6)
        X_test - 测试数据,维度为(None, 64, 64, 3)
        Y_test - 训练数据对应的标签,维度为(None, n_y = 6)
        learning_rate - 学习率
        num_epochs - 遍历整个数据集的次数
        minibatch_size - 每个小批量数据块的大小
        print_cost - 是否打印成本值,每遍历100次整个数据集打印一次
        isPlot - 是否绘制图谱

    返回:
        train_accuracy - 实数,训练集的准确度
        test_accuracy - 实数,测试集的准确度
        parameters - 学习后的参数
    """
    ops.reset_default_graph()  #能够重新运行模型而不覆盖tf变量
    tf.set_random_seed(1)    #确保你的数据和我一样
    seed = 3                 #指定numpy的随机种子
    (m , n_H0, n_W0, n_C0) = X_train.shape
    n_y = Y_train.shape[1]
    costs = []

    #为当前维度创建占位符
    X , Y = create_placeholders(n_H0, n_W0, n_C0, n_y)

    #初始化参数
    parameters = initialize_parameters()

    #前向传播
    Z3 = forward_propagation(X,parameters)

    #计算成本
    cost = compute_cost(Z3,Y)

    #反向传播,由于框架已经实现了反向传播,我们只需要选择一个优化器就行了
    optimizer = tf.train.AdamOptimizer(learning_rate=learning_rate).minimize(cost)

    #全局初始化所有变量
    init = tf.global_variables_initializer()

    #开始运行
    with tf.Session() as sess:
        #初始化参数
        sess.run(init)
        #开始遍历数据集
        for epoch in range(num_epochs):
            minibatch_cost = 0
            num_minibatches = int(m / minibatch_size) #获取数据块的数量
            seed = seed + 1
            minibatches = cnn_utils.random_mini_batches(X_train,Y_train,minibatch_size,seed)

            #对每个数据块进行处理
            for minibatch in minibatches:
                #选择一个数据块
                (minibatch_X,minibatch_Y) = minibatch
                #最小化这个数据块的成本
                _ , temp_cost = sess.run([optimizer,cost],feed_dict={X:minibatch_X, Y:minibatch_Y})

                #累加数据块的成本值
                minibatch_cost += temp_cost / num_minibatches

            #是否打印成本
            if print_cost:
                #每5代打印一次
                if epoch % 5 == 0:
                    print("当前是第 " + str(epoch) + " 代,成本值为:" + str(minibatch_cost))

            #记录成本
            if epoch % 1 == 0:
                costs.append(minibatch_cost)

        #数据处理完毕,绘制成本曲线
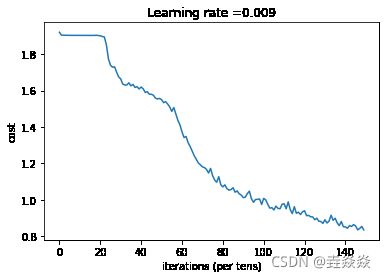
        if isPlot:
            plt.plot(np.squeeze(costs))
            plt.ylabel('cost')
            plt.xlabel('iterations (per tens)')
            plt.title("Learning rate =" + str(learning_rate))
            plt.show()

        #开始预测数据
        ## 计算当前的预测情况
        predict_op = tf.arg_max(Z3,1)
        corrent_prediction = tf.equal(predict_op , tf.arg_max(Y,1))

        ##计算准确度
        accuracy = tf.reduce_mean(tf.cast(corrent_prediction,"float"))
        print("corrent_prediction accuracy= " + str(accuracy))

        train_accuracy = accuracy.eval({X: X_train, Y: Y_train})
        test_accuary = accuracy.eval({X: X_test, Y: Y_test})

        print("训练集准确度:" + str(train_accuracy))
        print("测试集准确度:" + str(test_accuary))

        return (train_accuracy,test_accuary,parameters)
_, _, parameters = model(X_train, Y_train, X_test, Y_test,num_epochs=150)
当前是第 0 代,成本值为:1.9213323891162872
当前是第 5 代,成本值为:1.9041557759046555
当前是第 10 代,成本值为:1.9043088406324387
当前是第 15 代,成本值为:1.904477171599865
当前是第 20 代,成本值为:1.9018685296177864
当前是第 25 代,成本值为:1.7401807010173798
当前是第 30 代,成本值为:1.664649449288845
当前是第 35 代,成本值为:1.6262611597776413
当前是第 40 代,成本值为:1.6200454533100128
当前是第 45 代,成本值为:1.5801729559898376
当前是第 50 代,成本值为:1.5507072806358337
当前是第 55 代,成本值为:1.4860153570771217
当前是第 60 代,成本值为:1.3735136315226555
当前是第 65 代,成本值为:1.266873374581337
当前是第 70 代,成本值为:1.1810551509261131
当前是第 75 代,成本值为:1.1320813447237015
当前是第 80 代,成本值为:1.0706271640956402
当前是第 85 代,成本值为:1.0660263299942017
当前是第 90 代,成本值为:1.0115427523851395
当前是第 95 代,成本值为:0.985688503831625
当前是第 100 代,成本值为:1.0073445439338684
当前是第 105 代,成本值为:0.9434673264622688
当前是第 110 代,成本值为:0.9779011532664299
当前是第 115 代,成本值为:0.9618405252695084
当前是第 120 代,成本值为:0.9396611452102661
当前是第 125 代,成本值为:0.8901512138545513
当前是第 130 代,成本值为:0.8897779397666454
当前是第 135 代,成本值为:0.8981903865933418
当前是第 140 代,成本值为:0.8504592441022396
当前是第 145 代,成本值为:0.8556553609669209
corrent_prediction accuracy= Tensor("Mean_1:0", shape=(), dtype=float32) 训练集准确度:0.71944445 测试集准确度:0.55833334
import matplotlib.pyplot as plt # plt 用于显示图片
import matplotlib.image as mpimg # mpimg 用于读取图片
import numpy as np

#预测代码有问题
#这是博主自己拍的图片
my_image1 = "1.png"                                            #定义图片名称
fileName1 = "datasets/fingers/" + my_image1                      #图片地址
image1 = mpimg.imread(fileName1)                               #读取图片
plt.imshow(image1)                                             #显示图片
my_image1 = image1.reshape(1,64,64,3)                  #重构图片
Z3 = forward_propagation(X,parameters)
#my_image_prediction = tf_utils.predict(my_image1, parameters)  #开始预测
#print("预测结果: y = " + str(np.squeeze(my_image_prediction)))
print("Z3=",Z3)
print("parameters=",parameters)

W1 = tf.compat.v1.convert_to_tensor(parameters['W1'])
W2 = tf.compat.v1.convert_to_tensor(parameters['W2'])

params = {
    'W1': W1,
    'W2': W2
}
#x = tf.compat.v1.placeholder(tf.float32, [1, 64, 64, 3], name='x')

z3 = forward_propagation(x, params)
sess = tf.Session()

#sess.run(tf.initialize_all_variables())
prediction = sess.run(z3, feed_dict={x: my_image1})

sess.close()

#session = tf.compat.v1.Session()
#prediction = session.run(z3, feed_dict={x: my_image1})

#session.close()

#predict_op = tf.arg_max(Z3,1)

#with tf.Session() as sess_test:
    #X,Y = create_placeholders(64,64,3,6)
    #parameters = initialize_parameters()
    #Z3 = forward_propagation(X,parameters)
    #predict_op = tf.arg_max(Z3,1

    #Z3 = forward_propagation(X,parameters)

    #init = tf.global_variables_initializer()
    #sess_test.run(init)

    #a = sess_test.run(Z3,{X: my_image1 , Y: np.random.randn(1,6)})
    #print("Z3 = " + str(a))

    #sess_test.close()""

