SpringCloud:搭建Eureka服务注册与发现图文详解(一)
一、Eureka简介
刚学SpringCloud的时候踩过太多的坑,这篇博客是一个一个坑走过来的。
Eureka的基本框架主要包括3个角色,以我个人通俗理解:
(1)Eureka server(服务注册中心):相当于中介平台,一边为卖方提供服务,一边为买方提供消费服务,买卖双方都要到这个平台注册。
(2)Provide service(服务提供者(卖方)):向Eureka server提供自己的服务。
(3)Consumer service(服务消费者(买方)):在Eureka server找到自己所需的服务。
二、Eureka搭建
1. 使用idea2017,maven项目创建项目,File—>>new->Project
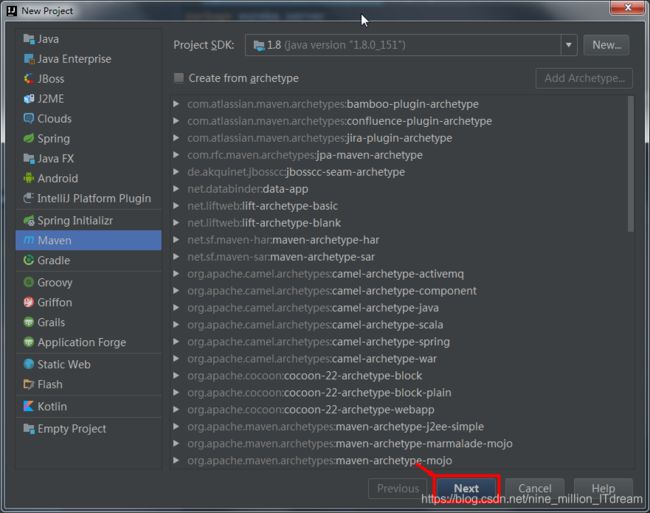
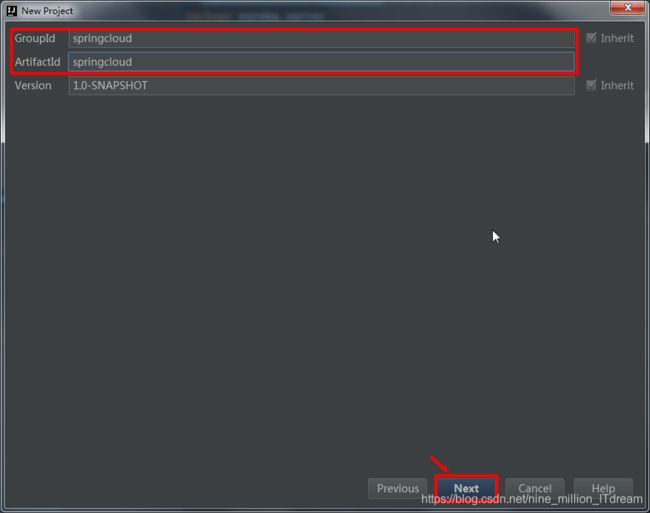
新建maven项目,基本不用配置什么,最后Finish

2. 新建完项目,首先配置pom.xml文件,可以把我的pom.xml直接复制。
    4.0.0

    spring-cloud
    spring-cloud
    1.0-SNAPSHOT
    pom


          UTF-8
          1.8
          3.1
          2.6
          1.3.2
          3.1.1
          1.2.0
          2.4.9
          3.4.5
          0.1
          0.2.6
          3.2.1


          org.springframework.boot
          spring-boot-starter-parent
          1.4.3.RELEASE


         javax.servlet
         javax.servlet-api
         provided


           commons-collections
           commons-collections
           ${commons.version}


          org.springframework.boot
          spring-boot-starter


             org.springframework.boot
             spring-boot-starter-test
             test


        org.apache.maven.plugins
        maven-compiler-plugin

            ${jdk.version}
            ${jdk.version}
            UTF-8


        org.apache.maven.plugins
        maven-resources-plugin

            UTF-8
3. 首先创建第一个Module,服务注册中心(Eureka server),在springcloud项目上New----》Module,一样是创建Maven项目,然后下一步。

为这个Module命名为spring-eureka-server
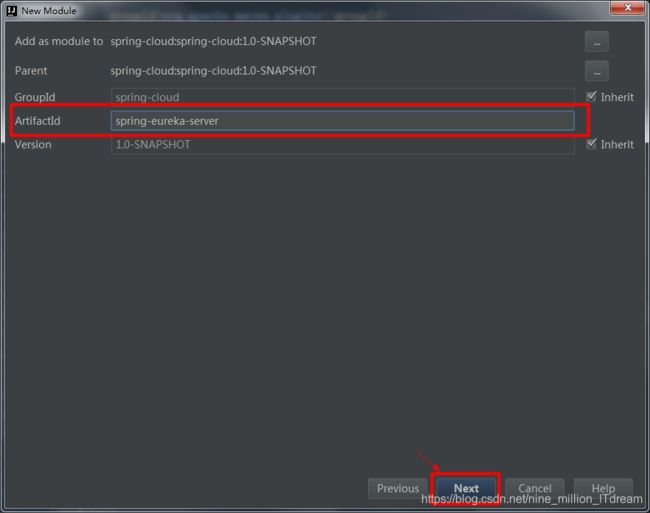
然后赋予Module name同样的名字
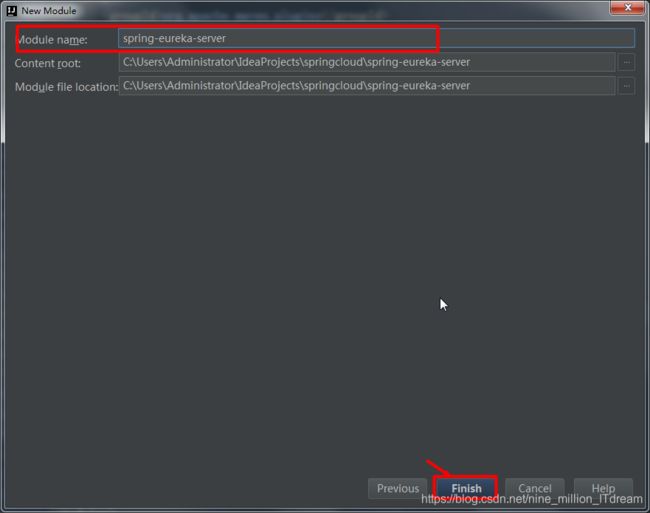
然后一样先配置这个Module的pom.xml文件,如下:
pom.xml
        spring-cloud
        spring-cloud
        1.0-SNAPSHOT

    4.0.0

    spring-eureka-server
    0.0.1-SNAPSHOT


        UTF-8
        UTF-8
        1.8


            org.springframework.cloud
            spring-cloud-starter-eureka-server


                org.springframework.cloud
                spring-cloud-dependencies
                Dalston.SR3
                pom
                import


                org.springframework.boot
                spring-boot-maven-plugin
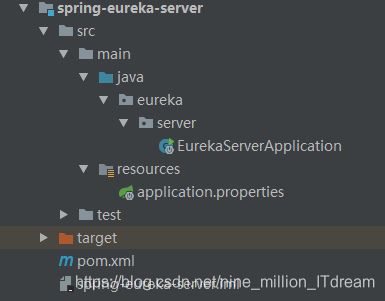
然后在resources文件夹下创建application.properties,如下:
server.port: 端口号,自己设置
spring.application.name=spring-eureka-server
server.port=9001

eureka.client.register-with-eureka=false
eureka.client.fetch-registry=false
eureka.client.serviceUrl.defaultZone=http://localhost:9001/eureka
然后在java包下创建包eureka.serverEurekaServerApplication.java,注意:不能再java下直接创建启动类,不然会报错,代码如下:

@EnableEurekaServer:表示这个是服务注册中心
@SpringBootApplication:表示这个为启动类
package eureka.server;

import org.springframework.boot.SpringApplication;
import org.springframework.boot.autoconfigure.SpringBootApplication;
import org.springframework.cloud.netflix.eureka.server.EnableEurekaServer;

@EnableEurekaServer
@SpringBootApplication
public class EurekaServerApplication {
    public static void main(String[] args){
        SpringApplication.run(EurekaServerApplication.class,args);
    }
}
Euerka-server项目架构
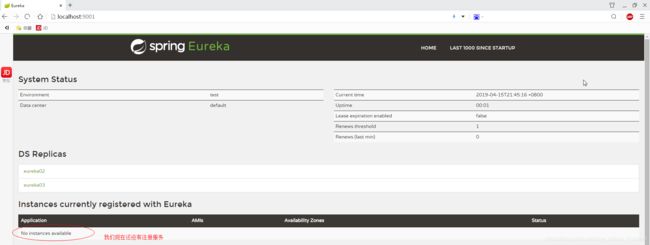
先启动这个服务注册中心,运行main主函数,然后到浏览器输入localhost:9001/eureka,测试是否成功,如下页面为成功。
4. 创建第二个Module,spring-eureka-provide(服务提供者),和创建第一个模块一样,只能命名不同,一样先配置pom.xml
        spring-cloud
        spring-cloud
        1.0-SNAPSHOT

    4.0.0

    spring-eureka-provide


        UTF-8
        UTF-8
        1.8


            org.springframework.cloud
            spring-cloud-starter-eureka


            org.springframework.boot
            spring-boot-starter-web


            mysql
            mysql-connector-java


            com.alibaba
            druid
            1.1.8


            org.springframework.boot
            spring-boot-starter-jdbc


            org.mybatis.spring.boot
            mybatis-spring-boot-starter
            1.3.1


            org.springframework.boot
            spring-boot-starter-data-jpa


            org.mybatis.spring.boot
            mybatis-spring-boot-starter
            1.3.1


            org.springframework.boot
            spring-boot-starter-actuator


                org.springframework.cloud
                spring-cloud-dependencies
                Dalston.SR3
                pom
                import


                org.springframework.boot
                spring-boot-maven-plugin
在resources下创建application.properties
spring.application.name=spring-eureka-provide
server.port=7001
eureka.client.serviceUrl.defaultZone=http://localhost:9001/eureka
eureka.instance.instance-id=provide7001
eureka.instance.prefer-ip-address=true
然后同样java包下新建eureka,provide包下创建启动类EurekaServerApplication.java
*注意:这个注解和Eureka server注解不一样
@EnableEurekaClient:表示这个是服务
package eureka.provide;

import org.mybatis.spring.annotation.MapperScan;
import org.springframework.boot.SpringApplication;
import org.springframework.boot.autoconfigure.SpringBootApplication;
import org.springframework.cloud.netflix.eureka.EnableEurekaClient;

@EnableEurekaClient
@SpringBootApplication
public class EurekaProvideApplication {

    public static void main(String[] args){
        SpringApplication.run(EurekaProvideApplication.class,args);
    }
}
再然后新建controller包下创建TestController.java,测试服务。

package eureka.provide.controller;

import org.springframework.web.bind.annotation.GetMapping;
import org.springframework.web.bind.annotation.RestController;

@RestController
public class TestController {

    @GetMapping("/test")
    public String test(){
        return "提供服务provide";
    }
}
启动主函数,看服务是否注册到服务注册中心。

刷新页面,服务已经注册了再测试一下,网站输入localhost:7001/test,这个是服务提供者的端口7001

好了,已经成功一大半了,最后创建最后一个Module,spring-eureka-consume(服务消费者),创建方法上面两个Module一样,先配置pom.xml文件
pom.xml
        spring-cloud
        spring-cloud
        1.0-SNAPSHOT

    4.0.0

    spring-eureka-consume


        UTF-8
        UTF-8
        1.8


            org.springframework.cloud
            spring-cloud-starter-eureka


            org.springframework.cloud
            spring-cloud-starter-ribbon


            org.springframework.boot
            spring-boot-starter-web


                org.springframework.cloud
                spring-cloud-dependencies
                Dalston.SR3
                pom
                import


                org.springframework.boot
                spring-boot-maven-plugin
application.properties
spring.application.name=spring-eureka-consume
server.port=8001
eureka.client.serviceUrl.defaultZone=http://localhost:9001/eureka/
主函数启动类EuerkaConsumeApplication.java
注解和服务提供者(provide)一样
package eureka.consume;

import org.springframework.boot.SpringApplication;
import org.springframework.boot.autoconfigure.SpringBootApplication;
import org.springframework.cloud.client.loadbalancer.LoadBalanced;
import org.springframework.cloud.netflix.eureka.EnableEurekaClient;
import org.springframework.context.annotation.Bean;
import org.springframework.web.client.RestTemplate;

@EnableEurekaClient
@SpringBootApplication
public class EurekaConsumeApplication {

    @Bean
    @LoadBalanced
    RestTemplate restTemplate(){
        return new RestTemplate();
    }

    public static void main(String[] args){
        SpringApplication.run(EurekaConsumeApplication.class,args);
    }
}
然后新建TestController.java调用服务提供者的服务
package eureka.consume.controller;

import org.springframework.beans.factory.annotation.Autowired;
import org.springframework.context.annotation.Configuration;
import org.springframework.stereotype.Controller;
import org.springframework.web.bind.annotation.GetMapping;
import org.springframework.web.bind.annotation.ResponseBody;
import org.springframework.web.client.RestTemplate;

@Controller
@Configuration
public class TestController {

    @Autowired
    private RestTemplate restTemplate;

    @GetMapping("/test")
    @ResponseBody
    public String test(){
        return restTemplate.getForEntity("http://spring-eureka-provide/test/",String.class).getBody();
    }
}
然后启动服务,刷新页面,看服务是否注册。

服务已经成功注册到注册中心,测试调用服务提供者的TestController服务,输入localhost:8001/test

服务消费者成功调用服务提供者
Eureka服务注册与发现完成!!!
总结
路是一步步走出来的,下面博客带来,Eureka集群,负载均衡等配置详解,谢谢大家支持,有不足之处望各位指出。
