【C#】VS Code中C#环境搭建
目录
前言
一,下载 .net core SDK
二,创建一个 C# 小栗子
创建方式一
创建方式二
三,Vs Code 中环境准备
四,最后运行 C# 小栗子
运行方式一
运行方式二
前言
工作需求而开始学 Unity 3D,因为 Unity 是和微软合作的,所以它用到的脚步语言是 C# ,于是我便开始学一下C#,哈哈,有过C/C++基础的人是很容易上手C#的,这里我不想用Visual Studio去编写C#程序,于是拿起我爱不释手的 Vs Code 编辑器来配置 C# 的运行环境
一,下载 .net core SDK
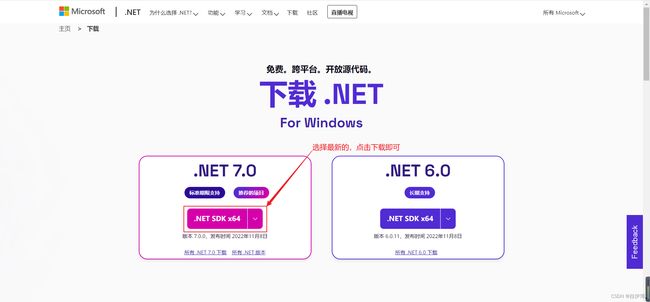
1.进入微软官网下载地址 https://dotnet.microsoft.com/zh-cn/download,显示如下页面直接下载即可
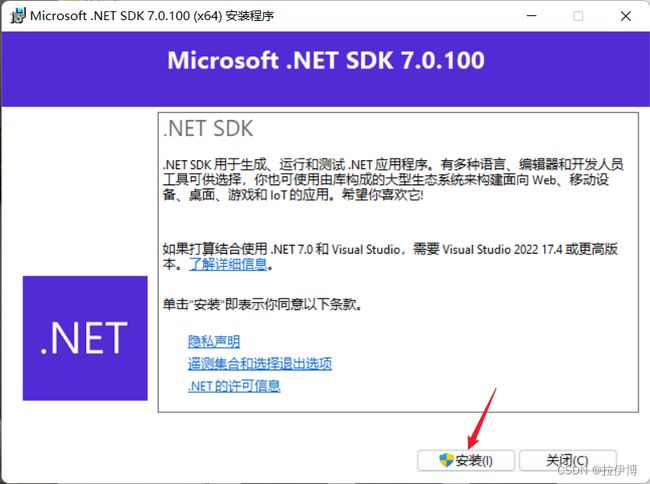
2.下载完成后右键以管理员身份运行,点击安装,然后稍微等待会就可安装完成
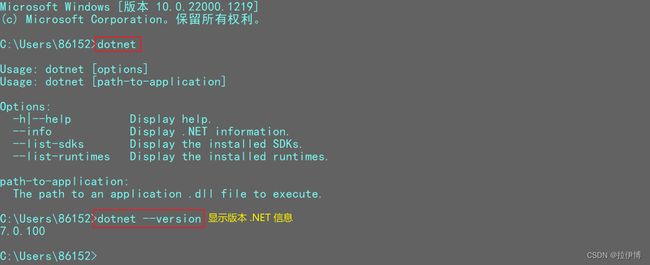
3.安装完成后,win+r输入cmd 打开新的命令提示符并运行命令:dotnet,显示如下就说明安装成功
二,创建一个 C# 小栗子
创建方式一
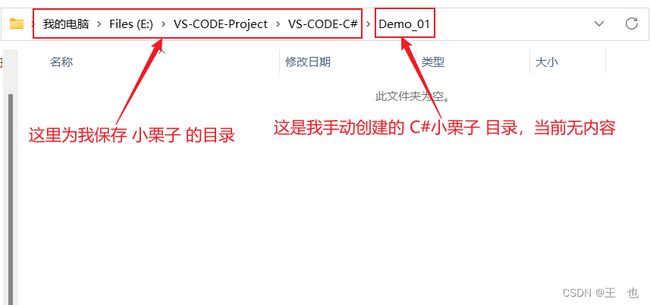
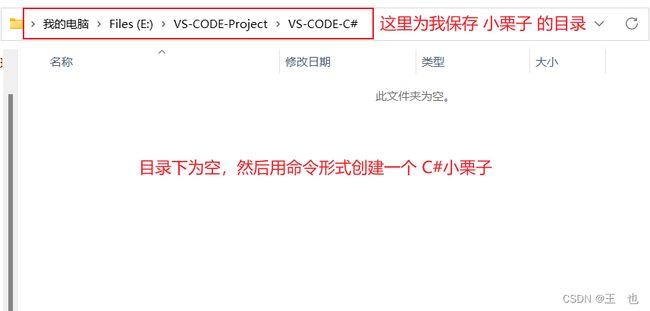
1.切换到你要保存该小栗子的目录下,手动创建一个 小栗子 目录并进入该目录后,在地址栏输入 cmd+回车,在新打开的命令提示符中输入 dotnet new console 来创建一个 C# 小栗子,如下
2.然后在上述地址栏用 cmd+回车 打开的命令提示符中输入命令:code .(运行该命令表示在Vs Code 中打开 Demo_01 工程),如下
创建方式二
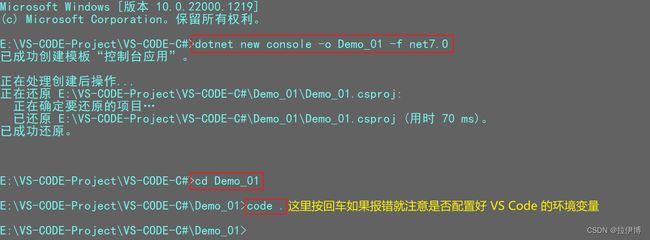
1.切换到你保存要该小栗子的目录下,在地址栏输入 cmd+回车,在新打开的命令提示符中输入 dotnet new console -o Demo_01 -f net7.0 来创建一个 C# 小栗子,如下
2.如上图所述会在当前目录下创建Demo_01工程,在上述地址栏用 cmd+回车 打开的命令提示符中输入 cd Demo_01 命令切换到该工程目录下,然后在输入 code . 命令(运行该命令表示在Vs Code 中打开该工程),如下
dotnet new console命令将为你新建控制台应用。-o参数会创建名为 Demo_01 的目录,用于存储应用并使用所需文件进行填充。-f参数指示你正在创建 .NET 7.0 应用程序。
三,Vs Code 中环境准备
1.安装如下两个插件,然后重启 Vs Code
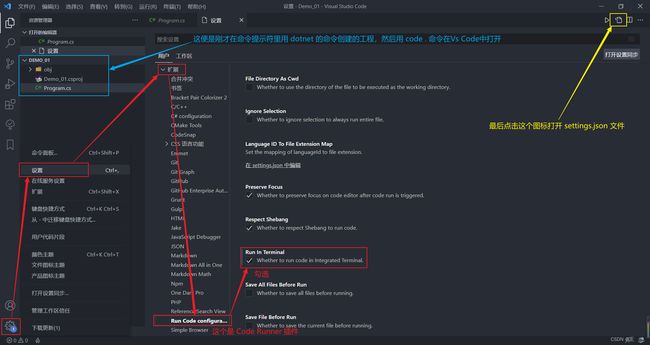
2.在 Code Runner 插件中 勾选在终端运行 并打开 settings.json 文件,如下
3.在打开的 settings.json 文件中,在最后一行输入 code 在弹出的框中选择 code-runner.executorMap 后按回车,自动会填充如下内容(内容不要对比哈,自动填充的,知道是这么会事就行)
"code-runner.executorMap": {
    "javascript": "node",
    "java": "cd $dir && javac $fileName && java $fileNameWithoutExt",
    "c": "cd $dir && gcc $fileName -o $fileNameWithoutExt && $dir$fileNameWithoutExt",
    "cpp": "cd $dir && g++ $fileName -o $fileNameWithoutExt && $dir$fileNameWithoutExt",
    "objective-c": "cd $dir && gcc -framework Cocoa $fileName -o $fileNameWithoutExt && $dir$fileNameWithoutExt",
    "php": "php",
    "python": "python -u",
    "perl": "perl",
    "perl6": "perl6",
    "ruby": "ruby",
    "go": "go run",
    "lua": "lua",
    "groovy": "groovy",
    "powershell": "powershell -ExecutionPolicy ByPass -File",
    "bat": "cmd /c",
    "shellscript": "bash",
    "fsharp": "fsi",
    "csharp": "scriptcs",
    "vbscript": "cscript //Nologo",
    "typescript": "ts-node",
    "coffeescript": "coffee",
    "scala": "scala",
    "swift": "swift",
    "julia": "julia",
    "crystal": "crystal",
    "ocaml": "ocaml",
    "r": "Rscript",
    "applescript": "osascript",
    "clojure": "lein exec",
    "haxe": "haxe --cwd $dirWithoutTrailingSlash --run $fileNameWithoutExt",
    "rust": "cd $dir && rustc $fileName && $dir$fileNameWithoutExt",
    "racket": "racket",
    "scheme": "csi -script",
    "ahk": "autohotkey",
    "autoit": "autoit3",
    "dart": "dart",
    "pascal": "cd $dir && fpc $fileName && $dir$fileNameWithoutExt",
    "d": "cd $dir && dmd $fileName && $dir$fileNameWithoutExt",
    "haskell": "runhaskell",
    "nim": "nim compile --verbosity:0 --hints:off --run",
    "lisp": "sbcl --script",
    "kit": "kitc --run",
    "v": "v run",
    "sass": "sass --style expanded",
    "scss": "scss --style expanded",
    "less": "cd $dir && lessc $fileName $fileNameWithoutExt.css",
    "FortranFreeForm": "cd $dir && gfortran $fileName -o $fileNameWithoutExt && $dir$fileNameWithoutExt",
    "fortran-modern": "cd $dir && gfortran $fileName -o $fileNameWithoutExt && $dir$fileNameWithoutExt",
    "fortran_fixed-form": "cd $dir && gfortran $fileName -o $fileNameWithoutExt && $dir$fileNameWithoutExt",
    "fortran": "cd $dir && gfortran $fileName -o $fileNameWithoutExt && $dir$fileNameWithoutExt",
    "sml": "cd $dir && sml $fileName"
}
4.在 setings.json 文件中找到上述内容中的 csharp 项,将其值更改为 cd $dir && dotnet run $fileName ,然后保存即可
四,最后运行 C# 小栗子
运行方式一
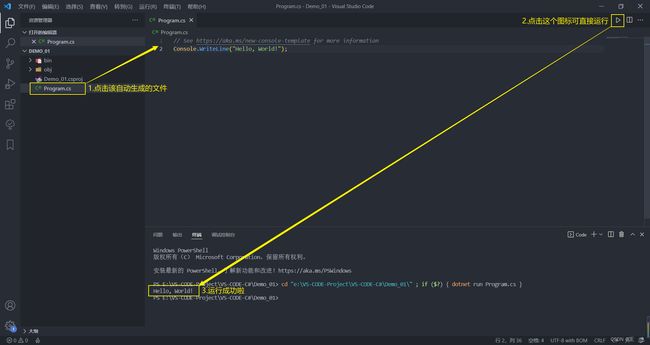
1.因为配置好了 settings.json 文件,所以可以直接用如下图那个三角形图标运行工程
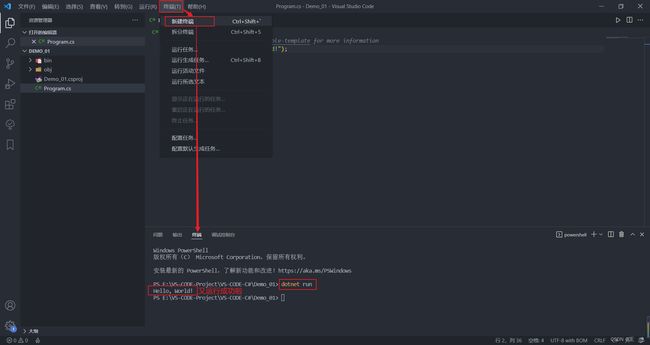
运行方式二
1.按如下新建一个终端,然后在终端中输入命令:dotnet run,(不想配置settings.json可用这种方式)
