Pytorch环境搭建-Gpytorch
提示:文章写完后,目录可以自动生成,如何生成可参考右边的帮助文档
Pytorch环境搭建-Gpytorch
- 前言
- 新建虚拟环境
- 搭建pytorch环境
- gpytorch及jupyter配置
-
- gpytorch安装
- jupyter配置
- 在这里插入图片描述
- 查看colab上的包
- Jupyter notebook基础教程(启动,汉化,操作)
-
- Jupyter Notebook 指定默认打开工作目录
- 总结
前言
以下为环境搭建全过程,记录一下方便后期需要。
提示:以下是本篇文章正文内容,下面案例可供参考
新建虚拟环境
conda env list                    #显示所有的虚拟环境

conda remove -n cpu --all        #删除xxxx虚拟环境
这里新建的虚拟环境名称为"CPU",使用python版本为3.9,目的是搭建pytohn(CPU)版本。
conda create -n cpu python=3.9 #创建python3.9的CPU虚拟环境
切换到cpu的虚拟环境
activate cpu
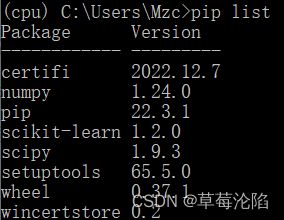
检查当前环境下所有包
pip list
生成freeze文件
pip freeze > requirements.txt
安装requirements.txt文件
pip install -r requirements.txt -i https://pypi.tuna.tsinghua.edu.cn/simple/
pip install --user  包的名字
pip install  --target=E:\Python\Anaconda3\envs\cpu\Lib\site-packages 包的名字
搭建pytorch环境
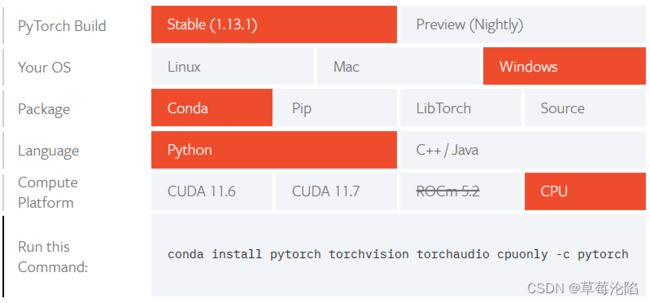
Pytorch官网:https://pytorch.org/get-started/locally/
Pytorch安装
#conda
conda install pytorch torchvision torchaudio cpuonly -c pytorch
#pip
pip3 install torch torchvision torchaudio
scikit-learn(sklearn) #清华源镜像
pip install scikit-learn -i https://pypi.tuna.tsinghua.edu.cn/simple/
pandas
pip install pandas
安装numpy
pip install numpy
#出现错误 更改路径
Looking in indexes: https://mirrors.aliyun.com/pypi/simple/
Requirement already satisfied: numpy c:\users\mzc\appdata\roaming\python\python39\site-packages (1.24.0)
pip install --target=目标路径  包的名字


pip install --target=E:\Python\Anaconda3\envs\cpu\Lib\site-packages numpy
之前安装pytorch不能使用最新的numpy。1.16.6可以。
但现在最新版本可以了。
matplotlib画图包
pip install matplotlib

pip install --user matplotlib==3.2.2
gpytorch及jupyter配置
gpytorch安装
pip install gpytorch
jupyter配置
查看当前的kernel
jupyter kernelspec list
删除旧内核
jupyter kernelspec remove cpu
安装 ipykernel
pip install ipykernel

conda install ipykernel

# 这里我们手动告知python的路径
E:\Python\Anaconda3\share\jupyter\kernels\python3
/home/test/anaconda2/envs/myPython2/bin/python -m ipykernel install --name myPython2
把当前环境配置到 ipykernel 里去
python -m ipykernel install --user --name 环境名 --display-name 显示的名字

python -m ipykernel install --user --name cpu --display-name pytorch(cpu)
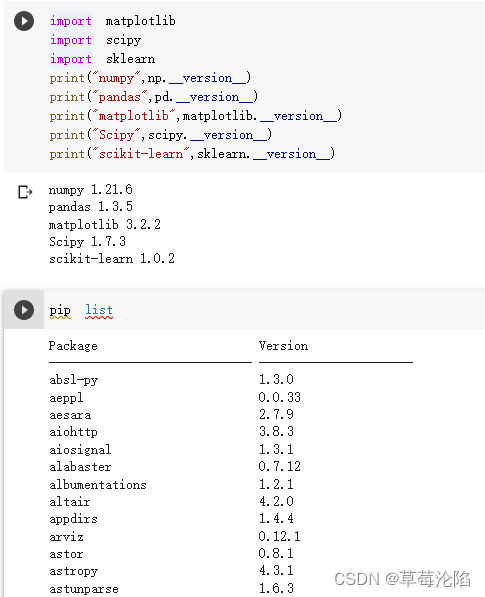
查看colab上的包
查看所属包
pip list
使用pip freeze命令导出本地的软件包和版本号。
将本地的库和版本号到文件requirements.txt中:
pip freeze > requirements.txt
别人拿到这个文件之后,如何安装呢
pip install -r requirements.txt
Jupyter notebook基础教程(启动,汉化,操作)
Jupyter notebook基础教程(启动,汉化,操作)
Jupyter Notebook 指定默认启动浏览器
cmd 命令窗口输入:jupyter notebook --generate-config 得到 Jupyter Notebook 的配置文件;
打开配置文件,搜索 “c.NotebookApp.browser”;
去掉前面的 # 号,并修改添加如下代码:
import webbrowser
webbrowser.register('chrome', None, webbrowser.GenericBrowser(u'你的浏览器安装位置'))
c.NotebookApp.browser = 'chrome'
Jupyter Notebook 指定默认打开工作目录
cmd 命令窗口输入:jupyter notebook --generate-config 得到 Jupyter Notebook 的配置文件;
打开配置文件,搜索 “c.NotebookApp.notebook_dir”;
去掉前面的 # 号,并修改添加如下代码:
c.NotebookApp.notebook_dir = '你的项目目录'
总结
Pytorch环境搭建-Gpytorch


