配置利用神经网络进行图片分类的某Python程序的运行环境记录(下)-安装scipy、scikit-learn、skimage、tensorflow、tflearn
在博文 https://blog.csdn.net/wenhao_ir/article/details/125259015中配置利用神经网络进行图片分类的某Python程序的运行环境失败了,原因是Python版本有点旧了。
所以在博文 https://blog.csdn.net/wenhao_ir/article/details/125263766中我将我的Python版本从3.6.8更换到了3.9.10。
更换完成后,接下来,重新来安装以下扩展库。
| 扩展包 | 功能 |
|---|---|
| numpy | 数值计算扩展库,用来存储和处理大型矩阵 |
| scipy | 在Numpy库的基础上增加了常用的库函数 |
| matplotlib | Python的2D绘图库 |
| scikit-learn | 集成了多种分类和聚类算法的Python工具包 |
| skimage | Python下的图像处理库 |
| tensorflow | Google开发的深度学习框架 |
| tflearn | 对Tensorflow接口进行了更高层次封装的工具包 |
| PIL | Python图形处理库 |
目录
- 01-安装numpy
- 02-安装scipy
- 03-安装matplotlib
- 04-安装scikit-learn
- 05-安装scikit-image
- 06-安装tensorflow
- 07-安装tflearn
- 08-PIL
- 用两个对图片进行分类训练的神经网络程序测试
01-安装numpy
numpy已经装了,详情见https://blog.csdn.net/wenhao_ir/article/details/125263766
02-安装scipy
scipy没有装,安装一下。
pip install scipy

速度依然很慢…慢慢等吧~
下载完了,也安装成功了…
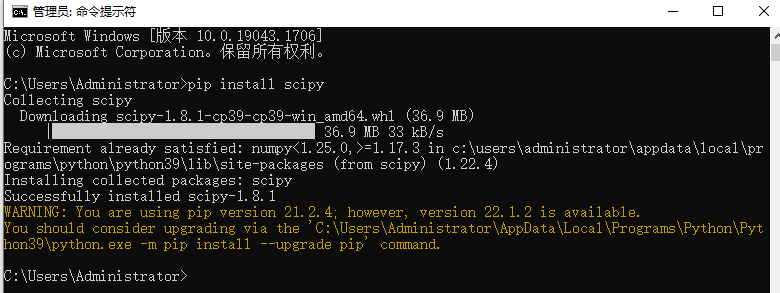
提供以上安装文件 scipy-1.8.1-cp39-cp39-win_amd64.whl的两个版本下载地址:
一个是直接从pip下载级存中提取的,文件名d4191b7c8d2e8d26a80361c0781a68cfb05c3ac0a830796d4a79b3bd
这个文件的使用方法见博文 https://blog.csdn.net/wenhao_ir/article/details/125271929
百度网盘下载链接:
链接:https://pan.baidu.com/s/16Tz2uqiHIyKbutS55S4tPg?pwd=snkq
另一个是scipy的github页面下载的:
https://github.com/scipy/scipy/releases
![]()
百度网盘下载链接:
链接:https://pan.baidu.com/s/1Wy_RKfwvfb8AuBsOIyLR9g?pwd=b09b
03-安装matplotlib
matplotlib也已经安装了,详情见https://blog.csdn.net/wenhao_ir/article/details/125263766
04-安装scikit-learn
pip install scikit-learn

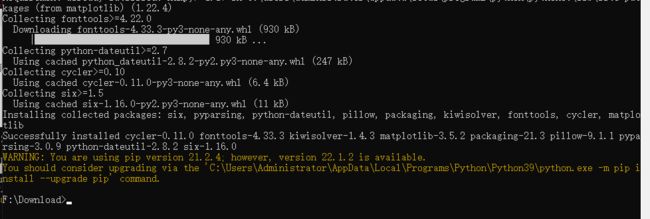
安装成功,除了scikit-learn-1.1.1,还附带安装了下面这些库:
- joblib-1.1.0
- threadpoolctl-3.1.0
05-安装scikit-image
pip install scikit-image


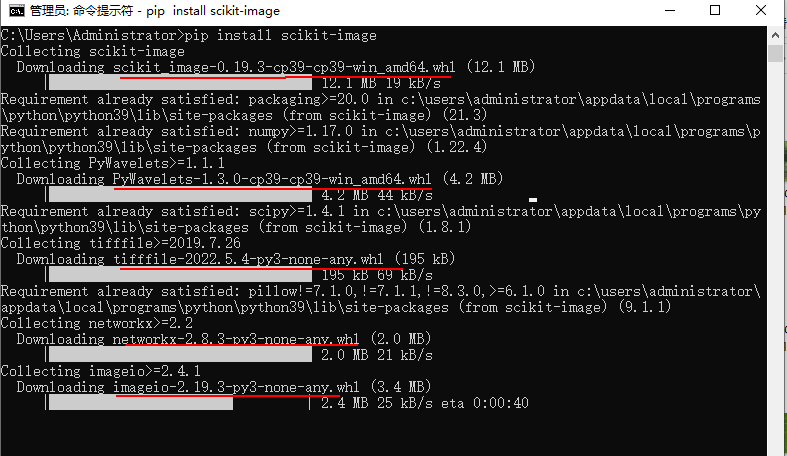

安装成功,从上面看出,除了scikit-image-0.19.3 ,还安装了以下依赖库:
- PyWavelets-1.3.0
- imageio-2.19.3
- networkx-2.8.3
- tifffile-2022.5.4
06-安装tensorflow
pip install tensorflow

有点大,这个下载下来之后要作个备份。
不行,需要的时间太长了…中间说不定要出什么幺蛾子~
手动去下载个tensorflow-2.9.1-cp39-cp39-win_amd64.whl 吧!先中止下载安装~
算了,现在又不方便用ti子 那就等它慢慢下吧,做事情要有耐心~
下载不下来再说~先去做点别的事。

…
果然报错了…

挂上ti子去手动下载吧~
找到了官方下载地址:
https://mirrors.tuna.tsinghua.edu.cn/pypi/web/simple/tensorflow/
https://mirrors.tuna.tsinghua.edu.cn/pypi/web/packages/c9/d1/3e8abee0f85cfef53be619766e1822b8190efad2dcb76167a62863033a14/tensorflow-2.9.1-cp39-cp39-win_amd64.whl#sha256=1c2c6557f6bd7e0d3f1063e27346e4f1c4353db2b7751ac7451033b335fa4b7c

不得不说,在这方面,还是谷歌好用啊。

飞一般地下载速度。
为了下次安装方便,传到百度网盘,百度网盘下载链接:
https://pan.baidu.com/s/1yipvD35L2WYm7cDURM37vA?pwd=hfn6
本地安装吧!
cd F:\Download
F:
pip install tensorflow==2.9.1
pip.exe install F:\Download\tensorflow-2.9.1-cp39-cp39-win_amd64.whl

这样就正确了。
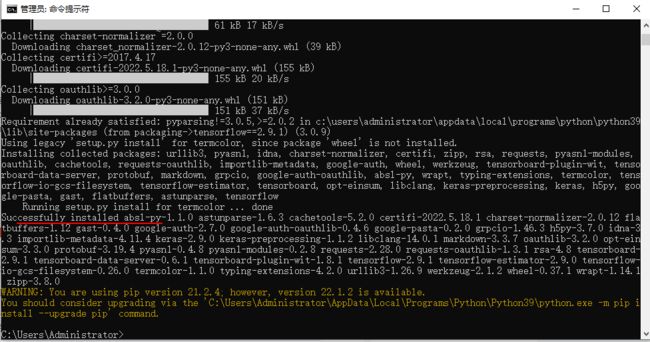
安装成功,除了tensorflow-2.9.1,还装了以下这些扩展库
- absl-py-1.1.0
- astunparse-1.6.3
- cachetools-5.2.0
- certifi-2022.5.18.1
- charset-normalizer-2.0.12
- flatbuffers-1.12
- gast-0.4.0
- google-auth-2.7.0
- google-auth-oauthlib-0.4.6
- google-pasta-0.2.0
- grpcio-1.46.3
- h5py-3.7.0
- idna-3.3
- importlib-metadata-4.11.4
- keras-2.9.0
- keras-preprocessing-1.1.2
- libclang-14.0.1
- markdown-3.3.7
- oauthlib-3.2.0
- opt-einsum-3.3.0
- protobuf-3.19.4
- pyasn1-0.4.8
- pyasn1-modules-0.2.8
- requests-2.28.0
- requests-oauthlib-1.3.1
- rsa-4.8
- tensorboard-2.9.1
- tensorboard-data-server-0.6.1
- tensorboard-plugin-wit-1.8.1
- tensorflow-estimator-2.9.0
- tensorflow-io-gcs-filesystem-0.26.0
- termcolor-1.1.0
- typing-extensions-4.2.0
- urllib3-1.26.9
- werkzeug-2.1.2
- wheel-0.37.1
- wrapt-1.14.1
- zipp-3.8.0
真是不容易。
07-安装tflearn
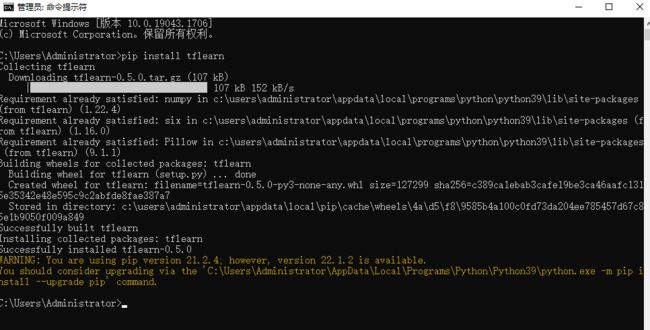
pip install tflearn
08-PIL
关于最后一个扩展库PIL要说明的是,我的site-packages中已经有它了,就不用安装了。
PIL(Python Imaging Library)是Python中一个强大的图像处理库,但目前其只支持到Python2.7。也就是说要想使用它,只能把Python版本降到Python2.7。如果想要用它,可以用pillow替代,pillow是PIL的一个分支,虽是分支但是其与PIL同样也具有很强的图像处理库。
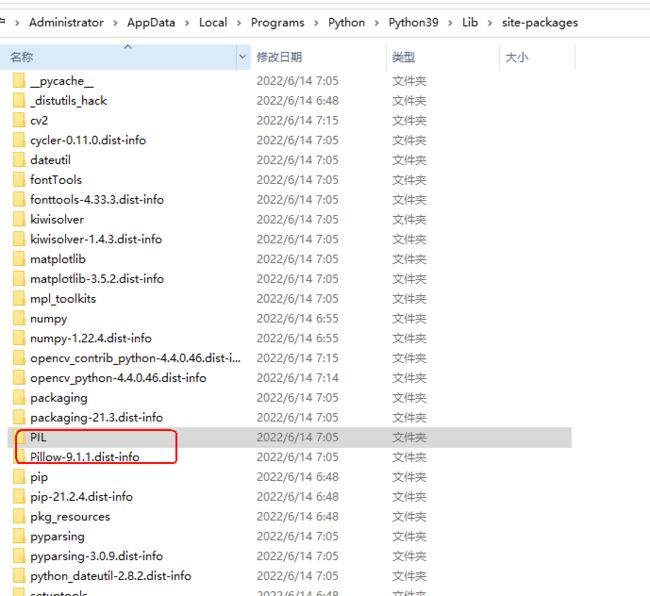
我是什么时候装上它的呢?
在装matplotlib-3.5.2的时候装上它的。
用两个对图片进行分类训练的神经网络程序测试
终于把这些扩展库安装好了,接下来用两个对图片进行分类训练的神经网络程序测试。
第一个是深度残差训练程序
# -*- coding: utf-8 -*-WW

from __future__ import division, print_function, absolute_import

import tflearn

from tflearn.datasets import cifar10

n = 5

(X, Y), (X_test, Y_test) = cifar10.load_data('F:/cifar10')

Y = tflearn.data_utils.to_categorical(Y, 10)
Y_test = tflearn.data_utils.to_categorical(Y_test, 10)

classes = ['airplane', 'automobile', 'bird', 'cat', 'deer', 'dog', 'frog', 'horse', 'ship', 'truck']

X_predict = X_test[9997:10000]
y_predict = Y_test[9997:10000]

print(X_predict)


print(y_predict)
for j in range(0, len(y_predict[0])):
  if y_predict[0][j] == 1.0:
    print('Correct Class : ' + classes[j])
for j in range(0, len(y_predict[0])):
  if y_predict[1][j] == 1.0:
    print('Correct Class : ' + classes[j])
for j in range(0, len(y_predict[0])):
  if y_predict[2][j] == 1.0:
    print('Correct Class : ' + classes[j])

img_prep = tflearn.ImagePreprocessing()
img_prep.add_featurewise_zero_center(per_channel=True)

img_aug = tflearn.ImageAugmentation()
img_aug.add_random_flip_leftright()
img_aug.add_random_crop([32, 32], padding=4)

net = tflearn.input_data(shape=[None, 32, 32, 3],
                         data_preprocessing=img_prep,
                         data_augmentation=img_aug)

net = tflearn.conv_2d(net, 16, 3, regularizer='L2', weight_decay=0.0001)
net = tflearn.residual_block(net, n, 16)
net = tflearn.residual_block(net, 1, 32, downsample=True)
net = tflearn.residual_block(net, n-1, 32)
net = tflearn.residual_block(net, 1, 64, downsample=True)
net = tflearn.residual_block(net, n-1, 64)
net = tflearn.batch_normalization(net)
net = tflearn.activation(net, 'relu')
net = tflearn.global_avg_pool(net)

net = tflearn.fully_connected(net, 10, activation = 'softmax')
mom = tflearn.Momentum(0.1, lr_decay = 0.1, decay_step = 32000, staircase = True)
net = tflearn.regression(net, optimizer=mom,
                         loss='categorical_crossentropy')

model = tflearn.DNN(net, tensorboard_verbose = 1, clip_gradients = 0.)

model.fit(X, Y, n_epoch = 120, validation_set = (X_test, Y_test), snapshot_epoch = False, snapshot_step = 500,show_metric = True, batch_size = 128, shuffle = True, run_id = 'resnet_cifar10')

y_array = model.predict(X_predict)
for j in range(0, len(y_array[0])):
  if y_predict[0][j] == 1.0:
    print('Predict Class : ' + classes[j])
for j in range(0, len(y_predict[0])):
  if y_predict[1][j] == 1.0:
    print('Predict Class : ' + classes[j])
for j in range(0, len(y_predict[0])):
  if y_predict[2][j] == 1.0:
    print('Predict Class : ' + classes[j])
注意:F:/cifar10是下载路径,运行之后程序会自动下载数据集到这个路径,如下图所示:


如果这个数据集没有下载成功,可手动下载它然后按照上面截图中的文件结构创建…
F:\cifar10
F:\cifar10\cifar-10-batches-py
上面的文件cifar-10-python.tar.gz的下载地址如下:
链接:https://pan.baidu.com/s/1PUgp5FHnpnok06NUd5kylQ?pwd=2yl3
Traceback (most recent call last):
  File "C:\Users\Administrator\AppData\Local\Programs\Python\Python39\lib\site-packages\tflearn\initializations.py", line 257, in variance_scaling
    from tensorflow.contrib.layers.python.layers.initializers import \
  File "D:\Program Files\pycharm\PyCharm Community Edition 2021.3.2\plugins\python-ce\helpers\pydev\_pydev_bundle\pydev_import_hook.py", line 21, in do_import
    module = self._system_import(name, *args, **kwargs)
ModuleNotFoundError: No module named 'tensorflow.contrib'
可见,问题应该是tensorflow的版本问题。
这里感慨下,提供运行环境,却不提供版本号,这可真坑人啊~
第二个是卷积神经网络程序,看能不能成功运行。
代码如下:
# -*- coding: utf-8 -*-

from __future__ import division, print_function, absolute_import

import numpy
import tflearn
from tflearn.data_utils import shuffle, to_categorical
from tflearn.layers.core import input_data, dropout, fully_connected
from tflearn.layers.conv import conv_2d, max_pool_2d
from tflearn.layers.estimator import regression
from tflearn.data_preprocessing import ImagePreprocessing
from tflearn.data_augmentation import ImageAugmentation
from PIL import Image

from tflearn.datasets import cifar10
# 注意:F:/cifar10是下载路径,运行之后程序会自动下载数据集到这个路径
(X, Y), (X_test, Y_test) = cifar10.load_data('F:/cifar10')
X, Y = shuffle(X, Y)
Y = to_categorical(Y, 10)
Y_test = to_categorical(Y_test, 10)

classes = ['airplane', 'automobile', 'bird', 'cat', 'deer', 'dog', 'frog', 'horse', 'ship', 'truck']

X_predict = X_test[1:3]
y_predict = Y_test[1:3]

print(X_predict)


print(y_predict)
for j in range(0, len(y_predict[0])):
	if y_predict[0][j] == 1.0:
		print('Correct Class : ' + classes[j])
for j in range(0, len(y_predict[0])):
	if y_predict[1][j] == 1.0:
		print('Correct Class : ' + classes[j])


img_prep = ImagePreprocessing()
img_prep.add_featurewise_zero_center()
img_prep.add_featurewise_stdnorm()

img_aug = ImageAugmentation()
img_aug.add_random_flip_leftright()
img_aug.add_random_rotation(max_angle=25.)


network = input_data(shape=[None, 32, 32, 3],
                     data_preprocessing=img_prep,
                     data_augmentation=img_aug)
network = conv_2d(network, 32, 3, activation='relu')
network = max_pool_2d(network, 2)
network = conv_2d(network, 64, 3, activation='relu')
network = conv_2d(network, 64, 3, activation='relu')
network = max_pool_2d(network, 2)
network = fully_connected(network, 512, activation='relu')
network = dropout(network, 0.5)
network = fully_connected(network, 10, activation='softmax')
network = regression(network, optimizer='adam',
                     loss='categorical_crossentropy',
                     learning_rate=0.001)

model = tflearn.DNN(network, tensorboard_verbose=1)
model.fit(X, Y, n_epoch=100, shuffle=True, validation_set=(X_test, Y_test),
          show_metric=True, batch_size=96, run_id='cifar10_cnn')

y_array = model.predict(X_predict)
for j in range(0, len(y_array[0])):
	if y_predict[0][j] == 1.0:
		print('Predict Class : ' + classes[j])
for j in range(0, len(y_predict[0])):
	if y_predict[1][j] == 1.0:
		print('Predict Class : ' + classes[j])
注意:F:/cifar10是下载路径,运行之后程序会自动下载数据集到这个路径,如下图所示:


如果这个数据集没有下载成功,可手动下载它然后按照上面截图中的文件结构创建…
F:\cifar10
F:\cifar10\cifar-10-batches-py
上面的文件cifar-10-python.tar.gz的下载地址如下:
链接:https://pan.baidu.com/s/1PUgp5FHnpnok06NUd5kylQ?pwd=2yl3
这个虽然能成功运行,便是似乎GPU没有成功启动,原因如下:
2022-06-14 11:56:15.475380: W tensorflow/stream_executor/platform/default/dso_loader.cc:64] Could not load dynamic library 'cudnn64_8.dll'; dlerror: cudnn64_8.dll not found
2022-06-14 11:56:15.476692: W tensorflow/core/common_runtime/gpu/gpu_device.cc:1850] Cannot dlopen some GPU libraries. Please make sure the missing libraries mentioned above are installed properly if you would like to use GPU. Follow the guide at https://www.tensorflow.org/install/gpu for how to download and setup the required libraries for your platform.
Skipping registering GPU devices...
可见,如果希望tensorflow使用GPU,我们还需要装cudnn才行。
那就安装呗,安装过程记录在 https://blog.csdn.net/wenhao_ir/article/details/125253533
安装完成后再运行上面的代码,发现秒级训练完…
第一次见识到GPU的强大~
第一次见识到GPU的强大~
第一次见识到GPU的强大~
真得太强大了~
没用GPU训练时5分钟都还没训练完,这个居然秒训练完…不可思议,不可思议,不可思议
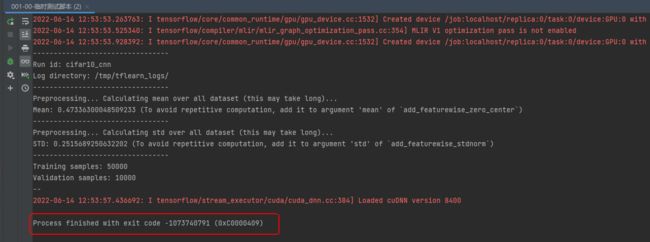
同时,从命令行输出中还知道了我的GPU算力…

从图中可以看出,我的GPU算力为6.1,这与我之前在博文https://blog.csdn.net/wenhao_ir/article/details/51262555中通过查询的方法查到的算力是一样的。
为了便于将来研究GPU的CUDA运算,我把这个程序的部分命令行输出摘录如下。
2022-06-14 12:53:52.720933: I tensorflow/core/platform/cpu_feature_guard.cc:193] This TensorFlow binary is optimized with oneAPI Deep Neural Network Library (oneDNN) to use the following CPU instructions in performance-critical operations:  AVX AVX2
To enable them in other operations, rebuild TensorFlow with the appropriate compiler flags.
2022-06-14 12:53:53.263763: I tensorflow/core/common_runtime/gpu/gpu_device.cc:1532] Created device /job:localhost/replica:0/task:0/device:GPU:0 with 1339 MB memory:  -> device: 0, name: NVIDIA GeForce GT 1030, pci bus id: 0000:01:00.0, compute capability: 6.1
2022-06-14 12:53:53.525340: I tensorflow/compiler/mlir/mlir_graph_optimization_pass.cc:354] MLIR V1 optimization pass is not enabled
2022-06-14 12:53:53.928392: I tensorflow/core/common_runtime/gpu/gpu_device.cc:1532] Created device /job:localhost/replica:0/task:0/device:GPU:0 with 1339 MB memory:  -> device: 0, name: NVIDIA GeForce GT 1030, pci bus id: 0000:01:00.0, compute capability: 6.1
---------------------------------
Run id: cifar10_cnn
Log directory: /tmp/tflearn_logs/
---------------------------------
Preprocessing... Calculating mean over all dataset (this may take long)...
Mean: 0.47336300048509233 (To avoid repetitive computation, add it to argument 'mean' of `add_featurewise_zero_center`)
---------------------------------
Preprocessing... Calculating std over all dataset (this may take long)...
STD: 0.2515689250632202 (To avoid repetitive computation, add it to argument 'std' of `add_featurewise_stdnorm`)
---------------------------------
Training samples: 50000
Validation samples: 10000
--
2022-06-14 12:53:57.436692: I tensorflow/stream_executor/cuda/cuda_dnn.cc:384] Loaded cuDNN version 8400
Process finished with exit code -1073740791 (0xC0000409)


