cifar10数据集和mnist数据集的读取以及可视化
文章目录
- 1.cifar10数据集
-
- 1.1 numpy库解析
- 1.2 pytorch代码解析
- 1.3 pytorch中解析cifar的源码
- 2. mnist数据集读取
-
- 2.1 mnist数据集简介
- 2.2 数据集读取
- 2.3 numpy和opencv读取
1.cifar10数据集
数据集百度云链接::cifar10百度云
提取码:ch7s
1.1 numpy库解析
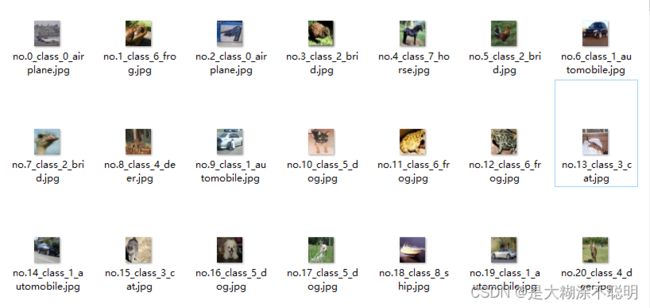
文件路径如下
主要是使用了unpack将二进制数解压出来
通过unpick等方式,可以了解cifar10数据集的格式和内容,对了解一个该数据集有较大的好处(相比直接调库解析)

相关注释,已经添加在代码中,很清楚了
import numpy as np
import cv2 as cv
import pickle
import os

root_path = r"datasets/IMBALANCECIFAR10/cifar-10-batches-py"


# 打开cifar-10文件的其中一个batch(一共5个batch)
def unpickle(file):
    if not isinstance(file, str):
        file = str(file)
    file_path = os.path.join(root_path, file)
    with open(file_path, 'rb') as f:
        data_dict = pickle.load(f, encoding='bytes')
    return data_dict


"""batches.meta大小仅为1kb, 只包含了三个信息"""
# num_cases_per_batch = 10000. 即:每个data_batch文件中数据为10000张
# label_names : 包含着类的名字
# num_vis,是每个图片的总像素个数,3072个像素点,rgb三通道; 因此reshape后为(32, 32, 3)
# data_dict = unpickle("batches.meta")


"""data_batch_ 大小为29M,包含着10000张图片相关信息"""
data_dict = unpickle("data_batch_4")
# 下面的字典的key, 是debug的结果
cifar_data = data_dict[b'data']
cifar_label = data_dict[b'labels']
cifar_filenames = data_dict[b'filenames']

cifar_data = np.array(cifar_data)  # 把字典的值转成array格式,方便操作
print(cifar_data.shape)  # (10000,3072)
cifar_label = np.array(cifar_label)
print(cifar_label.shape)  # (10000,)

label_name = ['airplane', 'automobile', 'brid', 'cat', 'deer', 'dog', 'frog', 'horse', 'ship', 'truck']

for i in range(100):
    image = cifar_data[i]
    image = image.reshape(-1, 1024)
    r = image[0, :].reshape(32, 32)  # 红色分量
    g = image[1, :].reshape(32, 32)  # 绿色分量
    b = image[2, :].reshape(32, 32)  # 蓝色分量
    img = np.zeros((32, 32, 3))
    # RGB还原成彩色图像
    img[:, :, 0] = r
    img[:, :, 1] = g
    img[:, :, 2] = b
    # cifar_filenames[i]是一个byte类型的,还不是str
    # 下面的写法,会报错

    """20220903更新,由于opencv读取机制的问题,需要将rgb转换成bgr才可以使用cv.imwrite保存"""
	img = img[:, :, ::-1  # rgb--->bgr
    cv.imwrite("datasets/IMBALANCECIFAR10/unpickle/data_batch_4/" + "no." + str(i) + "_class_" + str(
        cifar_label[i]) + "_" + str(label_name[cifar_label[i]]) + ".jpg", img)
1.2 pytorch代码解析
整体比较简单,调用pytorch自带的方法就可以完成
import numpy as np

import torch

import torchvision
import torchvision.transforms as transforms

import matplotlib.pyplot as plt
#加载数据
#train_set:50000张图片
classes = ['plane', 'car', 'bird', 'cat', 'deer', 'dog', 'frog', 'horse', 'ship', 'truck','Total']
train_set=torchvision.datasets.CIFAR10(root='./cifar-10-batches-py'
                                      ,train=True
                                      ,download=True
                                      ,transform=transforms.Compose([transforms.ToTensor()]))
'''
,transforms.Normalize((0.5, 0.5, 0.5), (0.5, 0.5, 0.5))]))
把[0,1]映射到[-1,1],images原始大小就在[0,1]
如果只是可视化可以不用Normalize,如果归一化,下面要加images=images/2+0.5恢复
'''
train_loader=torch.utils.data.DataLoader(train_set,batch_size=20,shuffle=True)
i=0
for batch in train_loader:
    if(i==0):
        images,labels=batch  #image.shape==torch.Size([1, 3, 32, 32])
        print(labels)
        i+=1
    else:
    	continue
#images=torch.squeeze(images)#torch.Size([3, 32, 32])#显示单张的时候用
print(images.shape)  # torch.Size([10, 3, 32, 32])
#显示
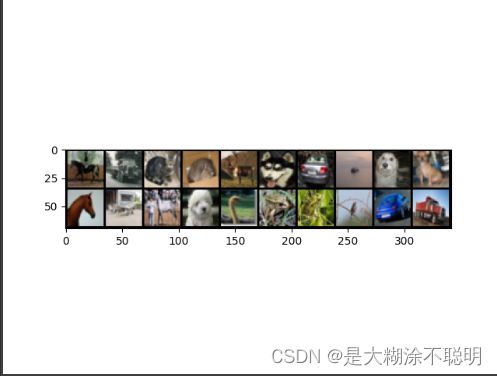
grid=torchvision.utils.make_grid(images,nrow=10)
plt.imshow(np.transpose(grid, (1,2,0)))#交换维度,从GBR换成RGB
plt.show()
1.3 pytorch中解析cifar的源码
import pickle
import os
import numpy as np
from PIL import Image

train_list = [
        ['data_batch_1', 'c99cafc152244af753f735de768cd75f'],
        ['data_batch_2', 'd4bba439e000b95fd0a9bffe97cbabec'],
        ['data_batch_3', '54ebc095f3ab1f0389bbae665268c751'],
        ['data_batch_4', '634d18415352ddfa80567beed471001a'],
        ['data_batch_5', '482c414d41f54cd18b22e5b47cb7c3cb'],
    ]
base_folder = r"datasets/IMBALANCECIFAR10/cifar-10-batches-py"

save_folder = r"datasets\IMBALANCECIFAR10\torch_Imagesave"
data = []
targets = []

for file_name, checksum in train_list:
    file_path = os.path.join(base_folder, file_name)
    with open(file_path, 'rb') as f:
        entry = pickle.load(f, encoding='latin1')
        data.append(entry['data'])
        if 'labels' in entry:
            targets.extend(entry['labels'])
        else:
            targets.extend(entry['fine_labels'])
# data原本是一个list,里面有5个元素,每个元素的shape是(10000, 3072)
data = np.vstack(data).reshape(-1, 3, 32, 32)
# (50000, 32, 32, 3)
data = data.transpose((0, 2, 3, 1))

# 保存前100张图片
for i in range(100):
    img = data[i]
    img = Image.fromarray(img)
    save_path = os.path.join(save_folder, str(i)+".jpg")
    img.save(save_path)
2. mnist数据集读取
2.1 mnist数据集简介
训练集 : 60000
测试集 : 10000
图片大小 :28x28
标签 : 0~9 ,手写数字识别
灰度图 , 图片中像素值归一化处理过了,因此在0~1之间,都是小数
2.2 数据集读取
数据集百度云链接
百度云链接:MNIST_DATA
提取码:2ijb
from torchvision import datasets
"""此处的download必须为True,否则又会报错"""
train_data = datasets.MNIST(root=r".\data", train=True, download=True)
print(len(train_data))
运行代码,显示如下
2.3 numpy和opencv读取
动态显示结果,每隔0.7s显示
import os
import struct
import cv2
import numpy as np


def load_mnist(path, kind='train'):
    """Load MNIST data from `path`"""
    labels_path = os.path.join(path, '%s-labels-idx1-ubyte' % kind)

    images_path = os.path.join(path, '%s-images-idx3-ubyte' % kind)

    with open(labels_path, 'rb') as lbpath:
        magic, n = struct.unpack('>II', lbpath.read(8))
        labels = np.fromfile(lbpath, dtype=np.uint8)
    # 读入magic是一个文件协议的描述,也是调用fromfile 方法将字节读入NumPy的array之前在文件缓冲中的item数(n).

    with open(images_path, 'rb') as imgpath:
        magic, num, rows, cols = struct.unpack('>IIII', imgpath.read(16))
        images = np.fromfile(imgpath, dtype=np.uint8).reshape(len(labels), 784)
    return images, labels


file_path = r"data/MNIST/raw"
images, labels = load_mnist(file_path)

for i in range(100):
    img = images[i, :].reshape(28, 28)
    cv2.imshow('src', img)
    cv2.waitKey(700)  # 间隔0.7s显示新图片

print(images.shape)


