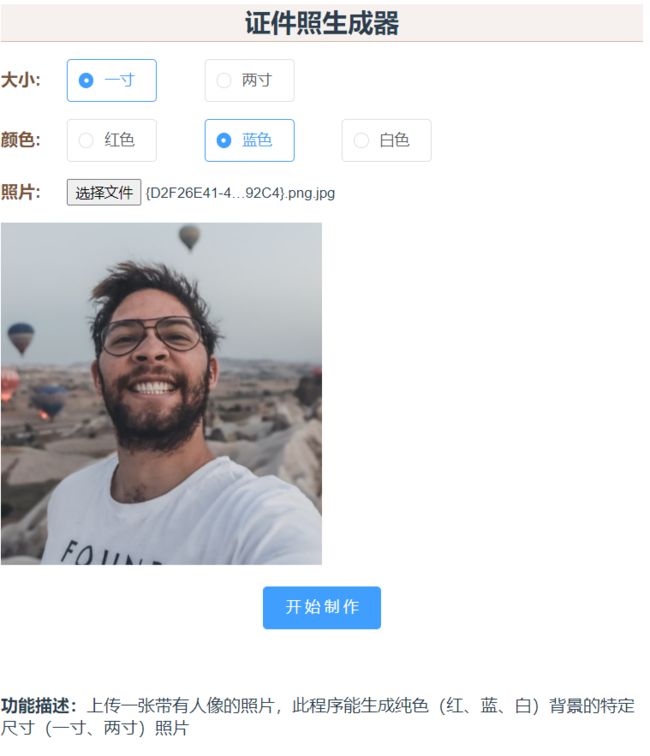
使用U2-Net深层网络实现——证件照生成程序
效果预览:http://map.gnnu.work/rm21/qy/profilepicture
使用到:
1.pytorch 加载分割模型
2.PIL 更加方便地操作图像
2.U2-net 网络将人像的轮廓从图像中分割出来
具体实现步骤如下:
1.原始图
原始图
2.从原始图片获得Alpha图
# 从原始图片获得Alpha图  org:原始图的路径 返回得到的Alpha图
def seg_trimap(org):
    image = Image.open(org)
    img = np.array(image)
    net = pre_net()
    inputs_test = pre_test_data(img)
    d1, d2, d3, d4, d5, d6, d7 = net(inputs_test)
    # normalization
    pred = d1[:, 0, :, :]
    pred = normPRED(pred)
    # 将数据转换成图片
    im = get_im(pred)
    # im.save(alpha)
    sp = image.size
    # 根据原始图片调整尺寸
    imo = im.resize((sp[0], sp[1]), resample=Image.BILINEAR)
    imo.save("alpha_resize111.jpg")
    return imo
    return imo
Alpha图
3.将Alpha图转成trimap图
def to_standard_trimap(alpha):
    #  Alpha图生成 trimap
    # image = Image.open(alpha)
    image = alpha;
    # image = image.convert("P")
    # image_file.save('resize_trimap.png')
    sp = image.size
    width = sp[0]
    height = sp[1]
    for yh in range(height):
        for xw in range(width):
            dot = (xw, yh)
            color_d_arr = image.getpixel(dot)
            color_d=color_d_arr[0]
            if 0 < color_d <= 60:
                image.putpixel(dot, (0,0,0))
            if 60 < color_d <= 200:
                image.putpixel(dot, (128,128,128))
            if 200 < color_d <= 255:
                image.putpixel(dot, (255,255,255))
    image.save("trimap1111.jpg")
    return image
trimap图
4.通过原始图和trimap图结合背景色生成最终结果
def to_background(org, resize_trimap, id_image, color):
    """
        org:原始图片
        resize_trimap:trimap
        id_image:新图片
        color: 背景颜色
    """
    scale = 1.0
    image = load_image(org, "RGB", scale, "box")
    trimap = load_image(resize_trimap, "GRAY", scale, "nearest")
    im = Image.open(org)
    # estimate alpha from image and trimap
    try:
        alpha = estimate_alpha_cf(image, trimap)
    except:
        print("异常")
        print(org)
        a = "-1"
        return a
    new_background = Image.new('RGB', im.size, color_dict[color])
    new_background.save("bj.png")
    # load new background
    new_background = load_image("bj.png", "RGB", scale, "box")
    # estimate foreground from image and alpha
    foreground, background = estimate_foreground_ml(image, alpha, return_background=True)
    # blend foreground with background and alpha
    new_image = blend(foreground, new_background, alpha)
    save_image(id_image, new_image)
    return id_image
结果图
至此,生成纯色证件照的功能已实现。
接下来使用Vue写程序界面以提供用户交互,由于证件照有特定的尺寸,此处借助vue-croppe实现让用户在前端将纯色证件照剪切成一寸或者两寸。
代码较多不进行展示,有需要跳转到文末获取源代码。
源码如下:
后端:https://github.com/QiuYang01/profilepicture-server
前端:https://github.com/QiuYang01/profilepicture-client


