React脚手架应用(创建脚手架、代理配置、ajax相关、组件通信)(四)
系列文章目录
第一章:React基础知识(React基本使用、JSX语法、React模块化与组件化)(一)
第二章:React基础知识(组件实例三大核心属性state、props、refs)(二)
第三章:React基础知识(事件处理、受控组件与非受控组件、高阶函数、组件的生命周期)(三)
第四章:React脚手架应用(创建脚手架、代理配置、ajax相关、组件通信)(四)
第五章:react-router5路由相关一(路由相关概念、基本使用、NavLink与NavLink的封装、Switch的使用、严格匹配、路由重定向、路由组件与一般组件的区别)(五)
第六章:react-router5路由相关二(嵌套路由、路由传参、replace、编程式路由导航、withRouter的使用、BrowserRouter与HashRouter的区别)(六)
第七章:React-Router6路由相关一(路由的基本使用、重定向、NavLink·、路由表、嵌套路由)(七)
第八章:React-Router6路由相关二(路由传参、编程式路由导航、路由相关hooks)(八)
第九章:React相关扩展一(setState、lazyLoad、Hooks相关)(九)
文章目录
- 系列文章目录
-
- 一、创建react应用
-
- 1.1 react脚手架
- 1.2 创建项目并启动
- 1.3 脚手架目录结构
- 1.4 功能界面组件化流程
- 二、React 配置代理
-
- 方法一
- 方法二
- 三、react发送ajax
-
- 3.1 axios
- 3.2 fetch
- 四、组件通信方式
-
- 4.1 props(父子组件通信)
- 4.2 PubSubJS(兄弟、祖孙组件)
一、创建react应用
1.1 react脚手架
1.xxx脚手架: 用来帮助程序员快速创建一个基于xxx库的模板项目
- 包含了所有需要的配置(语法检查、jsx编译、devServer…)
- 下载好了所有相关的依赖
- 可以直接运行一个简单效果
2.react提供了一个用于创建react项目的脚手架库: create-react-app
3.项目的整体技术架构为: react + webpack + es6 + eslint
4.使用脚手架开发的项目的特点: 模块化, 组件化, 工程化
1.2 创建项目并启动
第一步,全局安装:
npm i -g create-react-app
第二步,切换到想创项目的目录,使用命令:create-react-app hello-react
第三步,进入项目文件夹:cd hello-react
第四步,启动项目:npm start
1.3 脚手架目录结构
public ---- 静态资源文件夹
	favicon.icon ------ 网站页签图标
	index.html -------- 主页面
	logo192.png ------- logo图
	logo512.png ------- logo图
	manifest.json ----- 应用加壳的配置文件
	robots.txt -------- 爬虫协议文件
src ---- 源码文件夹
	App.css -------- App组件的样式
	App.js --------- App组件
	App.test.js ---- 用于给App做测试
	index.css ------ 样式
	index.js ------- 入口文件
	logo.svg ------- logo图
	reportWebVitals.js
		--- 页面性能分析文件(需要web-vitals库的支持)
	setupTests.js
		---- 组件单元测试的文件(需要jest-dom库的支持)
1.4 功能界面组件化流程
-
拆分组件: 拆分界面,抽取组件
-
实现静态组件: 使用组件实现静态页面效果
-
实现动态组件
3.1 动态显示初始化数据
3.2 交互(从绑定事件监听开始)
二、React 配置代理
当客户端向服务器发送请求时协议域名端口号有一个不一致,就会发生跨域,此时可以在项目中配置代理,解决跨域问题
方法一
在package.json中追加如下配置
"proxy":"http://localhost:5000"
说明:
- 优点:配置简单,前端请求资源时可以不加任何前缀。
- 缺点:不能配置多个代理。
- 工作方式:上述方式配置代理,当请求了3000不存在的资源时,那么该请求会转发给5000 (优先匹配前端资源)
方法二
-
第一步:创建代理配置文件
在src下创建配置文件:src/setupProxy.js
-
第二步: 编写setupProxy.js配置具体代理规则:
const proxy = require('http-proxy-middleware')

module.exports = function(app) {
  app.use(
    proxy('/api1', {  //api1是需要转发的请求(所有带有/api1前缀的请求都会转发给5000)
      target: 'http://localhost:5000', //配置转发目标地址(能返回数据的服务器地址)
      changeOrigin: true, //控制服务器接收到的请求头中host字段的值
      /*
      	changeOrigin设置为true时,服务器收到的请求头中的host为:localhost:5000
      	changeOrigin设置为false时,服务器收到的请求头中的host为:localhost:3000
      	changeOrigin默认值为false,但我们一般将changeOrigin值设为true
      */
      pathRewrite: {'^/api1': ''} //去除请求前缀,保证交给后台服务器的是正常请求地址(必须配置)
    }),
    proxy('/api2', {
      target: 'http://localhost:5001',
      changeOrigin: true,
      pathRewrite: {'^/api2': ''}
    })
  )
}
说明:
- 优点:可以配置多个代理,可以灵活的控制请求是否走代理。
- 缺点:配置繁琐,前端请求资源时必须加前缀。
代码案例:
import React, { Component } from 'react'
import axios from 'axios'

export default class App extends Component {

	getStudentData = ()=>{
	//发送请求时将端口号修改成当前端口号,并加上前缀
		axios.get('http://localhost:3000/api1/students').then(
			response => {console.log('成功了',response.data);},
			error => {console.log('失败了',error);}
		)
	}

	getCarData = ()=>{
	//发送请求时将端口号修改成当前端口号,并加上前缀
		axios.get('http://localhost:3000/api2/cars').then(
			response => {console.log('成功了',response.data);},
			error => {console.log('失败了',error);}
		)
	}

	render() {
		return (
			<div>
				<button onClick={this.getStudentData}>点我获取学生数据</button>
				<button onClick={this.getCarData}>点我获取汽车数据</button>
			</div>
		)
	}
}
三、react发送ajax
1.React本身只关注于界面, 并不包含发送ajax请求的代码
2.前端应用需要通过ajax请求与后台进行交互(json数据)
3.react应用中需要集成第三方ajax库(或自己封装)
3.1 axios
轻量级, 建议使用,封装XmlHttpRequest对象的ajax ,promise风格 ,可以用在浏览器端和node服务器端
代码片段:
1) POST请求
axios.get('/user?ID=12345')
  .then(function (response) {
    console.log(response.data);
  })
  .catch(function (error) {
    console.log(error);
  });

axios.get('/user', {
    params: {
      ID: 12345
    }
  })
  .then(function (response) {
    console.log(response);
  })
  .catch(function (error) {
    console.log(error);
  });
2) POST请求
axios.post('/user', {
  firstName: 'Fred',
  lastName: 'Flintstone'
})
.then(function (response) {
console.log(response);
})
.catch(function (error) {
console.log(error);
});
3.2 fetch
浏览器内置语法, promise风格, 老浏览器不支持, 可以引入fetch.js兼容包
代码片段:
1)GET请求
	//发送网络请求---使用fetch发送(优化前)
	fetch(url).then(function(response) {
	    return response.json()
	  }).then(function(data) {
	    console.log(data)
	  }).catch(function(e) {
	    console.log(e)
	  });
	//发送网络请求---使用fetch发送(优化后)
		try {
			const response= await fetch(`/api1/search/users2?q=${keyWord}`)
			const data = await response.json()
			console.log(data);
		} catch (error) {
			console.log('请求出错',error);

		}
2)POST请求
  fetch(url, {
    method: "POST",
    body: JSON.stringify(data),
  }).then(function(data) {
    console.log(data)
  }).catch(function(e) {
    console.log(e)
  })
四、组件通信方式
4.1 props(父子组件通信)
共同的数据放在父组件上, 特有的数据放在自己组件内部(state)
-
一般数据–>父组件传递数据给子组件–>子组件读取数据
- 传递数据:
- 接收数据:
this.props.name
- 传递数据:
-
函数数据–>子组件传递数据给父组件–>子组件调用函数
- 传递数据:
this.props.handleGetData(data) - 接收数据:
handleGetData=(data)=>{ console.log("子组件数据:",data) } ,
- 传递数据:
问题: 多层传递属性麻烦, 兄弟组件通信不方便
代码案例片段(为节省空间,样式代码,一律不截取):
App.js
import React, { Component } from 'react'
import Search from './components/Search'
import List from './components/List'

export default class App extends Component {

	state = { //初始化状态
		users:[], //users初始值为数组
		isFirst:true, //是否为第一次打开页面
		isLoading:false,//标识是否处于加载中
		err:'',//存储请求相关的错误信息
	}

	//更新App的state
	updateAppState = (stateObj)=>{
		this.setState(stateObj)
	}

	render() {
		return (
			<div className="container">
				<Search updateAppState={this.updateAppState}/>
				<List {...this.state}/>
			</div>
		)
	}
}
Search.jsx
import React, { Component } from 'react'
import axios from 'axios'
export default class Search extends Component {
search = ()=>{
//获取用户的输入(连续解构赋值+重命名)
const {keyWordElement:{value:keyWord}} = this
//发送请求前通知App更新状态
this.props.updateAppState({isFirst:false,isLoading:true})
//发送网络请求
axios.get(`/api1/search/users?q=${keyWord}`).then(
response => {
//请求成功后通知App更新状态
this.props.updateAppState({isLoading:false,users:response.data.items})
},
error => {
//请求失败后通知App更新状态
this.props.updateAppState({isLoading:false,err:error.message})
}
)
}
render() {
return (
<section className="jumbotron">
<h3 className="jumbotron-heading">搜索github用户</h3>
<div>
<input ref={c => this.keyWordElement = c} type="text" placeholder="输入关键词点击搜索"/>
<button onClick={this.search}>搜索</button>
</div>
</section>
)
}
}
List.jsx
import React, { Component } from 'react'
import './index.css'

export default class List extends Component {
	render() {
		const {users,isFirst,isLoading,err} = this.props
		return (
			<div className="row">
				{
					isFirst ? <h2>欢迎使用,输入关键字,随后点击搜索</h2> :
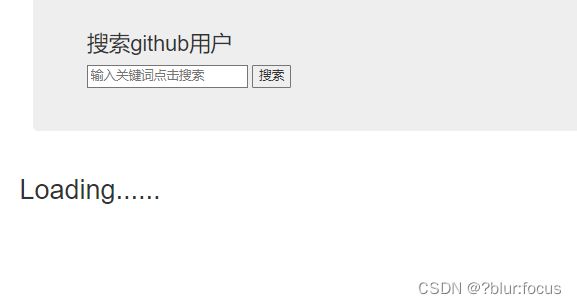
					isLoading ? <h2>Loading......</h2> :
					err ? <h2 style={{color:'red'}}>{err}</h2> :
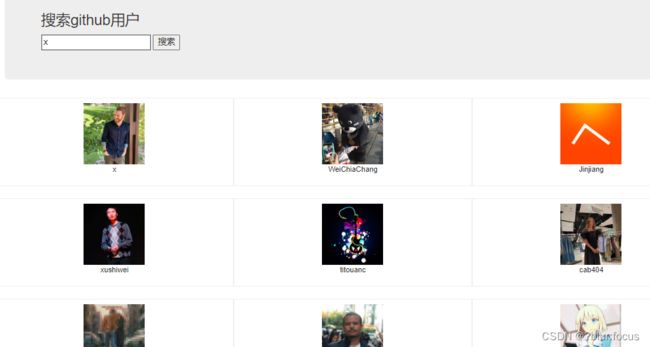
					users.map((userObj)=>{
						return (
							<div key={userObj.id} className="card">
								<a rel="noreferrer" href={userObj.html_url} target="_blank">
									<img alt="head_portrait" src={userObj.avatar_url} style={{width:'100px'}}/>
								</a>
								<p className="card-text">{userObj.login}</p>
							</div>
						)
					})
				}
			</div>
		)
	}
}
4.2 PubSubJS(兄弟、祖孙组件)
1.工具库: PubSubJS
2.下载: npm install pubsub-js --save
3.使用:
 1)import PubSub from 'pubsub-js' //引入
 2)PubSub.subscribe('delete', function(_,data){ }); //订阅
 3)PubSub.publish('delete', data) //发布消息
代码案例片段(为节省空间,样式代码,一律不截取):
App.js
import React, { Component } from 'react'
import Search from './components/Search'
import List from './components/List'

export default class App extends Component {
	render() {
		return (
			<div className="container">
				<Search/>
				<List/>
			</div>
		)
	}
}
List.jsx
import React, { Component } from 'react'
import PubSub from 'pubsub-js'
import './index.css'

export default class List extends Component {

	state = { //初始化状态
		users:[], //users初始值为数组
		isFirst:true, //是否为第一次打开页面
		isLoading:false,//标识是否处于加载中
		err:'',//存储请求相关的错误信息
	}

	componentDidMount(){
		this.token = PubSub.subscribe('getdata',(_,stateObj)=>{
			this.setState(stateObj)
		})
	}

	componentWillUnmount(){
		PubSub.unsubscribe(this.token)
	}

	render() {
		const {users,isFirst,isLoading,err} = this.state
		return (
			<div className="row">
				{
					isFirst ? <h2>欢迎使用,输入关键字,随后点击搜索</h2> :
					isLoading ? <h2>Loading......</h2> :
					err ? <h2 style={{color:'red'}}>{err}</h2> :
					users.map((userObj)=>{
						return (
							<div key={userObj.id} className="card">
								<a rel="noreferrer" href={userObj.html_url} target="_blank">
									<img alt="head_portrait" src={userObj.avatar_url} style={{width:'100px'}}/>
								</a>
								<p className="card-text">{userObj.login}</p>
							</div>
						)
					})
				}
			</div>
		)
	}
}
Search.jsx
import React, { Component } from 'react'
import PubSub from 'pubsub-js'
import axios from 'axios'
export default class Search extends Component {
search = ()=>{
//获取用户的输入(连续解构赋值+重命名)
const {keyWordElement:{value:keyWord}} = this
//发送请求前通知List更新状态
PubSub.publish('getdata',{isFirst:false,isLoading:true})
//发送网络请求
axios.get(`/api1/search/users?q=${keyWord}`).then(
response => {
//请求成功后通知List更新状态
PubSub.publish('getdata',{isLoading:false,users:response.data.items})
},
error => {
//请求失败后通知App更新状态
PubSub.publish('getdata',{isLoading:false,err:error.message})
}
)
}
render() {
return (
<section className="jumbotron">
<h3 className="jumbotron-heading">搜索github用户</h3>
<div>
<input ref={c => this.keyWordElement = c} type="text" placeholder="输入关键词点击搜索"/>
<button onClick={this.search}>搜索</button>
</div>
</section>
)
}
}


