前端:JavaScript(二)
JavaScript中的对象分为3种:内置对象,浏览器对象,自定义对象
内置对象
Array(数组)
var a =Array(); //创建一个空数组
a = new Array(10); //创建一个数组单元为10个的数组
a = new Array(10,20,30); //创建一个指定数组单元的数组

a4=[‘a’,’b’,’c’,’d’]; //快捷定义数组
✨数组遍历的三种方式:
1)for(var i =a4.length-1; i>=0; i- -){ //数组倒着遍历
	console.log(i,”=>”,a4[i]);
}
2)for(var i in a4){
	console.log(i, “=>”,a4[i]);
}
3)a4.forEach(function(v)){ //匿名内部类
	console.log(v);
}
✨数组转换成字符串:默认以逗号分隔形式分隔
console.log(a4.toString());
✨把数组所有元素放入一个字符串,通过指定的分隔符进行分隔
console.log(a4.join(“:”));
✨将两个或多个数组合并
var aa = [1,2,3];
document.write(aa.concat(4,5));
✨将数组元素进行从小到大排序
console.log(b.sort().join(“:”));
✨将数组元素从大到小排序
console.log(b.reverse().join(“:”));
✨往将数组最后塞入一个值
aa.push(50);
✨将数组中最后一个值删除
aa.pop();
✨删除并返回数组的第一个元素
aa.shift();
✨向数组的开头添加一个或更多元素
aa.unshift();
✨删除或清空数组
1)aa = [ ]; //推荐
2)aa.length = 3; //使数组仅保留3个数
3)aa.splice(0,arr.length);
基本包装类:基本数据类型不可以调用方法,JavaScript会自动把它变成包装类
为了方便操作基本数据类型,JavaScript还提供了三个特殊的引用类型:String/Number/Boolean
✨字符串会自动变成一个对象去调用方法
var s1 = ‘zhangsan’; //类似于 var s1 = new String(“zhangsan”)
console.log(s1.substring(2,5));
//截取字符串中第2到底五个字符
✨Fixed( ) 把数字转换为字符串,保留小数点后指定位数的结果
var num =20.5678;
console.log(num.toFixed(2)); //保留小数点后2位
✨Boolean 布尔值包装类对象

JavaScript 内置对象—Date 日期
<script>
//从1970年1月1日零时零分0秒至今的毫秒数
document.write(“时间戳:”+dd.valueOf( ));

//展示时间信息
function formatDate(dd){
if(!dd instanceof Date){
	return;
    }
//获取年月日,时分秒
    var y = dd.getFullYear(),
	m = dd.getMonth()+1,
	d = dd.getDate(),
	hh = dd.getHours(),
	mm = dd.getMinutes(),
	ss = dd.getSeconds();

	//判断单位数字前补零操作
	hh = hh<10 ? ‘0’+hh : hh;
	mm = mm<10 ? ’0’+mm : mm;
	ss = ss<10 ? ‘0’+ss : ss;

	return y+”-”+m+”-”+d+” ”+hh+”:”+mm+”:”+ss;
}

var dd = new Date( );
document.write(formatDate(dd));
</script>
JavaScript内置对象-String字符串
✨获取第n个字符
var s1 = “ZhangSanFeng”;
document.write(s1[5]+”
”);
✨获取从第n个字符开始后面的len个字符
document.write(s1.substr(5,3)+”
”);
✨获取从第n个字符开始到第n个字符结束中间的几个字符
document.write(s1.substring(5,8)+”
”);
✨获取所有字母字符的小写和大写形式
document.write(“小写:”+s1.toLowerCase()+”
”);
document.write(“大写:”+s1.toUpperCase()+”
”);
✨查找字符串中字符出现的位置
document.write(s1.indexOf(“an”)+”
”);//从前往后查
document.write(s1.lastIndexOf(“an”)+”
”);//从后往前查
✨替换字符串,或者一个逗号
document.write(s1.replace(“SanFeng”,”WuJi”)+”
”);
✨替换所有符号
document.write(“10,20,30,40,50”.replace(/,/g,”:”)+”
”);
✨字符串拆分成数组形式
var str = “10,20,30,40,50”
console.log(str.split(“:”));//竖排下标和值对应的格式
✨去除字符串前后一个多余的字符
var s2 = “+zhangsan*”;
console.log( s2.trim() ); //能够去除前后多余的一个字符
内置对象——Math对象
console.log(Math.abs(-20)); //取绝对值
console.log(Math.ceil(10.00001));//将.0001进一取整
console.log(Math.floor(10.999));//舍去.999取整
console.log(Math.found(10.5));//四舍五入取整
console.log(Math.max(10,20));//两个数取最大
console.log(Math.min(10,20));//两数取最小
console.log(Math.random());//取0-1的随机数
console.log(Math.ceil(Math.random()*10000)%10+1);//取1-10的随机数
JavaScript 单机事件与元素标签操作
所有在body内可见的html标签(元素)均可以被添加事件:
✨格式:
点击我
这里button被称之为 事件源,onclick 称为事件,事件的内容称为事件处理程序,可以是很多很多条的代码,可以都写进一个函数里,将JS函数放在
 <h1 id="hid">欢迎学习JavaScript</h1>
    <button onclick="fun()">点击我</button>
    <ul id = "uid">
        <li>AAAA</li>
        <li>BBBB</li>
        <li>CCCC</li>
        <li>DDDD</li>
    </ul>
    <ol>
        <li>111111</li>
        <li>222222</li>
    </ol>

</body>
<script>
function fun(){
    //获取id属性值为hid的元素标签
    var hid = document.getElementById("hid");
    //输出元素之间的文本内容
    console.log(hid.innerHTML);
    //修改标签之间的内容
    hid.innerHTML = "JavaScript";
    //改变HTML元素样式,注意background-color中的横线要去掉,Color大写
    hid.style.backgroundColor = "#ddd";
}
//获取当前网页中的所有li元素标签,注意后面的方法Elements有 s
var mlist = document.getElementById("uid").getElementsByTagName("li");
//遍历输出
for(var i in mlist){
    console.log(mlist[i].innerHTML);//遍历过程中i是第几个li的数字
    mlist[i].style.color="red";
}
</script>
JavaScript中的Timing定时器
✨在指定的毫秒数后执行函数
setTimeout(function,milliseconds);
✨在指定的毫秒数后重复执行函数
setInterval(function,milliseconds);
代码示例:
<script>
//定义3秒后执行参数中的函数
setTimeout(function(){
	console.log(“Hello JS!”);
},3000);
</script>
✨计数器案例:
<body>
    <h2 id="hid">计数器:0</h2>
</body>
<script>
    m = 0;
    setInterval(function(){
        m++;
        document.getElementById("hid").innerHTML = "计数器:"+m;
    },1000)
</script>
✨清除定时:clearInterval();
<body>
    <h2 id="hid">计数器:0</h2>
    <button onclick="doStop()">停止</button>
</body>
<script>
    m = 0;
    var mytime = setInterval(function(){
        m++;
        document.getElementById("hid").innerHTML = "计数器:"+m;
    },1000)

    function doStop(){
        clearInterval(mytime);
    }
</script>
✨如何用一次定时实现循环效果
<script>
var m =0; mytime = null;
function doRun(){
	m++;
	document.getElementById(“hid”).innerHTML=“计数器:”+m;
	mytime = setTimeout(doRun,1000);
}
doRun();
function doStop(){
	clearTimeout(mytime);
}
</script>
实现简单计算器实例
<body>
    <form action="" name="myform" method="get">
        数值1:<input type="text" name="num1" size="10"/><br/><br/>
        数值2:<input type="text" name="num2" size="10"/><br/><br/>
        结果:<input tyoe="text" name="res" readonly style="border:0px;"/>
        <input type="button" onclick="doFun(1)" value="加"/>
        <input type="button" onclick="doFun(2)" value="减"/>
        <input type="button" onclick="doFun(3)" value="乘"/>
        <input type="button" onclick="doFun(4)" value="除"/>
    </form>
</body>

```javascript
<script>
    //处理函数
    function doFun(c){
        var m1 = parseInt(document.myform.num1.value);
        var m2 = parseInt(document.myform.num2.value);

        switch(c){
            case 1:var res = m1+"+"+m2+"="+(m1+m2);break;
            case 2:var res = m1+"-"+m2+"="+(m1-m2);break;
            case 3:var res = m1+"*"+m2+"="+(m1*m2);break;
            case 4:var res = m1+"/"+m2+"="+(m1/m2);break;
        }
        //将结果放置到第三个输入框中
        document.myform.res.value = res;
    }
</script>
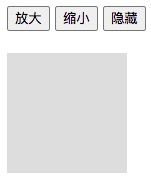
JS简单操作元素标签实例
<body>
    <button onclick="dofun(1)">放大</button>
    <button onclick="dofun(2)">缩小</button>
    <button onclick="dofun(3)">隐藏</button>
    <br/><br/>
    <div style = "width:200px;height:200px;background-color:#ddd;"id="did"></div>
</body>
<script>
    var width = 200,height = 200;
    var did = document.getElementById("did");

    function dofun(m){
        switch(m){
            case 1:
                width += 10;
                height +=10;
                did.style.width = width+"px";
                did.style.height= height+"px";
                break;
            case 2:
                width -=10;
                height -=10;
                did.style.width = width+"px";
                did.style.height = height+"px";
                break;
            case 3:
                did.style.display = "none";
                break;
        }
    }
</script>
事件的绑定方式:
Event事件由:事件源+事件+事件处理程序 三个部分构成
事件的绑定方式有:主动绑定和被动绑定
1)主动绑定:
<body>
    <button onclick="fun()">按钮1</button>
</body>
<script>
    function fun(){
        document.write("按钮1被点击了");
    }
</script>
被动绑定:
<body>
    <button id="bid">按钮2</button>
</body>
<script>
    document.getElementById("bid").onclick=function(){
        console.log("按钮2被点击了")
    }
</script>
获取事件源对象
1)主动绑定
<body>
    <button onclick="fun(this)">按钮1</button>
</body>
<script>
    function fun(ob){
        document.write(ob);
        console.log(ob);
	   ob.style.color = “green”;
}
</script>
2)被动绑定
<body>
    <button id="bid">按钮2</button>
</body>
<script>
    document.getElementById("bid").onclick=function(){
        console.log(“this”);
	   this.style.color=“red”;
    }
  </script>
批量绑定事件:
1.ondblclick双击事件
<script>
//获取上面所有li元素节点
var mlist = document.getElementsByTagName(“li”);
//遍历绑定事件
for(var i=0;i<mlist.length;i++){
    mlist[i].ondblclick = function(){
	//设置背景颜色
    this.style.backgroundColor = “#f0c”;
	}
}
</script>
2.JS处理之contextmenu右击事件
鼠标单击右键展示内容
<script>
//获取上面所有li元素节点后
//获取兼容的事件对象
document.oncontextmenu = function(ent){
var event = ent || window.event;
//获取鼠标在网页中的点击位置
var x = event.clientX;
var y = event.clientY;
console.log(x,y);

var uid = document.getElementById(“uid”);
uid.style.top = y+”px”;
uid.style.left = x+”px”;
uid.style.display = “block”;
return false;
}
</script>
3.JS处理事件之mouse鼠标移入移出事件和轮播效果图
<body>
    <h1>JS鼠标移动和轮播图</h1>
    <div id="did" onmouseover = "doStop()" onmouseout = "doStart()">
    <img src="./11.jpg" width="384"/>
    <img src="./22.jpg" width="384"/>
    <img src="./33.jpg" width="384"/>
    <img src="./44.jpg" width="384"/>
</div>
</body>
<script>
    var m =1;
    var mytime = null;
    //定义一个循环展示,每次只展示一张图片
    function show(x){
        var mlist = document.getElementById("did").getElementByTagName("img");
        for(var i =0;i<mlist.length;i++){
            if(x==i+1){
                mlist[i].style.display="block";
            }else{
                mlist[i].style.display="none";
            }
        }
    }
    //开启定时轮播图片
    function doStart(){
        if(mytime==null){
            mytime = setInterval(function(){
                m++;
                show(m);
                if(m>=4){
                    m=0;
                }
            },2000);
        }
    }
    //停止轮播图片
    function doStop(){
        if(mytime !=null){
            clearInterval(mytime);
            mytime = null;
        }
    }
</script>
4.JS事件管理图片切换展示
<body>
    <h1>JavaScript语言实例--onmouseover鼠标移入事件</h1>
    <div id="did">
        <img id="mid" src="11.jpg" width="384"/>
    </div>
    <div id="list">
        <img src="11.jpg"/>
        <img src="22.jpg"/>
        <img src="33.jpg"/>
        <img src="44.jpg"/>
    </div>
</body>
<script>
    //获取所有小图列表
    var mlist=document.getElementById("list").getElementsByTagName("img");
    //遍历这些图片
    for(var i =0;i<mlist.length;i++){
        mlist[i].onmouseover = function(){
            document.getElementById("mid").src=this.src;
        }
    }
</script>
5.JS事件管理之放大镜效果
✨this.offsetTop:获取当前对象距离上面是多大的尺寸
<body>
    <h1>JavaScript语言实例--图片的放大镜效果</h1>
    <br/><br/><br/>
    <img id="mid" src="./33.jpg" width="384" height="240"/>
    <div id="did">
        <img src="./33.jpg"/>
    </div>
</body>
<script>
    //获取被放大图片和放大镜图片对象
    var mid = document.getElementById("mid");
    var did = document.getElementById("did");
    //为图片添加鼠标移入和移除事件
    mid.onmouseover = function(){
        //对放大镜进行定位
        did.style.top = this.offsetTop+"px";
        did.style.left = this.offsetLeft+this.offsetWidth+10+"px";
        did.style.display = "block";
    }
    mid.onmouseout = function(){
        did.style.display = "none";
    }
    //添加鼠标移动事件
    mid.onmousemove = function(ent){
        //获取兼容的鼠标事件对象
        var event = ent || window.event;
        //获取鼠标在图片上的位置
        var x = event.clientX - this.offsetLeft;
        var y = event.clientY -this.offsetTop;
        //定位放大镜位置
        did.scrollTop = y*5-150;
        did.scrollLeft = x*5-150;
    }
</script>
6.JS事件之拖动效果
鼠标的按下和抬起事件:
按下:onmousedown();
抬起:onmouseup();
<script>
   //获取div层对象
   var did = document.getElementById("did");
   //绑定鼠标按下事件
   did.onmousedown = function(ent){
        //获取兼容的事件对象
        var event = ent || window.event;
        //获取鼠标在div层上的位置
        var x = event.clientX-this.offsetLeft;
        var y = event.clientY-this.offsetTop;

        this.style.backgroundColor = "blue";
        //绑定鼠标移动事件
        document.onmousemove = function(e){
            var myevent = e || window.event;
            //定位:求拖动后图像的左上角坐标位置的
            did.style.top = myevent.clientY-y+"px";
            did.style.left = myevent.clientX-x+"px";
        }
   }
   //绑定鼠标松开事件
   did.onmouseup = function(){
        this.style.backgroundColor = "#ddd";
        //取消移动事件
        document.onmousemove = null;
   }
</script>
7.JS事件处理之keydown键盘事件
用法格式:
window.document.onkeydown = function(ent){
//获取兼容的事件对象
var event = ent || window.event;
//输出键盘值,再通过键盘值做判断
console.log(event.keyCode);
}
8.onload事件:
//当页面加载完成之后才自动执行的程序(可以将
