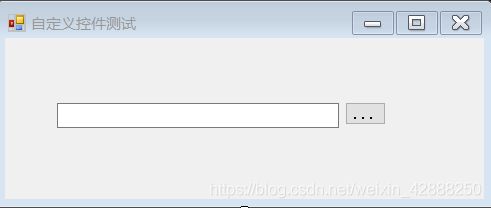
- 自动化脚本在Xshell中的应用
这多冒昧啊
运维githubgit运维自动化自动化脚本脚本
Xshell是一款功能强大的终端模拟软件,主要用于远程连接和管理服务器。它支持多种协议,包括SSH、Telnet、SFTP等,使用户能够通过命令行界面对远程服务器进行操作。Xshell提供了丰富的功能和特点,使其成为系统管理员、开发人员和网络工程师的得力工具。目录一、概述二、自动化脚本在Xshell中的应用案例案例一:自动化系统更新与维护案例二:自动化备份与恢复案例三:自动化网络安全检查三、总结一
- Eureka、Zookeeper、Nacos 三国杀:谁才是微服务“全家桶”的终极答案?
码农技术栈
eurekazookeeper微服务springcloudspringboot后端
引言:微服务世界的“三大护法”如果你在微服务领域摸爬滚打过,一定听过这三个名字:Eureka、Zookeeper、Nacos。它们看似都解决了“服务发现”问题,但背后的定位天差地别——Eureka是Netflix的“退休老干部”(已停更),主打高可用;Zookeeper是Apache的“强迫症管家”,专注强一致性;Nacos是阿里的“全能新秀”,号称“服务发现+配置管理”二合一。到底怎么选?我们通
- Cuppa CMS任意文件读取漏洞(CVE-2022-25401)
风中追风-fzzf
#文件读取安全web安全
一、漏洞概述CuppaCMSv1.0中文件管理器的复制功能允许将任何文件复制到当前目录,从而授予攻击者对任意文件得读取权限,/templates/default/html/windows/right.php文件存在任意文件读取漏洞。二、影响范围v1.0三、访问页面四、漏洞复现1、访问接口POST接口/templates/default/html/windows/right.phpPOST/temp
- 根据Excel生成建表语句sql——源码设计说明
忙碌的菠萝
java环境搭建sqljava数据库
根据Excel生成建表语句sql设计的人跟开发的人总不是同一个,这就导致了设计是设计的思路,开发是开发的思路,表也是一样,开发给加了字段不同步给设计人员,设计加了字段开发可能这个环境加了,另一个没加。为了避免比对和扯皮,以设计为准!序号内容连接地址1工具使用说明https://blog.csdn.net/qq_21271511/article/details/1219010642工具下载地址htt
- 网络安全工具 AWVS 与 Nmap:原理、使用及代码示例
阿贾克斯的黎明
网络安全安全web安全网络
目录网络安全工具AWVS与Nmap:原理、使用及代码示例AWVS:Web漏洞扫描的利器1.工具概述2.工作原理3.使用方法4.代码示例(Python调用AWVSAPI进行扫描)Nmap:网络探测与端口扫描的神器1.工具概述2.工作原理3.使用方法4.代码示例(Python调用Nmap进行扫描)总结在网络安全领域,AWVS(AcunetixWebVulnerabilityScanner)和Nmap是
- NX二次开发-UFUN重新分配内存UF_reallocate_memory
阿飞2018
UG二次开发(C++)c++
版本NX9+VS2012例子说明关于这个分配内存UF_allocate_memory和重新分配内存UF_reallocate_memory,我之前是在唐工的视频中学过。但是我做了这两年开发,虽然没开发过多少东西。但是还真的从来都没用过分配内存和重新分配内存。都忘记有这个东西的存在了快。这东西也就在C语言开发中,才会有,要是用C#开发的话,都不会有指针这些东西。也不用那么麻烦。我试过想自己单独写一个
- Spring Cloud Alibaba Spring Cloud Spring Boot 版本对应关系
马丁半只瞄
javaspringspringbootspringcloud
版本不对应可能有以下报错:Failedtobindpropertiesundermybatis-plus.configuration.result-maps[0]NoClassDefFoundError:reactor/netty/http/server/WebsocketServerSpec$Builderreactor.netty.resources.ConnectionProvider.el
- 阿里巴巴DIN模型原理与Python实现
eso1983
python开发语言算法推荐算法
阿里巴巴的DeepInterestNetwork(DIN)是一种用于点击率预测(CTR)的深度学习模型,特别针对电商场景中用户兴趣多样化和动态变化的特性设计。其核心思想是通过注意力机制动态捕捉用户历史行为中与当前候选商品相关的兴趣。1.DIN模型原理1.核心问题传统推荐模型(如Embedding+MLP)将用户历史行为视为固定长度的向量,忽略了用户兴趣的多样性。例如,用户历史行为中可能包含多个互不
- Linux驱动开发: USB驱动开发
DS小龙哥
Linux系统编程与驱动开发linuxUSB驱动嵌入式
一、USB简介1.1什么是USB?USB是连接计算机系统与外部设备的一种串口总线标准,也是一种输入输出接口的技术规范,被广泛地应用于个人电脑和移动设备等信息通讯产品,USB就是简写,中文叫通用串行总线。最早出现在1995年,伴随着奔腾机发展而来。自微软在Windows98中加入对USB接口的支持后,USB接口才推广开来,USB设备也日渐增多,如数码相机、摄像头、扫描仪、游戏杆、打印机、键盘、鼠标等
- 关闭linux系统端口占用,关闭linux系统端口的两种方法
爱吃面的喵
关闭linux系统端口占用
1、通过杀掉进程的方法来关闭端口每个端口都有一个守护进程,kill掉这个守护进程就可以了每个端口都是一个进程占用着,第一步、用下面命令netstat-anp|grep端口找出占用这个端口的进程,第二步、用下面命令kill-9PID杀掉就行了2、通过开启关闭服务的方法来开启/关闭端口因为每个端口都有对应的服务,因此要关闭端口只要关闭相应的服务就可以了。linux中开机自动启动的服务一般都存放在两个地
- Linux 查看端口占用命令
酒酿小圆子~
linux运维服务器
文章目录1、lsof-i:端口号2、netstat命令2.1netstat-tunlp命令2.2netstat-anp命令1、lsof-i:端口号用于查看某一端口的占用情况,比如查看5000端口使用情况:sudolsof-i:5000注意:这里最好使用sudo开启管理员权限,未开启管理员权限时,可能会检测不到相关进程。(并非所有进程都能被检测到,所有非本用户的进程信息将不会显示,如果想看到所有信息
- 最通用的跨平台引擎:ShiVa 3D引擎
pizi0475
图形图像其它文章图形引擎游戏引擎引擎跨平台脚本服务器sslsoap
ShiVa3D引擎是最通用的跨平台引擎,可以在Web浏览器运行并且也支持Windows,Mac,Linux,Wii,iPhone,iPad,Android,WebOS和AirplaySDK。该引擎支持SSL–securized插件扩展,很像PhysX引擎,FMOD声音库,ARToolkit和ScaleformHUD引擎。ClassicGeometry经典的图形处理支持多边形网,其中包括:-静态网格
- Linux系统如何排查端口占用
程序猿000001号
linux运维服务器
如何在Linux系统中排查端口占用在Linux系统中,当您遇到网络服务无法启动或响应异常的情况时,可能是因为某个特定的端口已经被其他进程占用。这时,您需要进行端口占用情况的排查来解决问题。本文将介绍几种常用的命令行工具和方法,帮助您快速定位并解决端口占用的问题。1.使用netstat命令netstat是一个网络统计工具,它可以显示网络连接、路由表、接口统计等信息。要检查端口占用情况,可以使用以下命
- Linux查看端口占用情况的几种方式
liu_caihong
linux服务器网络
Linux查看端口占用情况的几种方式概述测试环境为Centos7.9,本文简单给出了几种检测端口的例子。一、查看本机端口占用1、netstat#安装netstatyum-yinstallnet-tools#检测端口占用netstat-npl|grep"端口"[外链图片转存失败,源站可能有防盗链机制,建议将图片保存下来直接上传(img-FFUW0j6I-1655191692938)(C:%5CUse
- 白帽黑客系列教程之Windows驱动开发(64位环境)入门教程(七)
黑客影儿
技术分享原创文章系统安全驱动开发c语言windows系统安全程序人生学习方法visualstudio
为什么要写这篇文章呢?作为一名白帽黑客,如果想要学习ROOTKIT攻防技术,就必须要有能力进行驱动开发!本文章仅提供学习,切勿将其用于不法手段!在Windows操作系统的64位环境中,进行ROOTKIT攻防,就必须要学会Windows驱动开发!Windows驱动开发,是掌握Rootkit技术的硬性基础之一!不会Windows环境下的驱动开发,你就难以透彻理解ROOTKIT攻防技术的真相!接上一篇文
- b s架构 网络安全 网络安全架构分析
黑客Ash
web安全架构网络
目录文章目录目录网络安全逻辑架构微分段(Micro-segmentation)防火墙即服务(FirewallasaService,FWaaS)安全网络网关(Securewebgateway)净化域名系统(SanitizedDomainNameSystem,S-DNS)网络安全策略管理(NetworkSecurityPolicyManagement,NSPM)网络防火墙(Networkfirewal
- C#:强大编程语言的多面魅力
热爱技术。
C#c#开发语言
C#:强大编程语言的多面魅力一、C#语言的特点与优势(一)简洁的语法与精心设计C#在继承C和C++的强大功能的同时,去掉了一些复杂特性,如宏和多重继承,使得语言更加简洁易懂。C#是一种面向对象的语言,使用类、对象和继承来组织代码,使得代码结构清晰,易于维护。例如,属性初始化器可以为属性设置默认值,字符串插入可以直接将变量插入到字符串中,无需使用字符串连接符,空合并运算符可以在变量为null时提供默
- 指定的服务已标记为删除
勤不了一点
windowswindows
同时也适合xampp下的apache、mysql等各个服务转发:https://www.iteye.com/blog/inexus-1608761想重新在windows里部署svn服务,所以第一步删除svn服务:管理员权限下运行cmd:“scdeletesvnserver”之后再部署svn的服务:“sccreatesvnserverbinpath="C:\ProgramFiles\Tortoise
- nginx 安装(下载解压就行,免安装)
当归1024
nginxnginx运维
nginx是一个高性能的HTTP和反向代理web服务器,同时也提供了IMAP/POP3/SMTP服务。nginx由C语言编写,内存占用少,性能稳定,并发能力强,功能丰富;可以在大多数UnixLinuxOS上编译运行,并有Windows移植版。1、nginx下载地址:nginx:download2、windows安装及启动nginx是绿色免安装的,解压后可以直接启动双击nginx.exe即可启动服务
- 大型园区网华为ENSP毕业设计
滑杏舒
大型园区网华为ENSP毕业设计【下载地址】大型园区网华为ENSP毕业设计本项目聚焦于构建一个高度可靠、高效且可扩展的大型园区网络环境,采用华为设备仿真平台ENSP(EnterpriseNetworkSimulationPlatform)。通过实施标准的双星型拓扑结构,本设计旨在展示如何在复杂的网络环境中实现业务连续性、高可用性和负载均衡的关键原则。本README将详细介绍MSTP(多生成树协议)、
- 构建高效可靠的大型园区网络:华为ENSP毕业设计项目推荐
裴涓斐Kathy
构建高效可靠的大型园区网络:华为ENSP毕业设计项目推荐【下载地址】大型园区网华为ENSP毕业设计本项目聚焦于构建一个高度可靠、高效且可扩展的大型园区网络环境,采用华为设备仿真平台ENSP(EnterpriseNetworkSimulationPlatform)。通过实施标准的双星型拓扑结构,本设计旨在展示如何在复杂的网络环境中实现业务连续性、高可用性和负载均衡的关键原则。本README将详细介绍
- Java与C#语法对比及转换
carcarrot
Javajavac#
转载自:https://blog.csdn.net/eray/article/details/1553731Java(J2SE5.0)andC#ComparisonThisisaquickreferenceguidetohighlightsomekeysyntacticaldifferencesbetweenJavaandC#.Thisisbynomeansacompleteoverviewofe
- 密钥派生算法介绍 及 PBKDF2(过时)<Bcrypt(开始淘汰)<Scrypt< Argon2(含Argon2d、Argon2i、Argon2id)简介
carcarrot
相关知识算法与结构密钥派生算法密钥派生函数BcryptScryptArgon2
密钥派生算法介绍https://blog.csdn.net/xcxhzjl/article/details/127297263一、定义密钥派生函数(KeyDerivationFunction)就是从一个密码产生出一个或多个密钥,具体就是从一个masterkey,password或者passphrase派生出一个或多个密钥,派生的过程使用PRF(PseudoRandomFunction)。是一种实现
- customErrors及httpErrors配置
carcarrot
.Net相关知识.netasp.net
先看正确配置例子:customErrors和httpErrors的区别:Https//blog.csdn.net/a497785609/article/details/78949729
- OPC UA 资料收藏
小毛驴850
软件工程
1、教程OPCUAClient:UaExpert教程-无公害水果-博客园2、代码OpcUaHelper:一个通用的opcua客户端类库,基于.net4.6.1创建,基于官方opcua基金会跨平台库创建,封装了节点读写,批量节点读写,引用读取,特性读取,历史数据读取,方法调用,节点订阅,批量订阅等操作。还提供了一个节点浏览器工具
- 解决qt.network.ssl: QSslSocket::connectToHostEncrypted: TLS initialization failed
码农葫芦侠
Qtqtsslc++
解决Qt/C++程序中的TLS初始化失败错误:全面排查指南当你在程序中遇到qt.network.ssl:QSslSocket::connectToHostEncrypted:TLSinitializationfailed错误时,可能意味着SSL/TLS协议栈未能正确初始化。本文将深入分析常见原因,并提供可直接操作的解决方案。目录快速诊断:确认SSL支持状态❓OpenSSL库缺失或路径错误❌Qt与O
- opencv 自适应阈值
虚假程序设计
opencv人工智能计算机视觉
需要安装扩展库opencv-contrib-pythonCV_class.pyimportcv2importnumpyasnp#importserialimportos,sysfromdatetimeimportdatetimeimport_threadimportthreadingimporttimeimportwin32ui#只有windows能用.#fromCV_classimport*de
- Wireshark详解
靖节先生
wireshark测试工具网络
Wireshark使用详解1.Wireshark简介2.下载与安装1.下载地址2.安装步骤(以Windows为例)3.界面与核心功能1.主界面布局2.常用菜单功能4.过滤功能详解1.过滤类型2.常用过滤命令5.过滤命令与网络结构对应6.使用注意事项7.案例分析TCP三次握手1.实验目标2.操作步骤3.预期结果8.扩展学习1.Wireshark简介Wireshark是一款开源的网络协议分析工具,支持
- 【C++】探索Vector:灵活的数据存储解决方案
星霜旅人
C++c++
什么都无法舍弃的人,什么也改变不了。前言这是我自己学习C++的第六篇博客总结。后期我会继续把C++学习笔记开源至博客上。上一期笔记是关于C++的string类知识,没看的同学可以过去看看:【C++】代码森林中的STL宝藏工具箱---string类_c++工具箱-CSDN博客https://blog.csdn.net/hsy1603914691/article/details/143967928?s
- OpenCV开源机器视觉软件
视觉人机器视觉
杂说opencv开源人工智能
OpenCV(OpenSourceComputerVisionLibrary)是一个开源的计算机视觉和机器学习软件库,广泛应用于实时图像处理、视频分析、物体检测、人脸识别等领域。它由英特尔实验室于1999年发起,现已成为计算机视觉领域最流行的工具之一,支持多种编程语言(如C++、Python、Java)和操作系统(Windows、Linux、macOS、Android、iOS)。核心功能图像处理基
- Spring的注解积累
yijiesuifeng
spring注解
用注解来向Spring容器注册Bean。
需要在applicationContext.xml中注册:
<context:component-scan base-package=”pagkage1[,pagkage2,…,pagkageN]”/>。
如:在base-package指明一个包
<context:component-sc
- 传感器
百合不是茶
android传感器
android传感器的作用主要就是来获取数据,根据得到的数据来触发某种事件
下面就以重力传感器为例;
1,在onCreate中获得传感器服务
private SensorManager sm;// 获得系统的服务
private Sensor sensor;// 创建传感器实例
@Override
protected void
- [光磁与探测]金吕玉衣的意义
comsci
这是一个古代人的秘密:现在告诉大家
信不信由你们:
穿上金律玉衣的人,如果处于灵魂出窍的状态,可以飞到宇宙中去看星星
这就是为什么古代
- 精简的反序打印某个数
沐刃青蛟
打印
以前看到一些让求反序打印某个数的程序。
比如:输入123,输出321。
记得以前是告诉你是几位数的,当时就抓耳挠腮,完全没有思路。
似乎最后是用到%和/方法解决的。
而今突然想到一个简短的方法,就可以实现任意位数的反序打印(但是如果是首位数或者尾位数为0时就没有打印出来了)
代码如下:
long num, num1=0;
- PHP:6种方法获取文件的扩展名
IT独行者
PHP扩展名
PHP:6种方法获取文件的扩展名
1、字符串查找和截取的方法
1
$extension
=
substr
(
strrchr
(
$file
,
'.'
), 1);
2、字符串查找和截取的方法二
1
$extension
=
substr
- 面试111
文强chu
面试
1事务隔离级别有那些 ,事务特性是什么(问到一次)
2 spring aop 如何管理事务的,如何实现的。动态代理如何实现,jdk怎么实现动态代理的,ioc是怎么实现的,spring是单例还是多例,有那些初始化bean的方式,各有什么区别(经常问)
3 struts默认提供了那些拦截器 (一次)
4 过滤器和拦截器的区别 (频率也挺高)
5 final,finally final
- XML的四种解析方式
小桔子
domjdomdom4jsax
在平时工作中,难免会遇到把 XML 作为数据存储格式。面对目前种类繁多的解决方案,哪个最适合我们呢?在这篇文章中,我对这四种主流方案做一个不完全评测,仅仅针对遍历 XML 这块来测试,因为遍历 XML 是工作中使用最多的(至少我认为)。 预 备 测试环境: AMD 毒龙1.4G OC 1.5G、256M DDR333、Windows2000 Server
- wordpress中常见的操作
aichenglong
中文注册wordpress移除菜单
1 wordpress中使用中文名注册解决办法
1)使用插件
2)修改wp源代码
进入到wp-include/formatting.php文件中找到
function sanitize_user( $username, $strict = false
- 小飞飞学管理-1
alafqq
管理
项目管理的下午题,其实就在提出问题(挑刺),分析问题,解决问题。
今天我随意看下10年上半年的第一题。主要就是项目经理的提拨和培养。
结合我自己经历写下心得
对于公司选拔和培养项目经理的制度有什么毛病呢?
1,公司考察,选拔项目经理,只关注技术能力,而很少或没有关注管理方面的经验,能力。
2,公司对项目经理缺乏必要的项目管理知识和技能方面的培训。
3,公司对项目经理的工作缺乏进行指
- IO输入输出部分探讨
百合不是茶
IO
//文件处理 在处理文件输入输出时要引入java.IO这个包;
/*
1,运用File类对文件目录和属性进行操作
2,理解流,理解输入输出流的概念
3,使用字节/符流对文件进行读/写操作
4,了解标准的I/O
5,了解对象序列化
*/
//1,运用File类对文件目录和属性进行操作
//在工程中线创建一个text.txt
- getElementById的用法
bijian1013
element
getElementById是通过Id来设置/返回HTML标签的属性及调用其事件与方法。用这个方法基本上可以控制页面所有标签,条件很简单,就是给每个标签分配一个ID号。
返回具有指定ID属性值的第一个对象的一个引用。
语法:
&n
- 励志经典语录
bijian1013
励志人生
经典语录1:
哈佛有一个著名的理论:人的差别在于业余时间,而一个人的命运决定于晚上8点到10点之间。每晚抽出2个小时的时间用来阅读、进修、思考或参加有意的演讲、讨论,你会发现,你的人生正在发生改变,坚持数年之后,成功会向你招手。不要每天抱着QQ/MSN/游戏/电影/肥皂剧……奋斗到12点都舍不得休息,看就看一些励志的影视或者文章,不要当作消遣;学会思考人生,学会感悟人生
- [MongoDB学习笔记三]MongoDB分片
bit1129
mongodb
MongoDB的副本集(Replica Set)一方面解决了数据的备份和数据的可靠性问题,另一方面也提升了数据的读写性能。MongoDB分片(Sharding)则解决了数据的扩容问题,MongoDB作为云计算时代的分布式数据库,大容量数据存储,高效并发的数据存取,自动容错等是MongoDB的关键指标。
本篇介绍MongoDB的切片(Sharding)
1.何时需要分片
&nbs
- 【Spark八十三】BlockManager在Spark中的使用场景
bit1129
manager
1. Broadcast变量的存储,在HttpBroadcast类中可以知道
2. RDD通过CacheManager存储RDD中的数据,CacheManager也是通过BlockManager进行存储的
3. ShuffleMapTask得到的结果数据,是通过FileShuffleBlockManager进行管理的,而FileShuffleBlockManager最终也是使用BlockMan
- yum方式部署zabbix
ronin47
yum方式部署zabbix
安装网络yum库#rpm -ivh http://repo.zabbix.com/zabbix/2.4/rhel/6/x86_64/zabbix-release-2.4-1.el6.noarch.rpm 通过yum装mysql和zabbix调用的插件还有agent代理#yum install zabbix-server-mysql zabbix-web-mysql mysql-
- Hibernate4和MySQL5.5自动创建表失败问题解决方法
byalias
J2EEHibernate4
今天初学Hibernate4,了解了使用Hibernate的过程。大体分为4个步骤:
①创建hibernate.cfg.xml文件
②创建持久化对象
③创建*.hbm.xml映射文件
④编写hibernate相应代码
在第四步中,进行了单元测试,测试预期结果是hibernate自动帮助在数据库中创建数据表,结果JUnit单元测试没有问题,在控制台打印了创建数据表的SQL语句,但在数据库中
- Netty源码学习-FrameDecoder
bylijinnan
javanetty
Netty 3.x的user guide里FrameDecoder的例子,有几个疑问:
1.文档说:FrameDecoder calls decode method with an internally maintained cumulative buffer whenever new data is received.
为什么每次有新数据到达时,都会调用decode方法?
2.Dec
- SQL行列转换方法
chicony
行列转换
create table tb(终端名称 varchar(10) , CEI分值 varchar(10) , 终端数量 int)
insert into tb values('三星' , '0-5' , 74)
insert into tb values('三星' , '10-15' , 83)
insert into tb values('苹果' , '0-5' , 93)
- 中文编码测试
ctrain
编码
循环打印转换编码
String[] codes = {
"iso-8859-1",
"utf-8",
"gbk",
"unicode"
};
for (int i = 0; i < codes.length; i++) {
for (int j
- hive 客户端查询报堆内存溢出解决方法
daizj
hive堆内存溢出
hive> select * from t_test where ds=20150323 limit 2;
OK
Exception in thread "main" java.lang.OutOfMemoryError: Java heap space
问题原因: hive堆内存默认为256M
这个问题的解决方法为:
修改/us
- 人有多大懒,才有多大闲 (评论『卓有成效的程序员』)
dcj3sjt126com
程序员
卓有成效的程序员给我的震撼很大,程序员作为特殊的群体,有的人可以这么懒, 懒到事情都交给机器去做 ,而有的人又可以那么勤奋,每天都孜孜不倦得做着重复单调的工作。
在看这本书之前,我属于勤奋的人,而看完这本书以后,我要努力变成懒惰的人。
不要在去庞大的开始菜单里面一项一项搜索自己的应用程序,也不要在自己的桌面上放置眼花缭乱的快捷图标
- Eclipse简单有用的配置
dcj3sjt126com
eclipse
1、显示行号 Window -- Prefences -- General -- Editors -- Text Editors -- show line numbers
2、代码提示字符 Window ->Perferences,并依次展开 Java -> Editor -> Content Assist,最下面一栏 auto-Activation
- 在tomcat上面安装solr4.8.0全过程
eksliang
Solrsolr4.0后的版本安装solr4.8.0安装
转载请出自出处:
http://eksliang.iteye.com/blog/2096478
首先solr是一个基于java的web的应用,所以安装solr之前必须先安装JDK和tomcat,我这里就先省略安装tomcat和jdk了
第一步:当然是下载去官网上下载最新的solr版本,下载地址
- Android APP通用型拒绝服务、漏洞分析报告
gg163
漏洞androidAPP分析
点评:记得曾经有段时间很多SRC平台被刷了大量APP本地拒绝服务漏洞,移动安全团队爱内测(ineice.com)发现了一个安卓客户端的通用型拒绝服务漏洞,来看看他们的详细分析吧。
0xr0ot和Xbalien交流所有可能导致应用拒绝服务的异常类型时,发现了一处通用的本地拒绝服务漏洞。该通用型本地拒绝服务可以造成大面积的app拒绝服务。
针对序列化对象而出现的拒绝服务主要
- HoverTree项目已经实现分层
hvt
编程.netWebC#ASP.ENT
HoverTree项目已经初步实现分层,源代码已经上传到 http://hovertree.codeplex.com请到SOURCE CODE查看。在本地用SQL Server 2008 数据库测试成功。数据库和表请参考:http://keleyi.com/a/bjae/ue6stb42.htmHoverTree是一个ASP.NET 开源项目,希望对你学习ASP.NET或者C#语言有帮助,如果你对
- Google Maps API v3: Remove Markers 移除标记
天梯梦
google maps api
Simply do the following:
I. Declare a global variable:
var markersArray = [];
II. Define a function:
function clearOverlays() {
for (var i = 0; i < markersArray.length; i++ )
- jQuery选择器总结
lq38366
jquery选择器
1 2 3 4 5 6 7 8 9 10 11 12 13 14 15 16 17 18 19 20 21 22 23 24 25 26 27 28 29 30 31 32 33 34 35 36 37 38 39 40
- 基础数据结构和算法六:Quick sort
sunwinner
AlgorithmQuicksort
Quick sort is probably used more widely than any other. It is popular because it is not difficult to implement, works well for a variety of different kinds of input data, and is substantially faster t
- 如何让Flash不遮挡HTML div元素的技巧_HTML/Xhtml_网页制作
刘星宇
htmlWeb
今天在写一个flash广告代码的时候,因为flash自带的链接,容易被当成弹出广告,所以做了一个div层放到flash上面,这样链接都是a触发的不会被拦截,但发现flash一直处于div层上面,原来flash需要加个参数才可以。
让flash置于DIV层之下的方法,让flash不挡住飘浮层或下拉菜单,让Flash不档住浮动对象或层的关键参数:wmode=opaque。
方法如下:
- Mybatis实用Mapper SQL汇总示例
wdmcygah
sqlmysqlmybatis实用
Mybatis作为一个非常好用的持久层框架,相关资料真的是少得可怜,所幸的是官方文档还算详细。本博文主要列举一些个人感觉比较常用的场景及相应的Mapper SQL写法,希望能够对大家有所帮助。
不少持久层框架对动态SQL的支持不足,在SQL需要动态拼接时非常苦恼,而Mybatis很好地解决了这个问题,算是框架的一大亮点。对于常见的场景,例如:批量插入/更新/删除,模糊查询,多条件查询,联表查询,