第三章_Linux环境基础开发工具使用
1.Linux 软件包管理器 yum
简单尝试在root用户下安装一个小程序
[root@VM-12-12-centos ~]# yum install sl      //按回车


Is this ok [y/d/N]: y                         //按回车
输入sl命令,屏幕上会出现一辆小火车

2.yum list 命令
通过 yum list 命令可以罗列出当前一共有哪些软件包
-bash-4.2$ yum list
-bash-4.2$ yum list | grep lrzsz
lrzsz.x86_64                             0.12.20-36.el7                @os
发现确实有这个安装包,接下来安装这个安装包(注意要在root用户下安装)。
[root@VM-12-12-centos ~]# yum install lrzsz
再安装一个软件源
yum install https://dl.fedoraproject.org/pub/epel/epel-release-latest-7.noarch.rpm
//回车


Is this ok [y/d/N]: y
//回车
Installed:
  epel-release.noarch 0:7-14

Complete!
3. 安装vim
输入
[root@VM-12-12-centos ~]# yum install -y vim
安装好后,输入vim命令查看安装的版本
[root@VM-12-12-centos ~]# vim

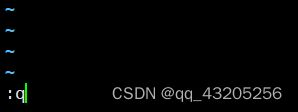
按shift+:(冒号),再按q+enter键退出。
4.使用vim进行首次编辑
1.创建test01.c文件,2.使用vim编辑test01.c文件
-bash-4.2$ touch test01.c
-bash-4.2$ ls
test01.c
-bash-4.2$ vim test01.c
2.进入文件后,是默认的“命令模式”,按“i”进入“插入模式”便可以进行编辑

3.编辑结束后,按“esc”键回到“命令模式”,再按“shift+:(冒号)”进入“底行模式”,输入“wq”再按回车键进行保存并退出。
4.输入 “cat test01.c”查看编辑的内容
-bash-4.2$ cat test01.c
#include

int main()
{
printf("hello world\n");
return 0;
}
5.三种模式之间的关系

5. 命令模式下的文本操作
1. yy+p为复制
#include
  3
  4 int main()
  5 {
  6   printf("hello world\n");
  7   printf("hello world\n");
  8   printf("hello world\n");
  9   printf("hello world\n");
 10  return  0;
 11 }
2. yy+5p为复制5次
 #include
  3
  4 int main()
  5 {
  6   printf("hello world\n");
  7   printf("hello world\n");
  8   printf("hello world\n");
  9   printf("hello world\n");
 10   printf("hello world\n");
 11   printf("hello world\n");
 12   printf("hello world\n");
 13   printf("hello world\n");
 14   printf("hello world\n");
 15   printf("hello world\n");
 16   printf("hello world\n");
 17  return  0;
 18 }
3.(5)dd为剪切
2 #include
  3
  4 int main()
  5 {
  6   printf("hello world\n");
  7   printf("hello world\n");
  8   printf("hello world\n");
  9   printf("hello world\n");
 10  return  0;
 11 }
4. shift+g光标定位到文本末尾
#include
  3
  4 int main()
  5 {
  6   printf("hello world\n");
  7   printf("hello world\n");
  8   printf("hello world\n");
  9   printf("hello world\n");
 10  return  0;
 11 }                                  //光标停留在文本末尾
5. gg光标定位到文本开始
 #include                   //此时光标定位到文本开头
  3
  4 int main()
  5 {
  6   printf("hello world\n");
  7   printf("hello world\n");
  8   printf("hello world\n");
  9   printf("hello world\n");
 10  return  0;
 11 }
6. 3+shift+g光标定位到第三行
 1
  2 #include
  3                                  //此时光标定位到第三行
  4 int main()
  5 {
  6   printf("hello world\n");
  7   printf("hello world\n");
  8   printf("hello world\n");
  9   printf("hello world\n");
 10  return  0;
 11 }
7. shift+4(即$号)/shift+6(即^号)光标移动到行尾或行首
8.w/b以单词为单位进行左右移动
9. h/j/k/l为左右下上
10. shift+~为大小写切换
 1
    2 #include
    3
    4 int main()
    5 {
    6   PRINTF("HELLO WORLD\N");     //此行切换为大写
    7   printf("hello world\n");
    8   printf("hello world\n");
    9   printf("hello world\n");
   10  return  0;
   11 }
11.(5)+ r + x,将已有字符替换成字符x
 1
    2 #include
    3
    4 int main()
    5 {
E>  6   xxxxxf("hello world\n");         //此行前几个字母被替换成字母x
    7   printf("hello world\n");
    8   printf("hello world\n");
    9   printf("hello world\n");
   10   printf("hello world\n");
   11   printf("hello world\n");
   12   printf("hello world\n");
   13   printf("hello world\n");
   14   printf("hello world\n");
   15   printf("hello world\n");
   16   printf("hello world\n");
   17   printf("hello world\n");
   18   printf("hello world\n");
   19   printf("hello world\n");
   20  return  0;
   21 }
12. (3)+x删除3个字符
    1
    2 #include
    3
    4 int main()
    5 {
    6   printf("hello world\n");
E>  7  ntf("hello world\n");            //此行删掉3个字符
    8   printf("hello world\n");
    9   printf("hello world\n");
   10   printf("hello world\n");
   11   printf("hello world\n");
   12   printf("hello world\n");
   13   printf("hello world\n");
   14   printf("hello world\n");
   15   printf("hello world\n");
   16   printf("hello world\n");
   17  return  0;
   18 }
6.Linux编译器-gcc/g++使用
gcc是用来编译C代码的,g++是用来编译C++代码的,但g++也可以直接用来编译C代码。所以这里只展示一下g++的使用方法。
[root@VM-12-12-centos 2022_07_25]# touch test01.cpp    //创建cpp文件
[root@VM-12-12-centos 2022_07_25]# ls
test01.cpp
[root@VM-12-12-centos 2022_07_25]# vim test01.cpp      //编辑C++代码


  1 #include
  2 #include
  3 int main()
  4 {
5 std::cout<<"hello world"< 3.安装C、和C++静态库
yum install -y glibc-static           //安装C静态库
yum install -y libstdc++-static       //安装C++静态库
使用静态库编译文件
[root@VM-12-12-centos 2022_07_25]# gcc test01.c -o test01_c -static
[root@VM-12-12-centos 2022_07_25]# ll
total 852
-rwxr-xr-x 1 root root 861288 Jul 25 11:15 test01_c
-rw-r--r-- 1 root root     74 Jul 25 11:01 test01.c
-rw-r--r-- 1 root root    130 Jul 25 10:27 test01.cpp
[root@VM-12-12-centos 2022_07_25]# ./test01_c
hello world


[root@VM-12-12-centos 2022_07_25]# g++ test01.cpp -o test01_cpp -static
[root@VM-12-12-centos 2022_07_25]# ll
total 2428
-rwxr-xr-x 1 root root  861288 Jul 25 11:15 test01_c
-rw-r--r-- 1 root root      74 Jul 25 11:01 test01.c
-rwxr-xr-x 1 root root 1612672 Jul 25 11:17 test01_cpp
-rw-r--r-- 1 root root     130 Jul 25 10:27 test01.cpp
7.Linux调试器-gdb使用
使用实例:
[root@VM-12-12-centos 2022_07_25]# ll //查看文件
total 4
-rw-r--r-- 1 root root 130 Jul 25 10:27 test01.cpp
[root@VM-12-12-centos 2022_07_25]# g++ test01.cpp -g //以Debug模式编译cpp文件
[root@VM-12-12-centos 2022_07_25]# ll
total 24
-rwxr-xr-x 1 root root 20480 Jul 25 11:40 a.out
-rw-r--r-- 1 root root 130 Jul 25 10:27 test01.cpp
[root@VM-12-12-centos 2022_07_25]# gdb a.out //使用gdb进行调试
GNU gdb (GDB) Red Hat Enterprise Linux 7.6.1-120.el7
Copyright (C) 2013 Free Software Foundation, Inc.
License GPLv3+: GNU GPL version 3 or later
This is free software: you are free to change and redistribute it.
There is NO WARRANTY, to the extent permitted by law. Type "show copying"
and "show warranty" for details.
This GDB was configured as "x86_64-redhat-linux-gnu".
For bug reporting instructions, please see:
//如果代码很多,按“回车”键继续显
2 #include //示剩下的代码
3 int main()
4 {
5 std::cout<<"hello world"< 8.Linux项目自动化构建工具-make/Makefifile
#include
int main()
{
 printf("hello Makefile!\n");
 return 0;
} .PHONY:clean
clean:
rm -f hello.i hello.s hello.o hello使用实例:
[root@VM-12-12-centos 2022_07_25]# touch test01.c
[root@VM-12-12-centos 2022_07_25]# ls
test01.c
[root@VM-12-12-centos 2022_07_25]# touch makefile
[root@VM-12-12-centos 2022_07_25]# ll
total 0
-rw-r--r-- 1 root root 0 Jul 25 12:19 makefile
-rw-r--r-- 1 root root 0 Jul 25 12:19 test01.c
[root@VM-12-12-centos 2022_07_25]# vim test01.c


  1 #include
  2 int main()
  3 {
  4   printf("hello world\n");
  5   return 0;
  6 }

[root@VM-12-12-centos 2022_07_25]# vim makefile

  1 test:test01.c                                   //添加依赖关系
  2 (按一下tab键) gcc test01.c -o test               //添加依赖方法


[root@VM-12-12-centos 2022_07_25]# make             //输入make直接生成可执行文件
gcc test01.c -o test
[root@VM-12-12-centos 2022_07_25]# ll
total 20
-rw-r--r-- 1 root root   82 Jul 25 12:24 makefile
-rwxr-xr-x 1 root root 8360 Jul 25 12:26 test       //可执行文件
-rw-r--r-- 1 root root   78 Jul 25 12:26 test01.c
[root@VM-12-12-centos 2022_07_25]# ./test           //运行文件
hello world
使用make clean清除生成的文件
[root@VM-12-12-centos 2022_07_25]# ll
total 8
-rw-r--r-- 1 root root 99 Jul 25 12:45 makefile
-rw-r--r-- 1 root root 78 Jul 25 12:26 test01.c
[root@VM-12-12-centos 2022_07_25]# vim makefile


  1 test:test01.c
  2   gcc test01.c -o test
  3
  4 .PHONY:clean                                   //.PHONY为关键字,后面的clean为伪目标
  5 clean:                                         //.PHONY后面跟的伪目标一定会被执行
  6   rm -r test                                   //依赖方法


[root@VM-12-12-centos 2022_07_25]# make
gcc test01.c -o test
[root@VM-12-12-centos 2022_07_25]# ll
total 20
-rw-r--r-- 1 root root   99 Jul 25 12:46 makefile
-rwxr-xr-x 1 root root 8360 Jul 25 12:46 test      //可执行文件
-rw-r--r-- 1 root root   78 Jul 25 12:26 test01.c
[root@VM-12-12-centos 2022_07_25]# ./test
hello world
[root@VM-12-12-centos 2022_07_25]# make clean      //清除可执行文件
rm -r test
[root@VM-12-12-centos 2022_07_25]# ll
total 8
-rw-r--r-- 1 root root 99 Jul 25 12:46 makefile
-rw-r--r-- 1 root root 78 Jul 25 12:26 test01.c
9. Linux第一个小程序-进度条
9.1 \r&&\n
#include
int main()
{
 printf("hello Makefile!\n");
 sleep(3);
 return 0;
}
打印出内容后,再停顿三秒。
#include
int main()
{
 printf("hello Makefile!");
 sleep(3);
 return 0;
}
停顿三秒后再打印内容
#include
int main()
{
 printf("hello Makefile!");
 fflush(stdout);              //立刻刷新显示器
 sleep(3);
 return 0;
}
打印出内容后,再停顿三秒。
9.2 进度条代码
#include
#include
int main()
{
 int i = 0;
 char bar[102];
 memset(bar, 0 ,sizeof(bar));
 const char *lable="|/-\\";
 while(i <= 100 ){
 printf("[%-100s][%d%%][%c]\r", bar, i, lable[i%4]);
 fflush(stdout);
 bar[i++] = '#';
 usleep(10000);
 }
 printf("\n");
 return 0;
}
yum ins
输出结果
[###################################################] [100%] [|]
9.3 使用 git 命令行
在gitee注册账户后点击新建仓库


输入 git clone + 地址
[root@VM-12-12-centos ~]# git clone https://gitee.com/cshappyheaven/linux--c--c.git输入gitee的帐户和密码
看到已经添加成功

进入仓库,创建一个.c文件

输入 git add +文件名
输入 git commit -m +"日志"
[root@VM-12-12-centos linux--c--c]# git add 01.c
[root@VM-12-12-centos linux--c--c]# git commit -m "第一个程序"
上面两个步骤是上传到本地仓库,最后上传到远地仓库
输入 git push
[root@VM-12-12-centos linux--c--c]# git push输入 ls -al 查看该目录下所有文件

输入vim .gitignore 可以设置禁止上传的文件

以上为git的基本用法。