Docker搭建maven私服(nexus3)以及常见启动问题
一、安装nexus3(自行搭建docker环境)
1.1:在docker中搜索maven镜像 : docker search nexus
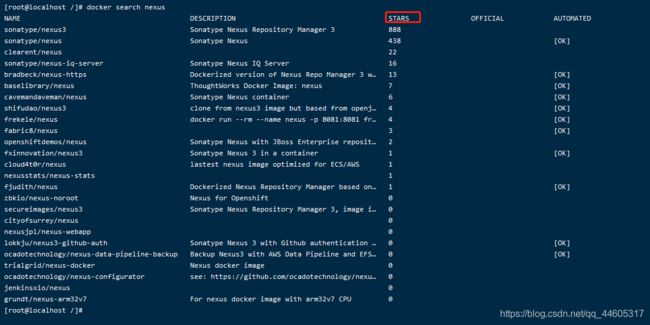
1.2:找到stars数最多的 pull(网速慢的话,可能pull不下来) :docker pull sonatype/nexus3
docker run -d -p 8081:8081 -p 8082:8082 -p 8083:8083 --name nexus3 -v /home/data/nexus/data:/nexus-data --restart=always sonatype/nexus3
解释:
-id 创建守护式容器
--name=名字 给你的容器起个名字
-p 宿主机端口:容器端口映射
-v 宿主机目录:容器目录 目录挂载

8082端口是用于host镜像仓库的服务端口
8083端口用户group镜像仓库的服务端口
8081 端口是nexus的服务端口
1.3.1:docker-compose启动nexus3
version: "2.2"
services:
  ###配置nexus3
  nexus3:
    restart: always
    image: sonatype/nexus3
    container_name: nexus3
    ports:
      - "8081:8081"
      - "8082:8082"
      - "8083:8083"
    volumes:
      - /home/data/nexus/data:/nexus-data
    environment:
      ES_JAVA_OPTS: "-Xmx1024m -Xms1024m"
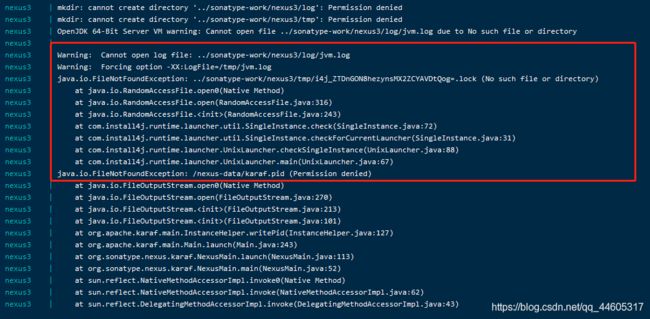
1.如果你想把docker中存储数据的目录映射到主机上,主机上的目录必须拥有最高权限,不然启动不起来。解决办法:(给主机的目录最高权限) 我想映射的目录是 /home/data/nexus/data
执行此操作
chmod 777 /home/data/nexus/data
2.nexus3启动的话需要主机的磁盘空间 4g以上 不然的话 是启动不起来的。

二、访问nexus3
2.1. 输入localhost:8081访问

2.2.这个时候我们登录是不知道密码的,我们需要看下密码 进入dokcer容器查看密码
docker exec -it 容器id或者容器name
nexus3版本与其他版本不一样,密码是随机的,在nexus-data目录中 admin.password。
2.3:登录以后我们看到这个页面
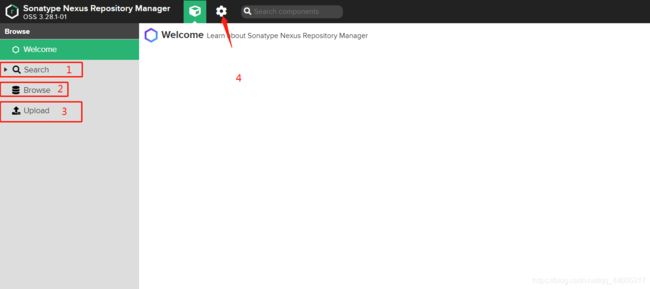
1.这里可以搜索我们maven库里的依赖
2.这里是我们所有的仓库
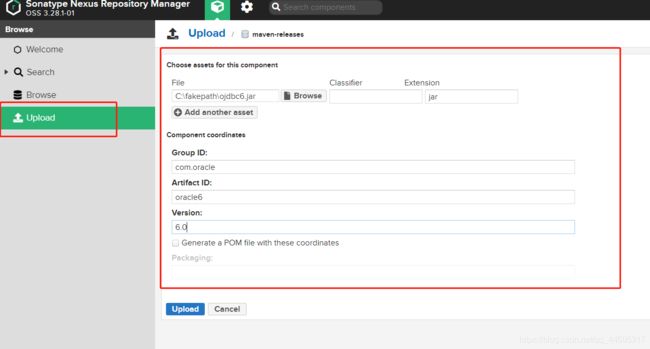
3.这里可以上传jar包到我们的maven库中
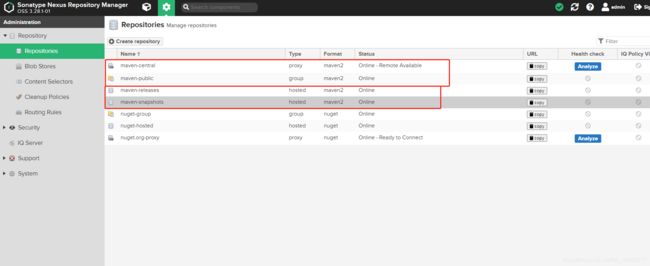
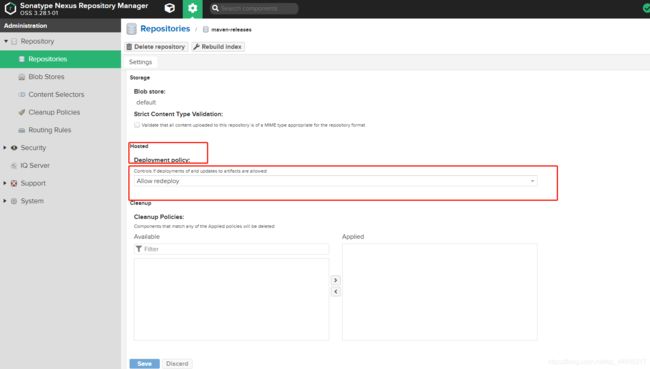
设置这几个仓库的Hosted
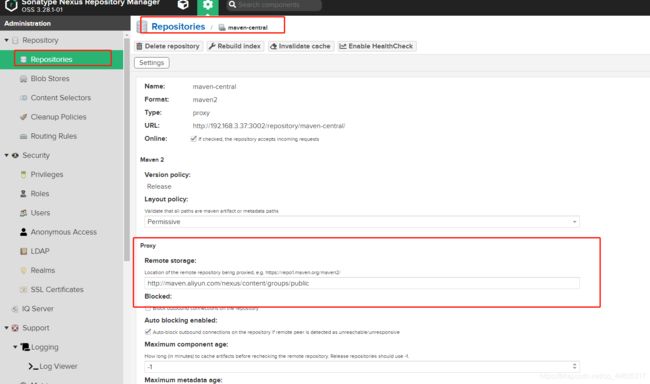
配置从阿里云maven库里面拉去依赖
查看图1中的Type的属性
- proxy:仓库中type属性的Proxy是代理仓库的意思 当PC访问中央库的时候,先通过Proxy下载到Nexus仓库,然后再从Nexus仓库下载到PC本地,这样的优势只要其中一个人从中央库下来了,以后大家都是从Nexus私服上进行下来,私服一般部署在内网,这样大大节约的宽带。
2.Hosted: Hosted是宿主机的意思,就是怎么把第三方的Jar放到私服上。
Hosted有三种方式,Releases、SNAPSHOT、Mixed
Releases: 一般是已经发布的Jar包
Snapshot: 未发布的版本
Mixed:混合的
3.group:group的意思也就是把三个仓库分为一个组,什么意思呢,就是我现在central和releases和snapshots放到一起 这三个type都是不同的,也是比如我把本地的项目打成jar包放到releases中 我拉取的时候 我们配的是 public他就会 可以拉到releases中的jar包
三、上传jar包到仓库中
3.1:上传方式分为 2种类 nexus3的upload上传和idea上传
  nexus-Mymaven
  central
  Nexus Mymaven
  http://localhost:8081/repository/maven-public/
上面的这个url地址是这个地址

2.2 配置私服maven的验证地址
在settings.xml文件中找到servers配置如下
  snapshots
  admin
  admin


  releases
  admin
  admin
2.3在项目的pom中配置如下
    <distributionManagement>
        <!--正式版本-->
        <repository>
            <!-- nexus服务器中用户名:在settings.xml中<server>的id-->
            <id>releases</id>
            <!-- 这个名称自己定义 -->
            <name>RELEASE</name>
            <!-- 这里的url和上面配置settings中的一样-->
            <url>http://localhost:8081/repository/maven-releases/</url>
        </repository>

        <!--快照版本-->
        <snapshotRepository>
            <id>snapshots</id>
            <name>SNAPSHOT</name>
            <url>http://localhost:8081/repository/maven-snapshots/</url>
        </snapshotRepository>

    </distributionManagement>
2.4发布什么版本是根据你这个项目的版本号定义的也就是pom文件中的这里
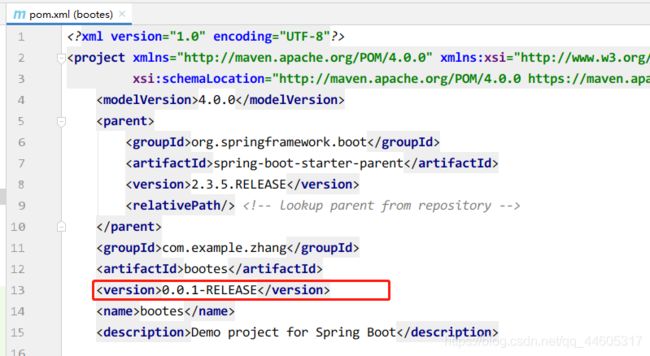
四、nexus3的存储路径
4.1:nexus3保存在本地的最终是一个 .bytes 类型的文件,在/blobs/default/content中
4.2:nexus设置自定义路径时,要设置Blob Stores,默认只有default一个,新建一个路径的话就可以自己指定了

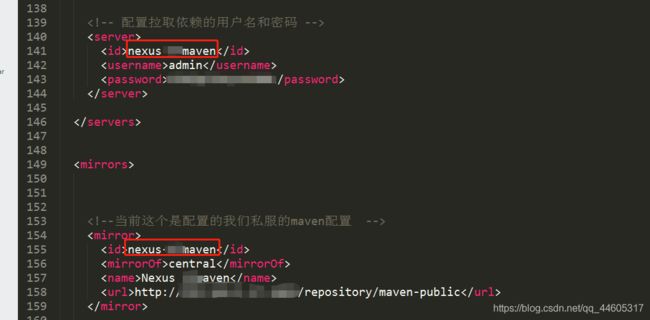
五、nexus3关闭了匿名访问,如何配置账号密码访问?
配置maven的settings文件中的 server (注意 图中勾住的地方 必须保证一致)
六、解决nexus3私服无法拉取依赖的问题
在settings文件中的 mirrors下面找到 profiles添加以下代码
        <profile>
            <id>nexus</id>
            <!-- 仓库配置 -->
            <repositories>
                <repository>
                    <!-- 注意这里的id必须和servers里面定义的那个id一致 不然认证失败 -->
                    <id>nexus-37maven</id>
                    <name>Repository for nexus</name>
                    <url>http://localhost:8081/repository/maven-public</url>
                </repository>
            </repositories>
            <!-- 插件仓库配置-->
	        <pluginRepositories>
	            <pluginRepository>
				<!-- 配置为 nexus-37maven 会覆盖超级POM中央仓库的配置 -->
	                <id>nexus-37maven</id>
	                <name>Repository for nexus</name>
	                <url>http://localhost:8081/repository/maven-public</url>
	            </pluginRepository>
	        </pluginRepositories>
        </profile>
  </profiles>

    <!--激活上面配置的仓库信息-->
    <activeProfiles>
        <activeProfile>nexus</activeProfile>
    </activeProfiles>

