图像处理之图像变换(放缩、平移、旋转、仿射变换、透视变换)
目录
1、放大缩小图像(Scaling)
2、平移图像(translation)
3、旋转图像(rotation)
4、仿射变换(Affine Transformation)
5、透视变换 (Perspective Transformation)
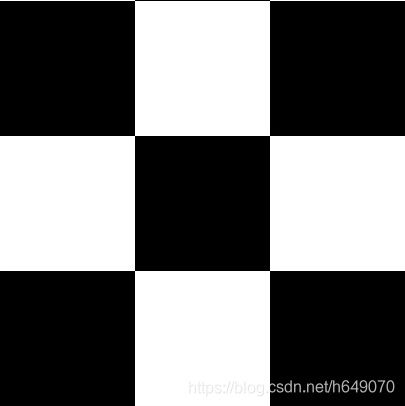
源图像
1、放大缩小图像(Scaling)
改变图像尺寸,即长和宽,可以按照比例即按照长宽比来改变图像大小,也可以不按照图像长宽比按照需求来放大或者缩小图像;
可以看到Opencv提供了resize函数,可以通过第二个参数输入图像的具体尺寸,也可以通过fx fy参数按照新的尺寸与旧尺寸的比值来设置;interpolation参数表示在放缩图像的时候的插值方法;
#1、放缩 Scaling
img = cv.imread('test.jpg')
res = cv.resize(img, None, fx=2, fy=2, interpolation=cv.INTER_CUBIC)
# OR
height, width = img.shape[:2]
res = cv.resize(img, (2 * width, 2 * height), interpolation=cv.INTER_CUBIC)
cv.imshow('res', res)
cv.waitKey(0)
cv.destroyAllWindows()
2、平移图像(translation)
假设我们的视域不变,也就是我们看的地方和范围都不变,对图像进行各个方向的移动,我们能看到的就是图像经过平移之后的结果;
Opencv python没有直接的图像平移函数,可以通过平移矩阵来完成对图像的平移,平移矩阵钱两列为一个单位矩阵,最后一列是沿着x,y方向的平移量;
#2、平移 translation
img = cv.imread('test.jpg', 0)
rows, cols = img.shape

M = np.float32([[1, 0, 100], [0, 1, 50]])
dst = cv.warpAffine(img, M, (cols, rows))

cv.imshow('img', dst)
cv.waitKey(0)
cv.destroyAllWindows()
3、旋转图像(rotation)
还是假设我们的视域是固定的,就是我们看到区域是固定的;固定现在图像中一个点,然后旋转图像,旋转之后,我们还能看到地方就是旋转之后的图像;
#3、旋转 rotation
img = cv.imread('test.jpg', 0)
rows, cols = img.shape

# cols-1 and rows-1 are the coordinate limits.
M = cv.getRotationMatrix2D(((cols - 1) / 2.0, (rows - 1) / 2.0), 60, 1)
dst = cv.warpAffine(img, M, (cols, rows))
cv.imshow('img', dst)
cv.waitKey(0)
cv.destroyAllWindows()
4、仿射变换(Affine Transformation)
简单来说就是源图像经过放缩、平移和旋转的一种或者集中各种组合变换之后的图像;还有说是仿射变换是图像线性变换加上平移,即Y=AX+B;
仿射变换如何变换取决于其变换矩阵是什么,变换矩阵是一个2*3的矩阵,变换矩阵的最后一列为平移量,前面是图像x,y的变换矩阵;由此可以看到,仿射变换是在二维图像中的变换;
想要更详细的参考知乎: https://www.zhihu.com/question/20666664
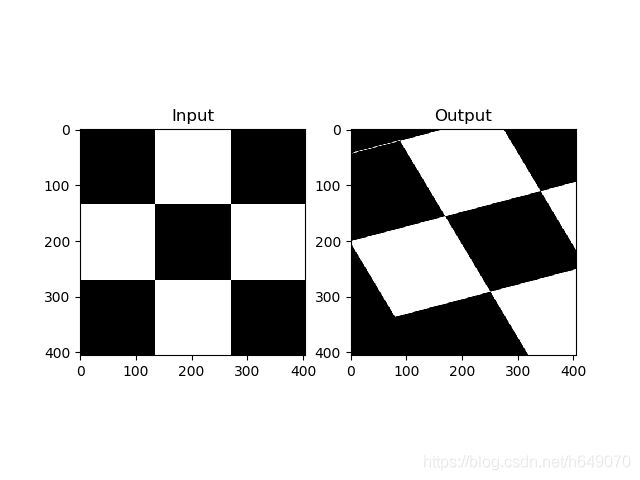
仿射变换矩阵,一般通过至少三组点来求出来,因为至少两组点才能求的所有的相关参数,求出来之后再通过仿射变换函数来进行转换得到结果,如下:
#4、仿射变换 : Affine Transformation
img = cv.imread('test.jpg')
rows, cols, ch = img.shape

pts1 = np.float32([[50, 50], [200, 50], [50, 200]])
pts2 = np.float32([[10, 100], [200, 50], [100, 250]])

M = cv.getAffineTransform(pts1, pts2)

print(M)

dst = cv.warpAffine(img, M, (cols, rows))

plt.subplot(121), plt.imshow(img), plt.title('Input')
plt.subplot(122), plt.imshow(dst), plt.title('Output')
plt.show()
5、透视变换 (Perspective Transformation)
透视变换简单理解就是在三维空间的仿射变换,把仿射变换矩阵改成3*4维,,就可以完成透视变换;
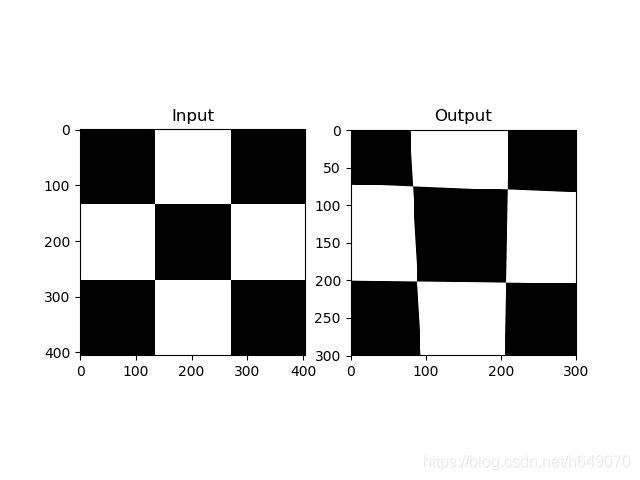
与仿射变换类似,至少需要四组对应点来求得变换矩阵,然后再进行相应变换,如下:
#5、透视变换 Perspective Transformation

img = cv.imread('test.jpg')
rows, cols, ch = img.shape

pts1 = np.float32([[56, 65], [368, 52], [28, 387], [389, 390]])
pts2 = np.float32([[0, 0], [300, 0], [0, 300], [300, 300]])

M = cv.getPerspectiveTransform(pts1, pts2)

dst = cv.warpPerspective(img, M, (300, 300))

plt.subplot(121), plt.imshow(img), plt.title('Input')
plt.subplot(122), plt.imshow(dst), plt.title('Output')
plt.show()
参考:Opencv官方参考文档


