基于Python的数字图形可视化水印系统的设计与实现
目录
1 经典数字图像水印算法 1
1.1 LSB 算法 1
1.2DCT 算法 2
2 经典数字图像水印算法的改进 7
2.1随机间隔算法 7
2.2区域校验位算法 8
2.3图像降级算法及其改进 11
2.3.2图像降级算法的改进 13
3可视化数字水印系统的实现 15
3.1界面布局 15
3.1.1空间域水印 15
3.1.2变换域水印 16
3.2程序运行界面 16
3.2.2空间域水印界面 17
3.2.3变换域水印界面 21
3.3系统功能展示 22
3.3.1变换域水印 38
3可视化数字水印系统的实现
3.1界面布局
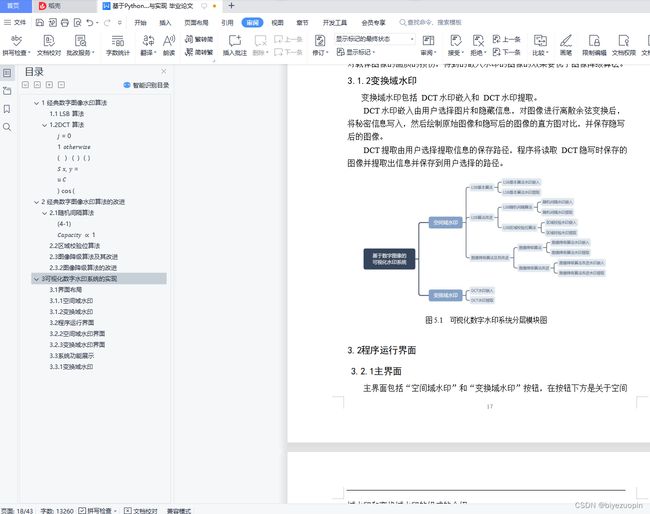
基于数字图像的可视化水印系统按照水印算法的不同主要分为空间域水印和变换域水印两大类。空间域水印以 LSB 算法——最低有效位算法为代表,变换域水印以 DCT 算法——离散余弦变换算法为代表[10]。
3.1.1空间域水印
空间域水印分为三个部分:LSB 基本算法、LSB 算法改进和图像降级算法及其改进。其中 LSB 图片水印和 LSB 算法改进均是基于 LSB 基本算法所进行的推广和改进。
(1)LSB 基本算法
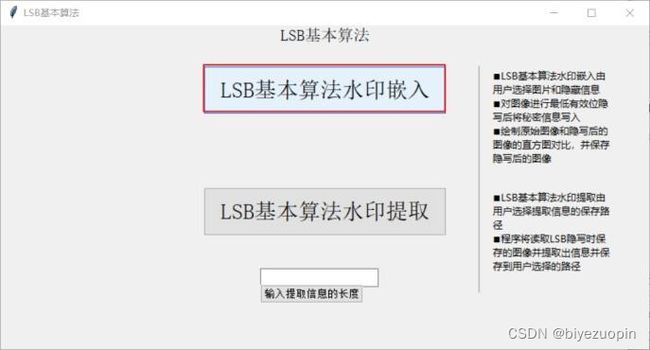
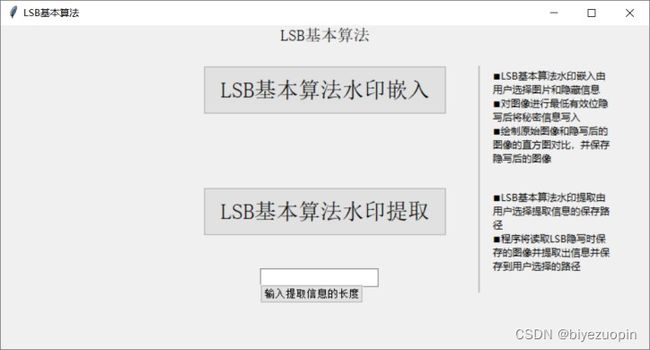
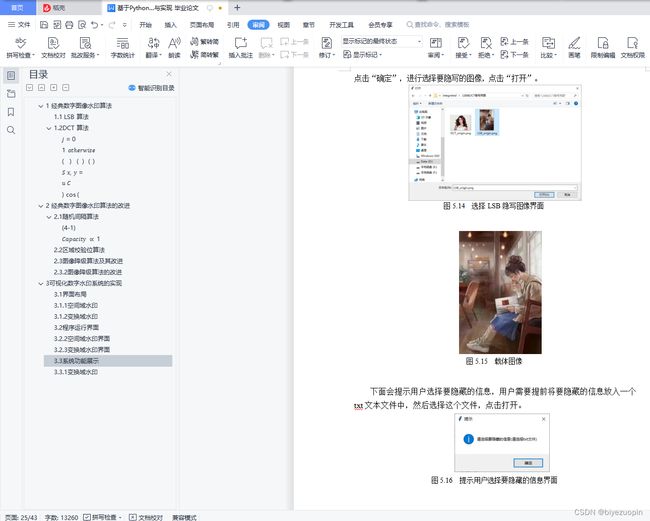
LSB 基本算法就是基于经典 LSB 算法理论进行文本水印嵌入和提取。LSB 基本算法包括 LSB 基本算法水印嵌入和 LSB 基本算法水印提取,可以实现将信息隐藏在图片中和从隐藏信息的图片中提取信息的功能。
(2)LSB 算法改进
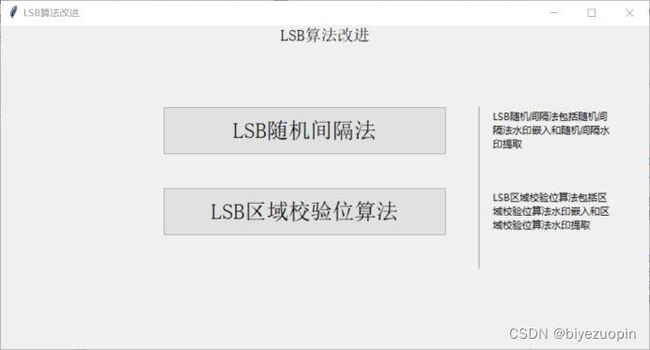
LSB 算法改进包括 LSB 随机间隔算法和 LSB 区域校验位算法,二者均能够减小水印嵌入对载体图片统计特性的影响。
① LSB 随机间隔算法
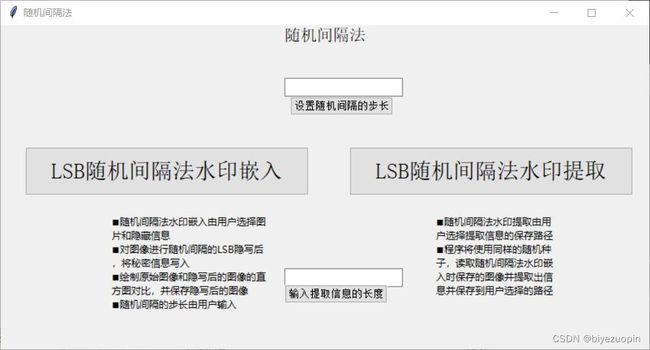
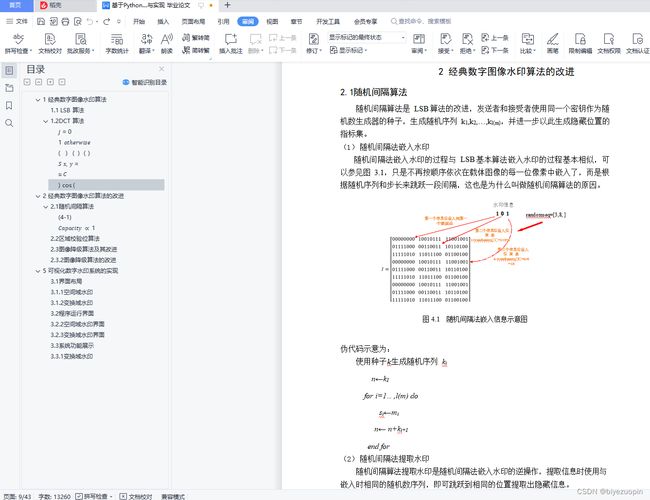
LSB 随机间隔算法包括随机间隔水印法嵌入和随机间隔法水印提取。LSB 随机间隔法算法水印嵌入由用户选择图片和隐藏信息,对图像进行随机间隔的 LSB 隐写后,将秘密信息写入,然后绘制原始图像和隐写后的图像的直方图对比,并保存隐写后的图像。随机间隔算法步长由用户输入。
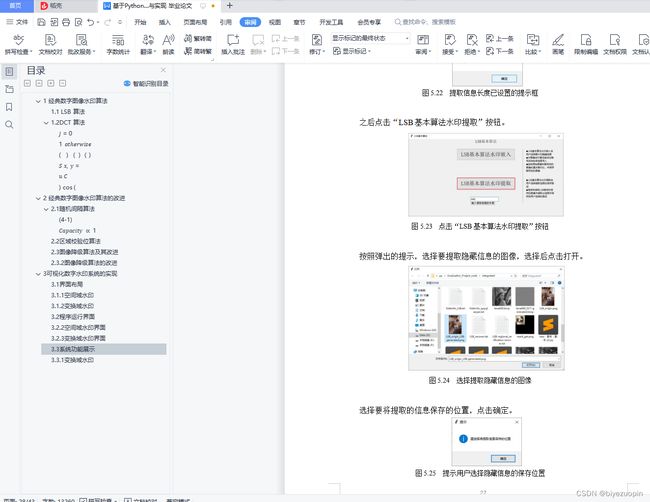
LSB 随机间隔法水印提取由用户选择要从中提取信息的图片和提取信息的保存路径,读取图像并提取出信息并保存到用户选择的路径。
② LSB 区域校验位算法
LSB 区域校验位算法包括区域校验位算法水印嵌入和区域校验位算法水印提取。
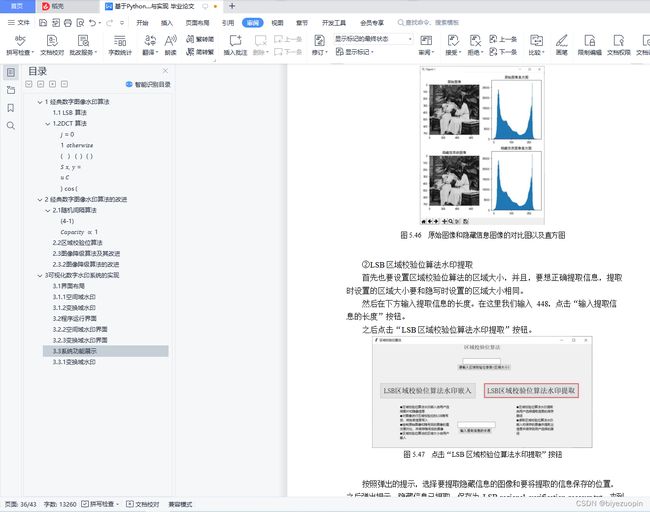
区域校验位算法水印嵌入由用户选择图片和隐藏信息,对图像进行区域校验位的 LSB 隐写后,将秘密信息写入,然后绘制原始图像和隐写后的图像的直方图对比,并保存隐写后的图像。区域校验位算法的区域大小由用户输入。
区域校验位算法水印提取由用户选择要从中提取信息的图片和提取信息的保存路径,读取图像并提取出信息并保存到用户选择的路径。
(3)图像降级算法及其改进
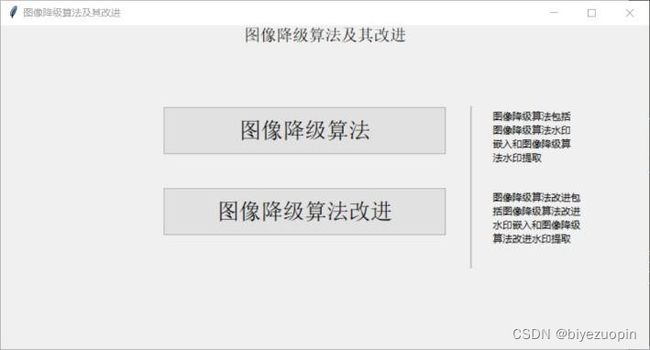
① 图像降级算法
图像降级算法包括图像降级算法水印嵌入和图像降级算法水印提取,可以实
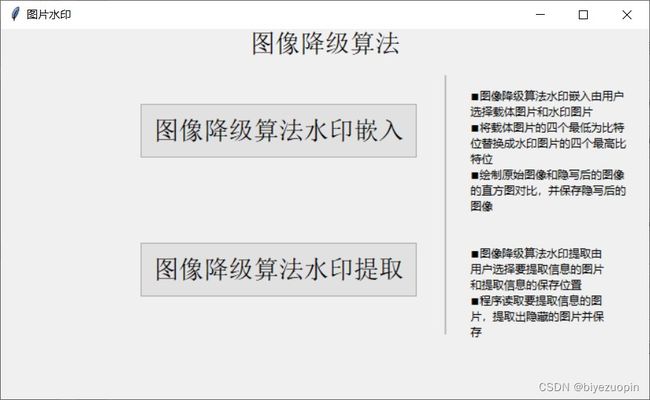
现将图片水印嵌入图片当中的功能。图像降级算法水印嵌入由用户选择载体图片和水印图片,对载体图像进行图像降级隐写,之后绘制原始图像和隐写后的图像的直方图对比,并保存隐写后的图像。本文转载自http://www.biyezuopin.vip/onews.asp?id=14767图像降级水印提取由用户选择要从中提取信息的图片和提取信息的保存路径,读取图片并提取出信息并保存到用户选择的路径当中。
由于图片的信息量一般要高于文本的信息量,所以图像降级的嵌入和提取耗时要长一些。
② 图像降级算法改进
图像降级算法改进的界面布局和操作与图像降级算法完全相同,只是改进了对载体图像的画质的损伤,得到的嵌入水印的图像的效果要优于图像降级算法。
3.1.2变换域水印
变换域水印包括 DCT 水印嵌入和 DCT 水印提取。
DCT 水印嵌入由用户选择图片和隐藏信息,对图像进行离散余弦变换后, 将秘密信息写入,然后绘制原始图像和隐写后的图像的直方图对比,并保存隐写后的图像。
DCT 提取由用户选择提取信息的保存路径,程序将读取 DCT 隐写时保存的图像并提取出信息并保存到用户选择的路径。
from tkinter import *
from tkinter import filedialog
import tkinter.messagebox #弹窗库
from PIL import Image, ImageDraw, ImageFont,ImageTk
import code
import matplotlib
import matplotlib.pyplot as plt
import cv2
import shutil
import numpy as np
import itertools
from skimage import color
import math
import random
import os
import tkinter.font as tkFont
from tkinter.filedialog import askopenfilename
from tkinter.ttk import *


np.set_printoptions(suppress=True)

plt.rcParams['font.sans-serif']=['SimHei'] #显示中文标签

quant = np.array([[16,11,10,16,24,40,51,61],      # QUANTIZATION TABLE
                    [12,12,14,19,26,58,60,55],    # required for DCT
                    [14,13,16,24,40,57,69,56],
                    [14,17,22,29,51,87,80,62],
                    [18,22,37,56,68,109,103,77],
                    [24,35,55,64,81,104,113,92],
                    [49,64,78,87,103,121,120,101],
                    [72,92,95,98,112,100,103,99]])


def plus(str):
	return str.zfill(8)
#Python zfill() 方法返回指定长度的字符串,原字符串右对齐,前面填充0。

def get_key(strr):
	#获取要隐藏的文件内容
	tmp = strr
	f = open(tmp,"rb")
	str = ""
	s = f.read()
	global text_len
	text_len = len(s)
	for i in range(len(s)):
		#code.interact(local=locals())
		str = str+plus(bin(s[i]).replace('0b',''))
		#逐个字节将要隐藏的文件内容转换为二进制,并拼接起来
		#1.先用ord()函数将s的内容逐个转换为ascii码
		#2.使用bin()函数将十进制的ascii码转换为二进制
		#3.由于bin()函数转换二进制后,二进制字符串的前面会有"0b"来表示这个字符串是二进制形式,所以用replace()替换为空
		#4.又由于ascii码转换二进制后是七位,而正常情况下每个字符由8位二进制组成,所以使用自定义函数plus将其填充为8位
		#print str
	f.closed
	return str

def mod(x,y):
	return x%y;

def toasc(strr):
	return int(strr, 2)

#q转换成第几行第几列
#width行height列
def q_converto_wh(q):
    w = q//600
    h = q%600
    return w,h


def swap(a,b):
	return b,a

def randinterval(m,n,count,key):
	#m,n = matrix.shape
	print(m,n)
	interval1 = int(m*n/count)+1
	interval2 = interval1-2
	if interval2 == 0:
		print('载体太小,不能将秘密信息隐藏进去!')
	# print('interval1:', interval1)
	# print('interval2:', interval2)

	#生成随机序列
	random.seed(key)
	a = [0]*count #a是list
	for i in range(0,count):
		a[i] = random.random()

	#初始化
	row = [0]*count
	col = [0]*count

	#计算row和col
	r = 0
	c = 0
	row[0] = r
	col[0] = c
	for i in range(1,count):
		if a[i]>= 0.5:
			c = c + interval1
		else:
			c = c + interval2
		if c > n:
			k = c%n
			r = r + int((c-k)/n)
			if r > m:
				print('载体太小不能将秘密信息隐藏进去!')
			c = k
			if c == 0:
				c=1
		row[i] = r
		col[i] = c

	return row,col


#str1为载体图片路径,str2为隐写文件,str3为加密图片保存的路径
def func_LSB_yinxie(str1,str2,str3):
	im = Image.open(str1)
	#获取图片的宽和高
	global width,height
	width = im.size[0]
	print("width:" + str(width)+"\n")
	height = im.size[1]
	print("height:"+str(height)+"\n")
	count = 0
	#获取需要隐藏的信息
	key = get_key(str2)
	print('key: ',key)
	keylen = len(key)
	print('keylen: ',keylen)


	for h in range(0,height):
		for w in range(0,width):
			pixel = im.getpixel((w,h))
			#code.interact(local=locals())
			a=pixel[0]
			b=pixel[1]
			c=pixel[2]
			if count == keylen:
				break
			#下面的操作是将信息隐藏进去
			#分别将每个像素点的RGB值余2,这样可以去掉最低位的值
			#再从需要隐藏的信息中取出一位,转换为整型
			#两值相加,就把信息隐藏起来了
			a= a-mod(a,2)+int(key[count])
			count+=1
			if count == keylen:
				im.putpixel((w,h),(a,b,c))
				break
			b =b-mod(b,2)+int(key[count])
			count+=1
			if count == keylen:
				im.putpixel((w,h),(a,b,c))
				break
			c= c-mod(c,2)+int(key[count])
			count+=1
			if count == keylen:
				im.putpixel((w,h),(a,b,c))
				break
			if count % 3 == 0:
				im.putpixel((w,h),(a,b,c))
	im.save(str3)
	tkinter.messagebox.showinfo('提示','图像隐写已完成,隐写后的图像保存为'+str3)


#le为所要提取的信息的长度,str1为加密载体图片的路径,str2为提取文件的保存路径
def func_LSB_tiqu(le,str1,str2):
	a=""
	b=""
	im = Image.open(str1)
	#lenth = le*8
	lenth = le
	width = im.size[0]
	height = im.size[1]
	count = 0
	for h in range(0, height):
		for w in range(0, width):
			#获得(w,h)点像素的值
			pixel = im.getpixel((w, h))
			#此处余3,依次从R、G、B三个颜色通道获得最低位的隐藏信息
			if count%3==0:
				count+=1
				b=b+str((mod(int(pixel[0]),2)))
				if count ==lenth:
					break
			if count%3==1:
				count+=1
				b=b+str((mod(int(pixel[1]),2)))
				if count ==lenth:
					break
			if count%3==2:
				count+=1
				b=b+str((mod(int(pixel[2]),2)))
				if count ==lenth:
					break
		if count == lenth:
			break

	print(b)

	with open(str2,"wb") as f:
		for i in range(0,len(b),8):
			#以每8位为一组二进制,转换为十进制
			stra = toasc(b[i:i+8])
			#stra = b[i:i+8]
			#将转换后的十进制数视为ascii码,再转换为字符串写入到文件中
			stra = chr(stra)
			sb = bytes(stra, encoding = "utf8")
			#print(sb)
			#f.write(chr(stra))
			f.write(sb)
			stra =""
	f.closed

global choosepic_LSB_basic
def LSB_yinxie():

	tkinter.messagebox.showinfo('提示','请选择要进行LSB隐写的图像')
	Fpath=filedialog.askopenfilename()
	shutil.copy(Fpath,'./')

	old = Fpath.split('/')[-1]

	global choosepic_LSB_basic
	choosepic_LSB_basic = old

	#处理后输出的图片路径
	new = old[:-4]+"_LSB-generated."+old[-3:]

	#需要隐藏的信息
	tkinter.messagebox.showinfo('提示','请选择要隐藏的信息(请选择txt文件)')
	txtpath = filedialog.askopenfilename()
	shutil.copy(txtpath,'./')
	enc=txtpath.split('/')[-1]
	# #print(enc)
	# plt.imshow(old)
	# plt.show()
	func_LSB_yinxie(old,enc,new)

	global LSB_new
	LSB_new = new

	old = cv2.imread(old)
	new = cv2.imread(new)

	plt.figure(figsize=(6, 7))  #matplotlib设置画面大小 600*700
	#plt.suptitle('LSB信息隐藏')
	b,g,r = cv2.split(old)
	old = cv2.merge([r,g,b])
	b,g,r = cv2.split(new)
	new = cv2.merge([r,g,b])

	plt.subplot(2,2,1)
	plt.imshow(old)
	plt.title("原始图像")
	plt.subplot(2,2,2)
	plt.hist(old.ravel(), 256, [0,256])
	plt.title("原始图像直方图")
	plt.subplot(2,2,3)
	plt.imshow(new)
	plt.title("隐藏信息的图像")
	plt.subplot(2,2,4)
	plt.hist(new.ravel(), 256, [0,256])
	plt.title("隐藏信息图像直方图")
	plt.tight_layout() #设置默认的间距
	plt.show()


global LSB_text_len
def LSB_tiqu():

	#le = text_len
	global LSB_text_len
	le = int(LSB_text_len)
	print('le: ',le)


	tkinter.messagebox.showinfo('提示','请选择要进行LSB提取的图像')
	Fpath=filedialog.askopenfilename()

	LSB_new = Fpath
	tkinter.messagebox.showinfo('提示','请选择将提取信息保存的位置')
	tiqu=filedialog.askdirectory()
	#print(tiqu)

	tiqu = tiqu+'/LSB_recover.txt'
	func_LSB_tiqu(le,LSB_new,tiqu)
	tkinter.messagebox.showinfo('提示','隐藏信息已提取,请查看LSB_recover.txt')


def DCT_yinxie():
	tkinter.messagebox.showinfo('提示','请选择要进行DCT隐写的图像')
	Fpath=filedialog.askopenfilename()
	shutil.copy(Fpath,'./')

	original_image_file = Fpath.split('/')[-1]
	#original_image_file是DCT_origin.bmp
	y = cv2.imread(original_image_file, 0)

	row,col = y.shape
	row = int(row/8)
	col = int(col/8)

	y1 = y.astype(np.float32)
	Y = cv2.dct(y1)

	tkinter.messagebox.showinfo('提示','请选择要隐藏的信息(请选择txt文件)')
	txtpath = filedialog.askopenfilename()
	shutil.copy(txtpath,'./')
	tmp=txtpath.split('/')[-1]
	#tmp是hideInfo_DCT.txt

	msg = get_key(tmp)

	count = len(msg)
	print('count: ',count)
	k1,k2 = randinterval(row,col,count,12)

	for i in range(0,count):
		k1[i] = (k1[i]-1)*8+1
		k2[i] = (k2[i]-1)*8+1


	#信息嵌入
	temp = 0
	H = 1
	for i in range(0,count):
		if msg[i] == '0':
			if Y[k1[i]+4,k2[i]+1] > Y[k1[i]+3,k2[i]+2]:
				Y[k1[i]+4,k2[i]+1] , Y[k1[i]+3,k2[i]+2] = swap(Y[k1[i]+4,k2[i]+1],Y[k1[i]+3,k2[i]+2])
		else:
			if Y[k1[i]+4,k2[i]+1] < Y[k1[i]+3,k2[i]+2]:
				Y[k1[i]+4,k2[i]+1] , Y[k1[i]+3,k2[i]+2] = swap(Y[k1[i]+4,k2[i]+1],Y[k1[i]+3,k2[i]+2])

		if Y[k1[i]+4,k2[i]+1] > Y[k1[i]+3,k2[i]+2]:
			Y[k1[i]+3,k2[i]+2] = Y[k1[i]+3,k2[i]+2]-H  #将小系数调整更小
		else:
			Y[k1[i]+4,k2[i]+1] = Y[k1[i]+4,k2[i]+1]-H

	y2 = cv2.idct(Y)


	global dct_encoded_image_file
	dct_encoded_image_file = original_image_file[:-4]+"_DCT-generated."+original_image_file[-3:]

	cv2.imwrite(dct_encoded_image_file,y2)

	old = cv2.imread(original_image_file)
	new = cv2.imread(dct_encoded_image_file)

	tkinter.messagebox.showinfo('提示','图像隐写已完成,隐写后的图像保存为'+dct_encoded_image_file)


	b,g,r = cv2.split(old)
	old = cv2.merge([r,g,b])
	b,g,r = cv2.split(new)
	new = cv2.merge([r,g,b])


	plt.figure(figsize=(6, 7))  #matplotlib设置画面大小 600*700

	plt.subplot(2,2,1)
	plt.imshow(old)
	plt.title("原始图像")
	plt.subplot(2,2,2)
	plt.hist(old.ravel(), 256, [0,256])
	plt.title("原始图像直方图")
	plt.subplot(2,2,3)
	plt.imshow(new)
	plt.title("隐藏信息的图像")
	plt.subplot(2,2,4)
	plt.hist(new.ravel(), 256, [0,256])
	plt.title("隐藏信息图像直方图")
	plt.tight_layout() #设置默认的间距
	plt.show()


global DCT_text_len
def DCT_tiqu():


	# print('le: ',le)
	count = int(DCT_text_len)
	print('count: ',count)

	tkinter.messagebox.showinfo('提示','请选择要进行DCT提取的图像')
	Fpath=filedialog.askopenfilename()
	dct_encoded_image_file = Fpath.split('/')[-1]

	dct_img = cv2.imread(dct_encoded_image_file,0)
	print(dct_img)
	y=dct_img
	y1 = y.astype(np.float32)
	Y = cv2.dct(y1)
	row,col = y.shape
	row = int(row/8)
	col = int(col/8)
	# count = 448
	k1,k2 = randinterval(row,col,count,12)
	for i in range(0,count):
		k1[i] = (k1[i]-1)*8+1
		k2[i] = (k2[i]-1)*8+1


	#准备提取并回写信息
	str2 = 'DCT_recover.txt'
	b = ""

	for i in range(0,count):
		if Y[k1[i]+4,k2[i]+1] < Y[k1[i]+3,k2[i]+2]:
			b=b+str('0')
			# print('msg[i]: ',0)
		else:
			b=b+str('1')
			# print('msg[i]: ',1)

	print(b)


	tkinter.messagebox.showinfo('提示','请选择将提取信息保存的位置')
	tiqu=filedialog.askdirectory()
	tiqu = tiqu+'/DCT_hidden_text.txt'

	str2 = tiqu
	with open(str2,"wb") as f:
		for i in range(0,len(b),8):
			#以每8位为一组二进制,转换为十进制
			stra = toasc(b[i:i+8])
			#stra = b[i:i+8]
			#将转换后的十进制数视为ascii码,再转换为字符串写入到文件中
			stra = chr(stra)
			sb = bytes(stra, encoding = "utf8")
			f.write(sb)
			stra =""
	f.closed

	tkinter.messagebox.showinfo('提示','隐藏信息已提取,请查看DCT_hidden_text.txt')

#图像降级改进
def Image1_yinxie():

	tkinter.messagebox.showinfo('提示','请选择载体图像')
	Fpath=filedialog.askopenfilename()

	shutil.copy(Fpath,'./')

	beiyinxie_image = Fpath.split('/')[-1]

	tkinter.messagebox.showinfo('提示','请选择要隐写的图像')
	Fpath=filedialog.askopenfilename()
	shutil.copy(Fpath,'./')
	mark_image = Fpath.split('/')[-1]

	img=np.array(Image.open(beiyinxie_image))
	mark=np.array(Image.open(mark_image))
	rows,cols,dims=mark.shape

	for i in range(0,dims):
		for j in range(0,rows*2):
			for k in range(0,cols*2):
				img[j,k,i]=img[j,k,i]&252

	for i in range(0,dims):
		for j in range(0,rows):
			for k in range(0,cols):
				img[2*j,2*k,i]=img[2*j,2*k,i]+(mark[j,k,i]&192)//64
				img[2*j,2*k+1,i]=img[2*j,2*k+1,i]+(mark[j,k,i]&48)//16
				img[2*j+1,2*k,i]=img[2*j+1,2*k,i]+(mark[j,k,i]&12)//4
				img[2*j+1,2*k+1,i]=img[2*j+1,2*k+1,i]+(mark[j,k,i]&3)
				#print(2*j+1,2*k+1)
	img=Image.fromarray(img)
	global new_image
	new_image = beiyinxie_image[:-4]+"_with_mark1."+beiyinxie_image[-3:]

	img.save(new_image)

	tkinter.messagebox.showinfo('提示','图像隐写已完成,隐写后的图像保存为'+new_image)

	old = cv2.imread(beiyinxie_image)
	new = cv2.imread(new_image)

	b,g,r = cv2.split(old)
	old = cv2.merge([r,g,b])
	b,g,r = cv2.split(new)
	new = cv2.merge([r,g,b])

	plt.figure(figsize=(6, 7))  #matplotlib设置画面大小 600*700
	#plt.suptitle('LSB信息隐藏')
	plt.subplot(2,2,1)
	plt.imshow(old)
	plt.title("原始图像")
	plt.subplot(2,2,2)
	plt.hist(old.ravel(), 256, [0,256])
	plt.title("原始图像直方图")
	plt.subplot(2,2,3)
	plt.imshow(new)
	plt.title("隐藏信息的图像")
	plt.subplot(2,2,4)
	plt.hist(new.ravel(), 256, [0,256])
	plt.title("隐藏信息图像直方图")
	plt.tight_layout() #设置默认的间距
	plt.show()

#图像降级改进
def Image1_tiqu():

	tkinter.messagebox.showinfo('提示','请选择要进行提取图片水印的图像')
	Fpath=filedialog.askopenfilename()
	new_image = Fpath


	tkinter.messagebox.showinfo('提示','请选择将提取信息保存的位置')
	tiqu=filedialog.askdirectory()

	print(tiqu)
	tiqu = tiqu+'/mark_get1.'+new_image[-3:]
	print(tiqu)

	imgwmark=np.array(Image.open(new_image))
	result=imgwmark
	rows,cols,dims=imgwmark.shape
	rows=rows//2
	cols=cols//2
	for i in range(0,dims):
		for j in range(0,rows*2):
			for k in range(0,cols*2):
				imgwmark[j,k,i]=imgwmark[j,k,i]&3

	for i in range(0,dims):
		for j in range(0,rows):
			for k in range(0,cols):
				result[j,k,i]=imgwmark[2*j,2*k,i]*64+imgwmark[2*j,2*k+1,i]*16
				+imgwmark[2*j+1,2*k,i]*4+imgwmark[2*j+1,2*k+1,i]
	mark_get=Image.fromarray(result)
	mark_get.save(tiqu)

	tkinter.messagebox.showinfo('提示','水印图片已提取,请查看mark_get1.'+new_image[-3:])


#图像降级
def Image_yinxie():

	tkinter.messagebox.showinfo('提示','请选择载体图像')
	Fpath=filedialog.askopenfilename()

	shutil.copy(Fpath,'./')

	beiyinxie_image = Fpath.split('/')[-1]

	tkinter.messagebox.showinfo('提示','请选择要隐写的图像')
	Fpath=filedialog.askopenfilename()
	shutil.copy(Fpath,'./')
	mark_image = Fpath.split('/')[-1]

	img=np.array(Image.open(beiyinxie_image))
	mark=np.array(Image.open(mark_image))
	rows,cols,dims=mark.shape

	for i in range(0,dims):
		for j in range(0,rows*2):
			for k in range(0,cols*2):
				img[j,k,i]=img[j,k,i]&240

	for i in range(0,dims):
		for j in range(0,rows):
			for k in range(0,cols):
				img[j,k,i] = img[j,k,i] + ((mark[j,k,i]&240)//16)

				# img[2*j,2*k,i]=img[2*j,2*k,i]+(mark[j,k,i]&192)//64
				# img[2*j,2*k+1,i]=img[2*j,2*k+1,i]+(mark[j,k,i]&48)//16
				# img[2*j+1,2*k,i]=img[2*j+1,2*k,i]+(mark[j,k,i]&12)//4
				# img[2*j+1,2*k+1,i]=img[2*j+1,2*k+1,i]+(mark[j,k,i]&3)
	img=Image.fromarray(img)
	global new_image
	new_image = beiyinxie_image[:-4]+"_with_mark."+beiyinxie_image[-3:]

	img.save(new_image)

	tkinter.messagebox.showinfo('提示','图像隐写已完成,隐写后的图像保存为'+new_image)

	old = cv2.imread(beiyinxie_image)
	new = cv2.imread(new_image)

	b,g,r = cv2.split(old)
	old = cv2.merge([r,g,b])
	b,g,r = cv2.split(new)
	new = cv2.merge([r,g,b])

	plt.figure(figsize=(6, 7))  #matplotlib设置画面大小 600*700
	#plt.suptitle('LSB信息隐藏')
	plt.subplot(2,2,1)
	plt.imshow(old)
	plt.title("原始图像")
	plt.subplot(2,2,2)
	plt.hist(old.ravel(), 256, [0,256])
	plt.title("原始图像直方图")
	plt.subplot(2,2,3)
	plt.imshow(new)
	plt.title("隐藏信息的图像")
	plt.subplot(2,2,4)
	plt.hist(new.ravel(), 256, [0,256])
	plt.title("隐藏信息图像直方图")
	plt.tight_layout() #设置默认的间距
	plt.show()

#图像降级
def Image_tiqu():

	tkinter.messagebox.showinfo('提示','请选择要进行提取图片水印的图像')
	Fpath=filedialog.askopenfilename()
	new_image = Fpath


	tkinter.messagebox.showinfo('提示','请选择将提取信息保存的位置')
	tiqu=filedialog.askdirectory()
	#print(tiqu)

	tiqu = tiqu+'/mark_get.'+new_image[-3:]


	imgwmark=np.array(Image.open(new_image))
	result=imgwmark
	rows,cols,dims=imgwmark.shape
	rows=rows//2
	cols=cols//2
	for i in range(0,dims):
		for j in range(0,rows*2):
			for k in range(0,cols*2):
				result[j,k,i]= (imgwmark[j,k,i]&15)
				result[j,k,i] = result[j,k,i]*16

	mark_get=Image.fromarray(result)
	mark_get.save(tiqu)

	tkinter.messagebox.showinfo('提示','水印图片已提取,请查看mark_get.'+new_image[-3:])


global LSB_suijijiange_step
LSB_suijijiange_step = 2
def func_LSB_suijijiange_yinxie(str1,str2,str3):
	im = Image.open(str1)
	global width,height
	width = im.size[0]
	print("width:" + str(width)+"\n")
	height = im.size[1]
	print("height:"+str(height)+"\n")
	count = 0
    #获取需要隐藏的信息
	global keylen
	key = get_key(str2)
	keylen = len(key)
	print(key)
	print(keylen)

	random.seed(2)
	global LSB_suijijiange_step
	step_max = int(width*height/keylen)
	print('step: ',LSB_suijijiange_step)
	print('step_max: ',step_max)
	LSB_suijijiange_step = int(LSB_suijijiange_step)
	if LSB_suijijiange_step > step_max:
		tkinter.messagebox.showinfo('提示','步长设置过大,请重新设置,步长最大值为: '+str(step_max))
		global LSB_suijijiange_sf
		LSB_suijijiange_sf = False
		return

	step=LSB_suijijiange_step
	random_seq = [0]*keylen
	for i in range(0,keylen):
		random_seq[i] = int(random.random()*step+1)
		print(random_seq[i])

	q=1

	for count in range(keylen):
	    w,h = q_converto_wh(q)
	    pixel = im.getpixel((w,h))
	    pixel = pixel-mod(pixel,2)+int(key[count])
	    q=q+random_seq[count]
	    im.putpixel((w,h),pixel)

	im.save(str3)
	tkinter.messagebox.showinfo('提示','图像隐写已完成,隐写后的图像保存为'+str3)


def LSB_suijijiange_yinxie():

	tkinter.messagebox.showinfo('提示','请选择要进行LSB随机间隔隐写的图像')
	Fpath=filedialog.askopenfilename()
	shutil.copy(Fpath,'./')

	old = Fpath.split('/')[-1]

	if(os.path.exists('./'+old)==False):
		shutil.copy(Fpath,'./')
	#处理后输出的图片路径
	new = old[:-4]+"_LSB-random_interval-generated."+old[-3:]

	#需要隐藏的信息
	tkinter.messagebox.showinfo('提示','请选择要隐藏的信息(请选择txt文件)')
	txtpath = filedialog.askopenfilename()
	shutil.copy(txtpath,'./')
	enc=txtpath.split('/')[-1]

	if(os.path.exists('./'+enc)==False):
		shutil.copy(txtpath,'./')
	#print(enc)
	global LSB_suijijiange_sf
	LSB_suijijiange_sf = True
	func_LSB_suijijiange_yinxie(old,enc,new)
	print('LSB_suijijiange_sf: ',LSB_suijijiange_sf)

	global LSB_new
	LSB_new = new

	old = cv2.imread(old)
	new = cv2.imread(new)

	if LSB_suijijiange_sf == True:
		plt.figure(figsize=(6, 7))  #matplotlib设置画面大小 600*700
		#plt.suptitle('LSB信息隐藏')
		plt.subplot(2,2,1)
		plt.imshow(old)
		plt.title("原始图像")
		plt.subplot(2,2,2)
		plt.hist(old.ravel(), 256, [0,256])
		plt.title("原始图像直方图")
		plt.subplot(2,2,3)
		plt.imshow(new)
		plt.title("隐藏信息的图像")
		plt.subplot(2,2,4)
		plt.hist(new.ravel(), 256, [0,256])
		plt.title("隐藏信息图像直方图")
		plt.tight_layout() #设置默认的间距
		plt.show()


#le为所要提取的信息的长度,str1为加密载体图片的路径,str2为提取文件的保存路径
def func_LSB_suijijiange_tiqu(le,str1,str2):
	a=""
	b=""
	im = Image.open(str1)


	global width
	global height
	width = im.size[0]
	height = im.size[1]
	print(width,',',height)
	len_total = le
	count = 0
	#print(len_total)
	random.seed(2)
	#step = int(width*height/len_total)
	step = int(LSB_suijijiange_step)
	random_seq = [0]*len_total
	for i in range(0,len_total):
		random_seq[i] = int(random.random()*step+1)


	q=1
	count = 0


	for count in range(len_total):

		w,h = q_converto_wh(q)
		pixel = im.getpixel((w, h))
		#print(q,'-----',w,',',h)
		b=b+str(mod(pixel,2))
		#print(count)
		q = q + random_seq[count]
		count+=1

	print(b)

	with open(str2,"wb") as f:
		for i in range(0,len(b),8):
			#以每8位为一组二进制,转换为十进制
			stra = toasc(b[i:i+8])
			#stra = b[i:i+8]
			#将转换后的十进制数视为ascii码,再转换为字符串写入到文件中
			stra = chr(stra)
			sb = bytes(stra, encoding = "utf8")
			#print(sb)
			#f.write(chr(stra))
			f.write(sb)
			stra =""
	f.closed


global LSB_suijijiange_text_len
def LSB_suijijiange_tiqu():
	global LSB_suijijiange_text_len
	le = int(LSB_suijijiange_text_len)
	print('le: ',le)


	tkinter.messagebox.showinfo('提示','请选择要进行LSB随机间隔算法提取的图像')
	Fpath=filedialog.askopenfilename()


	tkinter.messagebox.showinfo('提示','请选择将提取信息保存的位置')
	tiqu=filedialog.askdirectory()
	#print(tiqu)
	tiqu = tiqu+'/LSB-random_interval-recover.txt'
	LSB_new = Fpath
	print(LSB_new)
	func_LSB_suijijiange_tiqu(le,LSB_new,tiqu)
	tkinter.messagebox.showinfo('提示','隐藏信息已提取,请查看LSB-random_interval-recover.txt')


global LSB_quyujiaoyan_size
LSB_quyujiaoyan_size = 4
def func_LSB_quyujiaoyan_yinxie(str1,str2,str3):
	im = Image.open(str1)
	#获取图片的宽和高
	global width,height
	width = im.size[0]
	print("width:" + str(width)+"\n")
	height = im.size[1]
	print("height:"+str(height)+"\n")
	count = 0
	#获取需要隐藏的信息
	global keylen
	key = get_key(str2)
	keylen = len(key)
	print(key)
	print(keylen)


	q=1

	global LSB_quyujiaoyan_size
	size = int(LSB_quyujiaoyan_size)
	print('size: ',size)
	print(int(width*height/keylen))

	# LSB_suijijiange_step = int(LSB_suijijiange_step)
	# if LSB_suijijiange_step > step_max:
	size_max = int(width*height/keylen)
	print('size_max: ',size_max)
	if width * height < size* keylen :
		tkinter.messagebox.showinfo('提示','size设置过大,请重新设置,size最大值为: '+str(int(width*height/keylen)))

	pixel = []
	for p in range(1,keylen+1):
		for i in range(1,size+1):
			w,h = q_converto_wh((p-1)*size+i)
			print(w,h)
			#e = im.getpixel(0,1)
			pixel.append(im.getpixel((w,h)))

		tem = 0
		for i,v in enumerate(pixel):
			tem = tem + mod(v,2)  #+mod(pixel2,2)+mod(pixel3,2)+mod(pixel4,2)
		pixel = []
		tem = mod(tem,2)

		if tem != int(key[p-1]):
			q = int(random.random()*size)+1
			w,h = q_converto_wh((p-1)*size+q)
			pix = im.getpixel((w,h))
			im.putpixel((w,h),pix-1)


	im.save(str3)
	tkinter.messagebox.showinfo('提示','图像隐写已完成,隐写后的图像保存为'+str3)


def LSB_quyujiaoyan_yinxie():
	tkinter.messagebox.showinfo('提示','请选择要进行LSB区域校验位隐写的图像')
	Fpath=filedialog.askopenfilename()

	old = Fpath.split('/')[-1]

	if(os.path.exists('./'+old)==False):
		shutil.copy(Fpath,'./')
	#处理后输出的图片路径
	new = old[:-4]+"_LSB-regional_verification-generated."+old[-3:]

	#需要隐藏的信息
	tkinter.messagebox.showinfo('提示','请选择要隐藏的信息(请选择txt文件)')
	txtpath = filedialog.askopenfilename()
	enc=txtpath.split('/')[-1]

	if(os.path.exists('./'+enc)==False):
		shutil.copy(txtpath,'./')

	#print(enc)
	func_LSB_quyujiaoyan_yinxie(old,enc,new)

	global LSB_new
	LSB_new = new

	old = cv2.imread(old)
	new = cv2.imread(new)

	plt.figure(figsize=(6, 7))  #matplotlib设置画面大小 600*700
	#plt.suptitle('LSB信息隐藏')
	plt.subplot(2,2,1)
	plt.imshow(old)
	plt.title("原始图像")
	plt.subplot(2,2,2)
	plt.hist(old.ravel(), 256, [0,256])
	plt.title("原始图像直方图")
	plt.subplot(2,2,3)
	plt.imshow(new)
	plt.title("隐藏信息的图像")
	plt.subplot(2,2,4)
	plt.hist(new.ravel(), 256, [0,256])
	plt.title("隐藏信息图像直方图")
	plt.tight_layout() #设置默认的间距
	plt.show()


#le为所要提取的信息的长度,str1为加密载体图片的路径,str2为提取文件的保存路径
def func_LSB_quyujiaoyan_tiqu(le,str1,str2):
	a=""
	b=""
	im = Image.open(str1)


	global width
	global height
	width = im.size[0]
	height = im.size[1]
	print(width,',',height)
	len_total = le
	count = 0


	global LSB_quyujiaoyan_size
	size = int(LSB_quyujiaoyan_size)
	print('size: ',size)

	pixel = []
	for p in range(1,len_total+1):
		for i in range(1,size+1):
			w,h = q_converto_wh((p-1)*size+i)
			pixel.append(im.getpixel((w,h)))

		re = 0
		for i,v in enumerate(pixel):
			re = re + mod(v,2)
		pixel = []
		re = mod(re,2)
		b=b+str(re)


	print(b)

	with open(str2,"wb") as f:
		for i in range(0,len(b),8):
			#以每8位为一组二进制,转换为十进制
			stra = toasc(b[i:i+8])
			#stra = b[i:i+8]
			#将转换后的十进制数视为ascii码,再转换为字符串写入到文件中
			stra = chr(stra)
			sb = bytes(stra, encoding = "utf8")

			f.write(sb)
			stra =""
	f.closed


global LSB_quyujiaoyan_text_len
def LSB_quyujiaoyan_tiqu():

	global LSB_quyujiaoyan_text_len
	le = int(LSB_quyujiaoyan_text_len)
	print('le: ',le)


	tkinter.messagebox.showinfo('提示','请选择要进行LSB区域校验位算法提取的图像')
	Fpath=filedialog.askopenfilename()

	tkinter.messagebox.showinfo('提示','请选择将提取信息保存的位置')
	tiqu=filedialog.askdirectory()

	tiqu = tiqu+'/LSB-regional_verification-recover.txt'

	LSB_new = Fpath
	func_LSB_quyujiaoyan_tiqu(le,LSB_new,tiqu)
	tkinter.messagebox.showinfo('提示','隐藏信息已提取,请查看LSB-regional_verification-recover.txt')


def create_random_interval():
	root = Toplevel()
	root.title("随机间隔法")
	root.geometry('800x400')
	Label(root, text="随机间隔法",font=fontStyle1).pack()


	button5 = Button(root,text="LSB随机间隔法水印嵌入",command=LSB_suijijiange_yinxie)  # 控制label的颜色
	button6 = Button(root,   text="LSB随机间隔法水印提取",command=LSB_suijijiange_tiqu)  # 控制label的颜色
	button5.place(height =60,width =350,x = 30,y = 150)
	button6.place(height =60,width =350,x = 430,y = 150)
	myentry = Entry(root)
	myentry.place(x=350,y=65)
	def get_entry_text():
		global LSB_suijijiange_step
		LSB_suijijiange_step = myentry.get()
		tkinter.messagebox.showinfo('提示','随机间隔步长已被设置为'+LSB_suijijiange_step)
		print('LSB_suijijiange_step: ',LSB_suijijiange_step)
	Button(root,text="设置随机间隔的步长",command=get_entry_text,style='Test.TButton').place(x=357,y=87.5)


	myentry1 = Entry(root)
	myentry1.place(x=350,y=300)
	def get_entry_text():
		global LSB_suijijiange_text_len
		LSB_suijijiange_text_len = myentry1.get()
		tkinter.messagebox.showinfo('提示','输入提取信息的长度已被设置为'+LSB_suijijiange_text_len)
		print(LSB_suijijiange_text_len)
	Button(root,text="输入提取信息的长度",command=get_entry_text,style='Test.TButton').place(x=350,y=320)

	Message(root,text='∎随机间隔法水印嵌入由用户选择图片和隐藏信息\n∎对图像进行随机间隔的LSB隐写后,将秘密信息写入\n∎绘制原始图像和隐写后的图像的直方图对比,并保存隐写后的图像\n∎随机间隔的步长由用户输入').place(x=100,y=230)
	Message(root,text='∎随机间隔法水印提取由用户选择要提取信息的图片和提取信息的保存路径\n∎程序将使用同样的随机种子,读取随机间隔法水印嵌入时保存的图像并提取出信息并保存到用户选择的路径').place(x=530,y=230)

	root.mainloop()


def creatre_regional_verification():
	root = Toplevel()
	root.title("区域校验位算法")
	root.geometry('850x400')
	Label(root, text="区域校验位算法",font=fontStyle1).pack()


	button5 = Button(root,   text="LSB区域校验位算法水印嵌入",command=LSB_quyujiaoyan_yinxie)
	button6 = Button(root,   text="LSB区域校验位算法水印提取",command=LSB_quyujiaoyan_tiqu)
	button5.place(height =60,width =370,x = 30,y = 150)
	button6.place(height =60,width =370,x = 430,y = 150)

	myentry = Entry(root)
	myentry.place(x=350,y=55)
	def get_entry_text():
		global LSB_quyujiaoyan_size
		LSB_quyujiaoyan_size = myentry.get()
		tkinter.messagebox.showinfo('提示','区域大小已被设置为'+LSB_quyujiaoyan_size)
		print(LSB_quyujiaoyan_size)
	Button(root,text="请输入区域校验位参数(区域大小)",command=get_entry_text,style='Test.TButton').place(x=330,y=78)


	myentry1 = Entry(root)
	myentry1.place(x=330,y=300)
	def get_entry_text():
		global LSB_quyujiaoyan_text_len
		LSB_quyujiaoyan_text_len = myentry1.get()
		tkinter.messagebox.showinfo('提示','输入提取信息的长度已被设置为'+LSB_quyujiaoyan_text_len)
		print(LSB_quyujiaoyan_text_len)
	Button(root,text="输入提取信息的长度",command=get_entry_text,style='Test.TButton').place(x=335,y=323)

	Message(root,text='∎区域校验位算法水印嵌入由用户选择图片和隐藏信息\n∎对图像进行区域校验位的LSB隐写后,将秘密信息写入\n∎绘制原始图像和隐写后的图像的直方图对比,并保存隐写后的图像\n∎区域校验位算法的区域大小由用户输入').place(x=100,y=230)
	Message(root,text='∎区域校验位算法水印提取由用户选择要提取信息的图片和提取信息的保存路径\n∎读取区域校验位算法水印嵌入时保存的图像并提取出信息并保存到用户选择的路径').place(x=550,y=230)

	root.mainloop()


#图像降级
def create_image():
	root = Toplevel()

	root.title("图片水印")
	root.geometry('700x400')

	w = Canvas(root)
	w.place(x=300,y=0, width=300,height=700)
	w.create_line(180,50,180,330,
              fill='#C0C0C0',
              #fill='red',
              width=2,)


	Message(root,text='∎图像降级算法水印嵌入由用户选择载体图片和水印图片\n∎将载体图片的四个最低为比特位替换成水印图片的四个最高比特位\n∎绘制原始图像和隐写后的图像的直方图对比,并保存隐写后的图像').place(x=500,y=60)
	Message(root,text='∎图像降级算法水印提取由用户选择要提取信息的图片和提取信息的保存位置\n∎程序读取要提取信息的图片,提取出隐藏的图片并保存').place(x=500,y=230)
	Label(root, text="图像降级算法",font=fontStyle).pack()
	button5 = Button(root,   text="图像降级算法水印嵌入",command=Image_yinxie)  # 控制label的颜色
	button6 = Button(root,   text="图像降级算法水印提取",command=Image_tiqu)  # 控制label的颜色
	button5.place(height =60,width =300,x = 150,y = 80)
	button6.place(height =60,width =300,x = 150,y = 230)
	root.mainloop()


#图像降级改进
def create_image1():
	root = Toplevel()
	root.title("图片水印")
	root.geometry('700x400')


	w = Canvas(root)
	w.place(x=300,y=0, width=300,height=700)
	w.create_line(205,50,205,330,
              fill='#C0C0C0',
              #fill='red',
              width=2,)


	Message(root,text='∎图像降级算法改进水印嵌入由用户选择载体图片和水印图片\n∎将水印图片的信息的八位的二进制数分成四块,每块分别加入到载体图片上去\n∎绘制原始图像和隐写后的图像的直方图对比,并保存隐写后的图像',cursor='cross',width='150').place(x=520,y=60)
	Message(root,text='∎图像降级算法改进水印提取由用户选择要提取信息的图片和提取信息的保存位置\n∎程序读取要提取信息的图片,提取出隐藏的图片并保存',cursor='cross',width='150').place(x=520,y=230)


	Label(root, text="图像降级算法改进",font=fontStyle).pack()
	button5 = Button(root,   text="图像降级算法改进水印嵌入",command=Image1_yinxie)  # 控制label的颜色
	button6 = Button(root,   text="图像降级算法改进水印提取",command=Image1_tiqu)  # 控制label的颜色
	button5.place(height =60,width =350,x = 130,y = 60)
	button6.place(height =60,width =350,x = 130,y = 230)
	root.mainloop()


def create_LSB_improve():
	root = Toplevel()
	root.title("LSB算法改进")
	root.geometry('800x400')

	w = Canvas(root)
	w.place(x=300,y=0, width=300,height=700)
	w.create_line(290,100,290,300,
              fill='#C0C0C0',
              #fill='red',
              width=2,)

	Label(root, text="LSB算法改进",font=fontStyle1).pack()
	button7 = Button(root,   text="LSB随机间隔法",command=create_random_interval)  # 控制label的颜色
	button9 = Button(root,   text="LSB区域校验位算法",command=creatre_regional_verification)  # 控制label的颜色

	button7.place(height =60,width =350,x = 200,y = 100)
	button9.place(height =60,width =350,x = 200,y = 200)
	Message(root,text='LSB随机间隔法包括随机间隔法水印嵌入和随机间隔水印提取',cursor='cross',width='150').place(x=600,y=100)
	Message(root,text='LSB区域校验位算法包括区域校验位算法水印嵌入和区域校验位算法水印提取',cursor='cross',width='150').place(x=600,y=200)
	root.mainloop()


def create_image_downgrade():
	root = Toplevel()
	root.title("图像降级算法及其改进")
	root.geometry('800x400')

	w = Canvas(root)
	w.place(x=300,y=0, width=300,height=700)
	w.create_line(280,100,280,300,
              fill='#C0C0C0',
              #fill='red',
              width=2,)


	Label(root, text="图像降级算法及其改进",font=fontStyle1).pack()
	button7 = Button(root,   text="图像降级算法",command=create_image)  # 控制label的颜色
	button9 = Button(root,   text="图像降级算法改进",command=create_image1)  # 控制label的颜色

	button7.place(height =60,width =350,x = 200,y = 100)
	button9.place(height =60,width =350,x = 200,y = 200)
	Message(root,text='图像降级算法包括图像降级算法水印嵌入和图像降级算法水印提取').place(x=600,y=100)
	Message(root,text='图像降级算法改进包括图像降级算法改进水印嵌入和图像降级算法改进水印提取').place(x=600,y=200)

	root.mainloop()


def create_LSB_basic():
	root = Toplevel()
	root.title("LSB基本算法")
	root.geometry('800x400')

	w = Canvas(root)
	w.place(x=300,y=0, width=300,height=700)
	w.create_line(290,50,290,330,
              fill='#C0C0C0',
              #fill='red',
              width=2,)

	button1 = Button(root,   text="LSB基本算法水印嵌入",command=LSB_yinxie)
	button2 = Button(root,   text="LSB基本算法水印提取",command=LSB_tiqu)

	button1.place(height =60,width =300,x = 250,y = 50)
	button2.place(height =60,width =300,x = 250,y = 200)

	Message(root,text='∎LSB基本算法水印嵌入由用户选择图片和隐藏信息\n∎对图像进行最低有效位隐写后将秘密信息写入\n∎绘制原始图像和隐写后的图像的直方图对比,并保存隐写后的图像',cursor='cross',width='150').place(x=600,y=50)
	Message(root,text='∎LSB基本算法水印提取由用户选择要提取信息的图片和提取信息的保存路径\n∎程序将读取LSB隐写时保存的图像并提取出信息,保存到用户选择的路径',cursor='cross',width='150').place(x=600,y=200)


	myentry = Entry(root)
	myentry.place(x=320,y=300)
	def get_entry_text():
		global LSB_text_len
		LSB_text_len = myentry.get()
		tkinter.messagebox.showinfo('提示','提取信息长度已被设置为'+LSB_text_len)
		print(LSB_text_len)
	Button(root,text="输入提取信息的长度",command=get_entry_text,style='Test.TButton').place(x=320,y=320)

	Label(root, text="LSB基本算法",font=fontStyle1).pack()

	root.mainloop()


def create_DCT():
	root = Toplevel()

	Label(root, text="变换域水印",font=fontStyle1).pack()
	root.title("变换域水印")
	root.geometry('700x400')
	button3 = Button(root,   text="DCT水印嵌入",command=DCT_yinxie)  # 控制label的边界
	button4 = Button(root,   text="DCT水印提取",command=DCT_tiqu)  # 控制label的颜色
	button3.place(height =60,width =200,x = 100,y = 150)
	button4.place(height =60,width =200,x = 400,y = 150)

	Message(root,text='∎DCT水印嵌入由用户选择图片和隐藏信息\n∎对图像进行DCT变换后将秘密信息写入\n∎绘制原始图像和隐写后的图像的直方图对比,并保存隐写后的图像',cursor='cross',width='150').place(x=100,y=250)
	Message(root,text='∎DCT提取由用户选择要提取信息的图片和提取信息的保存路径\n∎程序将读取DCT隐写时保存的图像并提取出信息并保存到用户选择的路径',cursor='cross',width='150').place(x=430,y=250)

	myentry = Entry(root)
	myentry.place(x=280,y=300)
	def get_entry_text():
		global DCT_text_len
		DCT_text_len = myentry.get()
		tkinter.messagebox.showinfo('提示','提取信息长度已被设置为'+DCT_text_len)
		print(DCT_text_len)
	Button(root,text="输入提取信息的长度",command=get_entry_text,style='Test.TButton').place(x=280,y=330)

	root.mainloop()


def create_LSB():
	root1 = Toplevel()
	root1.title("空间域水印")
	root1.geometry('800x430')

	w = Canvas(root1)
	w.place(x=300,y=0, width=300,height=700)
	w.create_line(250,50,250,370,
              fill='#C0C0C0',
              #fill='red',
              width=2,)

	Label(root1, text="空间域水印").pack()
	button2 = Button(root1,   text="LSB基本算法",command=create_LSB_basic)
	button0 = Button(root1,   text="LSB算法改进",command=create_LSB_improve )
	button7 = Button(root1, text='图像降级算法及其改进',  command=create_image_downgrade )

	Message(root1,text='∎LSB基本算法包括LSB基本算法水印嵌入和LSB基本算法水印提取.\n∎可以实现将信息隐藏在图片中和从隐藏信息的图片中提取信息的功能',cursor='cross',width='150').place(x=600,y=50)
	Message(root1,text='∎LSB算法改进包括随机间隔法和区域校验位算法\n∎在LSB算法的基础上,减小了水印嵌入对载体图片统计特性的影响',cursor='cross',width='150').place(x=600,y=170)
	Message(root1,text='∎图像降级算法及其改进包括图像降级算法和图像降级算法的改进\n∎可以实现将图片水印嵌入图片当中的功能',cursor='cross',width='150').place(x=600,y=300)

	button2.place(height =60,width =300,x = 200,y = 50)
	button0.place(height = 60,width = 300,x = 200,y = 170)
	button7.place(height =60,width =300,x = 200,y = 300)

	root.mainloop()


def center_window(root, width, height):
    screenwidth = root.winfo_screenwidth()
    screenheight = root.winfo_screenheight()
    size = '%dx%d+%d+%d' % (width, height, (screenwidth - width)/2, (screenheight - height)/2)
    #print(size)
    root.geometry(size)


root = Tk()  # 创建一个主窗体。相当于提供了一个搭积木的桌子
#center_window(root, 500, 200)
root.title("郝希烜")
# root.geometry('1100x500+200+20')#调整窗体大小,第一个数横大小,第二个数纵大小,第三个数离左屏幕边界距离,第四个数离上面屏幕边界距离
root.geometry('850x500')#调整窗体大小,第一个数横大小,第二个数纵大小,第三个数离左屏幕边界距离,第四个数离上面屏幕边界距离

root.attributes('-toolwindow', False,
                '-alpha', 0.9,
                '-fullscreen', False,
                '-topmost', False)

global fontStyle
fontStyle = tkFont.Font(family="Lucida Grande", size=20)
fontStyle1 = tkFont.Font(family="Lucida Grande", size=15)
fontStyle2 = tkFont.Font(family="Lucida Grande", size=10)

w = Canvas(root)
w.place(x=500,y=170, width=300,height=190)

Label(root, text="基于数字图像的可视化水印系统",font=fontStyle).pack()

style = Style(root)
style.configure("TButton",font=fontStyle)
style.configure("Test.TButton",font=fontStyle2)
Button(root, text='空间域水印',command=create_LSB).place(height =60,width =200,x = 170,y = 170)
Button(root, text='变换域水印',command=create_DCT).place(height = 60,width = 200,x = 450,y = 170)

Message(root,text='空间域水印包含:\n    LSB水印嵌入和提取\n    LSB算法改进\n    图像降级算法及其改进',cursor='cross',width='200').place(x=200,y=270,width=200)
Message(root,text='变换域水印包含:\n    DCT隐写\n    DCT提取',cursor='cross',width='200').place(x=450,y=270,width=200)

root.mainloop()  # 开启一个消息循环队列,可以持续不断地接受操作系统发过来的键盘鼠标事件,并作出相应的响应
# mainloop应该放在所有代码的最后一行,执行他之后图形界面才会显示并响应系统的各种事件


