制作PointNet以及PointNet++点云训练样本
目录
一、明确问题:
1.1、 标准数据集参考:
1.2 、HDF5数据组织形式:
二、开始制作数据集
2.1、数据标注,本人使用了Arcgis软件进行标注
2.2、样本点云提取,采样,归一化
1):根据点云las名称和类别名称文件,创建输入输出存储的三级文件夹
2):提取las数据,保存为txt
3):按shp正式开始提取----点云加底面----采样为2048---标准化归一化----存储为las和txt格式
4):最后,可以把同类别样本移动到一起,并计算样本总数量
编辑
3、保存制作为hdf5文件
3.1、首先 需要不重复的选择 2048 个样本,代码如下:
3.2、最后,保存制作hdf5文件
4、最终
一、明确问题:
1.1、 标准数据集参考:
制作自己的PointNet、以及PointNet++ 网络中 classification (分类)使用的标准点云样本数据集包含(XYZ)坐标以及(label)标签信息。
参考的github地址:https://github.com/charlesq34/pointnet
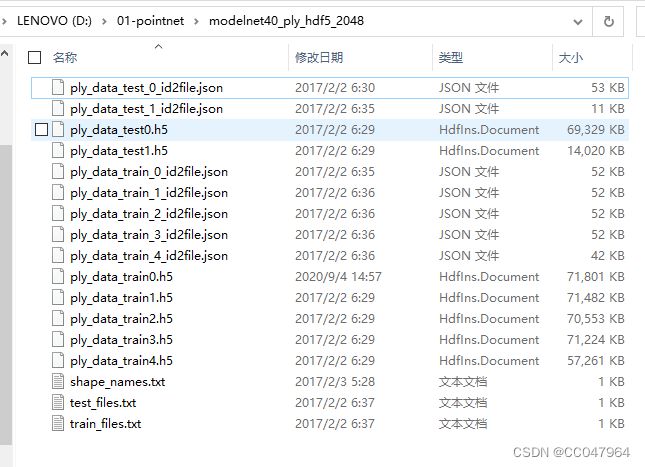
仿照的标准分类数据:modelnet40_ply_hdf5_2048,组织为.h5格式,test_files,train_files以及shape_names。
标准数据链接为:
1.2 、HDF5数据组织形式:
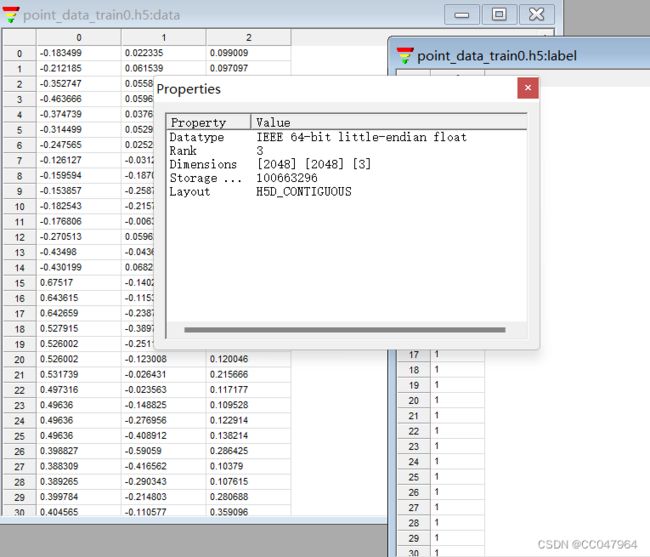
data: data中共有 2048个 2048 行*3列的 点云矩阵,即每个hdf5文件中有 2048个点云样本,每个点云样本中又有2048个点,每个点包括 (XYZ)三个坐标信息,所以矩阵表示是 2048*2048*3(2048个样本,每个样本2048个点,每个点包含XYZ三个坐标)。
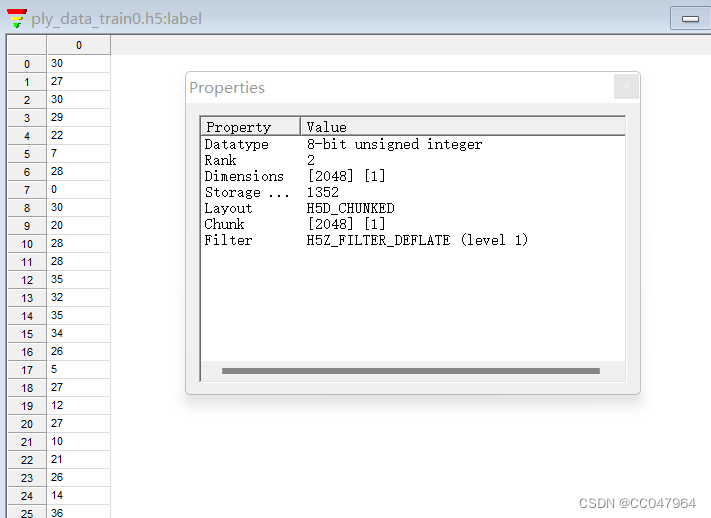
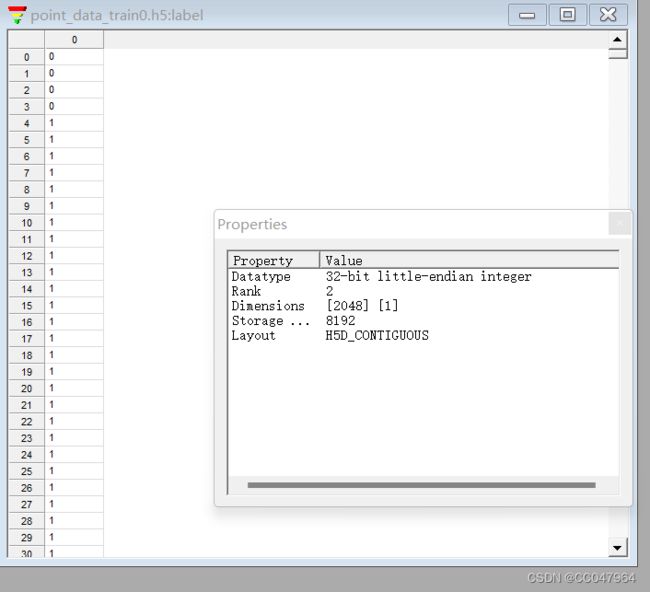
label: 因为数据是2048个点云样本,每一个样本有属于一个类别,(虽然每个样本有2048个点,但这是一个样本,其中所有点也属于一类),所以每个样本一个类别,2048个样本有2048*1个类别。这是label的组织格式,可以减少一些数据量
即:
data: 2048*2048*3
label:2048*1
二、开始制作数据集
2.1、数据标注,本人使用了Arcgis软件进行标注
首先 加载 需要的 点云(已经经过预处理的),建立 shp文件开始勾画,
2.2、样本点云提取,采样,归一化
勾画完成,python调用gis工具批量按照不同类别分类提取,并同时建立label信息。
(本实验将研究区划分了BC,BLC,BNC三个类别,分别标注0,1,2)
1):根据点云las名称和类别名称文件,创建输入输出存储的三级文件夹
输入数据:两个txt,放入一个文件夹:(需要自己创建,一个是类别名称txt,自己命名类别,一个是自己点云块的名称,没有点云块可以根据自己实际状况调整).
根据shapelabel , 和 lasname 创建输入数据,输出数据存储的三级文件夹,如下代码:
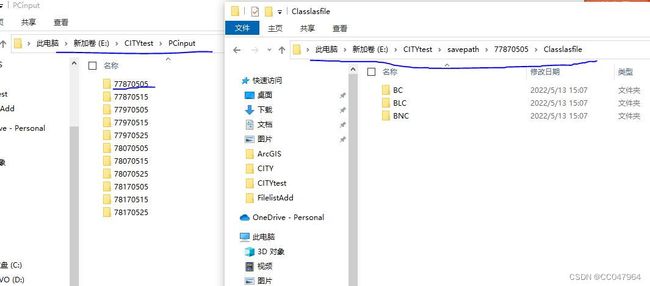
因为本人还想保留过程数据,比如单个类别的shp,las文件,所以给了file_class变量,最终只需要txt文件。(根据个人情况调整),创建的文件夹,一级:lasname,二级: file_class = ['Classshpfile', 'Classlasfile', 'Classtxtfile'], 三级: shapelabel = ['BC','BLC','BNC']
# -*- coding: UTF-8 -*-
import os
import shutil
# 获取文件中内容
def GetData_fromFile(list_filename):
    return [line.rstrip() for line in open(list_filename,'r')]

if __name__ == '__main__':
    # 输入输出根目录
    Input_path_root = 'E:\CITYtest\PCinput/'
    Out_path_root = 'E:\CITYtest/savepath//'

    # shapelable.txt和lasname.txt需根据自己的数据先创建,
    shapename = GetData_fromFile('E:\CITYtest\FilelistAdd\shapelable.txt')
    lasname =  GetData_fromFile('E:\CITYtest\FilelistAdd\lasname.txt')
    # 最后需要存储什么类型文件,根据自己需要
    file_class = ['Classshpfile', 'Classlasfile', 'Classtxtfile']

    # 建立三级存储文件夹,因为要同时存储每一大点云文件提取的每个类别样本的 las,shp,和txt文件
    # 也就是,一级:点云数据名称 ; 二级:las,shp,txt,三级:BC,BLC,BNC
    # 实际可根据自己的需要建立存储文件夹
    for m in range(len(lasname)):
        #创建 空的 输入文件夹
        Input_path_make = os.path.join(Input_path_root,lasname[m])
        if not os.path.exists(Input_path_make):  # 判断文件夹是否已经存在
            os.makedirs(Input_path_make)
        else:
            shutil.rmtree(Input_path_make)
            os.makedirs(Input_path_make)
        # 创建 空的 输出文件夹
        for i in range(len(file_class)):
            for j in range(len(shapename)):
                # 文件路径
                Out_path_make = os.path.join(Out_path_root,lasname[m],file_class[i],shapename[j])
                if not os.path.exists(Out_path_make):  # 判断文件夹是否已经存在
                    os.makedirs(Out_path_make)
                else:
                    shutil.rmtree(Out_path_make)
                    os.makedirs(Out_path_make)
    print('111')
执行成功:
2):提取las数据,保存为txt
准备数据:shp矢量文件,las点云数据,以及第一步提到的lasname和shapelabel的txt文件。
2.1、 准备shp数据
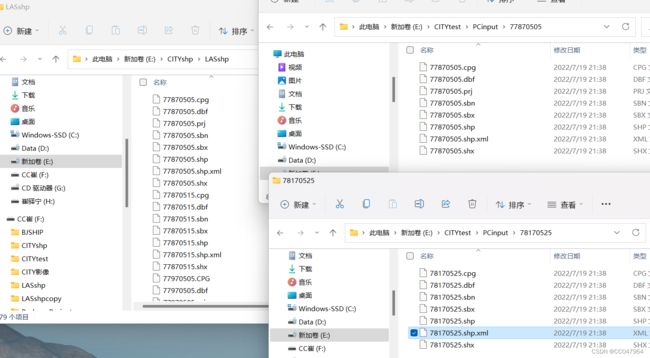
把数据标注勾画好的shp文件放进(移动)创建的PCinput文件中(各个名称对应)。
# -*- coding: UTF-8 -*-
import os
import shutil

def GetData_fromFile(list_filename):
    return [line.rstrip() for line in open(list_filename,'r')]

if __name__ == '__main__':
    lasname =  GetData_fromFile('E:\CITYtest\FilelistAdd\lasname.txt')
    old_path_shp = 'E:\CITYshp\LASshpAdd/'  # 源文件夹
    for j in  range(len(lasname)) :
        new_path = 'E:\CITYtest\PCinput/' + lasname[j]#目标文件夹
        filename = os.listdir(old_path_shp)
        for file in filename:
            #srcdir, tempfilename = os.path.split(fns[i])  ##分离绝对路径,文件名加后缀,得到的是路径和文件名加后缀
            fn1, extend1= os.path.splitext(file)  # 分离文件名和后缀
            fn, extend = os.path.splitext(fn1)  # 再次分离文件名和后缀,因为出现了.shp.xml的文件,对于.shp的不影响。
        #     字符串截取 是闭区间。
            if fn[3:] == lasname[j]:
                shutil.copy(os.path.join(old_path_shp,file), os.path.join(new_path,file))
print('666')
执行成功:
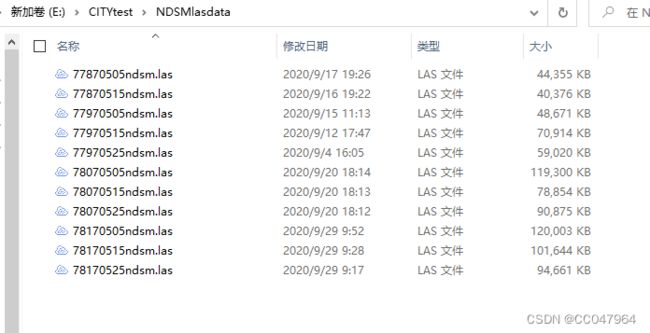
2.2 、准备las数据,我的las数据是已经预处理完的nDSM点云。
2.3 准备第一步提到的存储las名称和label名称的txt文件。
3):按shp正式开始提取----点云加底面----采样为2048---标准化归一化----存储为las和txt格式
代码如下
# -*- coding: utf-8 -*-
# 注意此时的laspy,有版本问题,2.0以上的版本就会出现问题,此时的版本是1.7.0
from laspy.file import File
import os
import arcpy
import shutil
import numpy as np
np.set_printoptions(suppress=True)

# 获取txt文件中的各种文件
def GetData_fromFile(list_filename):
    return [line.rstrip() for line in open(list_filename,'r')]

# 只获取文件里面的shpfile中的shp文件
def Get_specific_File(dir, ext):
    need_file = []
    allfiles = os.listdir(dir)
    for i in range(len(allfiles)):
        name,extend = os.path.splitext(allfiles[i])
        if extend[1:] == ext:
            root_shp_path = os.path.join(dir,allfiles[i])
            need_file.append(root_shp_path)
    return need_file

#分割对应点云块的shp文件,以便于下一步提取
def split_move_shp(shp_path, out_path, label,splitfield):
    arcpy.Split_analysis(in_features = shp_path, split_features = shp_path,
                     split_field = splitfield, out_workspace = out_path)
    all_files = os.listdir(out_path)
    for k in range(len(label)):
        move_path_dir = os.path.join(out_path, label[k])
        for file in all_files:
            name_first, ext_first = os.path.splitext(file)  # 分离文件名和后缀
            f_name, ext_second = os.path.splitext(name_first)  # 再次分离文件名和后缀,因为出现了.shp.xml的文件,对于.shp的不影响
            if f_name[:-4] == label[k]:
                shutil.move( os.path.join(out_path,file), move_path_dir)
        # 点云规范化
def PC_NORMLIZE(pc):
    centroid = np.mean(pc, axis=0)
    pc = pc - centroid
    m = np.max(np.sqrt(np.sum(pc**2, axis=1)))
    pc = pc / m
    return pc

# 采样到2048
def sample_data(data, num_sample):
    """ data is in N x ...
        we want to keep num_samplexC of them.
        if N > num_sample, we will randomly keep num_sample of them.
        if N < num_sample, we will randomly duplicate samples.
    """
    N = data.shape[0]
    if (N == num_sample):
        return data
    elif (N > num_sample):
        sample = np.random.choice(N, num_sample)
        return data[sample, ...]
    else:
        # 相当于从N中抽取 num_sample - N个随机数组成一维数组array,成为data的下标索引值
        sample = np.random.choice(N, num_sample - N)
        dup_data = data[sample, ...]  # 取数据
        # 按行拼接
        return np.concatenate([data, dup_data], axis=0)
        # return np.concatenate([data, dup_data], 0), list(range(N)) + list(sample)


if __name__ == "__main__":

    las_name = GetData_fromFile('E:\CITYtest\FilelistAdd/lasname.txt')
    label_name = GetData_fromFile('E:\CITYtest\FilelistAdd\shapelable.txt')
    #自定义需要得到什么类型的文件数据
    file_class = ['Classshpfile', 'Classlasfile','Classtxtfile']
    #输入文件·路径
    input_shp_dir = 'E:\CITYtest\PCinput//'
    input_las_dir = 'E:\CITYtest/NDSMlasdata//'
    save_dir = 'E:\CITYtest\savepath/'
    for m in range(len(las_name)):
        # 每个类别shp文件的路径
        shp_save_path = save_dir + '/'+ las_name[m] + '/'+ file_class[0]
        las_save_path = save_dir + '/'+ las_name[m] + '/'+ file_class[1]
        txt_save_path = save_dir + '/'+ las_name[m] + '/'+ file_class[2]
        # 获取每整个点云块的shp文件
        # 注意shp_full 是一个列表文件,不是直接变量,引用时需要用shp_full[0,1,2]
        shp_full = Get_specific_File(os.path.join(input_shp_dir, las_name[m]), 'shp')
        # # # 开始对整个shp文件分割
        if len(shp_full) != 0:
            split_move_shp( shp_full[0], shp_save_path, label_name,'newname')
        # 数据分割完毕,开始进行las点云提取
        # 得到每个label文件下的shp文件
        # 定义要提取的las路径,开始提取
            all_las_list = os.listdir(input_las_dir)
            las_ndsm_name,extend = os.path.splitext(all_las_list[m])
            root_extract_las = os.path.join(input_las_dir, all_las_list[m])

            for i in range(len(label_name)):
                # 获取每个类别的单个样本shp
                single_shp_path = os.path.join(shp_save_path, label_name[i])
                shp_list = Get_specific_File(single_shp_path, 'shp')
                # 提取单个las的路径
                single_las_save = os.path.join(las_save_path, label_name[i])

                if len(shp_list) != 0:
                    for j in range(len(shp_list)):
                        stir = str(j + 1)
                        st = stir.zfill(4)  # 补零补够四位数
                        arcpy.ddd.ExtractLas(in_las_dataset = root_extract_las,
                                             target_folder = single_las_save,
                                             boundary= shp_list[j],
                                             name_suffix=label_name[i] + st, remove_vlr=True,
                                             rearrange_points='REARRANGE_POINTS', )

                        las_list_path = os.path.join(single_las_save, las_ndsm_name + label_name[i] + st + '.las')

                        # 只提取样本las中的X,Y,Z和intensity,raw_classification信息
                        f = File(las_list_path, mode='rw')
                        # 改变样本标签为 0,1,2
                        # print(f.x.shape)
                        point_cloud = np.vstack((f.x, f.y, f.z, f.intensity, f.raw_classification)).T

                        point_cloud[:,4] = i
                        # 给点云加上底面,获取行数
                        row_num = point_cloud.shape[0]
                        # 生成和行数一 样的一维0数组
                        z_back = np.zeros(row_num)
                        # 底面
                        point_back = np.vstack((f.x, f.y, z_back, f.intensity, f.raw_classification)).T
                        # 屋顶和底面放一起
                        # print(point_back.shape)
                        point_cloud_add = np.vstack((point_cloud, point_back))
                        # point_cloud_add = np.concatenate((point_cloud, point_back),axis=0)
                        # 采样到2048
                        sample_pc = sample_data(point_cloud_add, 2048)
                        # 只取数据坐标信息归一化,中心化
                        pc_norm = PC_NORMLIZE(sample_pc[:, 0:3])
                        # 规范后数据代替原来的坐标
                        sample_pc[:, 0:3] = pc_norm
                        # 存储为txt格式
                        single_txt_save = os.path.join(txt_save_path,label_name[i])

                        np.savetxt( os.path.join(single_txt_save , las_name[m] + label_name[i] + st + '.txt'),
                                   sample_pc, fmt="%.6f", delimiter=" ")
                else:
                    print ("该类别无样本数据")

        else:
            print('该块las的样本shp为空')

    print('successful')
print('over')
运行成功,结果如下:(没放完)
至此,得到各个点云块,各个类别的单个样本数据。
4):最后,可以把同类别样本移动到一起,并计算样本总数量
# -*- coding: UTF-8 -*-
import os
import shutil
import numpy as np
import pandas as pd

def GetData_fromFile(list_filename):
	return [line.rstrip() for line in open(list_filename, 'r')]


if __name__ == '__main__':

	las_name = GetData_fromFile('E:\CITYtest\FilelistAdd/lasname.txt')
	label_name = GetData_fromFile('E:\CITYtest\FilelistAdd\shapelable.txt')

	# 自定义需要得到什么类型的文件数据
	file_class = ['Classshpfile', 'Classlasfile', 'Classtxtfile']
	# # 输入文件·路径
	save_dir = 'E:\CITYtest\savepath/'
	class_dir = 'E:\CITYtest\Allclass/'

	count = 0
	sum_count = 0
	num_sample = np.zeros((len(label_name)+1, 1), dtype=int)

	# # 创建同类别文件夹
	for i in range(len(label_name)):
		move_dir = os.path.join(class_dir, label_name[i])
		if not os.path.exists(move_dir):  # 判断文件夹是否已经存在
			os.makedirs(move_dir)
		else:
			shutil.rmtree(move_dir)
			os.makedirs(move_dir)


# 如下:分别计算每个类别样本数量
	for i in range(len(label_name)):
		for m in range(len(las_name)):
			# 每个类别shp文件的路径
			root_txt_path = save_dir + '/' + las_name[m] + '/' + file_class[2] + '//'+ label_name[i]

			all_txt_list = os.listdir(root_txt_path)
			# 计数一共有多少个样本
			count = count + len(all_txt_list)
			# 开始移动
			for j in range(len(all_txt_list)):
				old_file_path = os.path.join(root_txt_path, all_txt_list[j])
				new_file_path = os.path.join(class_dir + '/' + label_name[i], all_txt_list[j])
				shutil.copy(old_file_path, new_file_path)

		num_sample[i,0] = count
		sum_count = sum_count + count
		count = 0

	num_sample[len(label_name),0] =sum_count
	label_name.append('sum')
	df_num = pd.DataFrame(num_sample, index=label_name, columns=["number"])

	print(df_num)
	print('over')
运行结果如下:得到总样本数量5526个,以及各个类别的样本数量。
3、保存制作为hdf5文件
明确第一步的问题,每个hdf5的data 和label包含的数据:看第一步的介绍
data: 2048*2048*3
label:2048*1
那么,由于目前样本只有5526个, 可以大概分为 2个 hdf5 文件,即:所以,创建一个train,和一个test,如果有更多的样本可以依次组织 train_2,3,4,5......等等。
3.1、首先 需要不重复的选择 2048 个样本,代码如下:
# -*- coding: UTF-8 -*-
import os
import random
import shutil

def select_file_rand(source_path, out_path, num):
    num_list = 0
    list_file = os.listdir(source_path)
    if num > len(list_file):
        print('输出数量必须小于:', len(list_file))
        exit()
    else:
        num_list = random.sample(range(0, len(list_file)), num)  # 生成随机数列表a

    for n in num_list:
        filename = list_file[n]
        old_path = os.path.join(source_path, filename)
        new_path = os.path.join(out_path, filename)
        shutil.move(old_path, new_path)
    print('==========task OK!==========')

if __name__ == "__main__":
    # train_file = ['train0', 'train1', 'train2', 'train3', 'train4', 'train5', 'test0']
    train_file = ['train0', 'test0']
    source_file = r'E:\CITYtest\Allclass/allfile'
    out_dir = 'E:\CITYtest\Trainfile'
    net_num = 2048

    for i in range(len(train_file)):
        out_file = os.path.join(out_dir, train_file[i])
        os.makedirs(out_file)

        select_file_rand(source_file, out_file,net_num)  # 操作目录,输出目录,输出数量
3.2、最后,保存制作hdf5文件
data: 2048*2048*3
label:2048*1
# -*- coding: UTF-8 -*-
import os
import numpy as np
import h5py
np.set_printoptions(suppress=True)

def getDataFiles(path_root):
    filelist = os.listdir(path_root)
    for i in range(len(filelist)):
       filelist[i] = os.path.join(path_root,filelist[i])
    return filelist

#得到的返回值是一维字符串数组
def loadDataFile(path):
    data = np.loadtxt(path)
    point_xyz = data[:, 0:3]
    label=data[:,4]
    label_int = label.astype(int)
    return point_xyz, label_int

if __name__ == "__main__":

    train_file = ['train0', 'test0']
    net_num = 2048
    train_dir = 'E:\CITYtest\Trainfile//'

    for i in range(len(train_file)):
        root_file =  os.path.join(train_dir,train_file[i])
        DATA_FILES = getDataFiles(root_file)

        DATA_ALL = []
        LABEL_ALL = []
        for fn in range(len(DATA_FILES)):
            pre_data, his_label = loadDataFile(DATA_FILES[fn])
            pre_label = his_label.reshape(net_num, 1)  # 重塑为num行1列的数据 得到num个点云的标签

            # data_label = np.hstack((pre_data, pre_label))
            DATA_ALL.append(pre_data)  #列表元素
            # label一个样本中的类别是一样的,取一个数字就可以了
            LABEL_ALL.append(pre_label[0])

        # 把DATA_ALL和LABEL_ALL的列表转换成数组格式,
        out_data = np.vstack(DATA_ALL)
        out_label = np.vstack(LABEL_ALL)

        # 重塑为三维数组,2048  个  2048*4 的三个数组
        data_reshape = out_data.reshape(net_num, net_num, 3)
        # 写入训练数据
        filename= train_dir +'/'+ 'point_data_' + train_file[i] + '.h5'
        if not os.path.exists(filename):
            with h5py.File(filename, 'w') as f:
                f['data'] = data_reshape
                f['label'] = out_label
                f.close()
        else:
            print('hdf5文件已存在')

print("over")
最终结果如下:,即可在linux中进行训练,
4、最终
其中有些步骤可以简化,可以改变,可以修改,可以整合,仅供参考,fangbia非常感谢大家。
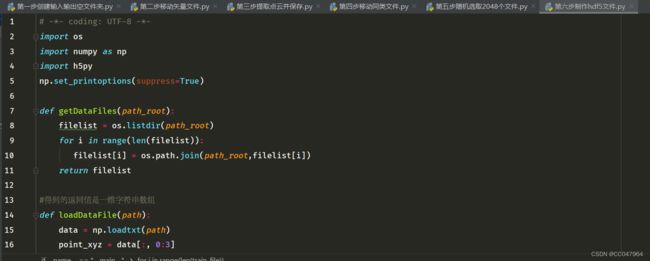
如下是自己程序运行的步骤,也是上述代码的顺序,仅供参考,
