【spring mvc】java-Spring mvc 简单搭建
【开发日记】java-Spring mvc简单搭建
开发环境
myEclipse +tomcat6 开发-1
工程文件及jar包
点击此处
第一步:建立一个Web项目
在myeclipse下创建web工程SpringTest2016.
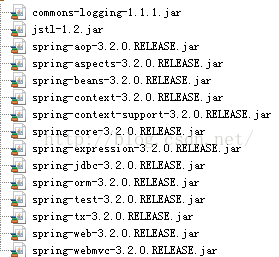
第二步:导入spring3.2.0的jar包
第三步:前端控制器配置
在\WEB-INF\web.xml中配置前端控制器,这里很关键
代码
<servlet>
<servlet-name>springmvcservlet-name>
<servlet-class>org.springframework.web.servlet.DispatcherServletservlet-class>
<init-param>
<param-name>contextConfigLocationparam-name>
<param-value>classpath:springmvc.xmlparam-value>
init-param>
<load-on-startup>1load-on-startup>
servlet>
<servlet-mapping>
<servlet-name>springmvcservlet-name>
<url-pattern>*.actionurl-pattern>
servlet-mapping>
load-on-startup:表示servlet随服务启动;
url-pattern:*.action的请交给DispatcherServlet处理。
contextConfigLocation:指定springmvc配置的加载位置,如果不指定则默认加
载WEB-INF/[DispatcherServlet的Servlet 名字]-servlet.xml。
具体截图
第四步:springmvc的配置
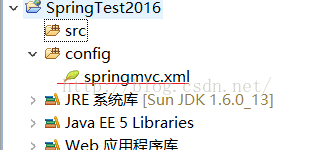
1、 在SpringTest2016中新建一个源文件夹、命名config
2、 新建一个文件,命名为springmvc.xml注意格式为xml
注意web.Xml里面classpath的springmvc.xml为上面的文件名这里是对应关系,这里填错了会运行不起来
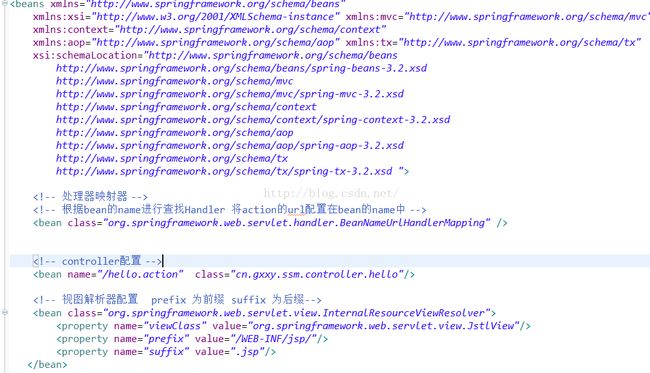
1、复制头代码进去
<beansxmlns="http://www.springframework.org/schema/beans"
xmlns:xsi="http://www.w3.org/2001/XMLSchema-instance"xmlns:mvc="http://www.springframework.org/schema/mvc"
xmlns:context="http://www.springframework.org/schema/context"
xmlns:aop="http://www.springframework.org/schema/aop"xmlns:tx="http://www.springframework.org/schema/tx"
xsi:schemaLocation="http://www.springframework.org/schema/beans
http://www.springframework.org/schema/beans/spring-beans-3.2.xsd
http://www.springframework.org/schema/mvc
http://www.springframework.org/schema/mvc/spring-mvc-3.2.xsd
http://www.springframework.org/schema/context
http://www.springframework.org/schema/context/spring-context-3.2.xsd
http://www.springframework.org/schema/aop
http://www.springframework.org/schema/aop/spring-aop-3.2.xsd
http://www.springframework.org/schema/tx
http://www.springframework.org/schema/tx/spring-tx-3.2.xsd">
2、配置处理器映射器:
3、配置处理器配置
<bean name="/hello.action" class="cn.gxxy.ssm.controller.hello"/>
4、配置视图解析器
<beanclass="org.springframework.web.servlet.view.InternalResourceViewResolver">
<propertyname="viewClass"value="org.springframework.web.servlet.view.JstlView"/>
<propertyname="prefix"value="/WEB-INF/jsp/"/>
<propertyname="suffix"value=".jsp"/>
5、总体截图
第五步: hello处理器开发
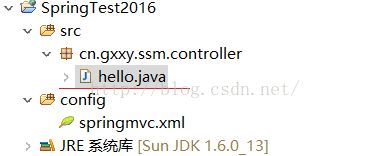
1、新建一个hello.java作为处理器
2、编辑hello.java添加servlet
添加对应的包->添加未实现的方法
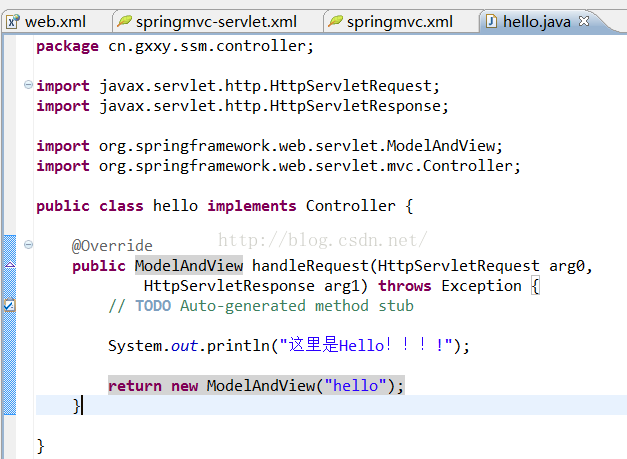
整个hello.java文件
3、添加对应的jsp文件-目录已经对应/WEB-INF/jsp/
详情在springmvc.xm里面、后缀为.jsp所以这里写个hello就行了
第六步: 运行程序
1、 工程——》运行-
2、 在地址栏输入:http://desktop-b2id923:8080/SpringTest2016/hello.action
效果:
好了,Spring已经基本搭建完了,最后祝大家Spring搭建成功.
