SpirngSecurity安全框架 | 狂神学习笔记
SpirngSecurity概述
Spring Security是 Spring 家族中的一个安全管理框架。相比与Shiro,它提供了更丰富的功能,社区资源也比Shiro丰富;
Spring Security是一个功能强大且高度可定制的身份验证和访问控制框架。
Spring Security是一个框架,致力于为Java应用程序提供身份验证和授权。与所有Spring项目一样,Spring Security的真正强大之处在于可以轻松扩展以满足自定义要求。
在 Java 生态中,目前有 Spring Security 和 Apache Shiro 两个安全框架,可以完成认证和授权的功能。
为什么要使用SpirngSecurity
在web开发中,安全占据第一位置
我们可以通过一些简单的安全策略,例如过滤器,拦截器保证安全
安全是一个非功能性需求,做网站,后台应该在设计之初进行考虑
就应该把这些东西考虑进去,虽然我们可以通过拦截器,过滤器来完成需求,但是会有大量的原生代码,冗余;而通过SpringSecurity,只需要进行简单的调用,便可实现无数复杂的功能
项目中所涉及的安全性问题
- 功能权限
- 访问权限
- 菜单权限
一般Web应用的需要进行 认证 和 授权 。
- 认证(Authentication):验证当前访问系统的是不是本系统的用户,并且要确认具体是哪个用户
- 授权(Authorization):经过认证后判断当前用户是否有权限进行某个操作
而认证和授权就是SpringSecurity作为安全框架的核心功能。
上手前需知
Spring Security是针对Spring项目的安全框架,也是Spring Boot底层安全模板默认的技术选型,他可以实现强大的Web安全控制,对于安全控制,我们仅需要引入spring-boot-starter-security模块,进行少量的配置,即可实现强大的安全管理
需要牢记的几个类
WebSecurityConfigurerAdapter: 自定义Security策略
AuthenticationManagerBuilder: 自定义认证策略
@EnableWebSecurity: 开启WebSecurity模式
案例实战
1、先导入静态资源页面
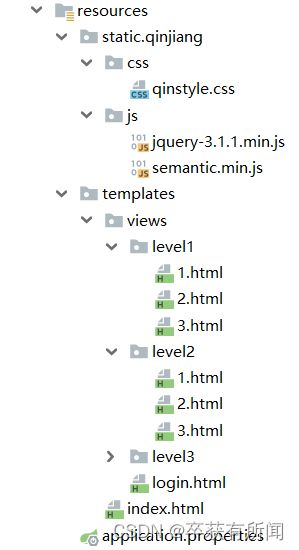
2、编写RouterController跳往各个页面
import org.springframework.stereotype.Controller;
import org.springframework.web.bind.annotation.PathVariable;
import org.springframework.web.bind.annotation.RequestMapping;

@Controller
public class RouterController {
    @RequestMapping({"/","/index"})
    public String index(){
        return "index";
    }
    @RequestMapping("toLogin")
    public String toLogin(){
        return "views/login";
    }
    @RequestMapping("/level1/{id}")
    public String level1(@PathVariable("id") int id){
        return "views/level1/"+id;
    }
    @RequestMapping("/level2/{id}")
    public String level2(@PathVariable("id") int id){
        return "views/level2/"+id;
    }
    @RequestMapping("/level3/{id}")
    public String level3(@PathVariable("id") int id){
        return "views/level3/"+id;
    }
}
2、SecurityConfig配置SpringSecurity
configure(HttpSecurity http)是实现授权功能的 什么用户可以访问什么页面
configure(AuthenticationManagerBuilder auth)是实现认证功能的
我们这里案例用的是用户名密码存到缓存里auth.inMemoryAuthentication(),也可以存到数据库 原理的一样的
我们还需要passwordEncoder(new BCryptPasswordEncoder() 对密码进行加密 保证安全
import org.springframework.security.config.annotation.authentication.builders.AuthenticationManagerBuilder;
import org.springframework.security.config.annotation.web.builders.HttpSecurity;
import org.springframework.security.config.annotation.web.configuration.EnableWebSecurity;
import org.springframework.security.config.annotation.web.configuration.WebSecurityConfigurerAdapter;
import org.springframework.security.crypto.bcrypt.BCryptPasswordEncoder;
//aop
@EnableWebSecurity
public class SecurityConfig extends WebSecurityConfigurerAdapter {

    //授权
    @Override
    protected void configure(HttpSecurity http) throws Exception {
        //首页所有人可以访问 里面的功能页只有有权限的人才能访问
        http.authorizeRequests().antMatchers("/").permitAll()
                .antMatchers("/level1/**").hasRole("vip1")
                .antMatchers("/level2/**").hasRole("vip2")
                .antMatchers("/level3/**").hasRole("vip3");

        //没有权限会到登录页面
        http.formLogin().loginPage("/toLogin"); //开启security默认的登录页面 没有权限会跳转这里

        //注销.开启了注销功能  .移除所有的cookie.清空所有的 sessiondeleteCookies("remove").invalidateHttpSession(true).
        http.logout().logoutSuccessUrl("/");

        //开启记住我功能,cookie 默认保存2周
        http.rememberMe().rememberMeParameter("remember");
    }

    //认证
    @Override
    protected void configure(AuthenticationManagerBuilder auth) throws Exception {
        auth.inMemoryAuthentication().passwordEncoder(new BCryptPasswordEncoder())
                .withUser("pzh").password(new BCryptPasswordEncoder().encode("123456")).roles("vip2","vip3") //加密
                .and()
                .withUser("root").password(new BCryptPasswordEncoder().encode("123456")).roles("vip","vip2","vip3")
                .and()
                .withUser("guest").password(new BCryptPasswordEncoder().encode("123456")).roles("vip");
    }
}
3、让特定身份只能看到特定内容的界面
通过Thymeleaf加SpringSecurity来实现,先导包
这里我们到5版本的,狂神视频导的4版本的,后面容易出bug
            org.thymeleaf.extras
            thymeleaf-extras-springsecurity5
            3.0.4.RELEASE
在页面引入命名空间
xmlns:th="http://www.thymeleaf.org" xmlns:sec=http://www.thymeleaf.org/extras/spring-security在html利用sec:authorize="hasRole(‘xxx’)"对权限进行筛选
这样我们就能实现 对应的用户 可以看到对应的界面了
4、开启记住密码功能
 //没有权限会到登录页面
        http.formLogin().loginPage("/toLogin"); //开启security默认的登录页面 没有权限会跳转这里
在授权类里面加上
//开启记住我功能,cookie 默认保存2周
        http.rememberMe().rememberMeParameter("remember");
security自动创建了remember-me的cookie对象,且有效期为14天
5、把默认登录页改成我们自己的
首先去把表单的请求路径改了
然后去授权类里面改
 //没有权限会到登录页面
http.formLogin().loginPage("/toLogin"); //开启security默认的登录页面 没有权限会跳转这里
这样我们就可以用自己的登录界面了