【Google Colab】使用手册、教程;使用 Google Colab 免费使用 python 服务器
- Colaboratory 是一个 Google 研究项目,旨在帮助传播机器学习培训和研究成果。它是一个 Jupyter 笔记本环境,不需要进行任何设置就可以使用,并且完全在云端运行。
- Colaboratory 笔记本存储在 Google 云端硬盘中,并且可以共享,就如同您使用 Google 文档或表格一样。Colaboratory 可免费使用。
- 利用Colaboratory ,可以方便的使用Keras,TensorFlow,PyTorch,OpenCV等框架进行深度学习应用的开发。
1.新建 ipynb 文件

2.选择使用的硬件


查看GPU情况:
! /opt/bin/nvidia-smi

3.连接服务器

4.将 ipynb 挂载到Google硬盘
首先要登录,然后切换目录。
from google.colab import drive

drive.mount("/content/drive/")
5.查看、更改当前路径
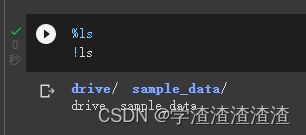
查看当前路径下所有文件
这三种都可以。
%ls
!ls
import os
os.listdir() # 这种方法可以返回每一个文件和文件夹,可以用于遍历
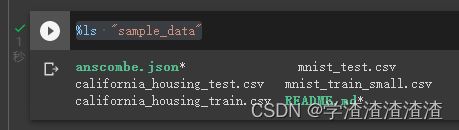
查看指定路径下所有文件
%ls “文件夹路径”
%ls "sample_data"
更改路径
方法一:
#更改路径
%cd "/content/drive/My Drive/datasets"
#查看当前目录 %和!其实是一样的,推荐用前者比较好,可以方便查看目录
%ls
!ls

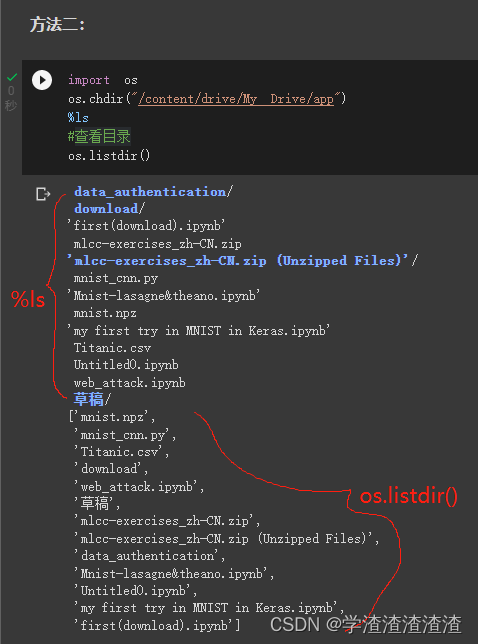
方法二:
import os
os.chdir("/content/drive/My Drive/app")
%ls
#查看目录
os.listdir()
★★★ 开启 Colab 远程桌面 ★★★
时常需要跑数十个小时的来训练模型。奈何自己电脑的性能不过好,而谷歌 Colab 又没有GUI而且还限时。就在我一筹莫展的时候,突然发现了一个可以开启 Colab 桌面版的方法。白嫖高性能带GPU的虚拟机生活就此开始!
参考:
https://github.com/demotomohiro/remocolab
如何评价 Google Colab 提供的免费 GPU? - TIM的回答 - 知乎,这个好像不可用了
使用 TPU 进行模型训练
首先在主菜单上,单击Runtime并选择Change Runtime type。设置“TPU”为硬件加速器。下面的单元格确保您能够访问Colab上的TPU。用法和GPU一样,只是模型训练的过程中需要添加一行代码。
查看TPU是否可用
import os
assert os.environ['COLAB_TPU_ADDR'] #检测TPU
安装 pytorch 和 XLA 包:
有关xla的具体使用方法可以参阅:http://pytorch.org/xla/release/1.12/index.html
建议先用 pip list 看当前的 torch 版本,再查找对应的 cloud-tpu-client 的版本 和 torch_xla 的版本(见https://github.com/pytorch/xla/,找到 colab 对应的版本),如下:

比如可以选择这样版本的进行安装:
!pip install cloud-tpu-client==0.10 torch==1.11.0 https://storage.googleapis.com/tpu-pytorch/wheels/colab/torch_xla-1.11-cp37-cp37m-linux_x86_64.whl
如果你在Colab上使用GPU,运行下面的注释代码来安装GPU兼容的PyTorch wheel和依赖:
!pip install cloud-tpu-client==0.10 torch==1.11.0 https://storage.googleapis.com/tpu-pytorch/wheels/cuda/112/torch_xla-1.11-cp37-cp37m-linux_x86_64.whl --force-reinstall
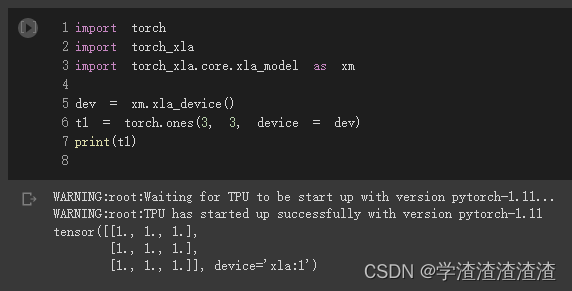
device 的选择和 tensor的创建
import torch
import torch_xla
import torch_xla.core.xla_model as xm

dev = xm.xla_device()
t1 = torch.ones(3, 3, device = dev)
print(t1)
训练模型
注意,训练模型时在 optimizer.step() 后面要加一句 xm.mark_step()。
import torch_xla.core.xla_model as xm

device = xm.xla_device()
model = MNIST().train().to(device)
loss_fn = nn.NLLLoss()
optimizer = optim.SGD(model.parameters(), lr=lr, momentum=momentum)

for data, target in train_loader:
  optimizer.zero_grad()
  data = data.to(device)
  target = target.to(device)
  output = model(data)
  loss = loss_fn(output, target)
  loss.backward()

  optimizer.step()
  xm.mark_step()  # 这一步很重要!!!否则就会一直卡着
然后就可以训练了:

但是速度好像还不如 GPU,甚至不如CPU。
实用功能
pip安装python包
!pip install numpy
运行python文件
!python3 "/content/drive/My Drive/app/mnist_cnn.py"
下载文件
右键获取某个文件的链接后,可以通过 !wget 下载文件,注意保存路径。
!wget https://raw.githubusercontent.com/vincentarelbundock/Rdatasets/master/csv/datasets/Titanic.csv -P "/content/drive/My Drive/app"
读取图片
from PIL import Image
from matplotlib import pyplot as plt

%cd "/content/drive/My Drive/app/download"
%ls

image0 = Image.open("figure.png")
print(image0.mode)
#print(image0)
plt.figure()
plt.imshow(image0)
plt.figure()

参考文献:
https://zhuanlan.zhihu.com/p/386162610
https://www.zhihu.com/question/266242493
https://blog.csdn.net/weixin_44498476/article/details/107700730