glide-源码解析-2
glide-源码解析-2
- glide-源码解析-2
-
- 一、RequestManager.into(imageView)
-
- 1. 不得不说的Target
- 2. 谁触发了target的onXXX方法?
- 3. RequestManager.track
- 4. target是如何计算大小的?
- 二、Glide.内存缓存读取
- 三、data如何解码成resource呢?
- 四、Glide内存缓存写操作
- 五、是model是如何转变为data?
-
- 1. HttpGlideUrlLoader
- 2. HttpUrlFetcher
- 创建HttpGlideUrlLoader的Factory及注册
- 六、data是如何被load出来的?
-
- 1. 流程图
- 2. Generator的链式调用
- 3. SourceGenerator.startNext方法
glide-源码解析-2
本篇接篇1代码,来分析RequestManager.into方法
一、RequestManager.into(imageView)
我们可以大体推测下,into里面最终肯定会发送一个加载资源请求,请求数据并终转换成一个Drawable对象,最后将这个对象设置我们传入的imageView当中去,这样就实现了图片的加载。接下来看下glide是如何实现的?
  /**
   * Sets the {@link ImageView} the resource will be loaded into, cancels any existing loads into
   * the view, and frees any resources Glide may have previously loaded into the view so they may be
   * reused.
   *
   * @see RequestManager#clear(Target)
   * @param view The view to cancel previous loads for and load the new resource into.
   * @return The {@link com.bumptech.glide.request.target.Target} used to wrap the given {@link
   *     ImageView}.
   */
  @NonNull
  public ViewTarget<ImageView, TranscodeType> into(@NonNull ImageView view) {
    // 1. 运行线程校验,因为涉及到view的渲染,必须保证在UI线程
    Util.assertMainThread();
    Preconditions.checkNotNull(view);

    BaseRequestOptions<?> requestOptions = this;
    if (!requestOptions.isTransformationSet()
        && requestOptions.isTransformationAllowed()
        && view.getScaleType() != null) {
      // Clone in this method so that if we use this RequestBuilder to load into a View and then
      // into a different target, we don't retain the transformation applied based on the previous
      // View's scale type.
      // 2. 获取imageview中的scaleType,并根据其值自动生成与其相匹配的requestOptions
      switch (view.getScaleType()) {
        case CENTER_CROP:
          requestOptions = requestOptions.clone().optionalCenterCrop();
          break;
        case CENTER_INSIDE:
          requestOptions = requestOptions.clone().optionalCenterInside();
          break;
        case FIT_CENTER:
        case FIT_START:
        case FIT_END:
          requestOptions = requestOptions.clone().optionalFitCenter();
          break;
        case FIT_XY:
          requestOptions = requestOptions.clone().optionalCenterInside();
          break;
        case CENTER:
        case MATRIX:
        default:
          // Do nothing.
      }
    }

    // 3. 构建imageViewTarget,requestOptions,UI线程执行器,传入into方法
    return into(
        glideContext.buildImageViewTarget(view, transcodeClass),
        /*targetListener=*/ null,
        requestOptions,
        Executors.mainThreadExecutor());
  }
这里面实现其实也是比较简单
- 校验工作
- 如果是不是运行的UI线程会抛出异常,因为涉及到view的渲染操作,所以必须保证在UI线程执行
- 校验传入的imageView是否空,view参数不能为空
- 生成一个与imageview.scaleType相匹配的请求配置信息
- 构建imageViewTarget、将2中的配置信息、UI线程调度器传入给into重载方法
1. 不得不说的Target
target翻译过来意思就是目标,在glide当中可以理解想把resource经过层层转换后,最终转换成Target需要消费的类型对象(resource),本例中是通过model(url)最终转换为Drawable对象
接下来看下buildImageViewTarget构建对象,最终调用ImageViewTargetFactory.buildTarget方法
public class ImageViewTargetFactory {
  @NonNull
  @SuppressWarnings("unchecked")
  public <Z> ViewTarget<ImageView, Z> buildTarget(
      @NonNull ImageView view, @NonNull Class<Z> clazz) {
    if (Bitmap.class.equals(clazz)) {
      return (ViewTarget<ImageView, Z>) new BitmapImageViewTarget(view);
    } else if (Drawable.class.isAssignableFrom(clazz)) {
      return (ViewTarget<ImageView, Z>) new DrawableImageViewTarget(view);
    } else {
      throw new IllegalArgumentException(
          "Unhandled class: " + clazz + ", try .as*(Class).transcode(ResourceTranscoder)");
    }
  }
}
参数clazz就是Target想要接受消费resouce类型,也就是Drawable.class;这里glide返回的target其实是DrawableImageViewTarget对象,它其实实现了Target接口

Target是可以接受resource加载事件以及组件生命周期事件的对象,通常调用流程如下
我们有理由相信onResourceReady中方法提供了给我们想要的Drawable资源了,glide就是在这个方法中实现了将drawable设置到view当中去的;我们先看下DrawableImageViewTarget的父类ImageViewTarget,它实现了onResourceReady方法,
// ImageViewTarget.java
...
@Override
  public void onResourceReady(@NonNull Z resource, @Nullable Transition<? super Z> transition) {
    if (transition == null || !transition.transition(resource, this)) {
      setResourceInternal(resource);
    } else {
      maybeUpdateAnimatable(resource);
    }
  }
private void setResourceInternal(@Nullable Z resource) {
    // Order matters here. Set the resource first to make sure that the Drawable has a valid and
    // non-null Callback before starting it.
    setResource(resource);
    maybeUpdateAnimatable(resource);
  }
protected abstract void setResource(@Nullable Z resource);
...
可以看到ImageViewTarget中最终调用了一个setResource抽象方法,子类DrawableImageViewTarget实现了它,
// DrawableImageViewTarget.java
@Override
  protected void setResource(@Nullable Drawable resource) {
    view.setImageDrawable(resource);
  }
可以清楚的看到DrawableImageViewTarget作为ImageViewTarget的子类承担了将target渲染到view上的职责,到了这里我们明白了resource(Drawable)是如何通过target渲染到mageview中去的。那问题来了,target的onLoadStarted、onResourceReady等方法到底有谁来触发的呢?
2. 谁触发了target的onXXX方法?
要回答这个问题, 我们需要回到之前的into方法中寻找答案,into方法调用了重载into方法
private <Y extends Target<TranscodeType>> Y into(
      @NonNull Y target,
      @Nullable RequestListener<TranscodeType> targetListener,
      BaseRequestOptions<?> options,
      Executor callbackExecutor) {

    // 1. 校验target, model是否设置
    Preconditions.checkNotNull(target);
    if (!isModelSet) {
      throw new IllegalArgumentException("You must call #load() before calling #into()");
    }

    // 2. 构建一个请求
    Request request = buildRequest(target, targetListener, options, callbackExecutor);

    // 3. 请求重复利用
    Request previous = target.getRequest();
    if (request.isEquivalentTo(previous)
        && !isSkipMemoryCacheWithCompletePreviousRequest(options, previous)) {
      // If the request is completed, beginning again will ensure the result is re-delivered,
      // triggering RequestListeners and Targets. If the request is failed, beginning again will
      // restart the request, giving it another chance to complete. If the request is already
      // running, we can let it continue running without interruption.
      if (!Preconditions.checkNotNull(previous).isRunning()) {
        // Use the previous request rather than the new one to allow for optimizations like skipping
        // setting placeholders, tracking and un-tracking Targets, and obtaining View dimensions
        // that are done in the individual Request.
        previous.begin();
      }
      return target;
    }

    // 4. 清理之前的请求
    requestManager.clear(target);

    // 5. 将新request和target绑定起来
    target.setRequest(request);

    // 6. 发起请求
    requestManager.track(target, request);

    return target;
  }
其实归来起来就三点
-
校验操作
- 校验target不能为空
- 校验model不能为空(此处为url)
-
旧请求的复用
- 对于是相同请求的(请求的参数配置信息和大小是一样的视为相同请求)并且这个请求还没完成且可以内存复用
- 如果旧请求正在运行中,直接触发旧请求的begin方法
-
清理不能复用的旧请求
/** * Cancel any pending loads Glide may have for the target and free any resources (such as {@link * Bitmap}s) that may have been loaded for the target so they may be reused. * * @param target The Target to cancel loads for. */ public void clear(@Nullable final Target<?> target) { if (target == null) { return; } untrackOrDelegate(target); } private void untrackOrDelegate(@NonNull Target<?> target) { // isOwnedByUs为true表示清理成功了 boolean isOwnedByUs = untrack(target); // 如果清理不成功,需要glide继续做清理操作 Request request = target.getRequest(); if (!isOwnedByUs && !glide.removeFromManagers(target) && request != null) { target.setRequest(null); request.clear(); } synchronized boolean untrack(@NonNull Target<?> target) { Request request = target.getRequest(); // If the Target doesn't have a request, it's already been cleared. if (request == null) { return true; } // 此时拿到request不空,一定是旧的,需要自己动手清理 if (requestTracker.clearAndRemove(request)) { targetTracker.untrack(target); target.setRequest(null); return true; } else { return false; } } }总结清理操作主要分如下几个步骤
- 将旧请求从RequestTracker中请求池中移除
- 中止旧请求,并释放所有相关资源
- 从TargetTracker.targets列表中移除target
- 解除target与request之间关联
-
发起新请求
-
target与新请求建立绑定关系
// ViewTarget.java
  @Override
  public void setRequest(@Nullable Request request) {
    setTag(request);
  }
  private void setTag(@Nullable Object tag) {
    isTagUsedAtLeastOnce = true;
    // tagId==R.id.glide_custom_view_target_tag
    view.setTag(tagId, tag);
  }
从ViewTarget类中可以看到是我们熟知的view.setTag方式来建立绑定关系,防止显示错位问题
-
调用requestManager.track方法(这部是重点)
-
3. RequestManager.track
重点方式就是在track方法
下面我们来看下其实现
  synchronized void track(@NonNull Target<?> target, @NonNull Request request) {
    targetTracker.track(target);
    requestTracker.runRequest(request);
  }
代码非常简洁

可以看到第一步只是将target添加到targetTracker中的一个集合中去,这样做是为了能够让所有的target感知生命周期,以方便target在不同生命周期执行不同操作
重点是第二行它是请求的真正发起者,我们先了解下RequestTracker结构

RequestTracker这个类顾名思义它是请求的追踪者,负责追踪,取消,重启进行中,完成,失败的请求,这个类管理RequestManager中所有请求,它是非线程安全,必须在主线程使用
  // RequestTracker.java
  /** Starts tracking the given request. */
  public void runRequest(@NonNull Request request) {
    requests.add(request);
    if (!isPaused) {
      request.begin();
    } else {
      request.clear();
      if (Log.isLoggable(TAG, Log.VERBOSE)) {
        Log.v(TAG, "Paused, delaying request");
      }
      pendingRequests.add(request);
    }
  }
可以看到RequestTracker发起请求前是将其存储到requests集合中,如果页面处在非paused情况下那就发起请求;否则停止请求,并将其存放到待请求列表中,一旦页面处以可以请求状态直接恢复请求。
接下来我们了解下Request,它的职责是用来给target加载一个resouce
Glide中的Request是个接口,它有三个子类

我们以常用的SingleRequest为例来看下begin方法,里面就有我们期待的target.onLoadStarted、target.onResourceReady等方法
@Override
  public void begin() {
    synchronized (requestLock) {
      assertNotCallingCallbacks();
      stateVerifier.throwIfRecycled();
      startTime = LogTime.getLogTime();

      // 1. 校验model,如果没有设置,直接调用onLoadFailed失败
      if (model == null) {
        if (Util.isValidDimensions(overrideWidth, overrideHeight)) {
          width = overrideWidth;
          height = overrideHeight;
        }
        // Only log at more verbose log levels if the user has set a fallback drawable, because
        // fallback Drawables indicate the user expects null models occasionally.
        int logLevel = getFallbackDrawable() == null ? Log.WARN : Log.DEBUG;
        onLoadFailed(new GlideException("Received null model"), logLevel);
        return;
      }

      // 如果这个请求是在运行中,不能再次重新请求
      if (status == Status.RUNNING) {
        throw new IllegalArgumentException("Cannot restart a running request");
      }

      // If we're restarted after we're complete (usually via something like a notifyDataSetChanged
      // that starts an identical request into the same Target or View), we can simply use the
      // resource and size we retrieved the last time around and skip obtaining a new size, starting
      // a new load etc. This does mean that users who want to restart a load because they expect
      // that the view size has changed will need to explicitly clear the View or Target before
      // starting the new load.

      // 2. 如果这个请求已经完成了,那就不用重新请求了,直接回调并返回
      if (status == Status.COMPLETE) {
        onResourceReady(resource, DataSource.MEMORY_CACHE);
        return;
      }

      // Restarts for requests that are neither complete nor running can be treated as new requests
      // and can run again from the beginning.

      // 3. 设置计算图片大小状态
      status = Status.WAITING_FOR_SIZE;
      // 如果设置过合法的overrideWidth,overrideHeight,触发回调,否则的话需要计算大小
      if (Util.isValidDimensions(overrideWidth, overrideHeight)) {
        onSizeReady(overrideWidth, overrideHeight);
      } else {
        target.getSize(this);
      }

      if ((status == Status.RUNNING || status == Status.WAITING_FOR_SIZE)
          && canNotifyStatusChanged()) {
        // 加载占位图,期盼已久
        target.onLoadStarted(getPlaceholderDrawable());
      }
      if (IS_VERBOSE_LOGGABLE) {
        logV("finished run method in " + LogTime.getElapsedMillis(startTime));
      }
    }
  }
glide在加载前是需要计算显示的resource要多大,这里涉及到计算大小问题
4. target是如何计算大小的?
这里以viewTarget为例
// ViewTarget.java
  public void getSize(@NonNull SizeReadyCallback cb) {
    sizeDeterminer.getSize(cb);
  }
// static final class SizeDeterminer
    void getSize(@NonNull SizeReadyCallback cb) {
      int currentWidth = getTargetWidth();
      int currentHeight = getTargetHeight();
      if (isViewStateAndSizeValid(currentWidth, currentHeight)) {
        cb.onSizeReady(currentWidth, currentHeight);
        return;
      }

      // We want to notify callbacks in the order they were added and we only expect one or two
      // callbacks to be added a time, so a List is a reasonable choice.
      if (!cbs.contains(cb)) {
        cbs.add(cb);
      }
      if (layoutListener == null) {
      	// 异步回调
        ViewTreeObserver observer = view.getViewTreeObserver();
        layoutListener = new SizeDeterminerLayoutListener(this);
        observer.addOnPreDrawListener(layoutListener);
      }
    }
我们看到对于显示多大图片的计算,最终交给了SizeDeterminer类处理,它首先会尝试获取targetWidth、targetHeight;如果能够获取成功则会触发onSizeReady方法,否则需要给view注册一个监听器,当onPreDraw触发时,再次调用getTargetWidth等方法,计算完毕后,调用cb.onSizeReady方法,注意后部分操作是一个异步调用,这里这一步请求资源的大小已经确定下来了,我们来看下SingleRequest.onSizeReady

方法内部设置了状态,最终调用了engine.load方法,这里引入了Engine类,它是用来启动加载和管理正在使用的或缓存过resources的类,load方法涉及到缓存的读取,让我们来领略glide是如何实现resource的缓存的
二、Glide.内存缓存读取
// Engine.java
  public <R> LoadStatus load(
      GlideContext glideContext,
      Object model,
      Key signature,
      int width,
      int height,
      Class<?> resourceClass,
      Class<R> transcodeClass,
      Priority priority,
      DiskCacheStrategy diskCacheStrategy,
      Map<Class<?>, Transformation<?>> transformations,
      boolean isTransformationRequired,
      boolean isScaleOnlyOrNoTransform,
      Options options,
      boolean isMemoryCacheable,
      boolean useUnlimitedSourceExecutorPool,
      boolean useAnimationPool,
      boolean onlyRetrieveFromCache,
      ResourceCallback cb,
      Executor callbackExecutor) {
    long startTime = VERBOSE_IS_LOGGABLE ? LogTime.getLogTime() : 0;

    // 1. 构建一个key,这个key其实就是glide存储缓存的key
    EngineKey key =
        keyFactory.buildKey(
            model,
            signature,
            width,
            height,
            transformations,
            resourceClass,
            transcodeClass,
            options);

    EngineResource<?> memoryResource;
    synchronized (this) {
      // 2. glide首先会从缓存中寻找想要的resource
      memoryResource = loadFromMemory(key, isMemoryCacheable, startTime);

      // 如果缓存中没有,则开启一个Job进行网络请求
      if (memoryResource == null) {
        return waitForExistingOrStartNewJob(
            glideContext,
            model,
            signature,
            width,
            height,
            resourceClass,
            transcodeClass,
            priority,
            diskCacheStrategy,
            transformations,
            isTransformationRequired,
            isScaleOnlyOrNoTransform,
            options,
            isMemoryCacheable,
            useUnlimitedSourceExecutorPool,
            useAnimationPool,
            onlyRetrieveFromCache,
            cb,
            callbackExecutor,
            key,
            startTime);
      }
    }

    // 3. 缓存中有则,直接调用onResourceReady回调
    // Avoid calling back while holding the engine lock, doing so makes it easier for callers to
    // deadlock.
    cb.onResourceReady(memoryResource, DataSource.MEMORY_CACHE);
    return null;
  }
虽然engine的load参数巨多,但内部流程还是非常清晰;它会先从缓存去寻找想要的resource,找到了则直接调用onResourceReady方法返回,没找到则开启一个job进行解码操作(关于如何将data解码成resource这个后面会单独讲解)
本小节重点集中在缓存读取,先来看Engine类
//Engine.java
private EngineResource<?> loadFromMemory(
      EngineKey key, boolean isMemoryCacheable, long startTime) {
    if (!isMemoryCacheable) {
      return null;
    }

  	// 1. 从activeResources缓存中找
    EngineResource<?> active = loadFromActiveResources(key);
    if (active != null) {
      if (VERBOSE_IS_LOGGABLE) {
        logWithTimeAndKey("Loaded resource from active resources", startTime, key);
      }
      return active;
    }

  	// 2. 从cache找
    EngineResource<?> cached = loadFromCache(key);
    if (cached != null) {
      if (VERBOSE_IS_LOGGABLE) {
        logWithTimeAndKey("Loaded resource from cache", startTime, key);
      }
      return cached;
    }

    return null;
  }
glide会首先校验本次是否可以使用内存缓存,如果不可以,则直接返回;否则先从ActiveResources中一个名为activeEngineResources的map取缓存;
@Nullable
  private EngineResource<?> loadFromActiveResources(Key key) {
    EngineResource<?> active = activeResources.get(key);
    if (active != null) {
      active.acquire();
    }
    return active;
  }

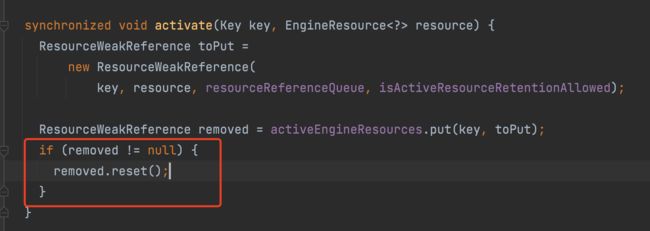
如果没找到则从cache中找,这个cache其实就是LruResourceCache(它其实是在GlideBuilder中创建的),和Android本身提供的LRUCache类实现思想一致的。如果从Lru缓存中找到后,会将缓存转移到activeResources中

注意当把cache中缓存移动到activeResoures缓存时,会将activeResoures中同key的缓存也主动清理掉,这样就保证内存中的缓存只有一份
上面可以看到activeResources中是通过弱引用来持有缓存数据,这样可以避免内存泄露,尽可能避免OOM,减少资源开销。也许有人会问,glide当中LruResourceCache的缓存是多大呢?
其实Glide是本身支持配置MemoryCache大小的,如果没有配置,glide会创建默认的LruResourceCache对象

其内存大小是基于当前设备对于app的内存状态动态分配的

到这里我们已经搞清楚了glide是如何读取resouce相关缓存了。
三、data如何解码成resource呢?
篇一中说过Glide的流程中提到过data会被解码成resource,如果忘记可以先阅读glide-篇一文字,本小节我们接上面流程继续分析并掌握data是如何解码成resource的
我们知道缓存没有时会开启EngineJob来进行磁盘加载或远程网络加载,实际调用的方法就是waitForExistingOrStartNewJob
// Engine.java
private <R> LoadStatus waitForExistingOrStartNewJob(
      GlideContext glideContext,
      Object model,
      Key signature,
      int width,
      int height,
      Class<?> resourceClass,
      Class<R> transcodeClass,
      Priority priority,
      DiskCacheStrategy diskCacheStrategy,
      Map<Class<?>, Transformation<?>> transformations,
      boolean isTransformationRequired,
      boolean isScaleOnlyOrNoTransform,
      Options options,
      boolean isMemoryCacheable,
      boolean useUnlimitedSourceExecutorPool,
      boolean useAnimationPool,
      boolean onlyRetrieveFromCache,
      ResourceCallback cb,
      Executor callbackExecutor,
      EngineKey key,
      long startTime) {

  	// 1. 根据key寻找job,这个job也是使用缓存的
    EngineJob<?> current = jobs.get(key, onlyRetrieveFromCache);
    if (current != null) {
      current.addCallback(cb, callbackExecutor);
      if (VERBOSE_IS_LOGGABLE) {
        logWithTimeAndKey("Added to existing load", startTime, key);
      }
      return new LoadStatus(cb, current);
    }

  	// 2. 新建一个engineJob
    EngineJob<R> engineJob =
        engineJobFactory.build(
            key,
            isMemoryCacheable,
            useUnlimitedSourceExecutorPool,
            useAnimationPool,
            onlyRetrieveFromCache);

    DecodeJob<R> decodeJob =
        decodeJobFactory.build(
            glideContext,
            model,
            key,
            signature,
            width,
            height,
            resourceClass,
            transcodeClass,
            priority,
            diskCacheStrategy,
            transformations,
            isTransformationRequired,
            isScaleOnlyOrNoTransform,
            onlyRetrieveFromCache,
            options,
            engineJob);

    jobs.put(key, engineJob);

    engineJob.addCallback(cb, callbackExecutor);
  	// 3. 启动解码data的job
    engineJob.start(decodeJob);

    if (VERBOSE_IS_LOGGABLE) {
      logWithTimeAndKey("Started new load", startTime, key);
    }
    return new LoadStatus(cb, engineJob);
  }
这里我们先跳过如何通过model生成data的(第五小节会讲解),先关注data如何解码,谁来解码呢?从名字就可以猜出就是DecodeJob,它就是用来将缓存数据或原始数据转换成你要想要的resource,其内部解码流程非常复杂,不再详细展开,我直接用一张图来表达,这样流程更清晰
该流程的核心部分其实第五部分decodeFromRetrievedData,

step1它最终会调用到DecodePath的decode方法
  // DecodePath.java
  public Resource<Transcode> decode(
      DataRewinder<DataType> rewinder,
      int width,
      int height,
      @NonNull Options options,
      DecodeCallback<ResourceType> callback)
      throws GlideException {

    // 1. 我们熟悉的glide流程中的data解码成原始source
    Resource<ResourceType> decoded = decodeResource(rewinder, width, height, options);

	// 2. 资源解码,
    Resource<ResourceType> transformed = callback.onResourceDecoded(decoded);

	// 3. 解码后资源的转换
    return transcoder.transcode(transformed, options);
  }
decode方法内部是三部其实对应glide中data的后续流程了,这个后篇会单独讲
从流程图中清晰看到DecodeJob解码成功后,会主动调用EngineJob的onResourceReady通知解码工作已完毕,同时EngineJob会将resource保存起来,以便后面可以复用

resource在哪里复用了呢?大家回头看下waitForExistingOrStartNewJob方法内部的开头,会首先从jobs池中取job,如果有的话会添加一个callBack,跟进去看下
synchronized void addCallback(final ResourceCallback cb, Executor callbackExecutor) {
    stateVerifier.throwIfRecycled();
    cbs.add(cb, callbackExecutor);
    // 这里的hasResource其实是在notifyCallbacksOfResult方法中被赋值为true的
    if (hasResource) {
      // Acquire early so that the resource isn't recycled while the Runnable below is still sitting
      // in the executors queue.
      incrementPendingCallbacks(1);
      callbackExecutor.execute(new CallResourceReady(cb));
    } else if (hasLoadFailed) {
      incrementPendingCallbacks(1);
      callbackExecutor.execute(new CallLoadFailed(cb));
    } else {
      Preconditions.checkArgument(!isCancelled, "Cannot add callbacks to a cancelled EngineJob");
    }
  }
如果有resource直接UI线程调用到SingleRequest.onResourceReady,SingleRequest最终通知给Target;onLoadFailed方法同理,注意这里的callbackExecutor其实是在into方法中传入的Executors.mainThreadExecutor();
到了这里我们明白了data是如何一步一步转化成resouce了,以及resource如何在EngineJob中被复用了
四、Glide内存缓存写操作
上面我们知道glide中rescource是被DeocodeJob解码出来的,那这个resource是在什么时候缓存到内存呢?可以猜想下是在它当前不再使用时会写入cache中,glide的缓存的写操作流程如下

当resources没有被引用时说明当前不需要使用,通过调用Engine.onResourceReleased方法来实现resource的缓存存储

resources不被引用时,会首先从activeResources中移除,如果可以被缓存,存储到LRU中,否则调用resource.recycle方法
五、是model是如何转变为data?
其实如果你曾经定制过ModelLoader,你应该比较清楚,model到data的转换其实是通过ModelLoader接口来进行的转换的,glide就是本身提供了几乎你能想要所有的ModelLoader子类(见下图),所以大部分情况下你不需要定制modelLoader

public interface ModelLoader<Model, Data> {

  /**
   * Contains a set of {@link com.bumptech.glide.load.Key Keys} identifying the source of the load,
   * alternate cache keys pointing to equivalent data, and a {@link
   * com.bumptech.glide.load.data.DataFetcher} that can be used to fetch data not found in cache.
   *
   * @param  The type of data that well be loaded.
   */
  class LoadData<Data> {
    public final Key sourceKey;
    public final List<Key> alternateKeys;
    public final DataFetcher<Data> fetcher;

    public LoadData(@NonNull Key sourceKey, @NonNull DataFetcher<Data> fetcher) {
      this(sourceKey, Collections.<Key>emptyList(), fetcher);
    }

    public LoadData(
        @NonNull Key sourceKey,
        @NonNull List<Key> alternateKeys,
        @NonNull DataFetcher<Data> fetcher) {
      this.sourceKey = Preconditions.checkNotNull(sourceKey);
      this.alternateKeys = Preconditions.checkNotNull(alternateKeys);
      this.fetcher = Preconditions.checkNotNull(fetcher);
    }
  }

  @Nullable
  LoadData<Data> buildLoadData(
      @NonNull Model model, int width, int height, @NonNull Options options);

  boolean handles(@NonNull Model model);
}
我们以HttpGlideUrlLoader为例
比如要让glide支持加载一个显示base64图片的字符串,
1. HttpGlideUrlLoader
/**
 * An {@link com.bumptech.glide.load.model.ModelLoader} for translating {@link
 * com.bumptech.glide.load.model.GlideUrl} (http/https URLS) into {@link java.io.InputStream} data.
 */
// Public API.
@SuppressWarnings("WeakerAccess")
public class HttpGlideUrlLoader implements ModelLoader<GlideUrl, InputStream> {
  ...
  @Override
  public LoadData<InputStream> buildLoadData(
      @NonNull GlideUrl model, int width, int height, @NonNull Options options) {
    // GlideUrls memoize parsed URLs so caching them saves a few object instantiations and time
    // spent parsing urls.
    // 1. 这里只是针对model做些缓存处理,可直接跳过
    GlideUrl url = model;
    if (modelCache != null) {
      url = modelCache.get(model, 0, 0);
      if (url == null) {
        modelCache.put(model, 0, 0, model);
        url = model;
      }
    }
    int timeout = options.get(TIMEOUT);
    // 2. 重点是HttpUrlFetcher对象
    return new LoadData<>(url, new HttpUrlFetcher(url, timeout));
  }

  @Override
  public boolean handles(@NonNull GlideUrl model) {
    return true;
  }
  ...
}
重点关注HttpGlideUrlLoader实现的buildLoadData、handles
- buildLoadData
是用来构建一个LoadData对象,这个对象里面的DataFetcher就是负责生产最原始的data的 - handles
顾名思义是只处理满足特定格式的model,HttpGlideUrlLoader是可以处理model类型为
2. HttpUrlFetcher
/** A DataFetcher that retrieves an {@link java.io.InputStream} for a Url. */
public class HttpUrlFetcher implements DataFetcher<InputStream> {
  private static final String TAG = "HttpUrlFetcher";
  private static final int MAXIMUM_REDIRECTS = 5;

  @VisibleForTesting
  static final HttpUrlConnectionFactory DEFAULT_CONNECTION_FACTORY =
      new DefaultHttpUrlConnectionFactory();
  /** Returned when a connection error prevented us from receiving an http error. */
  private static final int INVALID_STATUS_CODE = -1;

  private final GlideUrl glideUrl;
  private final int timeout;
  private final HttpUrlConnectionFactory connectionFactory;

  private HttpURLConnection urlConnection;
  private InputStream stream;
  private volatile boolean isCancelled;

  public HttpUrlFetcher(GlideUrl glideUrl, int timeout) {
    this(glideUrl, timeout, DEFAULT_CONNECTION_FACTORY);
  }

  @VisibleForTesting
  HttpUrlFetcher(GlideUrl glideUrl, int timeout, HttpUrlConnectionFactory connectionFactory) {
    this.glideUrl = glideUrl;
    this.timeout = timeout;
    this.connectionFactory = connectionFactory;
  }

  @Override
  public void loadData(
      @NonNull Priority priority, @NonNull DataCallback<? super InputStream> callback) {
    long startTime = LogTime.getLogTime();
    try {
      InputStream result = loadDataWithRedirects(glideUrl.toURL(), 0, null, glideUrl.getHeaders());
      callback.onDataReady(result);
    } catch (IOException e) {
      if (Log.isLoggable(TAG, Log.DEBUG)) {
        Log.d(TAG, "Failed to load data for url", e);
      }
      callback.onLoadFailed(e);
    } finally {
      if (Log.isLoggable(TAG, Log.VERBOSE)) {
        Log.v(TAG, "Finished http url fetcher fetch in " + LogTime.getElapsedMillis(startTime));
      }
    }
  }
  @NonNull
  @Override
  public Class<InputStream> getDataClass() {
    return InputStream.class;
  }

  @NonNull
  @Override
  public DataSource getDataSource() {
    return DataSource.REMOTE;
  }
	@Override
  public void cleanup() {
    if (stream != null) {
      try {
        stream.close();
      } catch (IOException e) {
        // Ignore
      }
    }
    if (urlConnection != null) {
      urlConnection.disconnect();
    }
    urlConnection = null;
  }
  ...
}
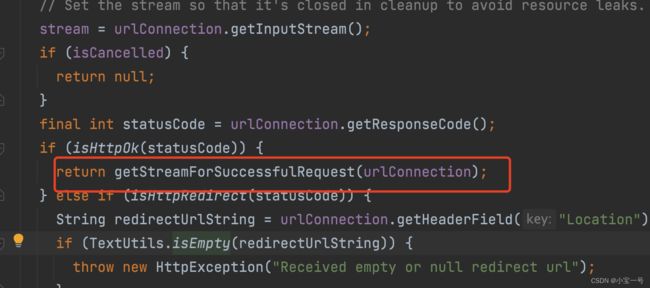
HttpUrlFetcher要做的事情就是通过将一个Uri对象经过网络请求最终生成一个InputStream数据
关键方法有
- loadData
它通过调用loadDataWithRedirects方法,内部是通过urlConnection接口实现输出InputStream的
loadData最终通过callback方式,将数据加载事件分发出去 - getDataClass
用以确定data数据的类型 - cleanup
在生成data数据完毕后,可以清理一些不必要的资源,此处对输入流及urlConnection的资源做释放处理
创建HttpGlideUrlLoader的Factory及注册
  /** The default factory for {@link HttpGlideUrlLoader}s. */
  public static class Factory implements ModelLoaderFactory<GlideUrl, InputStream> {
    private final ModelCache<GlideUrl, GlideUrl> modelCache = new ModelCache<>(500);

    @NonNull
    @Override
    public ModelLoader<GlideUrl, InputStream> build(MultiModelLoaderFactory multiFactory) {
      return new HttpGlideUrlLoader(modelCache);
    }

    @Override
    public void teardown() {
      // Do nothing.
    }
  }
HttpGlideUrlLoader中有个静态Factory类,它是用来生产HttpGlideUrlLoader,可以看到HttpGlideUrlLoader构造器中传入了一个modelCache,负责model的缓存;为了让HttpGlideUrlLoader生效还需要将其注册到glide中

上面的流程其实也是glide如何定制ModelLoader的过程,具体参见官网编写定制的 ModelLoader
六、data是如何被load出来的?
在第三小节中我们可以看到data的load阶段其实也是发生在解码阶段,只是第三小节我们忽略了这个过程,现在把忽略的部分进行详细展开,下面的流程图蓝色区块展示了data如何被load出来的,又是如何通知到DecodeJob的
1. 流程图
2. Generator的链式调用
从上面的流程图中可以看出其实数据的加载涉及到其实也是在解码阶段完成的,DecodeJob中会链式调用DataFetcherGenerator.startNext方法,Generator会计算出当前属于解码那种阶段,不同阶段执行不同Generator的startNext方法,startNext方法最终会调用DataFetcher中loadData方法获取data
下面我们看下DataFetcherGenerator是如何被链式调用的?先来看下接口
/**
 * Generates a series of {@link com.bumptech.glide.load.data.DataFetcher DataFetchers} using
 * registered {@link com.bumptech.glide.load.model.ModelLoader ModelLoaders} and a model.
 */
interface DataFetcherGenerator {
  /**
   * Attempts to a single new {@link com.bumptech.glide.load.data.DataFetcher} and returns true if a
   * {@link com.bumptech.glide.load.data.DataFetcher} was started, and false otherwise.
   */
  boolean startNext();

  /**
   * Attempts to cancel the currently running fetcher.
   *
   * This will be called on the main thread and should complete quickly.
   */
  void cancel();
}
DataFetcherGenerator这个类是用来加载或取消data的,startNext内部会通过调用DataFetcher.loadData方法来实现data的加载,cancel同理

我们看到实现DataFetcherGenerator的接口有三类
- ResourceCacheGenerator
- DataCacheGenerator
- SourceGenerator
这三个类其实是data在解码的不同阶段调用的,先看下data的解码分为下面几个阶段

我们知道解码工作其实是在DecodeJob中完成的,看下主流程代码
private void runWrapped() {
    switch (runReason) {
      case INITIALIZE:
        stage = getNextStage(Stage.INITIALIZE);
        currentGenerator = getNextGenerator();
        runGenerators();
        break;
      case SWITCH_TO_SOURCE_SERVICE:
        runGenerators();
        break;
      case DECODE_DATA:
        decodeFromRetrievedData();
        break;
      default:
        throw new IllegalStateException("Unrecognized run reason: " + runReason);
    }
  }
DecodeJob会根据当前解码的阶段以及磁盘缓存策略去确定下一个解码阶段,每个阶段都会有调用不同的Generator.startNext方法实现data的加载
// 下个解码阶段的确定
private Stage getNextStage(Stage current) {
    switch (current) {
      case INITIALIZE:
        return diskCacheStrategy.decodeCachedResource()
            ? Stage.RESOURCE_CACHE
            : getNextStage(Stage.RESOURCE_CACHE);
      case RESOURCE_CACHE:
        return diskCacheStrategy.decodeCachedData()
            ? Stage.DATA_CACHE
            : getNextStage(Stage.DATA_CACHE);
      case DATA_CACHE:
        // Skip loading from source if the user opted to only retrieve the resource from cache.
        return onlyRetrieveFromCache ? Stage.FINISHED : Stage.SOURCE;
      case SOURCE:
      case FINISHED:
        return Stage.FINISHED;
      default:
        throw new IllegalArgumentException("Unrecognized stage: " + current);
    }
  }
// 每个阶段是由不同的Generator来执行startNext方法
private DataFetcherGenerator getNextGenerator() {
    switch (stage) {
      case RESOURCE_CACHE:
        return new ResourceCacheGenerator(decodeHelper, this);
      case DATA_CACHE:
        return new DataCacheGenerator(decodeHelper, this);
      case SOURCE:
        return new SourceGenerator(decodeHelper, this);
      case FINISHED:
        return null;
      default:
        throw new IllegalStateException("Unrecognized stage: " + stage);
    }
  }
从上面可以知晓,通常情况下解码流程是
这其实就是拦截器的链式调用而已,注意一旦其中一个Generator.startNext返回true说明data被成功加载后面的链路就不在传递,整个解码流程直接结束;下图即为Generator的运行逻辑

3. SourceGenerator.startNext方法
好了,解码流程我们大体已经清楚了,接下来就看下SourceGenerator的starNext方法的具体实现呗
public boolean startNext() {
    //1. 如果data的cache存在,存储到磁盘缓存中
    if (dataToCache != null) {
      Object data = dataToCache;
      dataToCache = null;
      cacheData(data);
    }

    // 2. 如果sourceCacheGenerator加载过data,直接返回
    if (sourceCacheGenerator != null && sourceCacheGenerator.startNext()) {
      return true;
    }
    sourceCacheGenerator = null;

    // 3. 加载data
    loadData = null;
    boolean started = false;
    while (!started && hasNextModelLoader()) {
      loadData = helper.getLoadData().get(loadDataListIndex++);
      if (loadData != null
          && (helper.getDiskCacheStrategy().isDataCacheable(loadData.fetcher.getDataSource())
              || helper.hasLoadPath(loadData.fetcher.getDataClass()))) {
        started = true;
        loadData.fetcher.loadData(helper.getPriority(), this);
      }
    }
    return started;
  }
可以看到loadData方法参数传入了本身,所以加载data成功后,SourceGenerator的onDataReady会被调用

因为DataFetcher的通知给外部的数据运行的线程环境你无法保证,此处cb.reschedule()方法是为了将其重新切换到原来的glide线程中

他会重新调用GlideJob中run方法,会重新触发走通过从SourceGenerator.startNext方法,第二次执行该方法时,因为dataToCache不为空了,SourceGenerator先把这个data缓存到磁盘中,再所以会交给DataCacheGenerator.startNext处理,最终数据转交给DecodeJob的onDataFetcherReady方法;
好了Glide的model–>data–>resource–>target的整个流程,相信大家已经掌握了