首先,从框架搭建上,本篇示例采用当下流行的前后端分离的开发方式,前端使用npm作为脚手架搭建Svelte框架。 后端使用Java的SpringBoot作为后端框架。
首先,介绍下在前端Svelte框架下搭建在线表格编辑器。
1、在pageage.json文件中引入相关资源
   "@grapecity/spread-excelio": "15.2.5",
    "@grapecity/spread-sheets": "15.2.5",
    "@grapecity/spread-sheets-barcode": "15.2.5",
    "@grapecity/spread-sheets-charts": "15.2.5",
    "@grapecity/spread-sheets-designer": "15.2.5",
    "@grapecity/spread-sheets-designer-resources-cn": "15.2.5",
    "@grapecity/spread-sheets-languagepackages": "15.2.5",
    "@grapecity/spread-sheets-pdf": "15.2.5",
    "@grapecity/spread-sheets-pivot-addon": "15.2.5",
    "@grapecity/spread-sheets-pivots": "^14.0.0",
    "@grapecity/spread-sheets-print": "15.2.5",
    "@grapecity/spread-sheets-resources-zh": "15.2.5",
    "@grapecity/spread-sheets-shapes": "15.2.5",
    "@grapecity/spread-sheets-tablesheet": "15.2.5",
2、然后,集成在线表格编辑器Svelte组件版。在上一篇文章中,我们介绍了如何在Svelte框架中实现在线表格编辑器。
我们按照此思路新建一个SpreadSheet.svelte文件,写入基础在线表格编辑器。
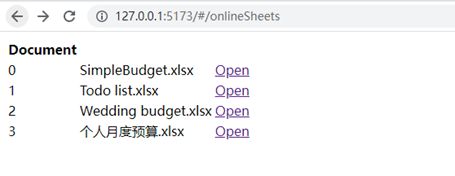
3、协同文档可能不止一个,我们需要在页面上创建一个文档列表,来允许用户选择编辑哪个文档,所以我们需要创建一个文档列表页面OnlineSheets.svelte。在此页面中,我们要实现路由跳转,和加载文档数据。
这里我们用了svelte-spa-router进行路由跳转 与isomorphic-fetch进行前后端数据传输。
{#each docList as docItem} Document {/each} {docItem.index} {docItem.fileName} Open
以上代码实现了文档列表查看与文档跳转,使用 Open将跳转至前面设计好的在线表格编辑器中。
至此,前端的相关内容就准备好了,接下来搭建下后端工作。
后端的准备工作,首先安装gradle作为包管理器。当然,这里也可以用其他工具来代替,例如maven,或者源生引入jar包的方式将需要用到的jar包引入进来。之后创建springboot工程配合搭建gradle引用GCExcel以及后面协同需要用到的websocket。
org.springframework.boot
spring-boot-starter-web


org.springframework.boot
spring-boot-starter-test
test


org.springframework.boot
spring-boot-starter-tomcat
2.4.3


org.springframework.boot
spring-boot-starter-websocket
2.4.3


com.grapecity.documents
gcexcel
4.0.3


com.google.code.gson
gson
2.8.6


javax.servlet
jstl
1.2


org.apache.tomcat.embed
tomcat-embed-jasper
10.0.2


com.jayway.jsonpath
json-path
2.5.0
这样子,我们做了框架的基本环境搭建,接下来我们介绍下如何搭建webSocket。
在SpreadSheet.svelte文件中写入如下代码建立webSocket链接:
    function connectDocument(docName) {
        if (webSocket != null) {
            return;
        }
        var ws = new WebSocket(Utility.webSocketUrl);  //'ws://localhost:8090/spreadjs'
        ws.onopen = function () {
            var data = {
                cmd: "connect",
                docID: docName
            }
            ws.send(JSON.stringify(data));
        }
        ws.onmessage = onmessage;
        webSocket = ws;
    }
接下来我们访问下文档列表页,从文档列表页跳转进入文档,进行编辑。

接下来我们需要监听前端发出的操作。这里因为在线表格编辑器本身将所有用户可能做的操作全部做了封装,所以省下了很多的功夫。
   onMount(async () => {
        //初始化Designer
        designer = new GCDesigner.Spread.Sheets.Designer.Designer(document.getElementById("designerHost"));
        let spread = designer.getWorkbook();
        //fromJSON
        openDocument(docName);
        //建立webSocket
        connectDocument(docName);
        var cm = spread.commandManager();
        cm.addListener('myListener', onCommandExecute)
    });
根据cmd去判断并且对命令再做一些简单封装,之后将封装过的命令发到服务端,之后通过websocket发同步指令:
  function onCommandExecute(args) {
        console.log(args.command);
        var command = args.command;
        var ServerCommand = null;

        switch (command.cmd) {
            case Utility.ServerCommands.EditCell:
                ServerCommand = {
                    sheetName: command.sheetName,
                    row: command.row,
                    column: command.col,
                    newValue: command.newValue
                }
                break;
            case Utility.ServerCommands.ResizeRow:
                ServerCommand = {
                    sheetName: command.sheetName,
                    rows: command.rows,
                    size: command.size
                };
                break;
            case Utility.ServerCommands.ResizeColumn:
                ServerCommand = {
                    sheetName: command.sheetName,
                    columns: command.columns,
                    size: command.size
                };
                break;
            case 'Designer.' + Utility.ServerCommands.SetFontFamily:
            case 'Designer.' + Utility.ServerCommands.SetFontSize:
            case 'Designer.' + Utility.ServerCommands.SetBackColor:
            case 'Designer.' + Utility.ServerCommands.SetForeColor:
            case 'Designer.' + Utility.ServerCommands.SetFontWeight:
            case 'Designer.' + Utility.ServerCommands.SetFontStyle:
            case 'Designer.' + Utility.ServerCommands.SetUnderline:
            case 'Designer.' + Utility.ServerCommands.SetDoubleUnderline:
                if (command.value && command.value.indexOf('undefined') === -1) {
                    ServerCommand = {
                        sheetName: command.sheetName,
                        selections: command.selections,
                        value: command.value
                    }
                }
                break;
            case Utility.ServerCommands.MoveFloatingObjects:
                ServerCommand = {
                    sheetName: command.sheetName,
                    floatingObjects: command.floatingObjects,
                    offsetX: command.offsetX,
                    offsetY: command.offsetY
                };
                break;
            case Utility.ServerCommands.ResizeFloatingObjects:
                ServerCommand = {
                    sheetName: command.sheetName,
                    floatingObjects: command.floatingObjects,
                    offsetX: command.offsetX,
                    offsetY: command.offsetY,
                    offsetWidth: command.offsetWidth,
                    offsetHeight: command.offsetHeight
                };
                break;
            case Utility.ServerCommands.InsertColumns:
            case Utility.ServerCommands.InsertRows:
                ServerCommand = {
                    sheetName: command.sheetName,
                    selections: command.selections
                };
                break;
            default:
        }

        if (ServerCommand != null) {

            var cmd = command.cmd;
            var dotIndex = cmd.lastIndexOf('.');
            if (dotIndex !== -1) {
                cmd = cmd.substring(dotIndex + 1);
            }
            ServerCommand.cmd = cmd;
            ServerCommand.docID = params.fileName;

            Utility.ExecuteCommandAtServer(ServerCommand);

            command.docID = ServerCommand.docID;
            webSocket.send(JSON.stringify(command))
        }
    }
当协同端通过websocket接收到请求的时候,使用onmessage方法做同步命令。这里在协同端执行command之前需要先撤销之前的监听,避免再发送websocket导致死循环。在执行之后,再次添加监听。
  function onmessage(message) {
        var command = JSON.parse(message.data);
        command._styles = null;
        let spread = designer.getWorkbook()
        var cm = spread.commandManager();
        cm.removeListener('myListener');

        spread.commandManager().execute(command);

        cm.addListener('myListener', onCommandExecute);
    }
至此,协同基础内容搭建结束,我们来看看编辑单元格内容后,发生了什么吧。
如下图所示,修改E4单元格内容,同时打开控制台网络tab。
将E4单元格数值2500改为2000,此时触发了EditCell事件,同时发出了交互指令:

此时新建一个窗口,复制链接,查看文档内容已经变为了2000。
如下动图所示:

到此这篇关于Svelte框架实现表格协同文档的示例的文章就介绍到这了,更多相关Svelte 表格协同文档内容请搜索脚本之家以前的文章或继续浏览下面的相关文章希望大家以后多多支持脚本之家!