ubuntu 与 windows terminal zsh 美化教程
ubuntu 与 windows terminal zsh 美化教程
- 安装 zsh 和 oh-my-zsh
- 选择与安装主题
-
- 使用自带的主题
- 安装 powerlevel10k 主题
-
- (1)下载 p10k 主题
- (2)下载 Meslo_LG_M_Regular_Nerd_Font_Complete_Mono 字体
- (3)配置 p10k 主题
- 选择与安装插件
-
- 使用自带的插件
- 安装第三方插件
-
- (1)zsh-autosuggestions
- (2)zsh-syntax-highlighting
- 配置颜色
- 参考链接
在 Windows 上通过 WLS2 安装了 Linux 子系统之后,就可以同时在两种系统环境下工作了。使用 windows terminal 可以方便地对 Powershell、cmd 和 ubuntu 等多种终端进行管理,还可以使用 zsh 对其进行美化。
与直接对 windows terminal 进行美化的做法不同,本文选择对 Ubuntu 子系统的 bash 进行美化,这样在 windows terminal 中打开 ubuntu 子系统的终端时,也能得到相同的美化效果,最终的效果图如下。
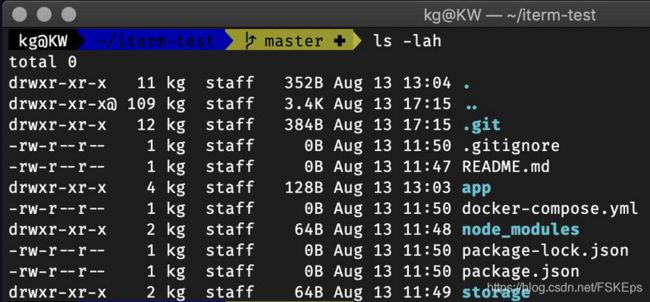
windows terminal 中打开的 ubuntu 子系统终端:

ubuntu 子系统中打开的终端:

安装 zsh 和 oh-my-zsh
Oh My Zsh( 官网 ,Github)是一个开源的“开箱即用”的 zsh 配置管理框架,安装之后可以很方便的为 zsh 安装主题、插件等。
# 安装 zsh
sudo apt install zsh

# 安装 oh-my-zsh
sh -c "$(wget -O- https://raw.githubusercontent.com/ohmyzsh/ohmyzsh/master/tools/install.sh)"

# 确认 zsh 成功安装
zsh

# 设置为默认 Shell
chsh -s /bin/zsh
第一次运行 zsh 后(在终端输入zsh命令),会生成一个配置文件(~/.zshrc)和一个文件夹(~/.oh-my-zsh)。
手动安装 oh-my-zsh 的方法:
(1) 从 github(https://github.com/ohmyzsh/ohmyzsh)下载 oh-my-zsh 项目
(2) 解压后复制到~/.oh-my-zsh目录下面
(3) 替换默认生成的.zshrc配置文件:cp ~/.oh-my-zsh/templates/zshrc.zsh-template ~/.zshrc
选择与安装主题
使用自带的主题
zsh 自带了很多的主题,相关的文件都放在了~/.oh-my-zsh/themes目录中。
默认的主题是 robbyrussell,如下图。

其中,比较炫酷的主题是 agnoste,如下图。
更换主题只需要编辑 ~/.zshrc ,将 ZSH_THEME="agnoster"改为对应的主题名称即可。
安装 Powerline 字体
许多主题中有很多图标需要显示,为此需要安装 Powerline 字体。
(1)Linux 上安装 Powerline 字体
在 ubuntu 系统上安装 powerline 字体非常简单,只需要一行命令,
sudo apt install fonts-powerline
(2)windows 上安装 Powerline 字体
从 Cascadia Code GitHub 发布页 下载 powerline 字体。

解压后,将下面的几个字体复制到 windows 系统的字体目录(c:/windows/fonts/)中。其中,绿色框中的字体在 windows terminal 中已经自带了。

重启 windows terminal 后,打开设置,选择 Cascadia Mono PL或Cascadia Code PL字体即可。

此时,在 windows terminal 中打开 ubuntu 子系统的终端,可以看到能正常显示主题的各种图标。
安装 powerlevel10k 主题
zsh 使用最多的主题是 powerlevel9k / powerlevel10k 。 powerlevel10k 在 powerlevel9k 的基础上做了一些改进,支持异步加载,速度要比 powerlevel9k 更快,而且 powerlevel9k 的配置命令在 powerlevel10k 中都可以使用。
(1)下载 p10k 主题
将该主题文件下载到对应的目录中,
git clone https://github.com/romkatv/powerlevel10k.git ~/.oh-my-zsh/custom/themes/powerlevel10k
然后编辑 ~/.zshrc ,设置 ZSH_THEME="powerlevel10k/powerlevel10k"。
(2)下载 Meslo_LG_M_Regular_Nerd_Font_Complete_Mono 字体
p10k 主题使用了更加丰富的图标,为此需要进一步安装 Meslo_LG_M_Regular_Nerd_Font_Complete_Mono 字体。
下载该字体文件后,
- windows 系统
将字体复制到c:/windows/fonts/中,然后在 windows terminal 的设置中选择该字体。

- Linux 子系统
将该字体下载到任意一个文件夹内,如 ~/Downloads,然后执行以下命令,
sudo mkdir -p /usr/share/fonts/custom
cd ~/Downloads
sudo mv Meslo\ LG\ M\ Regular\ Nerd\ Font\ Complete\ Mono.ttf /usr/share/fonts/custom
sudo chmod 744 /usr/share/fonts/custom/Meslo\ LG\ M\ Regular\ Nerd\ Font\ Complete\ Mono.ttf
cd /usr/share/fonts/custom/
sudo mkfontscale
sudo mkfontdir
sudo fc-cache -fv
至此,在 ubuntu 子系统内打开终端,或是在 windows terminal 中打开 ubuntu 子系统终端,都能正常显示该主题。
(3)配置 p10k 主题
使用下面的命令对该主题的具体样式进行配置,如图。
p10k configure

其它的一些配置命令:
# 列出主题中包含的所有图标的名称
get_icon_names

# 禁用 P9k / P10k
prompt_powerlevel9k_teardown

# 启用 P9k / P10k
prompt_powerlevel9k_setup
选择与安装插件
使用自带的插件
zsh 自带了很多的插件,相关的文件都放在了~/.oh-my-zsh/plugins目录中。
默认使用 Git 插件,能提供 Git 状态颜色编码和提示符。要想使用其他自带的插件,只需要编辑~/.zshrc文件,添加插件名称即可,
plugins=(
    git
    # 其它自带的插件
)
安装第三方插件
要想安装第三方的插件,首先需要将插件下载到~/.oh-my-zsh/plugins/目录下。推荐两个常用的插件:
(1)zsh-autosuggestions
根据 shell 中输入命令的历史记录,为当前输入的命令提供自动补全提示。
git clone https://github.com/zsh-users/zsh-autosuggestions ~/.oh-my-zsh/plugins/zsh-autosuggestions
(2)zsh-syntax-highlighting
为 shell 命令进行语法高亮显示。
git clone https://github.com/zsh-users/zsh-syntax-highlighting ~/.oh-my-zsh/plugins/zsh-syntax-highlighting
然后,与启用 oh-my-zsh 自带的插件一样,在 plugins 列表中添加对应的名称。
plugins=(
    ...  # 之前已经声明的插件名称
    zsh-autosuggestions
    zsh-syntax-highlighting
)
最后,通过重启终端或输入下面的命令来使插件生效。
source ~/.zshrc
配置颜色
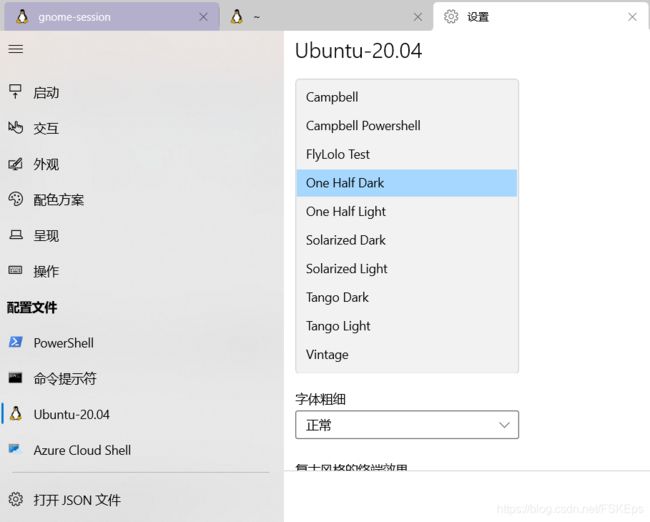
可以对终端的背景颜色进行配置。
windows terminal 中自带了几种配色,如图。
Gogh (官网,Github)为 gnome terminal、xfce4 terminal 等多种终端提供丰富的配色方案。

在 ubuntu 子系统中打开终端,执行以下命令,
# clone the repo into "$HOME/src/gogh"
mkdir -p "$HOME/src"
cd "$HOME/src"
git clone https://github.com/Mayccoll/Gogh.git gogh
cd gogh/themes

# necessary on ubuntu
export TERMINAL=gnome-terminal

# themes 目录下有多种主题
# 想要哪种主题,执行对应主题的脚步即可
./atom.sh
./dracula.sh
安装完主题后,在终端上鼠标右键,在 Profiles 选项里面就可以看到已经安装的主题,可以选择使用。

参考链接
- 微软官方教程:在 Windows 终端中设置 Powerline
- ubuntu美化及解决使用zsh后无法运行ROS
- Windows Terminal安装PowerLine教程
- 利用zsh、oh-my-zsh、powerlevel10k打造一款好看好用的终端
- Powerlevel9k:zsh下最棒的Powerline主题