PyQt第三课,用QtDesigner+python完成界面设计和小程序的编写
第一课
第二课
第三课
主要参考了这篇博客(其中关于Designer和uic的安装真保姆级教程了)和一本写的非常详细的书(可以从中学习到一些理论知识),接下来就开始吧。
文章目录
- 第三课
-
- 1、安装designer和pyuic
- 2、绘制ui
- 3、ui文件转py文件
- 4、功能实现
1、安装designer和pyuic
首先分别安装pyqt5-tools(里面有designer)和pyuic5-tool(用于把designer画出的ui文件转成py文件),这里我使用豆瓣源来安装
pip install -i https://pypi.douban.com/simple/ pyqt5-tools
pip install -i https://pypi.douban.com/simple/ pyuic5-tool
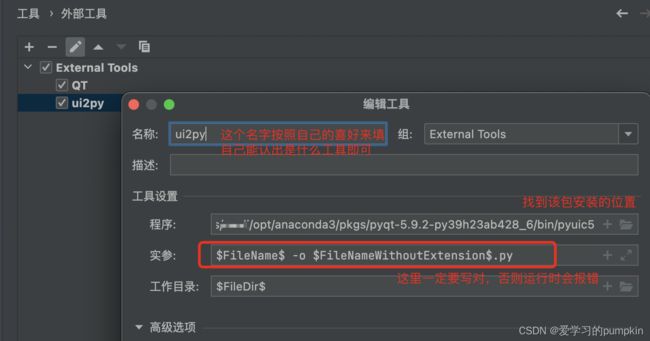
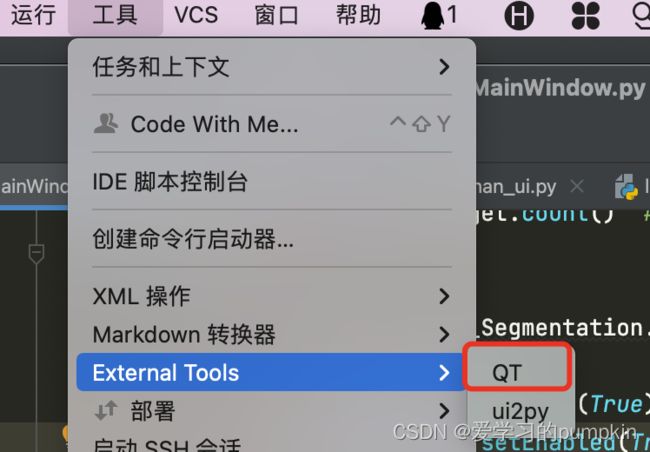
安装完成后把这两个小工具添加到pycharm中,方便我们快速启动。具体设置参考博客
pyuic的参数配置Arguments需要强调一下,该博客中图片显示不完整容易误解: $FileName$ -o $FileNameWithoutExtension$.py

2、绘制ui
现在就可以愉快的使用designer和uic啦,打开designer

新建一个窗口
拖拽组件创建自己的界面
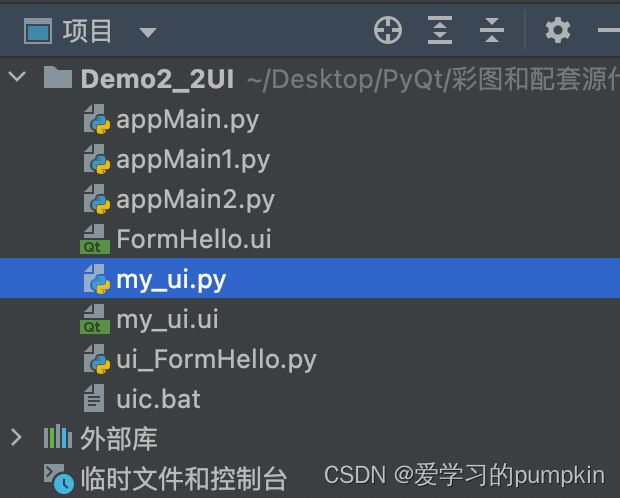
全部完成之后保存ui文件,最好保存到当前工作路径下
3、ui文件转py文件
!!!注意,最重要的一步来啦,在保存好的ui文件上右击,找到external tool,使用我们之前添加好的uic工具将ui文件转换成py文件。
这样就生成了同名的py文件,里面有根据自己业务需求组织好的组件

大概就是这个样子,大家可以自己生成一个看看,(这里我没有粘贴全部)
class Ui_MainWindow(object):
    def setupUi(self, MainWindow):
        MainWindow.setObjectName("MainWindow")
        MainWindow.resize(566, 397)
        self.centralwidget = QtWidgets.QWidget(MainWindow)
        self.centralwidget.setObjectName("centralwidget")
        self.label = QtWidgets.QLabel(self.centralwidget)
        self.label.setGeometry(QtCore.QRect(10, 20, 60, 16))
        self.label.setObjectName("label")
        self.comboBox = QtWidgets.QComboBox(self.centralwidget)
        self.comboBox.setGeometry(QtCore.QRect(90, 20, 341, 22))
4、功能实现
然后就是将我们生成的py文件导入进来开始实现功能部分啦
from my_ui import Ui_MainWindow
其中这一小段是关键,是整个界面与业务逻辑分离的关键(我认为),这里的界面我理解的是Qt自带的组件,而业务逻辑是在desiner中绘制出来的将各种组件根据自己需求组织好的东西,这种组织包括各种按钮的名称、大小、位置等等。自己的程序需要调用这些写好的组件添加上自己的功能函数就形成一个小软件。简单来说就是 ui.comboBox区别于QtWidgets.QComboBox
self.ui=Ui_MainWindow()    # 创建UI对象,将自己刚刚绘制的界面实例化出来
self.ui.setupUi(self)      # 构造UI界面
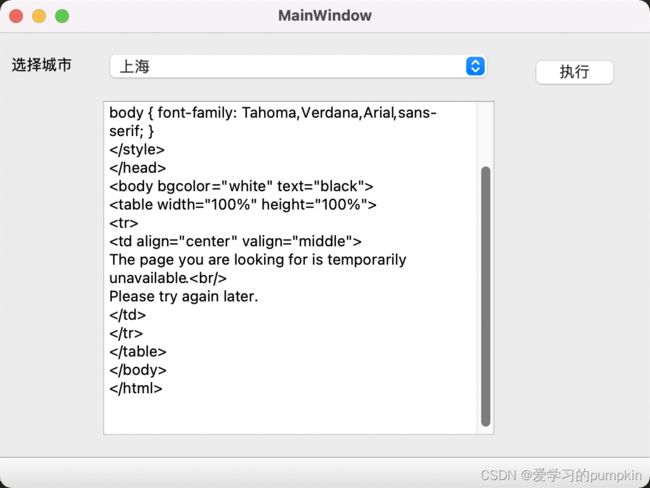
self.ui.comboBox.addItem("北京")#调用ui也就是Ui_MainWindow实例下的combobox,而不是Qt自带的combobox
from PyQt5 import QtCore, QtGui, QtWidgets
from PyQt5.QtWidgets import QApplication,QMainWindow,QWidget
from my_ui import Ui_MainWindow
import requests
import sys

class MyWindow(QMainWindow):
    def __init__(self, parent=None):
        super().__init__(parent)   # 调用父类构造函数,创建窗体
        self.ui=Ui_MainWindow()    # 创建UI对象
        self.ui.setupUi(self)      # 构造UI界面

        # 添加下拉列表选项
        self.ui.comboBox.addItem("北京")#调用ui也就是Ui_MainWindow实例下的combobox
        self.ui.comboBox.addItem("上海")
        # 省略添加了其他城市
        # 重定向输出流
        sys.stdout = EmittingStr(textWritten=self.outputWritten)
        sys.stderr = EmittingStr(textWritten=self.outputWritten)
        # 绑定按钮事件
        self.ui.pushButton.clicked.connect(self.buttClicked)
    def buttClicked(self):
        test = WeatherTest()
        selectedCity = self.ui.comboBox.currentText()
        test.Weather(city=selectedCity)

    def outputWritten(self, text):
        cursor = self.ui.textBrowser.textCursor()
        cursor.movePosition(QtGui.QTextCursor.End)
        cursor.insertText(text)
        self.ui.textBrowser.setTextCursor(cursor)
        self.ui.textBrowser.ensureCursorVisible()
class EmittingStr(QtCore.QObject):
    textWritten = QtCore.pyqtSignal(str)  # 定义一个发送str的信号

    def write(self, text):
        self.textWritten.emit(str(text))
class WeatherTest:
    def __init__(self):
        self
    def Weather(self, city):
        url = "http://notify.mse.sogou.com/weather"

        querystring = {"city": city}

        headers = {
            'User-Agent': "PostmanRuntime/7.16.3",
            'Accept': "*/*",
            'Cache-Control': "no-cache",
            'Postman-Token': "de3c837b-6f0c-48c8-a49d-1ca310c98917,d028ac2b-f12f-4fbd-ab4a-2aabfb32ab13",
            'Host': "notify.mse.sogou.com",
            'Accept-Encoding': "gzip, deflate",
            'Cookie': "IPLOC=CN1100",
            'Connection': "keep-alive",
            'cache-control': "no-cache"
        }

        response = requests.request("GET", url, headers=headers, params=querystring)
        print(response.text)

if __name__ == '__main__':
    app = QApplication(sys.argv)
    ex = MyWindow()
    ex.show()
    sys.exit(app.exec_())
