iTerm2+Oh-My-Zsh 如何在MAC上打造自己的自定义终端
文章目录
- 1、前言
- 2、安装iTerm2
- 3、安装oh-my-zsh
-
- 安装
-
- curl方式安装
- 下载到本地进行安装
- 安装时遇到的问题
- 安装成功
- 4、对oh-my-zsh进行字体适配
-
- 4.1 安装Powerline插件
-
- 安装powerline之前需要先安装pip
-
- 安装方法一:
- 安装方法二:
- 使用pip安装powerline
- 4.2 安装Powerline Fonts字体库
-
- 下载
- 安装
- 把iTerm 2的字体设置为Powerline Fonts
- 4.3 安装Nerd font字体库
-
- 下载和安装
- 把iTerm 2的字体设置为Nerd font
- 5、安装并配置主题
-
- 5.1 安装agnoster主题和使用
-
- 下载
- 安装
- 配置主题
- 5.2 安装powerlevel9k主题和使用
-
- 下载
- 配置主题
- 5.3 安装powerlevel10k主题和使用
-
- 下载
- 配置主题
- 5.4 oh-my-zsh自带的默认主题
- 6、配置文字配色方案
-
- iTerm2-Color-Schemes主题集的使用
- 安装配色方案
- 使用配色方案
- 7、配置语法高亮插件
-
- 下载插件
- 配置`.zshrc`文件
- 8、配置命令补全插件
-
- 下载插件
- 在`.zshrc`文件中配置命令补全插件
- 10、资料参考
标签:工具 主题
1、前言
我的iTerm2配置完成后是这样子的:
![]()
如果对iTerm与zsh和oh-my-zsh的关系不了解的同学,可以看我下面的这篇文章:
iTerm2与zsh和oh-my-zsh的关系
本文用到的文件编辑指令:几个常用的Vim指令
2、安装iTerm2
官网地址: http://iterm2.com/downloads.html
3、安装oh-my-zsh
安装
curl方式安装
$ curl -L https://raw.github.com/robbyrussell/oh-my-zsh/master/tools/install.sh | sh
我安装失败,所以下载资源到本地进行安装。
下载到本地进行安装
$ cd ~
$ git clone https://github.com/robbyrussell/oh-my-zsh.git
$ cd ~/Downloads/ohmyzsh-master/tools
$ ./install.sh
安装时遇到的问题
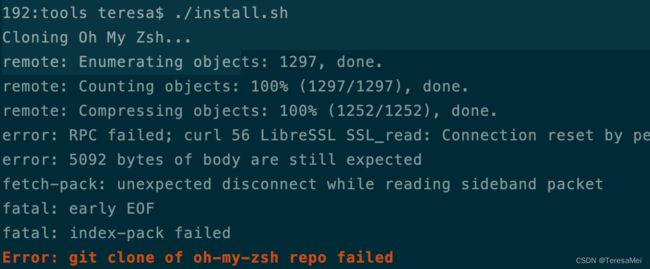
解决方案:
-
如果Safari地址栏中键入:
github.com:443后进入的Github是自己的仓库,那就退出登录。如果出现的是Github的登录界面,那就登录Github。我采用这个方法就解决了上述问题。我猜测是因为我没有给github设置SSH导致的。 -
终端
Clone项目失败就在Safari上刷新GitHub的网页,如果网页能刷新再继续Clone。(WiFi刷新失败可尝试切换热点)
安装成功
安装成功的截图如下,这里折腾了好久,安装成功给我高兴坏了。

4、对oh-my-zsh进行字体适配
4.1 安装Powerline插件
Powerline 是一款 Vim statusline 的插件,它用到了很多特殊的 icon 字符对oh-my-zsh的主题进行展示增强。
安装powerline之前需要先安装pip
安装方法一:
$ sudo easy_install pip
-
出现错误
SyntaxError: invalid syntax
换个方法安装。
安装方法二:
$ curl 'https://bootstrap.pypa.io/get-pip.py' > get-pip.py

$ sudo python3 get-pip.py
-
pip安装成功
Successfully installed pip-22.0.4
使用pip安装powerline
$ pip install powerline-status
-
安装成功
Successfully installed powerline-status-2.7
4.2 安装Powerline Fonts字体库
Powerline fonts 字体集本质是对一些现有的字体打 patch,把 powerline icon 字符添加到这些现有的字体里,目前对 30 款编程字体打了 patch。oh-my-zsh的一些主题,比如 agnoster,需要用到一些系统没有的特殊字体,所以需要安装 Powerline fonts字体库。
下载
$ git clone https://github.com/powerline/fonts
安装
进入下载好的fonts目录下,执行查看是否有install.sh文件,如果有就执行下面两步安装Powerline的字体。
$ cd fonts/    进入fronts目录中
$ ./install.sh
- 提示字体安装成功
Powerline fonts installed to /Users/teresa/Library/Fonts
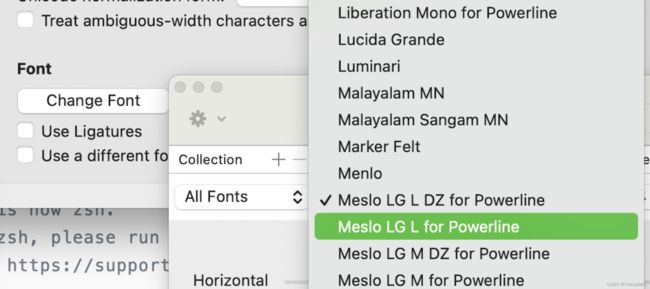
把iTerm 2的字体设置为Powerline Fonts
进入iTerm 2的设置里找到Profile中的Text ,设置Font的字体为Powerline后缀的字体即可。
步骤:iTerm2 -> Preferences -> Profiles -> Text
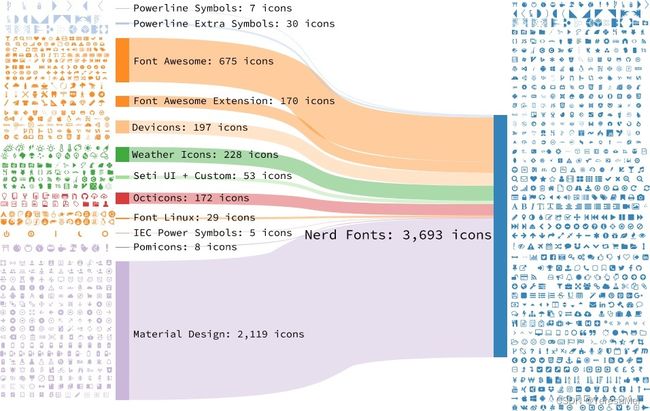
4.3 安装Nerd font字体库
Nerd font 的原理和 Powerline fonts 是一样的,也是针对已有的字体打 patch,把一些特殊 icon 字符插入进去。Nerd font 是Powerline的超集,下面的桑基图展示了Nerd Fonts中现有的字形组合:
想要了解更多,欢迎移步官网:
Nerd font字体库的官网地址
Nerd font字体库的GitHub仓库地址
下载和安装
git clone https://github.com/ryanoasis/nerd-fonts.git --depth 1
cd nerd-fonts
./install.sh
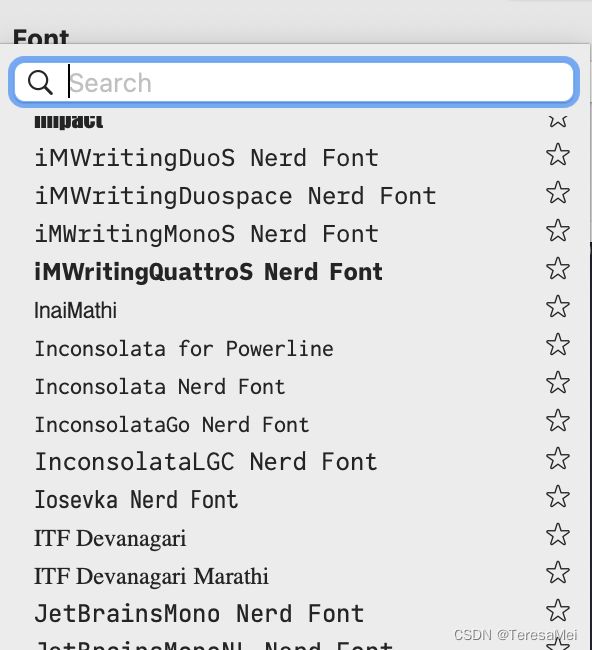
把iTerm 2的字体设置为Nerd font
进入iTerm 2的设置里找到Profile中的Text ,设置Font的字体为Powerline后缀的字体即可。
步骤:iTerm2 -> Preferences -> Profiles -> Text
5、安装并配置主题
5.1 安装agnoster主题和使用
下载
$ git clone https://github.com/fcamblor/oh-my-zsh-agnoster-fcamblor
安装
运行install文件,主题将被自动安装到~/.oh-my-zsh/themes目录下:
$ cd ~/Downloads/oh-my-zsh-agnoster-fcamblor-master
$ ./install
配置主题
配置.zshrc文件
$ vi ~/.zshrc
把ZSH_THEME设置为agnoster,重启终端后,agnoster就是当前主题。
-
ZSH_THEME=”agnoster“

5.2 安装powerlevel9k主题和使用
下载
把主题下载在~/.oh-my-zsh/themes/powerlevel10k目录下,这个主题是一个包,直接配置使用。
$ git clone https://github.com/bhilburn/powerlevel9k.git ~/.oh-my-zsh/themes/powerlevel9k
配置主题
配置.zshrc文件。
$ vi ~/.zshrc
把ZSH_THEME配置为:powerlevel9k/powerlevel9k。
ZSH_THEME=”powerlevel9k/powerlevel9k“
5.3 安装powerlevel10k主题和使用
下载
指导手册上要求先废弃当前正在使用的主题,再安装powerlevel10k,配置.zshrc文件中的ZSH_THEME=""废弃当前的主题。
国内直接使用gitee.com的镜像,官方安装指导如下:
git clone --depth=1 https://gitee.com/romkatv/powerlevel10k.git ${ZSH_CUSTOM:-$HOME/.oh-my-zsh/custom}/themes/powerlevel10k
我与powerlevel9k的方式保持一致,安装在~/.oh-my-zsh/themes/powerlevel10k目录下。
git clone --depth=1 https://gitee.com/romkatv/powerlevel10k.git ~/.oh-my-zsh/themes/powerlevel10k
配置主题
配置.zshrc文件。
$ vi ~/.zshrc
把ZSH_THEME配置为:"powerlevel10k/powerlevel10k"
ZSH_THEME=”powerlevel10k/powerlevel10k“
想了解更多使用方法,欢迎移步powerlevel10k官方。
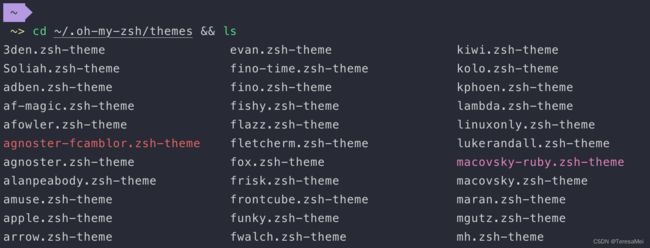
5.4 oh-my-zsh自带的默认主题
oh-my-zsh自带了一些默认主题,存放在 ~/.oh-my-zsh/themes 目录中,在终端输入 cd ~/.oh-my-zsh/themes && ls 就可以查看到。
cd ~/.oh-my-zsh/themes && ls
6、配置文字配色方案
iTerm2-Color-Schemes主题集的使用
目前最全的主题集合是iTerm2-Color-Schemes主题集,它包括Konsole、PuTTY、Xresources、Termite、XFCE 和 Terminator 等终端的主题集合。
iTerm2的配色方案合集也在这个包中。
GitHub仓库是:mbadolato/iTerm2-Color-Schemes,官网是: iterm2colorschemes 。
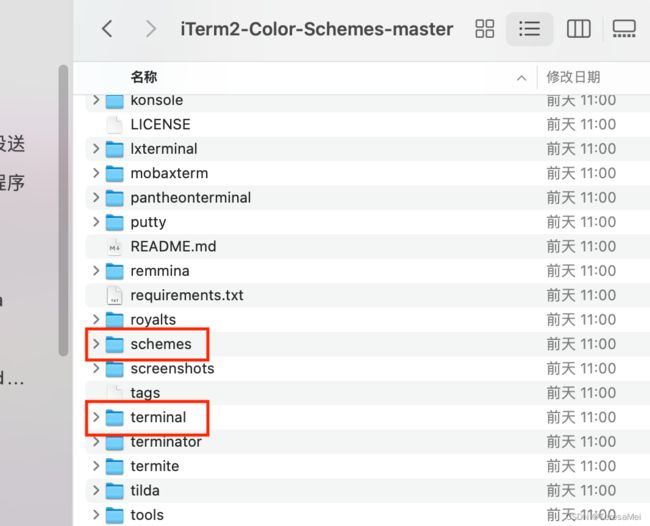
安装配色方案
下图为iTerm2-Color-Schemes的合集包。
schemes包中主题配色方案可用于iTerm 2中,直接双击.iterminators文件即可安装该配色方案。
terminal包中主题配色方案可用于MacOS 的默认终端iterm中。
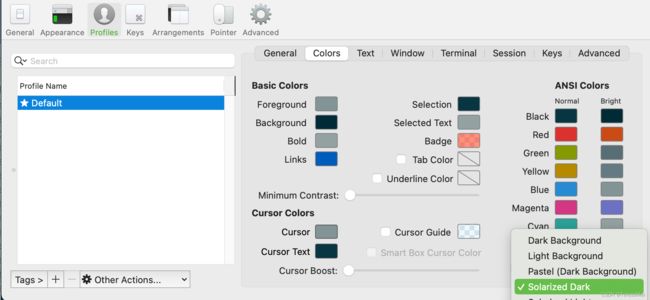
使用配色方案
进入iTerm 2的设置里找到Profile中的Color ,在color presets中选择刚才安装的配色方案即可使用。
步骤:iTerm2 -> Preferences -> Profiles -> Color—>color presets
7、配置语法高亮插件
如果输入的命令出错就一直显示红色的,直到输入正确才会变成绿色。
下载插件
$ cd ~/.oh-my-zsh/custom/plugins
$ git clone git://github.com/zsh-users/zsh-syntax-highlighting.git
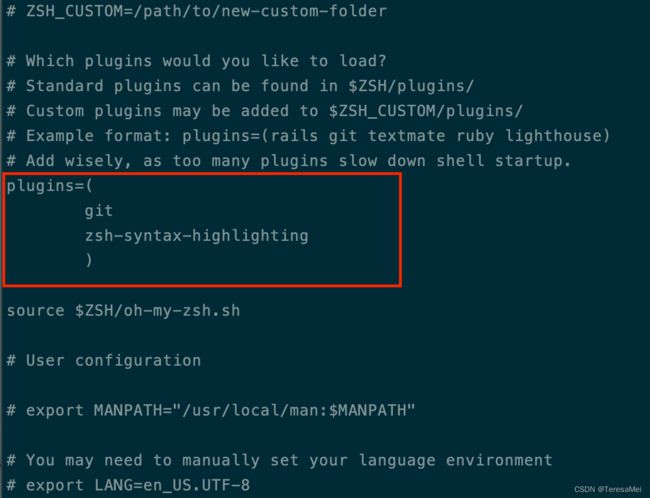
配置.zshrc文件
$ vi ~/.zshrc
在plugins中配置高亮插件时,zsh-syntax-highlighting必须放在所有插件的末尾。
plugins=(
git
zsh-syntax-highlighting
)
在.zshrc文件最后一行增加配置
source ~/.oh-my-zsh/custom/plugins/zsh-syntax-highlighting/zsh-syntax-highlighting.zsh
8、配置命令补全插件
下载插件
$ cd ~/.oh-my-zsh/custom/plugins/

$ git clone https://github.com/zsh-users/zsh-autosuggestions
在.zshrc文件中配置命令补全插件
plugins=(
git
zsh-autosuggestions
zsh-syntax-highlighting
)
至此,iTerminal 2 配置完成。

10、资料参考
本文参考以下众多网友的文章,感谢网友们的分享。
- iTerm2 + Oh My Zsh 打造舒适终端体验
- 10 个 Terminal 主题,让你的 macOS 终端更好看
- 整理了几个国内可访问的Github镜像源网站
- LibreSSL SSL_connect: SSL_ERROR_SYSCALL in connection to github.com:443 问题+解决过程
- Powerlevel9k
- powerlevel10k
- iterm2colorschemes