LNMP搭建个人博客
LNMP平台搭建个人博客
安装程序
安装nginx
配置nginx官方yum源
#vim /etc/yum.repos.d/nginx.repo
[nginx-stable]
name=nginx stable repo
baseurl=http://nginx.org/packages/centos/$releasever/$basearch/
gpgcheck=1
enabled=1
gpgkey=https://nginx.org/keys/nginx_signing.key
module_hotfixes=true
保存退出
安装nginx
#yum install -y nginx
安装MySQL
配置yum源
#wget http://repo.mysql.com/mysql-community-release-el7-5.noarch.rpm
#yum localinstall -y mysql-community-release-el7-5.noarch.rpm
安装MySQL
yum install -y mysql-community-server
安装php71
配置yum源
#wget http://rpms.famillecollet.com/enterprise/remi-release-7.rpm
#yum localinstall -y remi-release-7.rpm
安装php71
# yum install --enablerepo=remi --enablerepo=remi-php71 php71 php71-php-opcache php71-php-devel php71-php-mbstring php71-php-mcrypt php71-php-mysqlnd php71-php-phpuni-PHPUnit php-pecl-xdebug php-pecl-xhprof php-imap php-gd php-ldap php-xml php71-php-fpm
配置程序
先创建一个系统用户
#groupadd -g666 www
#useradd -u666 -g666-M -s /sbin/bin/nologin www
配置nginx
#vim /etc/nginx/nginx.conf
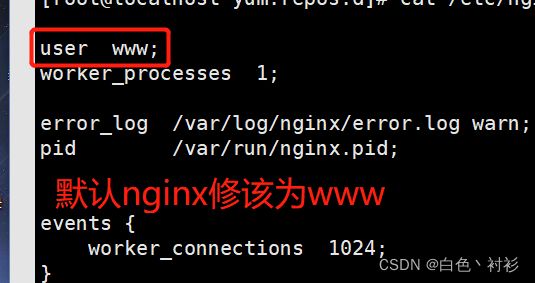
保存退出
#systemctl start nginx
#systemctl enable nginx
配置MySQL
#systemctl start mysqld
#systemctl enable mysqld
#mysqladmin -u root password [email protected]
#mysql -uroot [email protected]
>exit;
配置php
#vim /etc/opt/remi/php71/php-fpm.d/www.conf
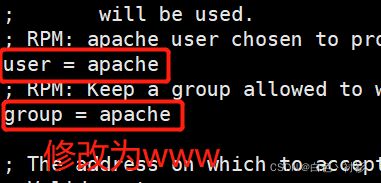
保存退出
#systemctl start php71-php-fpm
# systemctl enable php71-php-fpm
搭建个人博客
搭建虚拟主机
#vim /etc/nginx/conf.d/typecho.conf
server {
listen 80;
server_name localhost;
access_log /var/log/nginx/typecho.log;
location / {
root /usr/share/nginx/html/typecho/;
index index.php index.html;
}
location ~ \.php$ {
root /usr/share/nginx/html/typecho/;
fastcgi_pass 127.0.0.1:9000;
fastcgi_param SCRIPT_FILENAME $document_root$fastcgi_script_name;
fastcgi_index index.php;
include fastcgi_params;
}
}
创建数据库
#mysql -uroot [email protected]
>create database typecho;
>exit
创建目录并授予权限
#mkdir /usr/share/nginx/html/typecho
#chown -R www.www /usr/share/nginx/html/typecho
下载typecho源码
Typecho Official Site
进入网站下载源码
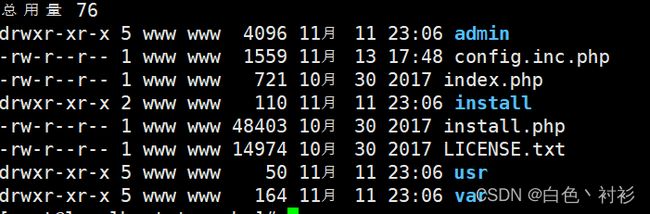
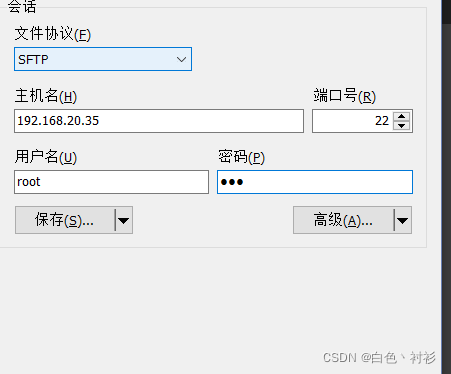
解压后把所有文件传送到/usr/share/nginx/html/typecho
重载nginx
#nginx -s reload
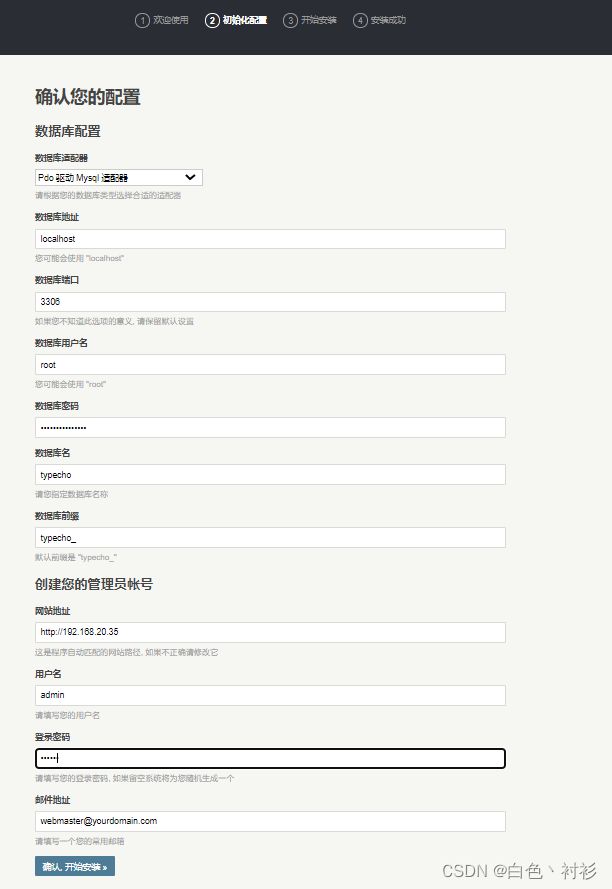
用浏览器打开192.168.20.35
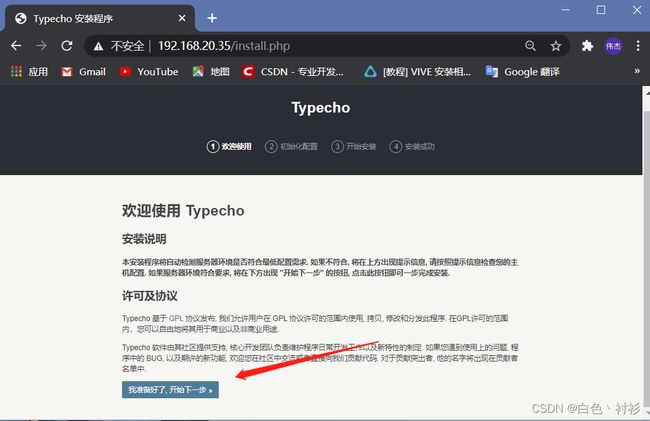
填写下面的内容后点击确认