【Android -- UI 开发】TextView 的基本使用

前言
TextView 是什么?
向用户显示文本,并可选择允许他们编辑文本。TextView 是一个完整的文本编辑器,但是基类为不允许编辑;其子类 EditText 允许文本编辑。

解释说明:
-
Button:用户可以点击或单击以执行操作的用户界面元素。
-
CheckedTextView:TextView支持Checkable界面和显示的扩展。
-
Chronometer:实现简单计时器的类。
-
DigitalClock:API17已弃用可用TextClock替代。
-
EditText:用于输入和修改文本的用户界面元素。
-
TextClock:可以将当前日期和/或时间显示为格式化字符串。
使用
1. 常用属性
效果图

代码
<LinearLayout xmlns:android="http://schemas.android.com/apk/res/android"
    android:layout_width="match_parent"
    android:layout_height="match_parent"
    android:layout_margin="@dimen/dimen_20"
    android:orientation="vertical">

    <TextView
        android:id="@+id/textView"
        android:layout_width="match_parent"
        android:layout_height="wrap_content"
        android:text="TextView" />

    <TextView
        android:layout_width="match_parent"
        android:layout_height="wrap_content"
        android:text="@string/str_setting_color_size"
        android:layout_marginTop="@dimen/dimen_10"
        android:textColor="@color/color_ff0000"
        android:textSize="@dimen/text_size_20" />

    <TextView
        android:layout_width="match_parent"
        android:layout_height="wrap_content"
        android:drawableLeft="@mipmap/ic_launcher"
        android:layout_marginTop="@dimen/dimen_10"
        android:gravity="center_vertical"
        android:shadowColor="@color/color_FF773D"
        android:shadowDx="30"
        android:shadowDy="-20"
        android:shadowRadius="2"
        android:text="右侧添加图片和使用阴影"
        android:textColor="@color/color_188FFF"
        android:textSize="@dimen/text_size_20" />

    <TextView
        android:layout_width="match_parent"
        android:layout_height="wrap_content"
        android:autoLink="email|phone"
        android:gravity="center_vertical"
        android:layout_marginTop="@dimen/dimen_10"
        android:text="可点击跳转邮件:SCC5201314@qq.com\n可点击跳转电话:0215201314"
        android:textColor="@color/color_188FFF"
        android:textSize="@dimen/text_size_14" />

    <TextView
        android:layout_width="match_parent"
        android:layout_height="wrap_content"
        android:ellipsize="end"
        android:gravity="center_vertical"
        android:lineSpacingMultiplier="1.2"
        android:layout_marginTop="@dimen/dimen_10"
        android:maxLength="2"
        android:text="TxtView继承了View,它还是Button、EditText两个UI组件类的父类。它的作用是在用户界面上显示文本素。从功能上来看TextView就是个文本编辑器,只不过Android关闭的它的可编辑功能。如果需要一个可编辑的文本框,就要使用到它的子类Editext了,Editext允许用户编辑文本框中的内容。TextView和Editext它俩最大的区别就在于TextView不允许用户编辑文本内容,Editext允许用户编辑文本内容。
下面咱写几个实例来详细了解一下TextView的。"
        android:textColor="@color/color_188FFF"
        android:textSize="@dimen/text_size_14" />

    <TextView
        android:layout_width="wrap_content"
        android:layout_height="wrap_content"
        android:background="@color/color_ff0000"
        android:layout_marginTop="@dimen/dimen_10"
        android:padding="10dp"
        android:text="背景色红色的文本"
        android:textColor="@color/white" />

    <TextView
        android:layout_width="wrap_content"
        android:layout_height="wrap_content"
        android:layout_marginTop="@dimen/dimen_10"
        android:background="@drawable/bg_tv_frame_red"
        android:padding="10dp"
        android:text="带着红色边框的文本" />

    <TextView
        android:layout_width="wrap_content"
        android:layout_height="wrap_content"
        android:layout_marginTop="@dimen/dimen_10"
        android:background="@drawable/bg_tv_frame_gradient"
        android:padding="10dp"
        android:textColor="@color/white"
        android:text="带着边框和背景色渐变的文本" />

LinearLayout>
- background 设置边框的文件
android:background="@drawable/bg_tv_frame_red"
<shape xmlns:android="http://schemas.android.com/apk/res/android">

    <corners android:radius="2dp"/>

    <stroke android:width="4px" android:color="@color/color_ff0000" />
shape>
- 带着边框和背景色渐变
android:background="@drawable/bg_tv_frame_gradient"
<shape xmlns:android="http://schemas.android.com/apk/res/android">

    <corners android:radius="8dp"/>

    <stroke android:width="1dp" android:color="@color/color_ff0000" />

    <gradient
        android:startColor="@color/color_188FFF"
        android:centerColor="@color/color_FF773D"
        android:endColor="@color/color_ff0000"
        android:type="linear"
        />
shape>
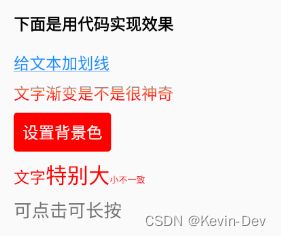
2. 给文本添加下划线
效果图
代码
<LinearLayout xmlns:android="http://schemas.android.com/apk/res/android"
   android:layout_width="match_parent"
   android:layout_height="match_parent"
   android:layout_margin="@dimen/dimen_20"
   android:orientation="vertical">
   <TextView
       android:layout_width="match_parent"
       android:layout_height="wrap_content"
       android:text="下面是用代码实现效果"
       android:textSize="@dimen/text_size_18"
       android:layout_marginTop="@dimen/dimen_20"
       android:layout_marginBottom="@dimen/dimen_10"
       android:textColor="@color/black"
       android:textStyle="bold" />

   <TextView
       android:id="@+id/tv_flag"
       android:layout_width="match_parent"
       android:layout_height="wrap_content"
       android:textColor="@color/color_188FFF"
       android:layout_marginTop="@dimen/dimen_10"
       android:text="给文本加划线"
       android:textSize="@dimen/text_size_18" />

   <TextView
       android:id="@+id/tv_gradient"
       android:layout_width="match_parent"
       android:layout_height="wrap_content"
       android:layout_marginTop="@dimen/dimen_10"
       android:textColor="@color/white"
       android:text="文字渐变是不是很神奇"
       android:textSize="@dimen/text_size_18" />

   <TextView
       android:id="@+id/tv_bg"
       android:layout_width="wrap_content"
       android:layout_height="wrap_content"
       android:layout_marginTop="@dimen/dimen_10"
       android:padding="10dp"
       android:text="设置背景色"
       android:textColor="@color/white"
       android:textSize="@dimen/text_size_18" />

   <TextView
       android:id="@+id/tv_size"
       android:layout_width="match_parent"
       android:layout_height="wrap_content"
       android:layout_marginTop="@dimen/dimen_10"
       android:textColor="@color/color_ff0000"
       android:text="文字特别大小不一致" />

   <TextView
       android:id="@+id/tv_onclick"
       android:layout_width="match_parent"
       android:layout_marginTop="@dimen/dimen_10"
       android:layout_height="wrap_content"
       android:textSize="@dimen/dimen_20"
       android:text="可点击可长按" />
LinearLayout>
        //下划线并加清晰
        tv_flag.getPaint().setFlags(Paint.UNDERLINE_TEXT_FLAG | Paint.ANTI_ALIAS_FLAG);
        tv_flag.getPaint().setAntiAlias(true);//抗锯齿

        int[] colors = {0xff188fff, 0xffff773D, 0xffff0000};//颜色的数组
        LinearGradient mLinearGradient = new LinearGradient(0, 0, 0,
                tv_gradient.getPaint().getTextSize(), colors, null, Shader.TileMode.CLAMP);
        tv_gradient.getPaint().setShader(mLinearGradient);
        tv_gradient.invalidate();

        int fillColor = Color.parseColor("#ff0000");//内部填充颜色
        GradientDrawable gd = new GradientDrawable();//创建drawable
        gd.setColor(fillColor);//设置背景色
        gd.setCornerRadius(10);//设置圆角
        tv_bg.setBackground(gd);//设置背景

        Spannable wordtoSpan = new SpannableString(tv_size.getText().toString());
        //setSpan:参数1,设置文字大小;参数2,开始的文字位置;参数3,结束改变文字位置不包含这个位置
        wordtoSpan.setSpan(new AbsoluteSizeSpan(DensityUtil.dip2px(this, 18)), 0, 2, Spannable.SPAN_EXCLUSIVE_EXCLUSIVE);
        wordtoSpan.setSpan(new AbsoluteSizeSpan(DensityUtil.dip2px(this, 24)), 2, 5, Spannable.SPAN_EXCLUSIVE_EXCLUSIVE);
        wordtoSpan.setSpan(new AbsoluteSizeSpan(DensityUtil.dip2px(this, 10)), 5, tv_size.length(), Spannable.SPAN_EXCLUSIVE_EXCLUSIVE);
        tv_size.setText(wordtoSpan);

        //TextView其实也是有点击事件的毕竟它的爸爸Veiew
        tv_onclick.setOnClickListener(new View.OnClickListener() {
            @Override
            public void onClick(View v) {
                MLog.e("这里是点击事件");
                Toast.makeText(TextViewActivity.this,"这里是点击事件",Toast.LENGTH_SHORT).show();
            }
        });
        tv_onclick.setOnLongClickListener(new View.OnLongClickListener() {
            @Override
            public boolean onLongClick(View v) {
                MLog.e("这里长按事件");
                Toast.makeText(TextViewActivity.this,"这里长按事件",Toast.LENGTH_SHORT).show();
                //true表示事件已消费
                return true;
            }
        });
3. Textview 显示一行,且超出自动截断,显示"…"
<TextView
    android:layout_width="wrap_content"
    android:layout_height="wrap_content"
    android:singleLine="true"
    android:ellipsize="end"
    android:textSize="26px"
    android:width="400px"/>
以下显示两行,超出多余显示"…"
<TextView
    android:layout_width="match_parent"
    android:layout_height="wrap_content"
    android:includeFontPadding="false"
    android:textSize="26px"
    android:maxLines="2"
    android:ellipsize="end"/>
消除 TextView 自带边界
android:includeFontPadding="false"
4. 实现一个常见的效果
效果图
![]()
使用 String.format 和 CDATA 来实现:
- string.xml
<string name="content">本月应发工资:%1$d]]> 实发工资:%2$d]]>元(包含奖金%3$d]]>元)string>
- MainActivity.java
public class MainActivity extends AppCompatActivity {
    private TextView tv;

    @Override
    protected void onCreate(Bundle savedInstanceState) {
        super.onCreate(savedInstanceState);
        setContentView(R.layout.activity_main);
        tv = (TextView) findViewById(R.id.tv);
        tv.setText(Html.fromHtml(String.format(getResources().getString(R.string.content),10,20,10)));
    }
}
三、跑马灯效果
1. 横向跑马灯
效果图:

单个实现跑马灯:
<LinearLayout xmlns:android="http://schemas.android.com/apk/res/android"
    xmlns:app="http://schemas.android.com/apk/res-auto"
    xmlns:tools="http://schemas.android.com/tools"
    android:layout_width="match_parent"
    android:layout_height="match_parent"
    android:orientation="vertical"
    tools:context=".MainActivity">

    <TextView
        android:id="@+id/tv_name"
        android:layout_width="match_parent"
        android:layout_height="wrap_content"
        android:ellipsize="marquee"
        android:focusable="true"
        android:singleLine="true"
        android:marqueeRepeatLimit="marquee_forever"
        android:focusableInTouchMode="true"
        android:text="@string/hello_word"/>
LinearLayout>
2. 多个横向跑马灯效果:
1,自定义一个类,继承 TextView;
/**
 * Created by gyq on 2018/1/5 13:42
 */

@SuppressLint("AppCompatCustomView")
public class MarqueeTextView extends TextView {
    public MarqueeTextView(Context context) {
        super(context);
    }

    public MarqueeTextView(Context context, @Nullable AttributeSet attrs) {
        super(context, attrs);
    }

    public MarqueeTextView(Context context, @Nullable AttributeSet attrs, int defStyleAttr) {
        super(context, attrs, defStyleAttr);
    }

    @Override
    public boolean isFocused() {
        return true;
    }
}
布局文件:
<LinearLayout xmlns:android="http://schemas.android.com/apk/res/android"
    xmlns:app="http://schemas.android.com/apk/res-auto"
    xmlns:tools="http://schemas.android.com/tools"
    android:layout_width="match_parent"
    android:layout_height="match_parent"
    android:orientation="vertical"
    tools:context="com.gyq.marqueedemo.marqueedemo.MainActivity">

    <com.gyq.marqueedemo.marqueedemo.widget.MarqueeTextView
        android:id="@+id/tv_name"
        android:layout_width="match_parent"
        android:layout_height="wrap_content"
        android:ellipsize="marquee"
        android:focusable="true"
        android:singleLine="true"
        android:marqueeRepeatLimit="marquee_forever"
        android:focusableInTouchMode="true"
        android:text="@string/hello_word"/>
    <com.gyq.marqueedemo.marqueedemo.widget.MarqueeTextView
        android:id="@+id/tv_content"
        android:layout_width="match_parent"
        android:layout_height="wrap_content"
        android:layout_marginTop="10dp"
        android:ellipsize="marquee"
        android:focusable="true"
        android:singleLine="true"
        android:marqueeRepeatLimit="marquee_forever"
        android:focusableInTouchMode="true"
        android:text="@string/hello_word"/>

LinearLayout>
3. 竖向跑马灯
3.1 效果图
3.2 Bean 类
public class FootBall {
    private String name;
    private String title;

    public String getName() {
        return name;
    }

    public void setName(String name) {
        this.name = name;
    }

    public String getTitle() {
        return title;
    }

    public void setTitle(String title) {
        this.title = title;
    }
}
3.3 自定义View
/**
 * Created on 2019/11/26 16:13
 *
 * @author Gong Youqiang
 */
public class VerticalMarquee extends ViewAnimator {
    private static final long DEFAULT_TIMER = 2000L;
    private long delayTime = DEFAULT_TIMER;
    private int viewIndex;
    private List<View> views;
    private static Handler handler = new Handler();
    private boolean started;//是否已经开始轮播

    public VerticalMarquee(Context context) {
        this(context,null);
    }

    public VerticalMarquee(Context context, AttributeSet attrs) {
        super(context, attrs);
        init();
    }

    private void init() {
        this.setInAnimation(AnimationUtils.loadAnimation(this.getContext(), R.anim.vertical_marquee_in));
        this.setOutAnimation(AnimationUtils.loadAnimation(this.getContext(), R.anim.vertical_marquee_out));
    }

    protected void onFinishInflate() {
        super.onFinishInflate();
    }

    private void startMarquee() {
        if (this.views != null) {
            if (this.views.size() > 1) {
                handler.postDelayed(new Runnable() {
                    public void run() {
                        VerticalMarquee.this.viewIndex++;
                        if (VerticalMarquee.this.viewIndex >= VerticalMarquee.this.views.size()) {
                            VerticalMarquee.this.viewIndex = 0;
                        }
                        showNext();
                        VerticalMarquee.handler.postDelayed(this, delayTime);
                    }
                }, delayTime);
                started = true;
            } else if (this.views.size() > 0) {
                this.viewIndex = 0;
            } else {
                this.viewIndex = 0;
            }
        } else {
            this.viewIndex = 0;
        }

    }

    /**
     * 获取当前显示的View
     * 修改方法名,避免与父类方法重名
     *
     * @return View
     */
    public View getCurView() {
        if (this.views != null && this.viewIndex >= 0 && this.viewIndex < this.views.size()) {
            return this.views.get(this.viewIndex);
        }

        return null;
    }

    /**
     * 获取当前显示View的index
     *
     * @return index
     */
    public int getCurIndex() {
        return this.viewIndex;
    }

    /**
     * 设置轮播的View列表,该方法会自动轮播
     *
     * @param views view列表
     */
    public void setViewList(List<View> views) {
        setViewList(views, DEFAULT_TIMER);
    }

    /**
     * 设置轮播的View列表,该方法会自动轮播
     *
     * @param views     view列表
     * @param delayTime 间歇时间
     */
    public void setViewList(final List<View> views, long delayTime) {
        if (views == null || views.size() == 0) {
            return;
        }
        if (delayTime >= 100) {
            //最少100毫秒,否则为默认值
            this.delayTime = delayTime;
        }
        this.views = views;
        handler.removeCallbacksAndMessages(null);
        started = false;
        post(new Runnable() {
            @Override
            public void run() {
                for (View view : views) {
                    addView(view);
                }
                startMarquee();
            }
        });
    }


    //开始倒计时(轮播),在页面可见并且需要自动轮播的时候调用该方法
    public void startTimer() {
        if (started || views == null || views.size() <= 1) {
            return;
        }
        stopTimer();
        startMarquee();
    }

    //停止倒计时(轮播),如果调用过startTimer();在页面不可见的时候调用该方法停止自动轮播
    public void stopTimer() {
        if (handler != null) {
            handler.removeCallbacksAndMessages(null);
            started = false;
        }
    }

}
3.4 新建 anim 文件夹
vertical_marquee_out.xml
<translate xmlns:android="http://schemas.android.com/apk/res/android"
    android:duration="1000"
    android:fromYDelta="0"
    android:toYDelta="-100%p" >

translate>
vertical_marquee_out.xml
<translate xmlns:android="http://schemas.android.com/apk/res/android"
    android:duration="1000"
    android:fromYDelta="100%p"
    android:toYDelta="0">

translate>
3.5 布局文件
activity.xml
<LinearLayout xmlns:android="http://schemas.android.com/apk/res/android"
    xmlns:app="http://schemas.android.com/apk/res-auto"
    xmlns:tools="http://schemas.android.com/tools"
    android:layout_width="match_parent"
    android:layout_height="wrap_content"
    android:gravity="center"
    tools:context=".MainActivity">

    <TextView
        android:layout_width="wrap_content"
        android:layout_height="wrap_content"
        android:textColor="@color/black"
        android:textSize="26sp"
        android:text="头条"/>

    <com.epro.test.widget.VerticalMarquee
        android:id="@+id/vm_root"
        android:layout_width="match_parent"
        android:layout_height="wrap_content"/>
LinearLayout>
marquee_item.xml
<LinearLayout xmlns:android="http://schemas.android.com/apk/res/android"
    xmlns:tools="http://schemas.android.com/tools"
    android:layout_width="match_parent"
    android:layout_height="44dp">

    <TextView
        android:id="@+id/marquee_name"
        android:layout_width="wrap_content"
        android:layout_height="wrap_content"
        android:layout_gravity="center_vertical"
        android:layout_marginLeft="16dp"
        android:layout_marginTop="8dp"
        android:layout_marginBottom="8dp"
        android:background="@color/text_bg"
        android:paddingLeft="10dp"
        android:paddingTop="5dp"
        android:paddingRight="10dp"
        android:paddingBottom="5dp"
        android:textColor="@color/text_color"
        android:textSize="11dp"
        tools:text="这是标题" />

    <TextView
        android:id="@+id/marquee_desc"
        android:layout_width="0dp"
        android:layout_height="wrap_content"
        android:layout_gravity="center_vertical"
        android:layout_weight="1"
        android:ellipsize="end"
        android:maxLines="1"
        android:paddingLeft="10dp"
        android:paddingRight="10dp"
        android:textColor="@color/black"
        android:textSize="14dp"
        tools:text="这里是内容~" />
LinearLayout>
3.6 MainActivity.java
public class MainActivity extends AppCompatActivity {
    @BindView(R.id.vm_root)
    VerticalMarquee mText;


    @Override
    protected void onCreate(Bundle savedInstanceState) {
        super.onCreate(savedInstanceState);

        setContentView(R.layout.activity_main);
        ButterKnife.bind(this);

        initData();

    }

    private void initData() {
        List<View> views = new ArrayList<>();
        LayoutInflater inflater = LayoutInflater.from(this);
        FootBall ballx = new FootBall();
        ballx.setName("意甲");
        ballx.setTitle("萨里投票给C罗");
        views.add(inflateView(inflater, mText, ballx));

        FootBall bally = new FootBall();
        bally.setName("英超");
        bally.setTitle("穆里尼奥担任热刺主帅");
        views.add(inflateView(inflater, mText, bally));

        FootBall ballh = new FootBall();
        ballh.setName("西甲");
        ballh.setTitle("皇家马德里Vs巴萨罗那定在12月4日");
        views.add(inflateView(inflater, mText, ballh));
        mText.setViewList(views);
    }

    private View inflateView(LayoutInflater inflater, VerticalMarquee marqueeRoot, FootBall ball) {
        if (inflater == null) {
            inflater = LayoutInflater.from(this);
        }
        View view = inflater.inflate(R.layout.marquee_item, marqueeRoot, false);
        TextView viewName = view.findViewById(R.id.marquee_name);
        TextView viewDesc = view.findViewById(R.id.marquee_desc);
        viewName.setText(ball.getName());
        viewDesc.setText(ball.getTitle());
        return view;
    }
}
四、显示大小不同的字体
1. 效果图

2. activity_main.xml
<androidx.constraintlayout.widget.ConstraintLayout xmlns:android="http://schemas.android.com/apk/res/android"
    xmlns:app="http://schemas.android.com/apk/res-auto"
    xmlns:tools="http://schemas.android.com/tools"
    android:layout_width="match_parent"
    android:layout_height="match_parent"
    tools:context=".MainActivity">


    <TextView
        android:id="@+id/textView"
        android:layout_width="wrap_content"
        android:layout_height="wrap_content"
        android:layout_marginTop="96dp"
        android:text="TextView"
        app:layout_constraintEnd_toEndOf="parent"
        app:layout_constraintStart_toStartOf="parent"
        app:layout_constraintTop_toTopOf="parent" />

    <TextView
        android:id="@+id/textView2"
        android:layout_width="wrap_content"
        android:layout_height="wrap_content"
        android:layout_marginTop="48dp"
        android:layout_marginEnd="3dp"
        android:text="TextView"
        app:layout_constraintEnd_toEndOf="@+id/textView"
        app:layout_constraintTop_toBottomOf="@+id/textView" />

androidx.constraintlayout.widget.ConstraintLayout>
3. StrUtil.java
/**
 * created on 2020/5/13 21:43
 *
 * @author Scarf Gong
 */
public class StrUtil {
    public static String formatToSepara(String data) {
        try {
            double value = Double.parseDouble(data);
            DecimalFormat df = new DecimalFormat("####");
            return df.format(value);
        } catch (Exception e) {
            e.printStackTrace();
        }
        return data;
    }
}
4. MainActivity.java
public class MainActivity extends AppCompatActivity {

    @Override
    protected void onCreate(Bundle savedInstanceState) {
        super.onCreate(savedInstanceState);
        setContentView(R.layout.activity_main);

        TextView textView = findViewById(R.id.textView);
        String data1 = StrUtil.formatToSepara("6663")+ "/10000";
        Spannable sp = new SpannableString(data1);
        sp.setSpan(new AbsoluteSizeSpan(25,true),0,data1.length() - 6,
                Spanned.SPAN_INCLUSIVE_EXCLUSIVE);
        textView.setText(sp);

        TextView textView2 = findViewById(R.id.textView2);
        String data2 = StrUtil.formatToSepara("28")+ "分钟";
        Spannable sp2 = new SpannableString(data2);
        sp2.setSpan(new AbsoluteSizeSpan(25,true),0,data2.length() - 2,
                Spanned.SPAN_INCLUSIVE_EXCLUSIVE);
        textView2.setText(sp2);

    }
}