Launcher布局加载流程
前言
以前只知道Launcher是桌面,也就是显示已安装的应用图标,其它的一概不知。当自己要去学习它,要去修改它时,却发现Launcher涉及到的东西很多,此次则将自己对Launcher布局的理解做个记录。
一
通过了解,Launcher和普通的APP其实没啥两样,它可以单独编译,打包成APK,安装到手机上,所以要学习它,我还是从AndroidManifest文件开始,使用的源码是一位大佬分享到Github上,Launcher源码。
<manifest
    xmlns:android="http://schemas.android.com/apk/res/android"
    package="com.android.launcher3">
    <uses-sdk android:targetSdkVersion="23" android:minSdkVersion="21"/>


    <permission
        android:name="com.android.launcher3.permission.READ_SETTINGS"
        android:permissionGroup="android.permission-group.SYSTEM_TOOLS"
        android:protectionLevel="signatureOrSystem"
        android:label="@string/permlab_read_settings"
        android:description="@string/permdesc_read_settings"/>
    <permission
        android:name="com.android.launcher3.permission.WRITE_SETTINGS"
        android:permissionGroup="android.permission-group.SYSTEM_TOOLS"
        android:protectionLevel="signatureOrSystem"
        android:label="@string/permlab_write_settings"
        android:description="@string/permdesc_write_settings"/>

    <uses-permission android:name="com.android.launcher.permission.READ_SETTINGS" />
    <uses-permission android:name="com.android.launcher.permission.WRITE_SETTINGS" />
    <uses-permission android:name="com.android.launcher3.permission.READ_SETTINGS" />
    <uses-permission android:name="com.android.launcher3.permission.WRITE_SETTINGS" />

    <application
        android:backupAgent="com.android.launcher3.LauncherBackupAgent"
        android:fullBackupOnly="true"
        android:fullBackupContent="@xml/backupscheme"
        android:hardwareAccelerated="true"
        android:icon="@drawable/ic_launcher_home"
        android:label="@string/derived_app_name"
        android:theme="@style/AppTheme"
        android:largeHeap="@bool/config_largeHeap"
        android:restoreAnyVersion="true"
        android:supportsRtl="true" >


        <activity
            android:name="com.android.launcher3.Launcher"
            android:launchMode="singleTask"
            android:clearTaskOnLaunch="true"
            android:stateNotNeeded="true"
            android:windowSoftInputMode="adjustPan"
            android:screenOrientation="unspecified"
            android:configChanges="keyboard|keyboardHidden|mcc|mnc|navigation|orientation|screenSize|screenLayout|smallestScreenSize"
            android:resizeableActivity="true"
            android:resumeWhilePausing="true"
            android:taskAffinity=""
            android:enabled="true">
            <intent-filter>
                <action android:name="android.intent.action.MAIN" />
                <category android:name="android.intent.category.HOME" />
                <category android:name="android.intent.category.DEFAULT" />
                <category android:name="android.intent.category.MONKEY"/>
                <category android:name="android.intent.category.LAUNCHER_APP" />
            intent-filter>
        activity>


        <activity
            android:name="com.android.launcher3.SettingsActivity"
            android:label="@string/settings_button_text"
            android:theme="@android:style/Theme.DeviceDefault.Settings"
            android:autoRemoveFromRecents="true">
            <intent-filter>
                <action android:name="android.intent.action.APPLICATION_PREFERENCES" />
                <category android:name="android.intent.category.DEFAULT" />
            intent-filter>
        activity>


        <provider
            android:name="com.android.launcher3.LauncherProvider"
            android:authorities="com.android.launcher3.settings"
            android:exported="true"
            android:writePermission="com.android.launcher3.permission.WRITE_SETTINGS"
            android:readPermission="com.android.launcher3.permission.READ_SETTINGS" />

    application>
manifest>
看AndroidManifest.xml文件,很明显并不复杂,在Application的标签下,有两个activity和一个provider,它们分别是:Launcher、SettingsActivity和LauncherProvider;
- Launcher即我们手机看到的桌面;
- SettingsActivity是桌面的设置页面;
- LauncherProvider是用来存储页面布局信息的。
二
本想着逐行去看源码,奈何细节过多,拘泥于一处,反而影响对项目的理解;所以借助于前人总结文档,结合自己理解,翻看源码,以学习Launcher布局。
首先介绍Launcher的一些界面,让自己有个认识,而不是凭空想象。
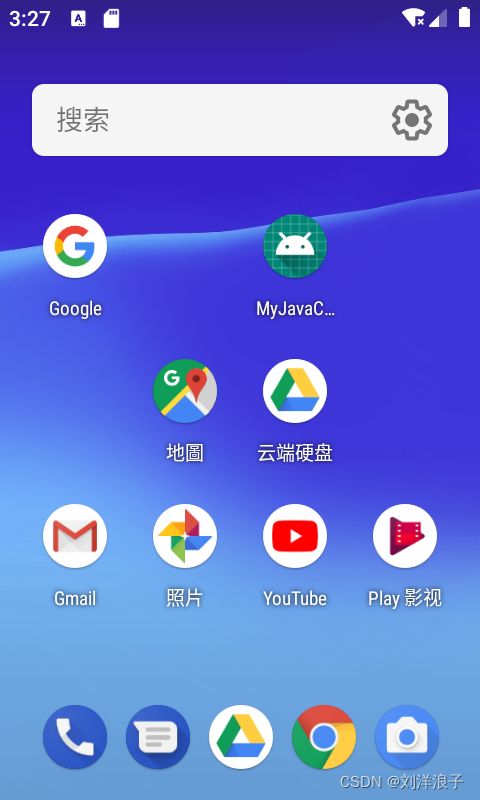
此为Launcher首页,桌面有快捷方式、小部件和Google搜索框等
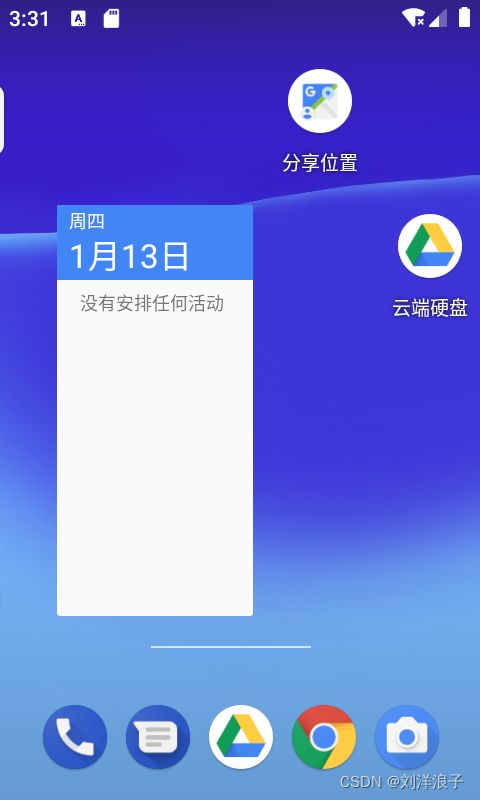
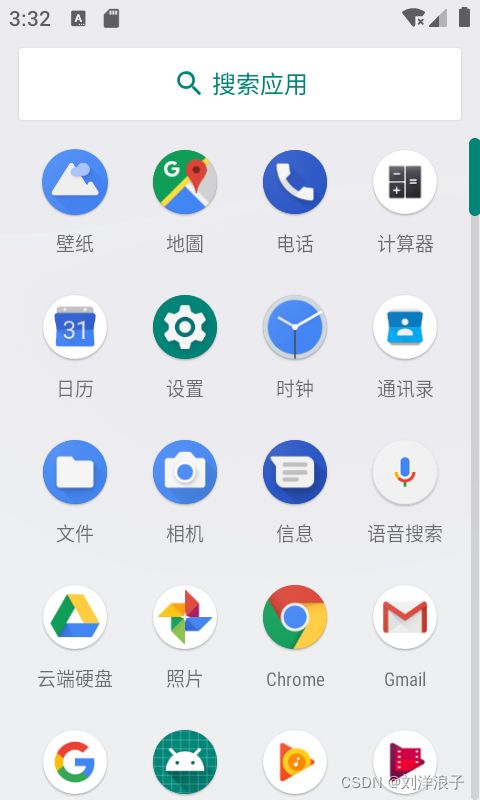
通过上滑即可进入Launcher的抽屉页,里面包括所有的已安装应用。
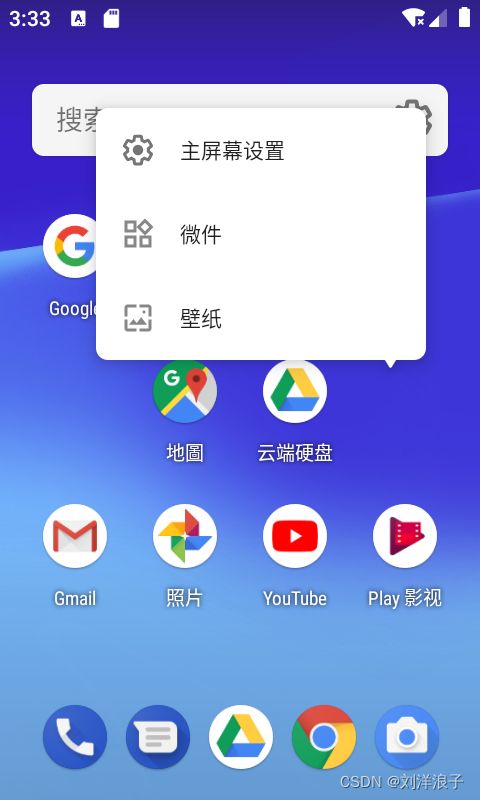
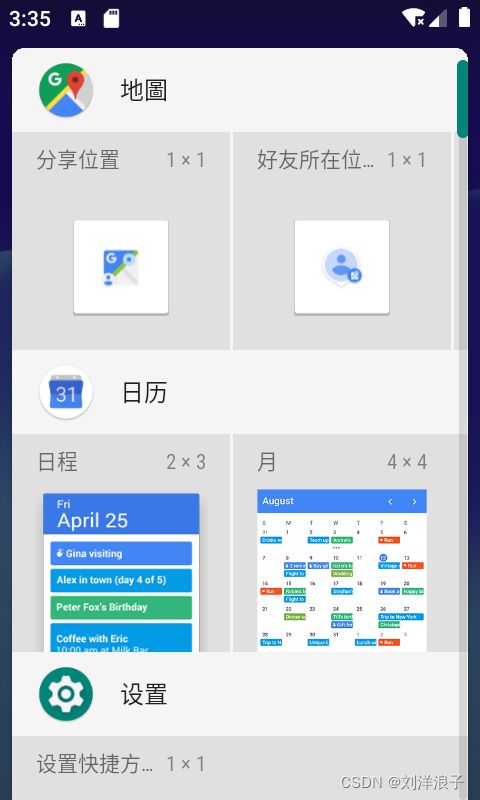
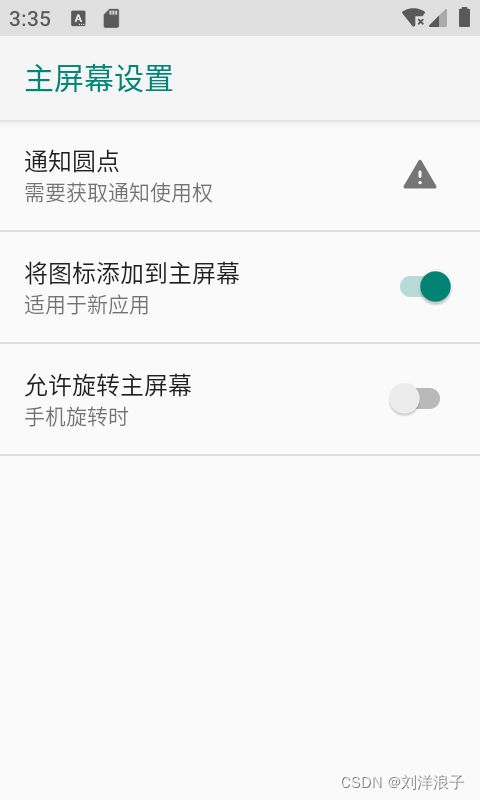
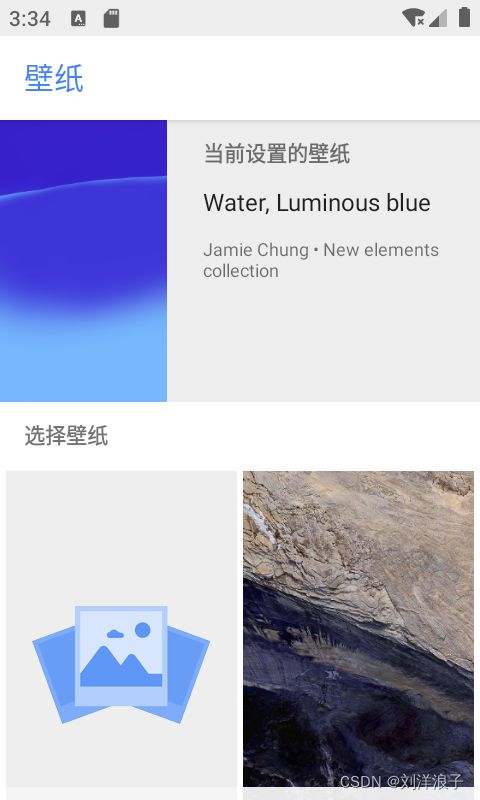
此为长按桌面后的一些操作,有壁纸的更换,小部件的添加,以及桌面设置。
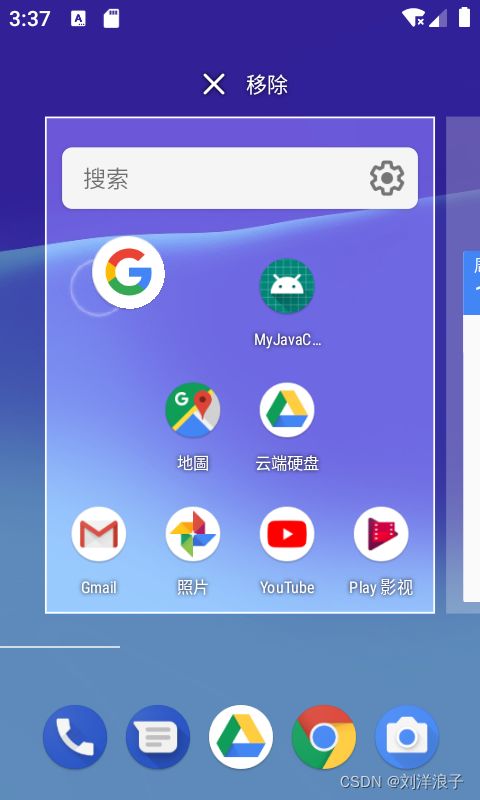
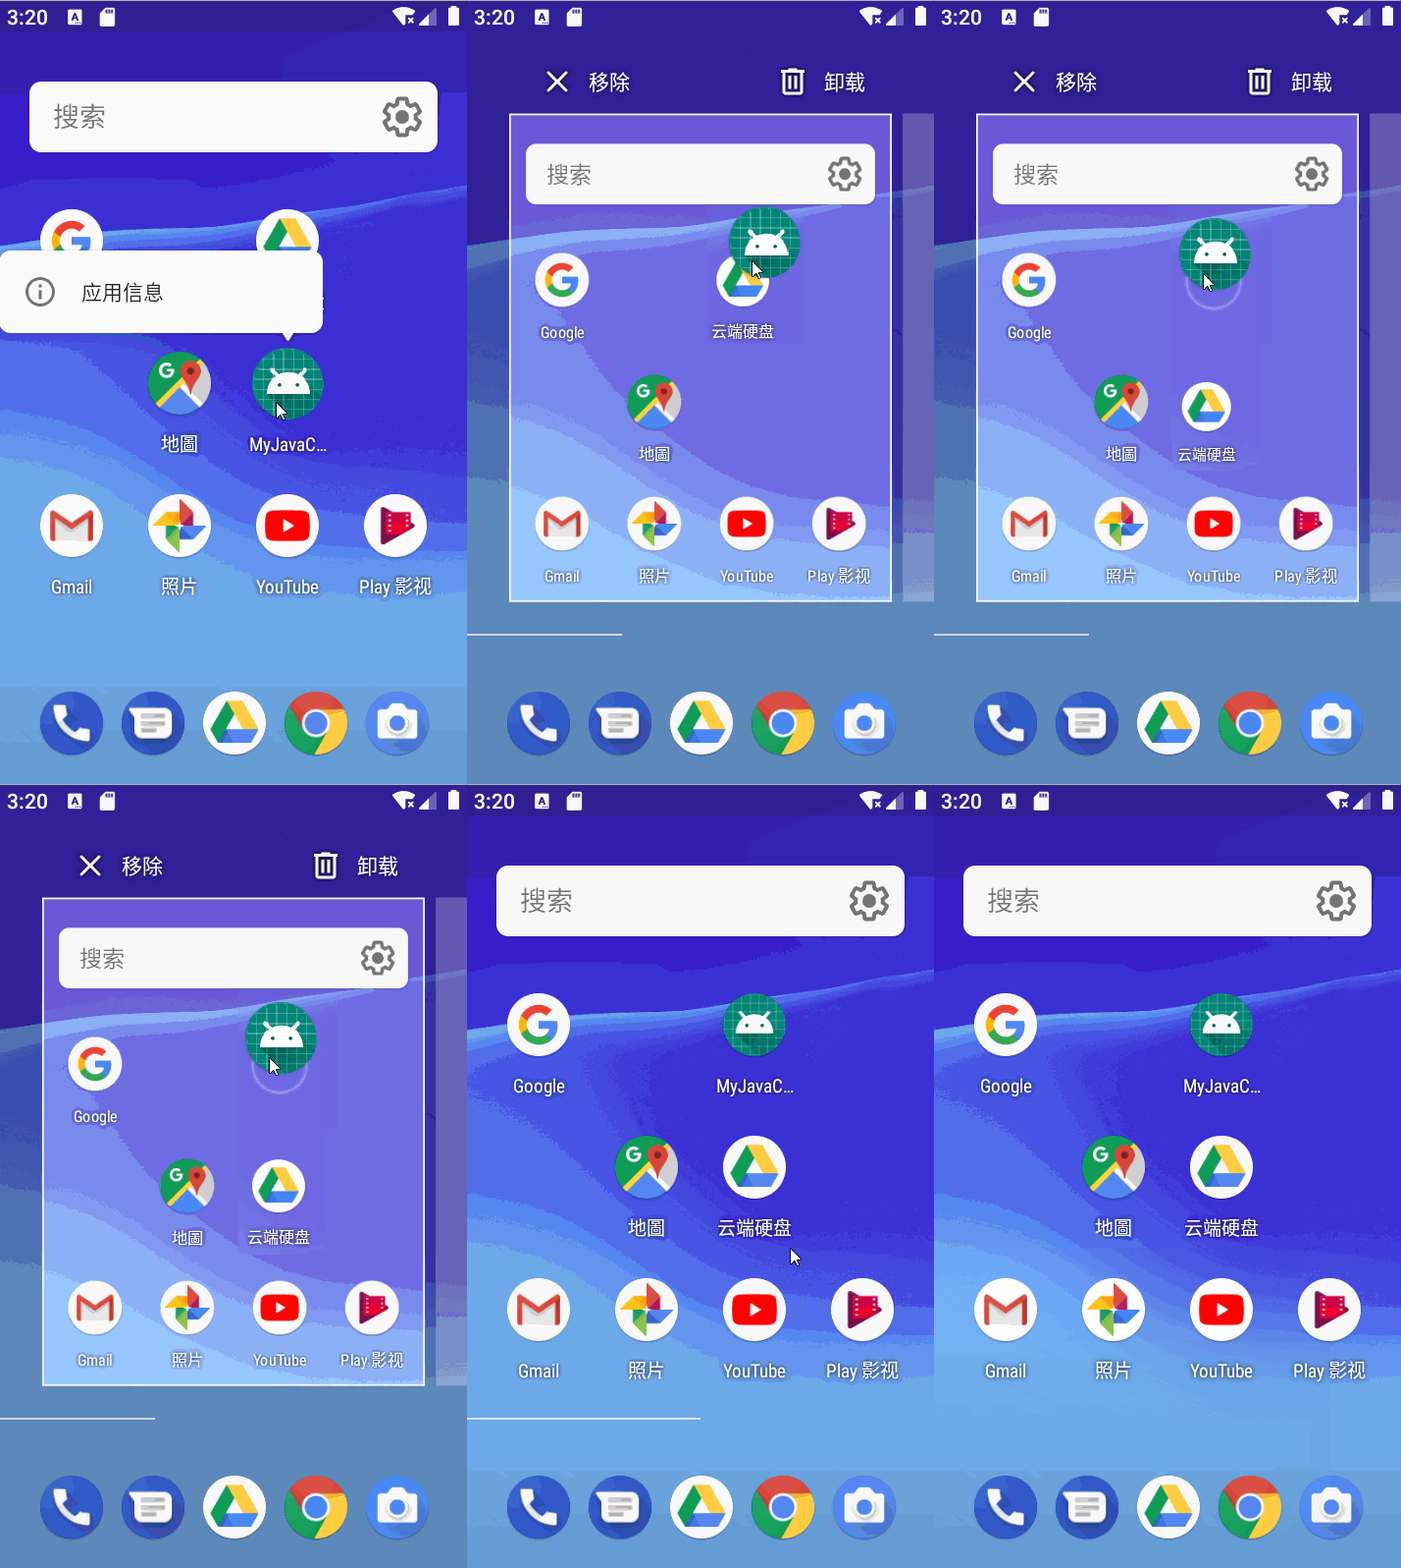
此为长按桌面上的图标或者小部件时,显示移除按钮。

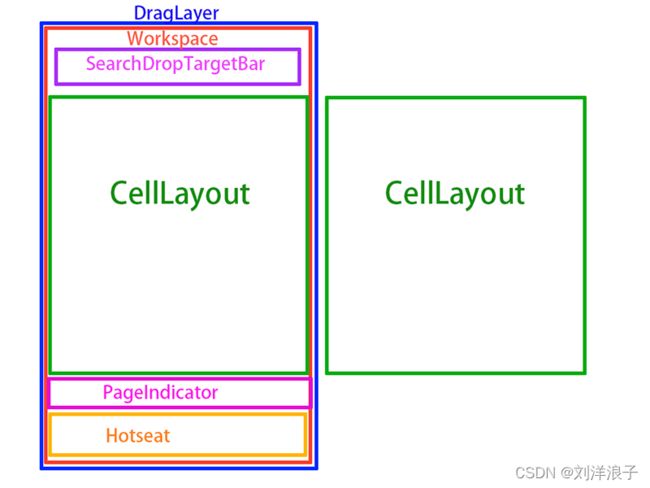
此为桌面布局的一个示意图。(如有侵权,立即删除。)
- DragLayer是根布局,用来处理子View的拖动的布局;
- Workspace是用来装载桌面上其它所有布局的控件;
- SearchDropTargetBar是用来显示移除和卸载的控件;
- CellLayout是用来显示应用和桌面小工具的,一个Workspace中可以显示多个CellLayout;
- PageIndicator是用来指示当前为第几页的CellLayout;
- Hotseat是常用应用显示控件。
三
接下来可以看看桌面的布局具体是怎么加载的;
翻看Launcher.java的代码,在onCreate()方法中,有如下代码。
      //将xml文件加载为View对象
      mLauncherView = LayoutInflater.from(this).inflate(R.layout.launcher, null);
      //将View设置到Activity上
      setContentView(mLauncherView);
很简单,就是将launcher.xml加载到Activity中;
<com.android.launcher3.LauncherRootView
    xmlns:android="http://schemas.android.com/apk/res/android"
    xmlns:launcher="http://schemas.android.com/apk/res-auto"
    android:id="@+id/launcher"
    android:layout_width="match_parent"
    android:layout_height="match_parent"
    android:fitsSystemWindows="true">

    <com.android.launcher3.dragndrop.DragLayer
        android:id="@+id/drag_layer"
        android:layout_width="match_parent"
        android:layout_height="match_parent"
        android:clipChildren="false"
        android:clipToPadding="false"
        android:importantForAccessibility="no">


        <com.android.launcher3.Workspace
            android:id="@+id/workspace"
            android:layout_width="match_parent"
            android:layout_height="match_parent"
            android:layout_gravity="center"
            android:theme="@style/HomeScreenElementTheme"
            launcher:pageIndicator="@+id/page_indicator" />

        <include
            android:id="@+id/overview_panel"
            layout="@layout/overview_panel"
            android:visibility="gone" />


        <com.android.launcher3.pageindicators.WorkspacePageIndicator
            android:id="@+id/page_indicator"
            android:layout_width="match_parent"
            android:layout_height="@dimen/vertical_drag_handle_size"
            android:layout_gravity="bottom|center_horizontal"
            android:theme="@style/HomeScreenElementTheme" />

        <include
            android:id="@+id/drop_target_bar"
            layout="@layout/drop_target_bar" />

        <include android:id="@+id/scrim_view"
            layout="@layout/scrim_view" />

        <include
            android:id="@+id/apps_view"
            layout="@layout/all_apps"
            android:layout_width="match_parent"
            android:layout_height="match_parent"
            android:visibility="invisible" />


        <include
            android:id="@+id/hotseat"
            layout="@layout/hotseat"
            android:layout_width="match_parent"
            android:layout_height="match_parent" />
    com.android.launcher3.dragndrop.DragLayer>

com.android.launcher3.LauncherRootView>
查看launcher.xml文件,可以清晰的看到它包含的View有如下几个:
- LauncherRootView
- DragLayer
- Workspace
- WorkspacePageIndicator
- overview_panel
- drop_target_bar
- scrim_view
- all_apps
- hotseat
其中前四个是通过类名直接引入到xml文件中,后五个则是通过include形式引入到xml文件中的;
有几个前面有提及,例如:DragLayer、Workspace、WorkspacePageIndicator和hotseat;
有几个是第一次看到,包括LauncherRootView、overview_panel、drop_target_bar、scrim_view、以及all_apps;
根据我们学到的Android xml布局知识可以判断,桌面布局示意图和launcher.xml还是有差异的。
差异点有如下:
- 在xml文件中,根布局是LauncherRootView,在示意图中,我们是没有看到它;
- 同样在xml文件中有,在示意图中没有的布局还有overview_panel、scrim_view、all_apps。
- 在示意图中,Workspace是SearchDropTargetBar、CellLayout、PageIndicator和Hotseat的父控件,而在xml文件中,我们看到Workspace是一个单独控件;
- 在示意图中,有看到CellLayout布局,在xml文件中没有看到它;
我们学习Launcher当然是以源码为基础,所以如果示意图和xml有差异,当然是以xml为准,接下来就逐一看一下它们的差异点。
四
在xml文件中,根布局是LauncherRootView,在示意图中,我们是没有看到它;
通过翻看源码可知,LauncherRootView是InsettableFrameLayout的子类,InsettableFrameLayout又是FrameLayout的子类,且它实现了Insettable接口;由此可知LauncherRootView就是一个FrameLayout,且是具有Insettable功能的FrameLayout,那Insettable接口的功能又是什么呢?通过查资料可知,该接口是让实现它的类的子布局不被状态栏或者导航栏所遮挡,使用的方法是给子View设置Margin值,关键代码看下方;LauncherRootView的子类只有一个,它就是DragLayer,所以DragLayer肯定不会被状态栏和导航栏所遮挡。
    @Override
    public void setInsets(Rect insets) {
        final int n = getChildCount();
        for (int i = 0; i < n; i++) {
            final View child = getChildAt(i);
            setFrameLayoutChildInsets(child, insets, mInsets);
        }
        mInsets.set(insets);
    }
    public void setFrameLayoutChildInsets(View child, Rect newInsets, Rect oldInsets) {
        final LayoutParams lp = (LayoutParams) child.getLayoutParams();

        if (child instanceof Insettable) {
            ((Insettable) child).setInsets(newInsets);
        } else if (!lp.ignoreInsets) {
            lp.topMargin += (newInsets.top - oldInsets.top);
            lp.leftMargin += (newInsets.left - oldInsets.left);
            lp.rightMargin += (newInsets.right - oldInsets.right);
            lp.bottomMargin += (newInsets.bottom - oldInsets.bottom);
        }
        child.setLayoutParams(lp);
    }
五
同样在xml文件中有,在示意图中没有的布局还有overview_panel、scrim_view、all_apps。
overview_panel
通过查看overview_panel.xml文件,发现它就是一个Space控件,Space控件是一个轻量级视图子类,可用于在通用布局中的组件之间创建间隙,这里它的宽高设置为0dp,可见它并不占用空间;
<Space
      xmlns:android="http://schemas.android.com/apk/res/android"
      android:layout_width="0dp"
      android:layout_height="0dp" />
在代码中,也只是在DragLayer中确认了一下它的坐标,其它地方均无调用。
mLauncher.getDragLayer().getDescendantRectRelativeToSelf(mLauncher.getOverviewPanel(),
                    sTempRect);
scrim_view
查看scrim_view.xml文件,它就是一个ScrimView,它的作用是在滑出抽屉页面时,桌面背景过渡的View
<com.android.launcher3.views.ScrimView
    xmlns:android="http://schemas.android.com/apk/res/android"
    android:layout_width="match_parent"
    android:layout_height="match_parent"
    android:id="@+id/scrim_view" />
all_apps
查看all_apps.xml文件,它的根布局是AllAppsContainerView,在AllAppsContainerView下通过include又引入了四个布局,它们分别是:all_apps_rv_layout、all_apps_floating_header、search_container_all_apps和all_apps_fast_scroller;
<com.android.launcher3.allapps.AllAppsContainerView
    xmlns:android="http://schemas.android.com/apk/res/android"
    android:id="@+id/apps_view"
    android:layout_width="match_parent"
    android:layout_height="match_parent"
    android:clipChildren="true"
    android:clipToPadding="false"
    android:focusable="false"
    android:saveEnabled="false" >

    <include layout="@layout/all_apps_rv_layout" />

    <include layout="@layout/all_apps_floating_header" />

    <include
        android:id="@id/search_container_all_apps"
        layout="@layout/search_container_all_apps"/>

    <include layout="@layout/all_apps_fast_scroller" />
com.android.launcher3.allapps.AllAppsContainerView>
all_apps_rv_layout 是用来显示所有已安装app的控件,翻看源码可知它的父类的父类就是我们常用的RecyclerView;
public class AllAppsRecyclerView extends BaseRecyclerView
public abstract class BaseRecyclerView extends RecyclerView
all_apps_floating_header 是头部悬停布局,翻看源码和测试,发现其内部的控件会被隐藏;
        //1.通过打印得知mUsingTabs的值为false
        if (mUsingTabs) {
            mAH[AdapterHolder.MAIN].setup(mViewPager.getChildAt(0), mPersonalMatcher);
            mAH[AdapterHolder.WORK].setup(mViewPager.getChildAt(1), mWorkMatcher);
            onTabChanged(mViewPager.getNextPage());
        } else {
            mAH[AdapterHolder.MAIN].setup(findViewById(R.id.apps_list_view), null);
            //2.mAH[AdapterHolder.WORK].recyclerView设置为null
            mAH[AdapterHolder.WORK].recyclerView = null;
        }
        setupHeader();
    public void setupHeader() {
        mHeader.setVisibility(View.VISIBLE);
        //3. 第二个参数为true
        mHeader.setup(mAH, mAH[AllAppsContainerView.AdapterHolder.WORK].recyclerView == null);

        int padding = mHeader.getMaxTranslation();
        for (int i = 0; i < mAH.length; i++) {
            mAH[i].padding.top = padding;
            mAH[i].applyPadding();
        }
    }
    public void setup(AllAppsContainerView.AdapterHolder[] mAH, boolean tabsHidden) {
        mTabsHidden = tabsHidden;
        //4. tabsHidden为true时,mTabLayout就会被隐藏。
        mTabLayout.setVisibility(tabsHidden ? View.GONE : View.VISIBLE);
        mMainRV = setupRV(mMainRV, mAH[AllAppsContainerView.AdapterHolder.MAIN].recyclerView);
        mWorkRV = setupRV(mWorkRV, mAH[AllAppsContainerView.AdapterHolder.WORK].recyclerView);
        mParent = (ViewGroup) mMainRV.getParent();
        setMainActive(mMainRVActive || mWorkRV == null);
        reset(false);
    }
六
在示意图中,Workspace是SearchDropTargetBar、CellLayout、PageIndicator和Hotseat的父控件,而在xml文件中,我们看到Workspace是一个单独控件;
Workspace
Workspace它是一个单独的控件,如果它有子View,那么子View肯定就是通过代码的形式添加,翻看源码,确实如此,而且可以确定的是,它有子View,且它的子View是CellLayout。
public CellLayout insertNewWorkspaceScreen(long screenId, int insertIndex) {
        if (mWorkspaceScreens.containsKey(screenId)) {
            throw new RuntimeException("Screen id " + screenId + " already exists!");
        }

        // Inflate the cell layout, but do not add it automatically so that we can get the newly
        // created CellLayout.
        CellLayout newScreen = (CellLayout) LayoutInflater.from(getContext()).inflate(
                R.layout.workspace_screen, this, false /* attachToRoot */);
        newScreen.getShortcutsAndWidgets().setId(R.id.workspace_page_container);
        int paddingLeftRight = mLauncher.getDeviceProfile().cellLayoutPaddingLeftRightPx;
        int paddingBottom = mLauncher.getDeviceProfile().cellLayoutBottomPaddingPx;
        newScreen.setPadding(paddingLeftRight, 0, paddingLeftRight, paddingBottom);

        mWorkspaceScreens.put(screenId, newScreen);
        mScreenOrder.add(insertIndex, screenId);
        addView(newScreen, insertIndex);
        mStateTransitionAnimation.applyChildState(
                mLauncher.getStateManager().getState(), newScreen, insertIndex);

        if (mLauncher.getAccessibilityDelegate().isInAccessibleDrag()) {
            newScreen.enableAccessibleDrag(true, CellLayout.WORKSPACE_ACCESSIBILITY_DRAG);
        }

        return newScreen;
    }
经过搜索,在Workspace的代码中,只有insertNewWorkspaceScreen()这块代码中有调用addView()的方法,可以看到它添加的View便是newScreen,而它又是通过LayoutInflater加载的View,通过查看workspace_screen.xml可以知道,它就是一个CellLayout。
<com.android.launcher3.CellLayout
    xmlns:android="http://schemas.android.com/apk/res/android"
    xmlns:launcher="http://schemas.android.com/apk/res-auto"
    android:layout_width="wrap_content"
    android:layout_height="wrap_content"
    android:hapticFeedbackEnabled="false"
    launcher:containerType="workspace" />
进一步查看,可知有三个位置调用了insertNewWorkspaceScreen()方法:
/**
     * Initializes and binds the first page
     * @param qsb an existing qsb to recycle or null.
     */
    public void bindAndInitFirstWorkspaceScreen(View qsb) {
        if (!FeatureFlags.QSB_ON_FIRST_SCREEN) {
            return;
        }
        // Add the first page
        CellLayout firstPage = insertNewWorkspaceScreen(Workspace.FIRST_SCREEN_ID, 0);
        // Always add a QSB on the first screen.
        if (qsb == null) {
            // In transposed layout, we add the QSB in the Grid. As workspace does not touch the
            // edges, we do not need a full width QSB.
            qsb = LayoutInflater.from(getContext())
                    .inflate(R.layout.search_container_workspace,firstPage, false);
        }

        CellLayout.LayoutParams lp = new CellLayout.LayoutParams(0, 0, firstPage.getCountX(), 1);
        lp.canReorder = false;
        if (!firstPage.addViewToCellLayout(qsb, 0, R.id.search_container_workspace, lp, true)) {
            Log.e(TAG, "Failed to add to item at (0, 0) to CellLayout");
        }
    }
    //插入新的CellLayout到后面
    public void insertNewWorkspaceScreenBeforeEmptyScreen(long screenId) {
        /**
         * Find the index to insert this view into.
         * If the empty screen exists, then insert it before that.
          */
        int insertIndex = mScreenOrder.indexOf(EXTRA_EMPTY_SCREEN_ID);
        if (insertIndex < 0) {
            insertIndex = mScreenOrder.size();
        }
        insertNewWorkspaceScreen(screenId, insertIndex);
    }
    /**
     * 当拖拽应用需要添加一屏时或者当前没有任何一屏时,
     * 调用此方法在Workspace中添加一个CellLayout
     * @param screenId
     */
    public void insertNewWorkspaceScreen(long screenId) {
        insertNewWorkspaceScreen(screenId, getChildCount());
    }
由此可知,Workspace是一个或多个CellLayout的父控件。
其它三个控件,在此也进行 一 一 说明下:
SearchDropTargetBar
SearchDropTargetBar它对应的就是launcher.xml中的drop_target_bar,它是用来显示当用户拖拽应用快捷图标时,屏幕上方会显示移除或者卸载按钮的控件;
<com.android.launcher3.DropTargetBar xmlns:android="http://schemas.android.com/apk/res/android"
    android:layout_width="match_parent"
    android:layout_height="@dimen/dynamic_grid_drop_target_size"
    android:layout_gravity="center_horizontal|top"
    android:focusable="false"
    android:alpha="0"
    android:theme="@style/HomeScreenElementTheme"
    android:visibility="invisible">


    <com.android.launcher3.DeleteDropTarget
        android:id="@+id/delete_target_text"
        style="@style/DropTargetButton"
        android:layout_width="wrap_content"
        android:layout_height="wrap_content"
        android:layout_gravity="center"
        android:gravity="center"
        android:text="@string/remove_drop_target_label" />


    <com.android.launcher3.SecondaryDropTarget
        android:id="@+id/uninstall_target_text"
        style="@style/DropTargetButton"
        android:layout_width="wrap_content"
        android:layout_height="wrap_content"
        android:layout_gravity="center"
        android:gravity="center"
        android:text="@string/uninstall_drop_target_label" />

com.android.launcher3.DropTargetBar>
PageIndicator
PageIndicator对应launcher.xml文件中的WorkspacePageIndicator,它是Workspace中CellLayout也没的指示器,它们通过launcher:pageIndicator属性关联起来;
        <com.android.launcher3.pageindicators.WorkspacePageIndicator
            android:id="@+id/page_indicator"
            android:layout_width="match_parent"
            android:layout_height="@dimen/vertical_drag_handle_size"
            android:layout_gravity="bottom|center_horizontal"
            android:theme="@style/HomeScreenElementTheme" />
        <com.android.launcher3.Workspace
            android:id="@+id/workspace"
            android:layout_width="match_parent"
            android:layout_height="match_parent"
            android:layout_gravity="center"
            android:theme="@style/HomeScreenElementTheme"
            launcher:pageIndicator="@+id/page_indicator" />
Hotseat
Hotseat对应launcher.xml文件中的hotseat,它是桌面上常驻底部图标栏,经查看它里面也是一个CellLayout,查看源码可知,它确实只显示一行或者一列。
<com.android.launcher3.Hotseat
    android:theme="@style/HomeScreenElementTheme"
    xmlns:android="http://schemas.android.com/apk/res/android"
    xmlns:launcher="http://schemas.android.com/apk/res-auto">

    <com.android.launcher3.CellLayout
        android:id="@+id/layout"
        android:layout_width="wrap_content"
        android:layout_height="match_parent"
        android:layout_gravity="center"
        launcher:containerType="hotseat"
        android:importantForAccessibility="no" />
com.android.launcher3.Hotseat>
        if (hasVerticalHotseat) {
            mContent.setGridSize(1, idp.numHotseatIcons);
        } else {
            mContent.setGridSize(idp.numHotseatIcons, 1);
        }
七
在示意图中,有看到CellLayout布局,在xml文件中没有看到它;
从前面的介绍可知,CellLayout是Workspace或者Hotseat的子View,它在Workspace中时是用来显示桌面上的快捷方式或者小部件的,在Hotseat中是用来显示常驻的快捷方式的。
翻看源码可知,CellLayout是根据配置将页面分割成同样的矩形,在矩形中显示快捷方式,或者小部件,每个应用的快捷方式占一个矩形,而如果是小部件,则需要根据小部件的大小来确定需要占几个矩形。
//celllayout宽高减掉padding值之后所剩余的大小
int childWidthSize = widthSize - (getPaddingLeft() + getPaddingRight());
int childHeightSize = heightSize - (getPaddingTop() + getPaddingBottom());
//均宽
int cw = DeviceProfile.calculateCellWidth(childWidthSize, mCountX);
//均高
int ch = DeviceProfile.calculateCellHeight(childHeightSize, mCountY);
    public static int calculateCellWidth(int width, int countX) {
        return width / countX;
    }
    public static int calculateCellHeight(int height, int countY) {
        return height / countY;
    }
      	 //从配置文件中获取行数和列数
        DeviceProfile grid = mLauncher.getDeviceProfile();
        mCountX = grid.inv.numColumns;
        mCountY = grid.inv.numRows;
总结
本篇文章其实只是对launcher.xml文件的介绍,通过查看源码方式,对每个控件都有了新的认识;在其它地方看到了launcher布局的示意图,它帮助我理解launcher布局,同时它也有不足之处,促使我也画一个自己理解的launcher布局示意图,如下:
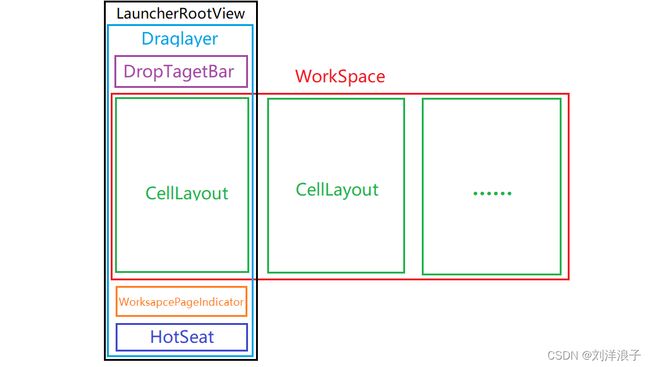
此图为个人理解,不喜勿喷。
参考资料
墨香带你学Launcher
Android 9.0 Launcher源码分析(三)——Launcher的布局与多设备适配
Android M Launcher3主流程源码浅析
还有许多已查看,但找不到的资料了,感谢各位的无私分享,谢谢。
