学习笔记 —— python代码耗时及内存占用测试方法 以及一些零碎的python小工具
这里写目录标题
- 1、手写耗时测试
- 2、开源工具
-
- 2.1 耗时测试
-
- cProfile
- SnakeViz
- line_profiler
- 2.2 内存占用测试
-
- memory_profiler
- mprof
- perf(only on Linux)
- 2.3 CPU 占用 --psutil
- 3、零碎小工具
-
- Pytest
- logging
- Sphinx
- pylint
- black
1、手写耗时测试
先看结果;
主要有三种方法,各自的时钟间隔如下:
可见方法2,即timeit 的时钟间隔最短。
注:最后一个是以ns为单位的,前两个是以s为单位的
三种方法的时钟测量及调用方式如下:
import numpy as np

import time
from timeit import default_timer as timer

def checktick():
    M = 200
    timesfound = np.empty((M,))
    for i in range(M):
        # t1 = time.time()  # get timestamp from timer
        # t2 = time.time()  # get timestamp from timer
        t1 = timer()  # get timestamp from timer
        t2 = timer()  # get timestamp from timer
        # t1 = time.time_ns() # get timestamp from timer
        # t2 = time.time_ns()  # get timestamp from timer
        while (t2 - t1) < 1e-16:  # if zero then we are below clock granularity, retake timing
            # t2 = time.time()  # get timestamp from timer
            t2 = timer() # get timestamp from timer
            # t2 = time.time_ns()  # get timestamp from timer
        timesfound[i] = t2  # record the time stamp
    # minDelta = 1000000
    Delta = np.diff(timesfound)  # it should be cast to int only when needed
    minDelta = Delta.min()
    return minDelta


if __name__ == "__main__":
    print(f"the Clock Granularity is {checktick()*10e8} nanosecond")
    # print(f"the Clock Granularity is {checktick()} nanosecond")
np.diff() 函数说明
import time
from functools import wraps

# decorator to time
def timefn(fn):
    @wraps(fn)
    def measure_time(*args, **kwargs):
        t1 = time.time()
        result = fn(*args, **kwargs)
        t2 = time.time()
        print(f"@timefn: {fn.__name__} took {t2 - t1} seconds")
        return result
    return measure_time


@timefn
def calc_something(param1, param2):
	...add your code...

if __name__ == "__main__":
    calc_something(param1=1000, param2=300)
2、开源工具
与手写相比,还有一些可以详细到每一个函数,甚至每一行代码的耗时的工具。(但会增大一些开销,仅测试使用)
2.1 耗时测试
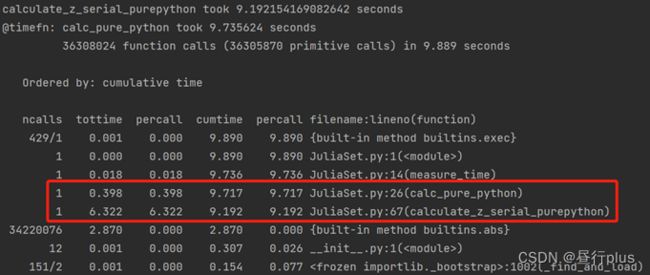
cProfile
一般是内置的,不用装,直接运行
python -m cProfile -s cumulative JuliaSet.py
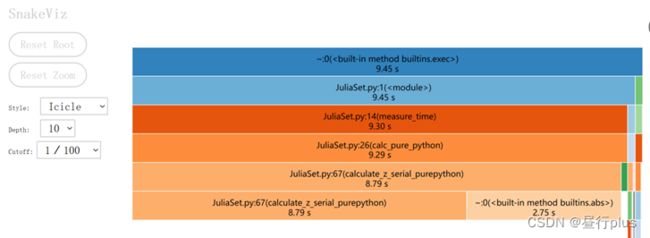
SnakeViz
安装
pip install snakeviz
运行
python -m cProfile -o profile.stats JuliaSet.py
python -m snakeviz profile.stats --server
line_profiler
安装
pip install line_profiler
使用
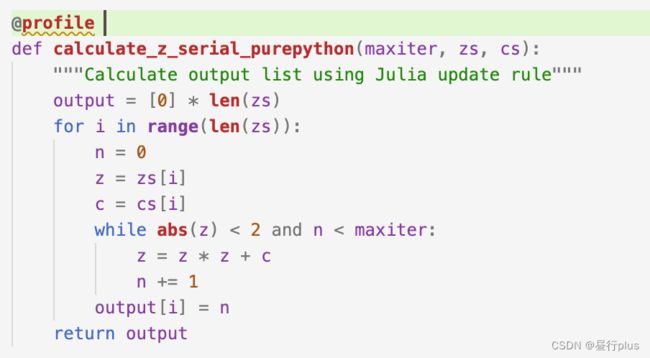
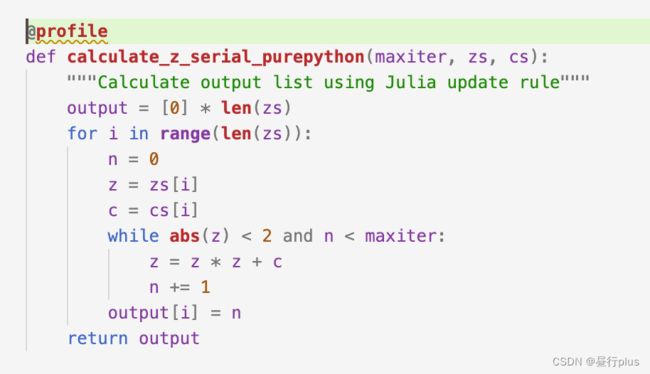
在函数上方添加 “@profile” 标识(这个时候编辑器可能会报错,不用管,反正咱们用的是命令行)
运行
python -m kernprof -l JuliaSet.py
python -m line_profiler JuliaSet.py.lprof
2.2 内存占用测试
测试内存的附加耗时比测试时间多的多,可能是10-100倍甚至更多。
memory_profiler
安装
pip install memory_profiler
使用
python -m memory_profiler JuliaSet.py
mprof
mprof是memory_profiler内置的可视化工具
运行(这里需要matplotlib)
python -m mprof run JuliaSet.py
python -m mprof plot mprofile_20220116173811.dat
第二句的文件mprofile_20220116173811.dat与第一句的输出保持一致


perf(only on Linux)
使用(有人写挺全的),这里简明扼要针对用过的人做个笔记。
perf stat –e performance_counter1, performance_counter2 python python_code.py
关于performance_counter* 可以通过命令 perf list 来看

2.3 CPU 占用 --psutil
psutil不止可以看CPU占用,也能看内存占用
pip install psutil
这个怎么用看官方示例吧, 还有文档
针对看CPU占用主要用这个函数:
psutil.cpu_percent(interval=1, percpu=True)
可以看每个CPU核的占用百分比
3、零碎小工具
Pytest
pip install pytest
函数命名必须在开头或结尾加上“test”
#It will find all tests inside file test_example.py and run them
pytest test_example.py
or
python -m pytest test_example.py
logging
一般无需安装
import logging
logging.basicConfig(level=logging.INFO, file='sample.log')

logging.debug('Debug message')
logging.info('Info message')
logging.warning('Warning message')
logging.error('Error message')
logging.critical('Critical message')
第二行用于设置打印级别,默认为logging.WARNING,低于该级别的log不会被打印。 如果设置file值,则将把结果打印到对应文件中。
Sphinx
Sphinx是一个便捷文档生成工具。
还没搞明白怎么回事……
pylint
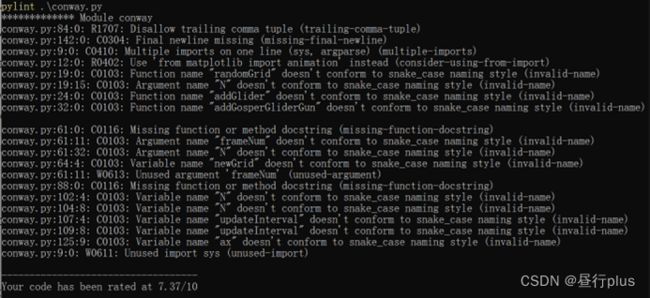
用于检查代码书写是否符合规范
pip install pylint
运行
pylint conway.py
black
有检查格式的就有自动修正格式的:)
pip install black
运行
black conway.py


