自己开发Web框架(Python版)
根据课程所做笔记
源码已整理上传网盘
链接:https://pan.baidu.com/s/1pn_dFJ1W67nP_BfkQM9CQQ
提取码:bsyh
1 计算机网络简单知识
- HTTP:
无状态、短链接 - TCP:
不断开 - WEB应用:
socket客户端(浏览器):
	② DNS解析域名
	  	socket连接
	  	发送socket请求
	⑤ 接收
	⑥ 连接断开
socket服务端:
	①监听端口
	while True:
		等待用户连接
		③ 收到客户端请求
		④ 响应请求
		用户断开
2 简单socket编程
2.1 简单原理版
import socket

# 创建socket对象
sock = socket.socket()
# 绑定ip以及端口
sock.bind(('127.0.0.1',8000))
# listen()方法开始监听端口,传入参数指定等待连接的最大数量为5
sock.listen(5)

# 接下来服务器程序通过一个永久循环来接受来自客户端的链接
while True:
    # 接收一个新的连接
    conn, addr = sock.accept()
    # 获取用户数据
    data = conn.recv(8096)
    # 回复
    # 响应头
    conn.send(b'HTTP/1.1 200 OK\r\n\r\n')
    # 响应体
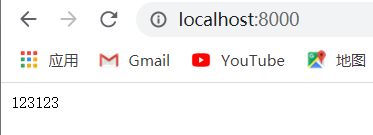
    conn.send(b'123123')
    # 关闭连接
    conn.close()
b'
GET / HTTP/1.1
Host: localhost:8000
Connection: keep-alive
nCache-Control: max-age=0
nUpgrade-Insecure-Reques
ts: 1
User-Agent: Mozilla/5.0 (Windows NT 10.0; Win64; x64) AppleWebKit/537.36 (KHTML, like Gecko) Chrome/83.0.4103.106 Safari/537.36
Accept: text/html,application/xhtml+xml,application/xml;q=0.9,image/webp,image/apng,*/*;q=0.8,application/signed-exchange;v=b3;q=0.9
nSec-Fetch-Site: none
Sec-Fetch-Mode: navigate
Sec-Fetch-User: ?1
Sec-Fetch-Des
t: document
Accept-Encoding: gzip, deflate, br
Accept-Language: zh-CN,zh;q=0.9
Cookie: Goland-c22efa88=68593b8d-368e-4b39-b1f4-679ef9cad0a6; Pycharm-36d26765=cd37937e-64cc-47aa-9140-316446d8daaa; Pycharm-42af32e2=c9e5711c-4162-4d82-b
1ed-a9fc0d81d8d4


'
2.2 简单添加路由版
由于访问路径一般在请求头的访问方法之后,故可以将请求头进行切割获得访问路径。
![]()
import socket

# 创建socket对象
sock = socket.socket()
# 绑定ip以及端口
sock.bind(('127.0.0.1',8000))
# listen()方法开始监听端口,传入参数指定等待连接的最大数量为5
sock.listen(5)

# 接下来服务器程序通过一个永久循环来接受来自客户端的链接
while True:
    # 接收一个新的连接
    conn, addr = sock.accept()
    # 获取用户数据
    data = conn.recv(8096)
    # 快速将data的b类型转换为str类型
    data = str(data, encoding='utf-8')
    # 分割请求头和请求体
    headers, bodies = data.split('\r\n\r\n')
    # 获取第一行
    temp_list = headers.split('\r\n')
    # 获得请求路径
    method,url,protocal = temp_list[0].split(" ")
    # 回复
    # 响应头
    conn.send(b'HTTP/1.1 200 OK\r\n\r\n')
    if url == '/xx':
        # 响应体
        conn.send(b'123123')
    else:
        conn.send(b'404 not found')
    # 关闭连接
    conn.close()
2.3 进阶结构化版
import socket


# 处理路由函数
def f1(request):
    '''
    处理请求,并返回相应内容
    :param request: 用户请求的信息
    :return:
    '''
    return b"f1"


def f2(request):
    return b"f2"


# 路由列表
routers = [
    ('/xx', f1),
    ('/pp', f2),
]

# 创建socket对象
sock = socket.socket()
# 绑定ip以及端口
sock.bind(('127.0.0.1', 8000))
# listen()方法开始监听端口,传入参数指定等待连接的最大数量为5
sock.listen(5)

# 接下来服务器程序通过一个永久循环来接受来自客户端的链接
while True:
    # 接收一个新的连接
    conn, addr = sock.accept()
    # 获取用户数据
    data = conn.recv(8096)
    # 快速将data的b类型转换为str类型
    data = str(data, encoding='utf-8')
    # 分割请求头和请求体
    headers, bodies = data.split('\r\n\r\n')
    # 获取第一行
    temp_list = headers.split('\r\n')
    # 获得请求路径
    method, url, protocal = temp_list[0].split(" ")
    # 回复
    # 响应头
    conn.send(b'HTTP/1.1 200 OK\r\n\r\n')

    func_name = None
    for router in routers:
        if router[0] == url:
            func_name = router[1]
            break

    if func_name:
        response = func_name(data)
    else:
        response = b"404"

    # 返回响应
    conn.send(response)
    # 关闭连接
    conn.close()

if __name__ == "__main__":
    run()
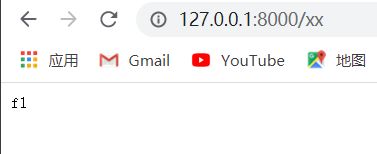
访问结果
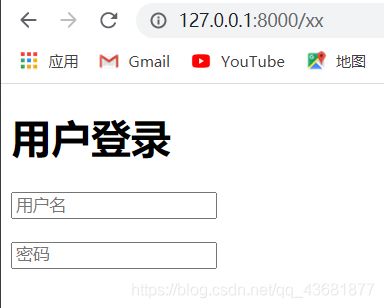
2.4 进阶HTML版
<html lang="en">
<head>
    <meta charset="UTF-8">
    <title>Indextitle>
head>
<body>
    <h1>用户登录h1>
    <form>
        <p><input type="text" placeholder="用户名"/>p>
        <p><input type="password" placeholder="密码"/>p>
    form>
body>
html>
将路由函数修改为:
# 处理路由函数
def f1(request):
    '''
    处理请求,并返回相应内容
    :param request: 用户请求的信息
    :return:
    '''
    f = open("index.html",'rb')
    data = f.read()
    f.close()
    return data
<html lang="en">
<head>
    <meta charset="UTF-8">
    <title>Aricletitle>
head>
<body>
    <table border="1">
        <thead>
            <tr>
                <th>IDth>
                <th>用户名th>
                <th>邮箱th>
            tr>
        thead>
        <tbody>
            <tr>
                <th>1th>
                <th>rootth>
                <th>[email protected]th>
            tr>
        tbody>
    table>

body>
html>
修改f2()函数
def f2(request):
    f = open("article.html",'rb')
    data = f.read()
    f.close()
    return data
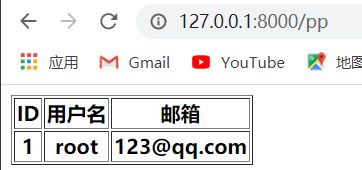
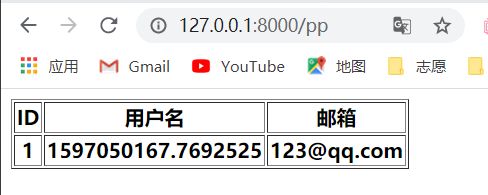
访问结果:

但是上面案例为静态网站,下面来连接数据库成为动态网站
2.5 进阶版简单模板
修改article HTML文件为:
<html lang="en">
<head>
    <meta charset="UTF-8">
    <title>Aricletitle>
head>
<body>
    <table border="1">
        <thead>
            <tr>
                <th>IDth>
                <th>用户名th>
                <th>邮箱th>
            tr>
        thead>
        <tbody>
            <tr>
                <th>1th>
                <th>@@sw@@th>
                <th>[email protected]th>
            tr>
        tbody>
    table>

body>
html>
替换HTML中@@sw@@
def f2(request):
    f = open("article.html", 'r', encoding='utf-8')
    data = f.read()
    import time
    ctime = time.time() #现在就可以动态变化
    data = data.replace('@@sw@@', str(ctime))
    f.close()
    return bytes(data, encoding='utf-8')
2.6 进阶连接数据库版
新建html文件 userlist.html
<html lang="en">
<head>
    <meta charset="UTF-8">
    <title>Aricletitle>
head>
<body>
    <table border="1">
        <thead>
            <tr>
                <th>IDth>
                <th>用户名th>
                <th>年龄th>
            tr>
        thead>
        <tbody>
            @@shd@@
        tbody>
    table>

body>
html>
新增 f3()
def f3(request):
import pymysql
# 操作mysql
# 创建连接
conn = pymysql.connect(host='127.0.0.1', port=3306, user='root', passwd='xxxxxx', db='test03')
# 创建游标
cursor = conn.cursor(cursor=pymysql.cursors.DictCursor)
cursor.execute("select SNO,Name,Age from student")
user_list = cursor.fetchall()
# 关闭游标
cursor.close()
# 关闭连接
conn.close()
# print(user_list)
content_list = []
for row in user_list:
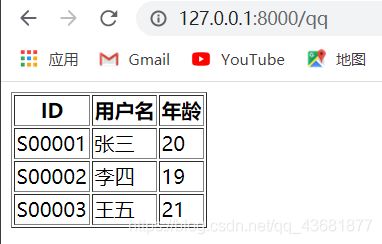
template = "%s %s %s 数据库查询的user如下(user_list)
[{'SNO': 'S00001', 'Name': '张三', 'Age': 20},
{'SNO': 'S00002', 'Name': '李四', 'Age': 19},
{'SNO': 'S00003', 'Name': '王五', 'Age': 21}]
替换的内容如下:
['S00001 张三 20 S00002 李四 19 S00003 王五 21 2.7 使用jinja2进行模板渲染
host_list.html
<html lang="en">
<head>
    <meta charset="UTF-8">
    <title>HostListtitle>
head>
<body>
    <table border="1">
        <thead>
            <tr>
                <th>IDth>
                <th>用户名th>
                <th>年龄th>
            tr>
        thead>
        <tbody>
            {% for row in host_list %}
            <tr>
                <td>{{row.SNO}}td>
                <td>{{row.Name}}td>
                <td>{{row.Age}}td>
            tr>
            {% endfor %}
        tbody>
    table>

body>
html>
编写 f4()
def f4(request):
    import pymysql

    # 创建连接
    conn = pymysql.connect(host='127.0.0.1', port=3306, user='root', passwd='liaojiaxin68', db='test03')
    # 创建游标
    cursor = conn.cursor(cursor=pymysql.cursors.DictCursor)
    cursor.execute("select SNO,Name,Age from student")
    user_list = cursor.fetchall()
    # 关闭游标
    cursor.close()
    # 关闭连接
    conn.close()

    f = open('hostlist.html', 'r', encoding='utf-8')
    data = f.read()
    f.close()

    from jinja2 import Template
    template = Template(data)
    # render 进行渲染 使用jinja规则 用这里的user_list替换html中的host_list
    data = template.render(host_list=user_list)

    return data.encode('utf-8')
3 总结
- socket 服务器
- 根据URL不同路径返回不同内容
路由系统:
URL——>函数 - 字符串返回给用户
模板引擎渲染:
1.HTML自己充当模板(特殊字符)
2.自己创造任意数据
字符串 - WEB框架
1.框架种类:
-a,b,c ——>Tonado
-[第三方a]b,c (Ngix其实是一个Socket服务端) ——>wsgiref ——>Django
-[第三方a],b,[第三方c] wsgiref …——>flask——>jinja2
2.分类
-Django框架(Web…)
-其他
