SDR之Open5gs搭建使用篇
关于国内使用开源的SDR软件,Open5GS的搭建使用(和真实的LTE基站和商用手机进行组网测试)
Open5gs硬件平台使用树莓派P4,需要安装Ubuntu系统,可以从下面连接下载需要的系统
树莓派资源下载 | 树莓派实验室
配置好树莓派连到wifi,可以上网获取open5gs的源码
Required HW
The test program has been run on [VirtualBox - CPU: 1, Memory: 4.00 GB] and [Docker for Mac - CPU: 2, Memory: 2.00 GB] with default setting (max.ue: 4,096, pool.packet: 32,768).
树莓派 Pi 系统
Ubuntu System(Ubuntu 16.04(xenial) and earlier versions, and Debian 9(stretch) and earlier versions are not supported)
Getting MongoDB (安装HSS Database)
Install MongoDB with package manager. It is used as database for NRF/PCF/UDR and PCRF/HSS.
$ sudo apt update
$ sudo apt install mongodb
$ sudo systemctl start mongodb (if '/usr/bin/mongod' is not running)
$ sudo systemctl enable mongodb (ensure to automatically start it on system boot)
Setting up TUN device (not persistent after rebooting) # 建立UE通信接口
Create the TUN device with the interface name ogstun.
$ sudo ip tuntap add name ogstun mode tun
$ sudo ip addr add 10.45.0.1/16 dev ogstun
$ sudo ip addr add 2001:db8:cafe::1/48 dev ogstun
$ sudo ip link set ogstun up
Building Open5GS
Install the dependencies for building the source code.
$ sudo apt install python3-pip python3-setuptools python3-wheel ninja-build build-essential flex bison git libsctp-dev libgnutls28-dev libgcrypt-dev libssl-dev libidn11-dev libmongoc-dev libbson-dev libyaml-dev libnghttp2-dev libmicrohttpd-dev libcurl4-gnutls-dev libnghttp2-dev libtins-dev libtalloc-dev meson
Git clone.
$ git clone https://github.com/open5gs/open5gs
To compile with meson:
$ cd open5gs
$ meson build --prefix=`pwd`/install
$ ninja -C build
Check whether the compilation is correct.
$ ./build/tests/attach/attach ## EPC Only
$ ./build/tests/registration/registration ## 5G Core Only
Run all test programs as below.
$ cd build
$ meson test -v
You need to perform the installation process.
$ cd build
$ ninja install
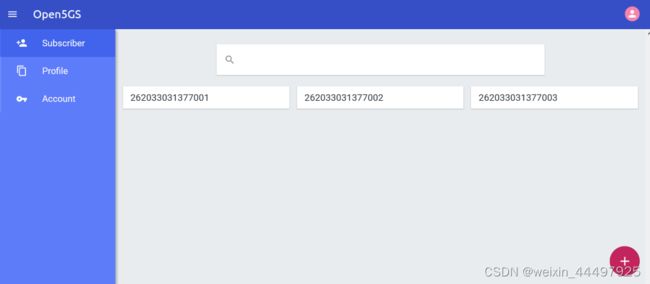
Building the WebUI of Open5GS(用于编辑用户数,即imsi信息)
Node.js is required to build WebUI of Open5GS
$ sudo apt install curl
$ curl -fsSL https://deb.nodesource.com/setup_14.x | sudo -E bash -
$ sudo apt install nodejs
Install the dependencies to run WebUI
$ cd webui
$ npm ci --no-optional
Server listening can be changed by setting the environment variable HOSTNAME or PORT as below.
启动webUI的界面
$ HOSTNAME=0.0.0.0 npm run dev
Register Subscriber Information
树莓派的ip地址:10.0.0.79,则
Connect to http://10.0.0.79:3000 and login with admin account. Note:10.0.0.79,从wifi获取的ip地址
Username : admin
Password : 1423
To add subscriber information, you can do WebUI operations in the following order:
- Go to Subscriber Menu.
- Click + Button to add a new subscriber.
- Fill the IMSI, security context(K, OPc, AMF), and APN of the subscriber.
- Click SAVE Button
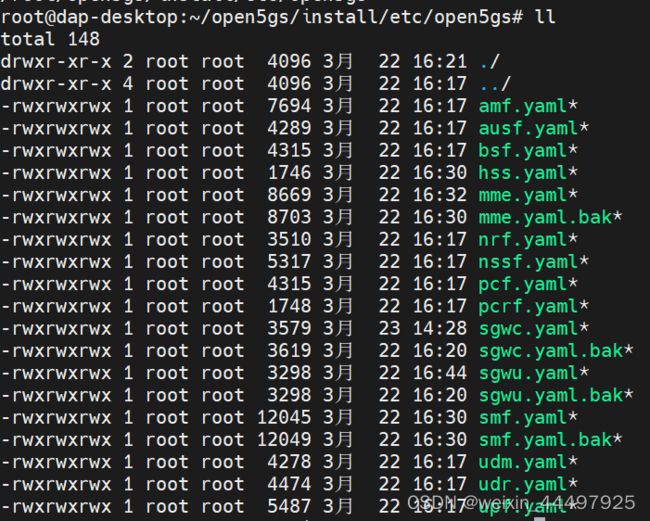
放置目录 /root/open5gs
配置文件 /root/open5gs/install/etc/open5gs
功能模块之间端口的信息
#define OGS_GTPV1_MME_SGWC_U_UDP_PORT 2152
#define OGS_GTPV2_MME_SGWC_C_UDP_PORT 2123
#define OGS_GTPV1_SGWC_SGWU_U_UDP_PORT 2153
#define OGS_GTPV2_SGWC_SGWU_C_UDP_PORT 2124
#define OGS_GTPV1_SGWU_SGWC_U_UDP_PORT 2154
#define OGS_GTPV2_SGWC_SGWC_C_UDP_PORT 2125
#define OGS_GTPV1_SMF_UPF_U_UDP_PORT 2155
#define OGS_GTPV2_SMF_UPF_C_UDP_PORT 2126
#define OGS_GTPV1_UPF_SMF_U_UDP_PORT 2156
#define OGS_GTPV2_UPF_SMF_C_UDP_PORT 2127
MME-s1ap = 10.69.65.126 :36412 for S1-MME
MME-gtpc = 10.69.65.126 :2123 for S11
SGWC-gtpc = 10.69.65.127 :2123 for S11
SGWC-pfcp = 10.69.65.127 :8805 for Sxa
SGWU-pfcp = 10.69.65.128 :8805 for Sxa
SGWU-gtpu = 10.69.65.128 :2152 for S1-U, S5u -------internet
SGWU-gtpu = 10.69.65.130 :2152 for S1-U, S5u --------ims
UPF-pfcp = 10.69.65.129 :8805 for N4 (Sxb)
UPF-gtpu = 10.69.65.129 :2152 for S5u, N3, N4u (Sxu)
SMF-gtpc = 10.69.65.131 :2123 for S5c, N11
SMF-gtpu = 10.69.65.131:2152 for N4u (Sxu)
SMF-pfcp = 10.69.65.131 :8805 for N4 (Sxb)
SMF-frDi = 10.69.65.131 :3868 for Gx auth
SMF-sbi = 10.69.65.131 :7777 for 5G SBI (N7,N10,N11)
增加IP地址如下图
编辑/etc/netplan目录下,50-cloud-init.yaml文件
如下图
启动Open5gs的顺序
- mme
- hss
- sgwc
- sgwu
- upf
- smf
- pcrf
启动后可以用命令 ps -ef |grep open5gs 查看7个进程是否启动ok
如下 Open5GS log 录 /root/open5gs/install/var/log/open5gs
启动后,使用eth0和eNB的传输网口相连(保证eNB的配置正确,TDD的eNB保证可以锁定GPS),eNB会onair,释放无线信号。配置好商用手机,插入刷好的sim卡,可以使用cellular-Z软件查看信息(含plmn,tac,pci,rsrp,sinr等信息)


