Linux iptables实现(SNAT)源地址转换以及http访问控制
一、实现拓扑
二、实验要求
1、实验要求SNAT:内网主机访问外网主机,通过iptables进行原地址转换,允许访问外网的httpd和ping
2、外网主机访问内网主机的http服务通过iptables进行目的地址(DNAT)转换
3、仅允许内网主机使用ssh远程管理iptabels通过vm1通过vm1接口进行管理,不允许其他主机通过任何端口进行ssh管理
三、实验准备
准备三台虚拟机;虚拟机修改名称可以用
1、方法:hostname 名称 ;然后bash刷新一下就有
[root@InComputer~]# 内网主机 A
[root@iptables~]# 防火墙
[root@OutComputer ~]# 外网主机 B
2、先把前置服务安装好,待会要修改网卡配置,会导致下载服务不方便
内网主机
[root@InCompiter ~]# yum -y install httpd #安装httpd服务
[root@InCompiter ~]# systemctl start httpd #开启服务
[root@InCompiter ~]# systemctl stop firewalld #关闭自带防火墙,方便配置
[root@InCompiter ~]# systemctl disable firewalld #关闭防火墙开机启动
外网主机
[root@OutCompiter ~]# yum -y install httpd #安装httpd服务
[root@OutCompiter ~]# systemctl start httpd #开启服务
[root@OutComputer ~]# systemctl stop firewalld
[root@OutComputer ~]# systemctl disable firewalld
防火墙主机
[root@iptabels ~]# yum -y install iptables-services #安装iptables
[root@iptabels ~]# systemctl stop firewalld #关闭默认firewalld防火墙
[root@iptabels ~]# systemctl disable firewalld
[root@iptabels ~]# systemctl start iptables #启用iptables
[root@iptabels ~]# systemctl status iptables #查看是否正常启动,如下
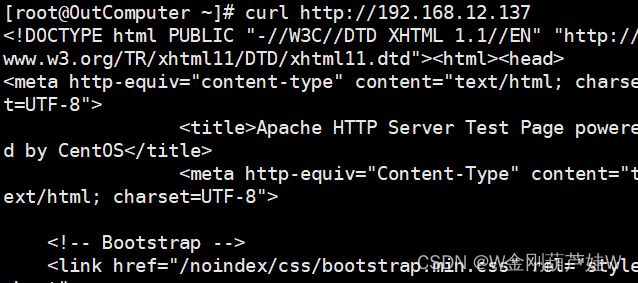
[root@OutComputer ~]# curl http://192.168.12.137 #访问内网主机的HTTP默认页面
两台主机可以相互访问一下
四、修改网卡(注意要先把所有软件装好,第三部确认无误,再修改)
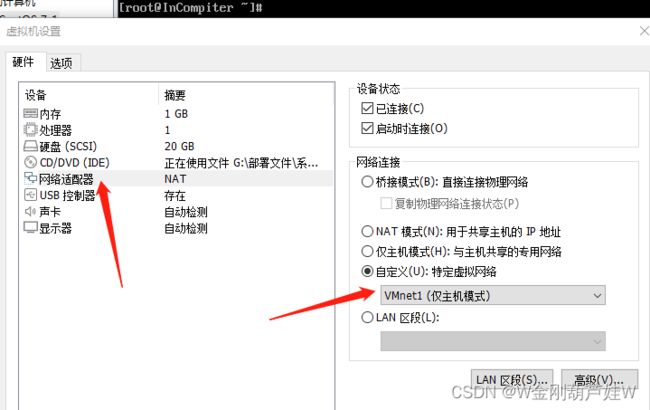
1、内网主机网卡设置成Vm1(修改后你的xshell会断开)
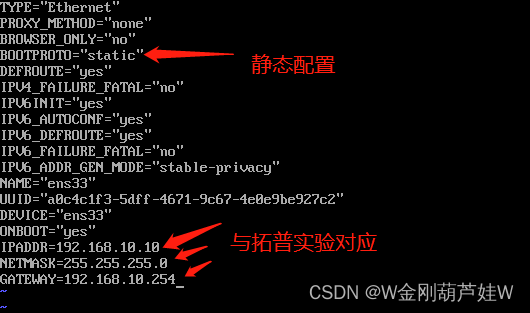
1.1修改完网卡后需要去配置静态ip
[root@InCompiter ~]# vim /etc/sysconfig/network-scripts/ifcfg-ens33
[root@InCompiter ~]#systemctl restart network #重启网卡
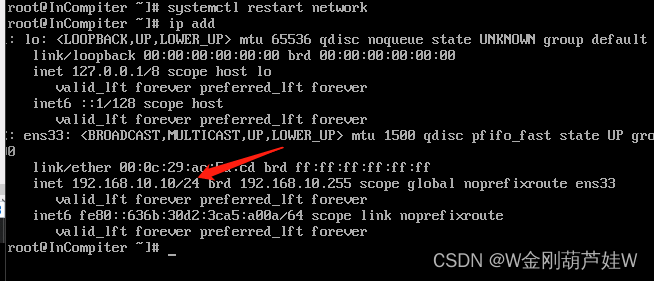
1.2查看ip是否配置成功
[root@InCompiter ~]#ip addr
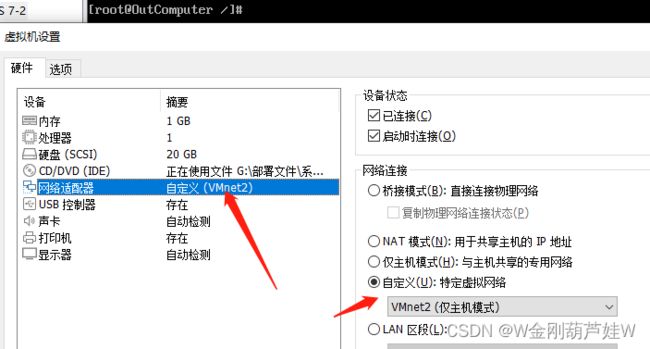
2、外网主机网卡设置成Vm2
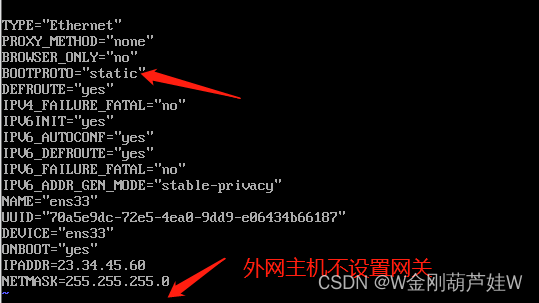
2.2修改网卡配置,配置静态IP
[root@OutComputer ~]# vim /etc/sysconfig/network-scripts/ifcfg-ens33
[root@OutComputer ~]#systemctl restart network #重启网卡
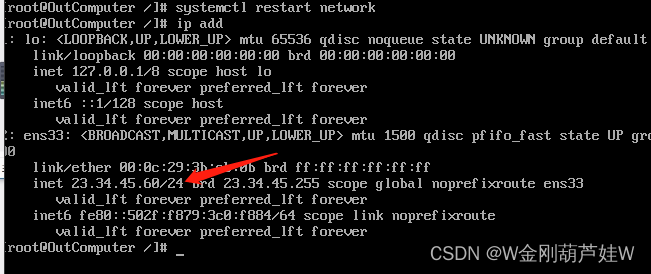
2.3查看Ip是否配置成功
[root@OutComputer ~]#ip addr
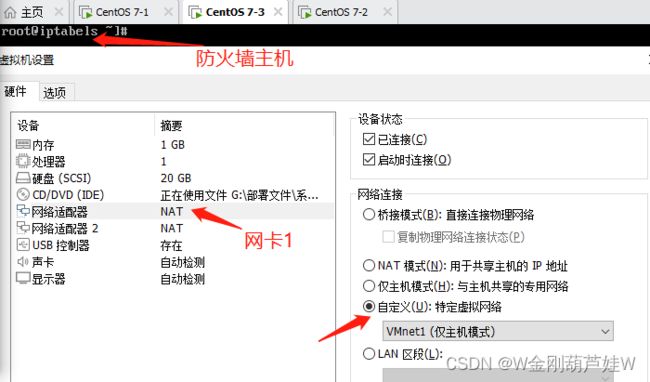
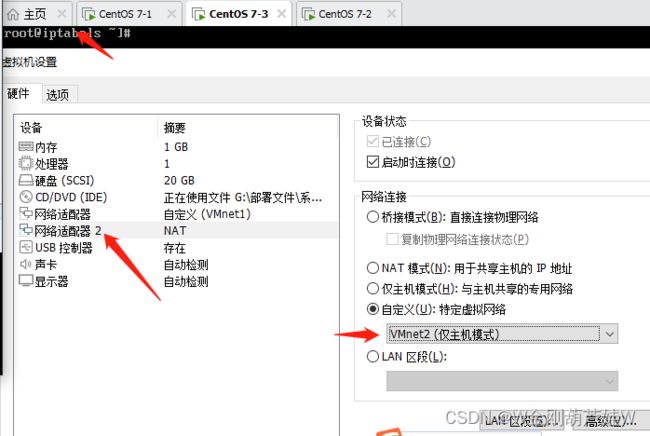
3.防火墙配置,因为防火墙需要转发,所以配置两张网卡(VM1和VM2)
注意这里虽然生成了新的网卡,但是没有生成对应的网卡配置文件
[root@iptabels ~]#cd /etc/sysconfig/network-scripts #进入到网卡配置文件
[root@iptabels ~]#cp -p ifcf-ens33 ifcfg-ens36 #复制并改名36
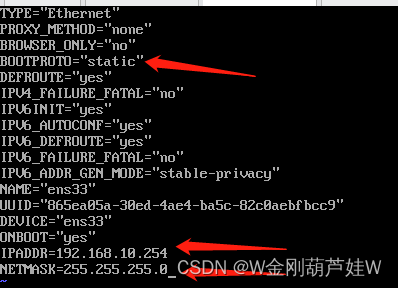
配置ens33网卡(内网)
[root@iptabels ~]#vi ifcfg-ens33
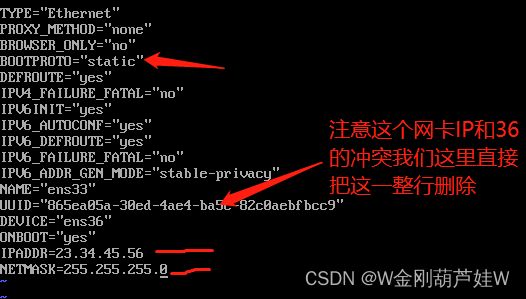
[root@iptabels ~]#vi ifcfg-ens36
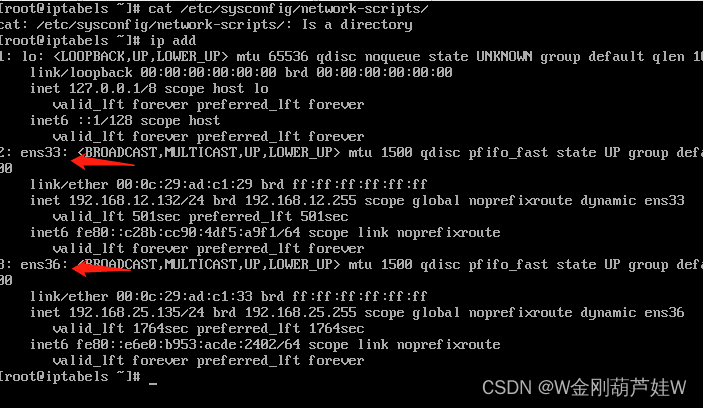
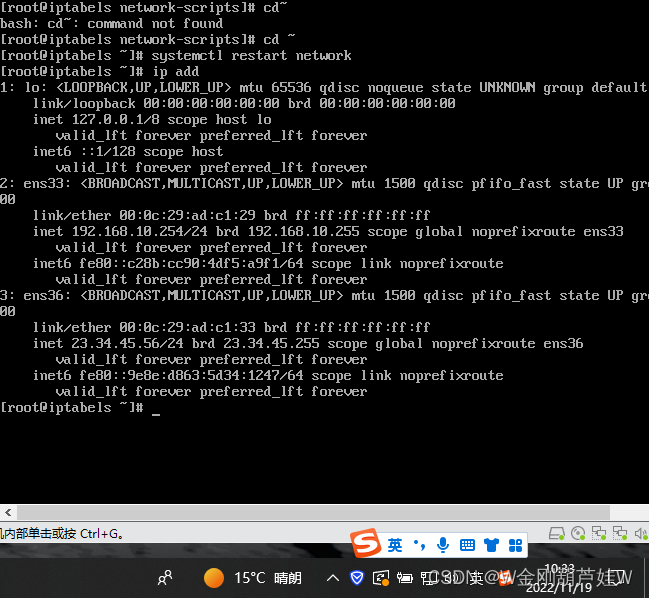
[root@iptabels ~]#systemctl restart network #重启网卡
结果查看
实验要求一(实验要求SNAT:内网主机访问外网主机,通过iptables进行原地址转换,允许访问外网的httpd和ping)
五、iptables配置
1、开启防火墙转发功能(两个方法二选一即可)
方法一:
[root@iptabels ~]#echo net.ipv4.ip_forward = 1 >> /etc/sysctl.conf #修改内核配置文件
[root@iptabels ~]#source /etc/sysctl.conf
方法二:[root@iptabels ~]#echo 1 >> /proc/sys/net/ipv4/ip_forward #修改内核配置文件,临时配置,立即生效
配置完成后,现在内网主机是没办法访问外网.45.60主机的
2、iptables流量转发配置
2.1#配置防火墙允许转发
[root@iptabels ~]#iptables -I FORWARD -p tcp --dport 80 -j ACCEPT
2.2#配置SNAT源地址转换 这里是大写的 -i 指定被转发的网段 (-o指定出站网卡)
[root@iptabels ~]#iptables -t nat -I POSTROUTING -s 192.168.10.0/24 -o ens36 -j SNAT --to-source 23.34.45.56
——————此时流量以及可以到达外网的主机,但是回包时候被防火墙拦截————
2.3配置防火墙回包的转发
[root@iptabels ~]#iptables -I FORWARD -p tcp --sport 80 -j ACCEPT #指定源80端口
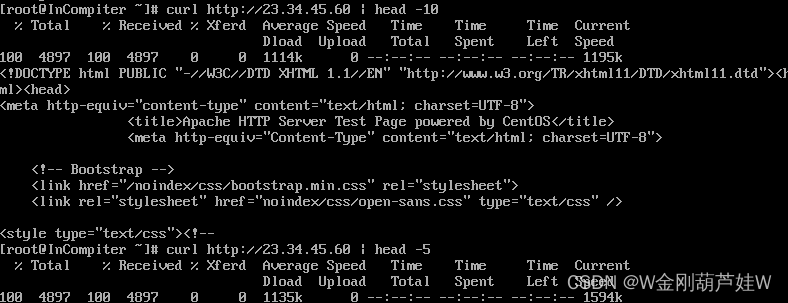
此时Vm1已经可以访问外网Vm2的http服务,已经可以访问默认页面
2.4配置Ping(目前无法ping通)
[root@iptabels ~]#iptables -I FORWARD -p icmp -j ACCEPT
验证:(实验要求1完成)
实验要求二(外网主机访问内网主机的http服务通过iptables进行目的地址(DNAT)转换)
一、配置DNAT转换
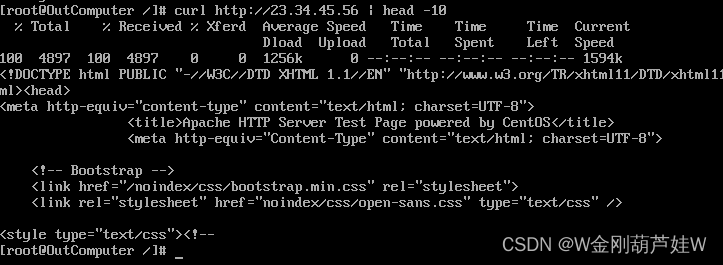
[root@iptabels ~]#iptables -t nat -I PREROUTING -i ens36 -d 23.34.45.56 -p tcp --dport 80 -j DNAT --to-destination 192.168.10.10
验证:成功访问内网httpd服务
实验要求三(仅允许内网主机使用ssh远程管理iptabels通过vm1通过vm1接口进行管理,不允许其他主机通过任何端口进行ssh管理)
一、查看防火墙原始配置
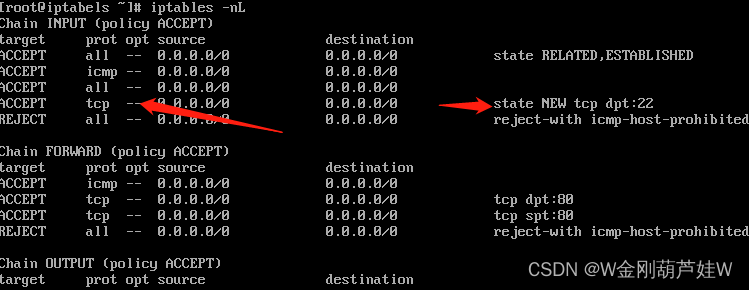
1、[root@iptabels ~]#iptables -nL
这里可以看到这条策略默认是允许所有tcp链接来访问22号端口,并没有做限制,所以要把它删除
[root@iptabels ~]#iptables -D INPUT 4
————此时所有主机已经都无法通过ssh链接
2、配置允许通过内网网卡来访问,并且指定目的Ip
[root@iptabels ~]#iptables -I INPUT -p tcp --dport 22 -i ens33 -d 192.168.10.254 -j ACCEPT
验证:内网访问
验证:外网访问
DONE


