12.1 基于Django的服务器信息查看应用(系统信息、用户信息)
文章目录
- 新建Django项目
-
- 创建子应用并设置本地化
- 创建数据库表
- 创建超级用户
- git管理项目(requirements.txt、README.md、.ignore)
- 主机信息监控应用的框架搭建
- 具体功能实现
-
- 系统信息展示
-
- 前端界面设计
- 视图函数设计
- 用户信息展示
-
- 视图函数设计
- 自定义过滤器的实现
- 前端界面设计
目标:使用 Python Django框架和psutil开发一个中文版 Linux 服务器信息查看应用,可查看的信息包括系统、CPU、内存、硬盘、进程、网络、登录用户等,同时可查看并导出部分数据的图表。
psutil模块参考文章:参考文章:https://www.cnblogs.com/saneri/p/7528283.html
新建Django项目
使用虚拟的解释器环境
下图中,应该将 Inherit global site-packages 勾选上

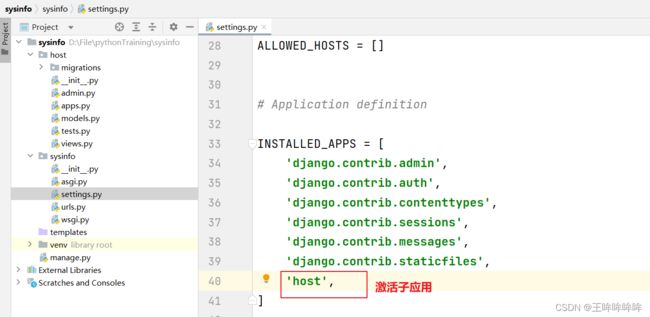
创建子应用并设置本地化
创建数据库表
Django项目自带后台管理
虽然新建的Django项目还没有加入新数据,但是Django项目自带的用户名之类的数据信息都需要存储到数据库中。
创建超级用户

在Terminal运行项目:python manage.py runserver
浏览器访问

至此,项目最基本的搭建完成。
git管理项目(requirements.txt、README.md、.ignore)


提示warning信息:
warning: in the working copy of ‘.idea/inspectionProfiles/profiles_settings.xml’, LF will be replaced by CRLF the next time Git touches it
根据文章:https://www.cnblogs.com/poppyCHN/p/16865100.html和https://www.cnblogs.com/outs/p/6909567.html。
做出以下修改:

pip freeze  # 列出当前环境已经安装的第三方模块
pip freeze > requirements.txt  # 输出重定向到requirements.txt 文件
右击新建File,新建README.md文件。
主机信息监控应用的框架搭建
| 路由 | 视图函数 | 前端模板 |
|---|---|---|
| / | views.index | index.html |
| /user/ | views.user | user.html |
| /cpu/ | views.cpu | cpu.html |
| /memory/ | views.memory | memory.html |
| /disk/ | views.disk | disk.html |
| /network/ | views.network | network.html |
| /process/ | views.process | process.html |
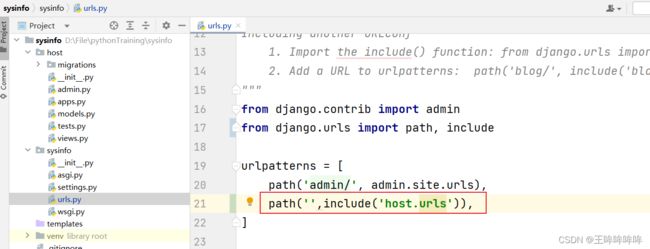
在sysinfo项目的主路由文件设置,使得访问转入到子应用的路由文件

在子应用的路由配置文件中写明:不同的访问路径,执行相应的视图函数

在子应用host中编写视图函数,
sysinfo/host/views.py :
from django.shortcuts import render
# Create your views here.
def index(request):
    pass
    return render(request,'host/index.html',locals())
def user(request):
    pass
    return render(request,'host/user.html',locals())
def cpu(request):
    pass
    return render(request,'host/cpu.html',locals())
def memory(request):
    pass
    return render(request,'host/memory.html',locals())
def disk(request):
    pass
    return render(request,'host/disk.html',locals())
def network(request):
    pass
    return render(request,'host/network.html',locals())
def process(request):
    pass
    return render(request,'host/process.html',locals())
在template下新建host目录,并创建对应的HTML文件

至此,项目的框架搭建完成。
具体功能实现
系统信息展示
前端界面设计
新建 templates/host/base.html 文件:
<!DOCTYPE html>
<html {% block html_attribs %}{% endblock html_attribs %}>
<head>
    {% block head %}
        <meta http-equiv="Content-Type" content="text/html; charset=utf-8">
        <meta name="viewport" content="width=device-width, initial-scale=1">
        <title>{% block title %} {% endblock title %}</title>
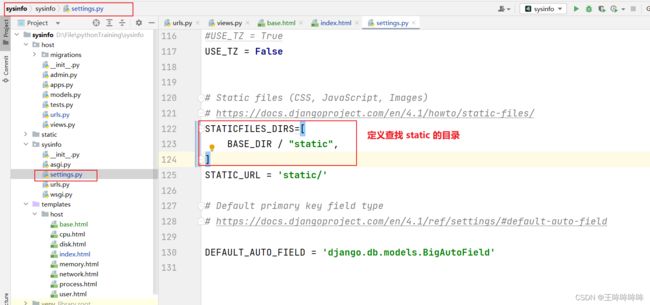
        <link rel="stylesheet" type="text/css" href="/static/css/bootstrap.css">
        <link rel="stylesheet" type="text/css" href="/static/css/my-style.css">
        <script src="/static/js/jquery-3.1.1.min.js"></script>
    {% endblock head %}
</head>
<body>
<div class="sysinfo">
    <div class="navbar navbar-inverse" role="navigation">
        <div class="container">
            <div class="navbar-header">
                <a class="navbar-brand" href="/">Sys Info</a>
            </div>
            <div class="navbar-collapse collapse">
                <ul class="nav navbar-nav">
                    <li><a href="/">系统</a></li>
                    <li><a href="/cpu/">CPU</a></li>
                    <li><a href="/memory/">内存</a></li>
                    <li><a href="/disk/">硬盘</a></li>
                    <li><a href="/network/">网络</a></li>
                    <li><a href="/process/">进程</a></li>
                    <li><a href="/user/">用户</a></li>
                </ul>
            </div>
        </div>
    </div>
    <div class="container">
        {% block content %}{% endblock %}
    </div>
</div>
</body>
</html>
在templates/host/index.html 文件中包含 base.html 文件:
{% extends 'host/base.html' %}
{% block title %}Sys Info{% endblock %}
{% block content %}
    <div class="page-header">
        <h1>系统信息</h1>
    </div>
    <div>
        <table class="table table-bordered">
            <tr>
                <td>主机名</td>
                <td>{{ sys_name }}</td>
            </tr>
            <tr>
                <td>内核名称</td>
                <td>{{ kernel_name }}</td>
            </tr>
            <tr>
                <td>发行版本号</td>
                <td>{{ kernel_no }}</td>
            </tr>
            <tr>
                <td>内核版本</td>
                <td>{{ kernel_version }}</td>
            </tr>
            <tr>
                <td>系统架构</td>
                <td>{{ sys_framework }}</td>
            </tr>
            <tr>
                <td>现在时间</td>
                <td>{{ now_time }}</td>
            </tr>
            <tr>
                <td>开机时间</td>
                <td>{{ boot_time }}</td>
            </tr>
            <tr>
                <td>运行时间</td>
                <td>{{ up_time }}</td>
            </tr>
        </table>
    </div>
{% endblock %}
测试:发现能展示出首页效果。但是还没有数据显示。这是因为还没写视图函数,业务逻辑还没实现。

视图函数设计
如果是在Linux系统下,通过python执行Linux命令就能获取到主机信息。
查看主机名、操作系统、内核版本、系统架构:hostnamectl
查看系统名称: uname
查看系统开机时间、已经运行了多长时间: top、w、uptime、 cat /proc/uptime
查看内核版本、系统架构: uname -r
获取系统架构: hostnamectl | grep Architecture | awk -F : '{print $2}'
python中执行Linux命令的方式一:
命令直接输出结果。但是很多情况下,希望把结果存起来。
在Linux系统下:
执行 ipython 命令(安装:pip install ipython)
import os
cmd="hostnamectl | grep Architecture | awk -F : '{print $2}'"
os.system(cmd) #执行命令,直接输出命令结果
python中执行Linux命令的方式二:
Linux下:
输入 python3 命令
import os
os.popen('hostname')  #返回的是一个文件对象
f= os.popen('hostname')
f.read()  #输出结果值
os.popen('hostname').read()
如果是在Windows下,无法执行Linux命令,该如何获取Linux服务器的这些信息???
通过 psutil 模块
参考文章:https://www.cnblogs.com/saneri/p/7528283.html
视图函数编辑 host/views.py
from datetime import datetime
from django.shortcuts import render
import psutil
import os,platform

# Create your views here.
def index(request):
    try:
        info=os.uname()# linux系统下
    except:
        info=platform.uname() # Windows系统下
    sys_name=info.node
    kernel_name=info.system
    kernel_no=info.release
    kernel_version=info.version
    sys_framework=info.machine
    boot_time = datetime.fromtimestamp(psutil.boot_time())
    now_time = datetime.now()
    up_time = now_time - boot_time
    return render(request, 'host/index.html', locals())
用户信息展示
渲染就是将视图函数的变量信息填充到模板HTML页面中,最终返回给用户的过程。
视图函数设计
在 host/views.py 文件修改user 函数:
def user(request):
    users=psutil.users() #很多用户
    return render(request, 'host/user.html', locals())
自定义过滤器的实现
为了将用户登录时间显示的更友好,需要自定义过滤器。
自定义过滤器参考文档:https://docs.djangoproject.com/zh-hans/4.1/howto/custom-template-tags/
新建包 templatetags(包的名字是固定的)
新建python文件 timefilter.py ,实现过滤器

自定义的过滤器文件 timefilter.py :
from datetime import datetime
from django import template
register = template.Library() # 1、实例化库

@register.filter(name='timefmt') # 3、注册过滤器
def timefmt(value): # 2、具体实现过滤器
    """将时间戳转换为datetime类型的时间"""
    return datetime.fromtimestamp(value)
前端界面设计
编辑 templates/host/user.html 文件:
其中,extends 表示继承基模板
{% load timefilter %} 表示加载自定义过滤器文件
{{ user.started | timefmt }} 表示使用过滤器。这个过滤器可以是内置过滤器,也可以自定义过滤器
{% extends 'host/base.html' %}
{% load timefilter %}
{% block title %} 用户信息 {% endblock %}
{% block content %}
    <div class="page-header">
        <h1> 登录用户 </h1>
    </div>
    <div>
        <table class="table table-bordered">
            <tr>
                <td>用户名</td>
                <td>登录主机</td>
                <td>终端</td>
                <td>登录时间</td>
            </tr>
            {% for user in users %}
            <tr>
                <td>{{ user.name }}</td>
                <td>{{ user.host }}</td>
                <td>{{ user.terminal }}</td>
                <td>{{ user.started | timefmt }}</td>
            </tr>
            {% endfor %}
        </table>
    </div>
{% endblock %}
项目里添加文件之后,需要重启项目才能生效
测试:


