PHP —— 用 ThinkPHP5.0 实现微信小程序登陆
PHP —— 用 ThinkPHP5.0 实现微信小程序登陆
《工欲善其事,必先利其器》
大家好,之前学习了 原生 PHP 和框架,今天我们运用框架 TP5.0 来实现一下微信小程序的用户登陆以及获取用户的信息接口。
一、创建 Wxuser 模型
一般 MVC 框架的数据操作,都是在 Model 层里面的,所以这里我们需要实现微信登陆的模型,代码如下,分为几个小功能点:
- 使用前端发来的 code 去换取 openid;
- 利用 openid 生成 token;
- 将 openid 和 token 以及用户信息入库。
namespace app\api\model; // 命名空间,根据自己的项目路径来生成
use think\Model; // 引入tp框架的Model类
use app\common\exception\BaseException; // 引入基础错误捕捉类
use think\Db; // 引入 tp 框架的Db类
use think\Cache; // 引入 tp 框架的缓存类
class Wxuser extends Model {
private $appId;
private $appSecret;
public $error;
public $token;
protected $resultSetType = "collection"; // 设置返回类型
protected $autoWriteTimestamp = true; // 自动记录时间戳
/**
* Wxuser constructor
* @param $appId
* @param $appSecret
*/
public function __construct() {
$appKey = Db::name("appkey")->find(); // 查找管理后台入库的小程序信息
$this->appId = $appKey["appId"];
$this->appSecret = $appKey["appSecret"];
}
/**
* 获取用户信息
* @param $token
* @return null|static
* @throws \think\exception\DbException
*/
public static function getUser($token) {
$open_id = Cache::get($token)['openid'];
$userInfo = DB::name("wxuser")->where("open_id",$open_id)->find();
if ($userInfo) {
$userInfo["create_time"] = date('Y-m-d',$userInfo["create_time"]);
$userInfo["update_time"] = date('Y-m-d',$userInfo["update_time"]);
}
return $userInfo;
}
/**
* 用户登陆
*/
public function login($post) {
// 微信登陆 获取session_key
$session = $this->wxlogin($post["code"]);
// 自动注册用户
$user_id = $this->register($session["openid"],$post["nickName"],$post["avatarUrl"],$post["gender"]);
// 生成token
$this->token = $this->token($session["openid"]);
// 记录缓存 7天
Cache::set($this->token, $session, 86400 * 7);
return $user_id;
}
/**
* 微信登陆
* @param $code
* @return array|mixed
* @throws BaseException
* @throws \think\exception\DbException
*/
private function wxlogin($code) {
// 获取当前小程序信息
if (empty($this->appId) || empty($this->appSecret)) {
throw new BaseException(['msg' => '请到 [后台-小程序设置] 填写appid 和 appsecret']);
}
// 微信登录 (获取session_key)
if (!$session = $this->sessionKey($code)) {
throw new BaseException(['msg' => $this->error]);
}
return $session;
}
/**
* 获取session_key
* @param $code
* @return array|mixed
*/
public function sessionKey($code) {
/**
* code 换取 session_key
* 这是一个 HTTPS 接口,开发者服务器使用登录凭证 code 获取 session_key 和 openid。
* 其中 session_key 是对用户数据进行加密签名的密钥。为了自身应用安全,session_key 不应该在网络上传输。
*/
$url = 'https://api.weixin.qq.com/sns/jscode2session';
$result = json_decode(curl($url, [
'appid' => $this->appId,
'secret' => $this->appSecret,
'grant_type' => 'authorization_code',
'js_code' => $code
]), true);
if (isset($result['errcode'])) {
$this->error = $result['errmsg'];
return false;
}
return $result;
}
/**
* 生成用户认证的token
* @param $openid
* @return string
*/
private function token($openid) {
return md5($openid . 'token_salt');
}
/**
* 获取token
* @return mixed
*/
public function getToken() {
return $this->token;
}
/**
* 自动注册用户
* @param $open_id
* @param $userInfo
* @return mixed
* @throws BaseException
* @throws \think\exception\DbException
*/
private function register($open_id, $nickName,$avatarUrl,$gender) {
$userInfo['open_id'] = $open_id;
$userInfo['nickName'] = preg_replace('/[\xf0-\xf7].{3}/', '', $nickName);
$userInfo['avatarUrl'] = $avatarUrl;
$userInfo['gender'] = $gender+1;
$data=Db::name('wxuser')->where('open_id',$open_id)->find();
if(!$data){
$userInfo['create_time']=time();
$userInfo['update_time']=time();
$user_id = Db::name('wxuser')->insertGetId($userInfo);
if (!$user_id) {
return json_encode(['code'=>0,'msg' => '用户注册失败']);
}
return $user_id;
}else{
$userInfo['update_time']=time();
Db::name('wxuser')->where('id',$data['id'])->update($userInfo);
return $data['id'];
}
}
}
?>
二、创建 login 控制器
实现登陆 Controller 主要就是接收前端发送来的数据,然后把数据进行提纯处理。只留下有需要的部分,再将数据传递给 Model。
namespace app\api\controller;
use app\common\exception\BaseException;
use think\Controller;
use app\api\model\Wxuser;
use think\Db;
use think\Request; // 引入 tp 请求体类

class User extends Controller {
	/**
     * 用户自动登录
     * @return array
     * @throws \app\common\exception\BaseException
     * @throws \think\Exception
     * @throws \think\exception\DbException
     */
    public function login() {
        $model = new Wxuser;
        $user_id = $model->login($this->request->post());
        $token = $model->getToken();
        return json_encode(['code'=>200,'user_id' => $user_id,'token'=>$token]);
    }

	/**
     * 获取用户信息
     * @return array
     * @throws \app\common\exception\BaseException
     * @throws \think\Exception
     * @throws \think\exception\DbException
     */
     public function loginInfo() {
		 if (!$token = $this->request->param("token")) {
			throw new BaseException(['code' => 0, 'msg' => '缺少必要的参数:token']);
		 }
		 if (!$user = Wxuser::getUser($token)) {
			 throw new BaseException(['code' => 0, 'msg' => '没有找到用户信息']);
		 }
		 return json_encode(['code'=>200,'data'=>$user]);
	 }
}
?>
三、前端小程序登陆部分
前端就比较简单了,分为三个小功能点:
- 调用 wx.login API 获取用户的 code;
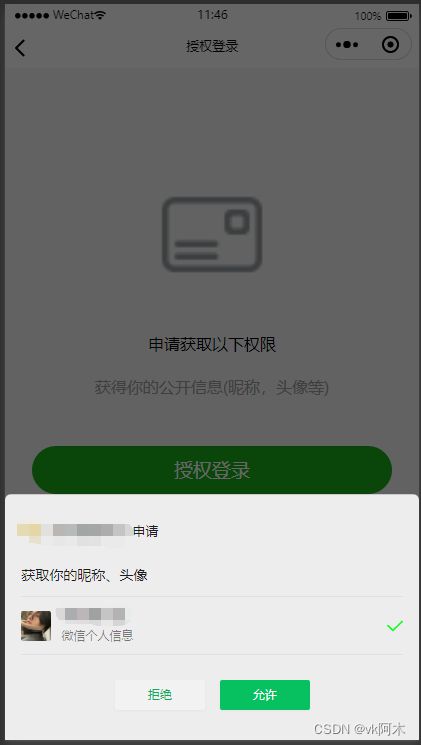
- 调用 wx.getUserProfile API 获取用户的个人信息;
- 调用上面实现的 login 接口,把个人信息和 code 传递给后端。
const loginApi = 'api/user/login'; // 对应 tp 的控制器路径
onLoad: function () {
    wx.login({
      success: res => {
          this.data.code = res.code;
      }
    })
},

// 这里就没有做 微信获取用户API的 适配了,有需要的自己上网查一下,搜索 canIUse
getUserProfile: function() {
    wx.getUserProfile({
        desc: '用户完善个人资料',
        success: res => {
            http.request(loginApi,{
                nickName: res.userInfo.nickName,//用户昵称
                avatarUrl: res.userInfo.avatarUrl,//用户LOGO
                code: this.data.code,//code值
                gender: res.userInfo.gender//性别
            },res=>{
                wx.setStorageSync('token', res.token)
                wx.setStorageSync('user_id', res.user_id)
                wx.navigateBack({
                  delta: 1
                })
            })
        },
        fail: function() {
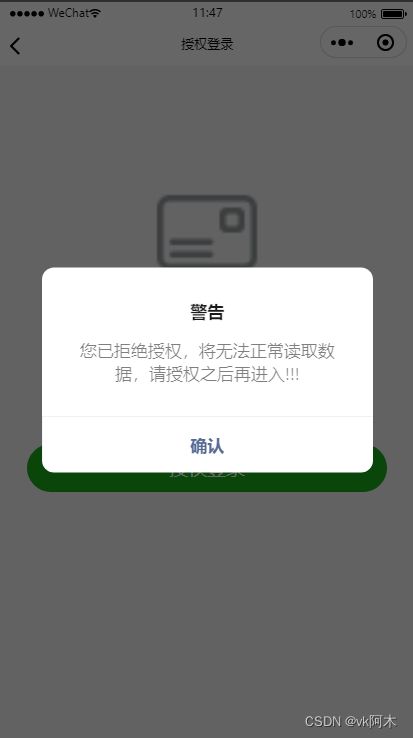
            //用户按了拒绝按钮
            wx.showModal({
                title: '警告',
                content: '您已拒绝授权,将无法正常读取数据,请授权之后再进入!!!',
                showCancel: false,
                confirmText: '确认',
                success: function (res) {
                	if (res.confirm) {
                    	wx.navigateBack({
                    		delta: 1
                    	})
                	}
                }
            })
        }
    })
}
四、前端小程序获取用户数据
const userApi = '/api/user/info'; // 对应 tp 控制器路径
var token;

onLoad: function(options) {
    token = wx.getStorageSync('token');
    //获取用户数据
    this.getUserData();
},

getUserData() {
    http.getData(userApi, {
      token: token
    }, res => {
      if (res.code == 200) {
        that.setData({
            userLogo: res.data.avatarUrl,
            userName: res.data.nickName,
            time: res.data.update_time
          })
      }
    })
}


