springboot-springcloud-nacos服务搭建与实现
准备阶段
1.搭建微服务工程,创建多个微服务,实现多个服务之间的注册和调用
2.下载Nacos 并安装
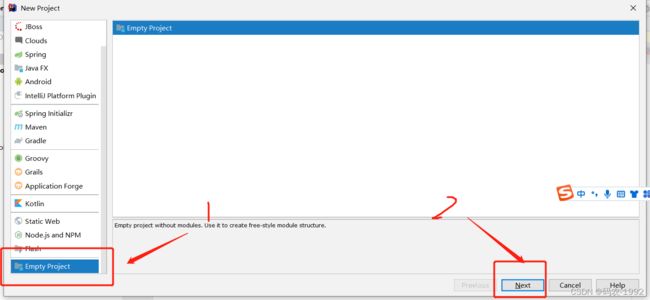
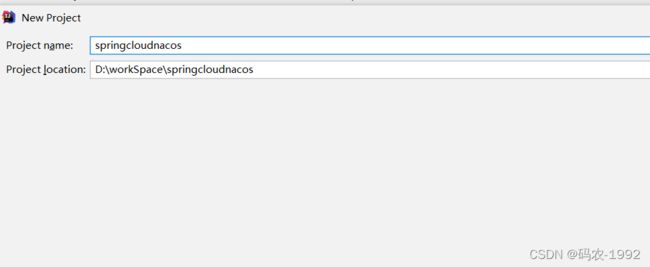
创建工程springcloudnacos
springcloudnacos 下pom文件
    4.0.0

    com.ws
    springcloudnacos


        org.springframework.boot
        spring-boot-starter-parent
        2.2.10.RELEASE


        api
        service

        service/service-school
        service/service-stu
        service/service-tea
        api/api-school
        api/api-teacher
        api/api-student

    nacos Program


        1.8


    pom


            org.springframework.boot
            spring-boot-starter-test
            test


            org.projectlombok
            lombok
            true
在springcloudnacos下分别创建项目service和api
api下创建项目 api-school、api-student、api-teacher
service下创建项目 service-school、service-student、service-teacher
最终结构目录如下
三个项目分别实现查询功能
1.把 service-school、service-student、service-teacher 三个服务在nacos中进行注册
引入依赖(只需引入一次 依赖加在service文件下的pom文件里)
            com.alibaba.cloud
            spring-cloud-starter-alibaba-nacos-discovery
            2.2.5.RELEASE
2.配置文件进行配置
#配置nacos第一步加依赖 第二步设置nacos服务地址
spring.cloud.nacos.discovery.server-addr=127.0.0.1:8848
以 service-student为例
# 服务端口
server.port=8002
# 服务名
spring.application.name=service-student

# 环境设置:dev、test、prod
spring.profiles.active=dev

# mysql数据库连接
spring.datasource.driver-class-name=com.mysql.cj.jdbc.Driver
spring.datasource.url=jdbc:mysql://localhost:3306/education?serverTimezone=GMT%2B8
spring.datasource.username=root
spring.datasource.password=root

#返回json的全局时间格式
spring.jackson.date-format=yyyy-MM-dd HH:mm:ss
spring.jackson.time-zone=GMT+8

# 设置日志级别
logging.level.root=info

#配置nacos第一步加依赖 第二步设置nacos服务地址
spring.cloud.nacos.discovery.server-addr=127.0.0.1:8848

#解决报错问题
spring.mvc.pathmatch.matching-strategy=ANT_PATH_MATCHER

#mybatis日志
#mybatis-plus.configuration.log-impl=org.apache.ibatis.logging.stdout.StdOutImpl@EnableDiscoveryClient//nacos第三步启动类加注解对三个服务分别添加
访问本地的nacos http://localhost:8848/nacos/
以 service-student为例
@SpringBootApplication
@EnableDiscoveryClient//nacos第三步启动类加注解
@MapperScan(basePackages = {"com.ws.mapper"})
public class StudentApplication {
    public static void main(String[] args) {
        SpringApplication.run(StudentApplication.class,args);
    }
}
服务直接的接口调用
1.需要服务调用的依赖引入
引入依赖(只需引入一次 依赖加在service文件下的pom文件里)
            org.springframework.cloud
            spring-cloud-starter-openfeign
            2.2.5.RELEASE
2.启动类添加注解
@EnableFeignClients//服务调用端启动类需要加以service-teacher工程为例
@SpringBootApplication
@EnableDiscoveryClient//nacos第三步启动类加注解
@EnableFeignClients//服务调用端启动类需要加
@MapperScan(basePackages = {"com.ws.mapper"})
public class TeacherApplication {
    public static void main(String[] args) {
        SpringApplication.run(TeacherApplication.class,args);
    }
}
3.在调用端创建interface接口 ,使用注解调用指定服务名称,定义调用方法的路径
以service-teacher为例 调用service-student中的方法
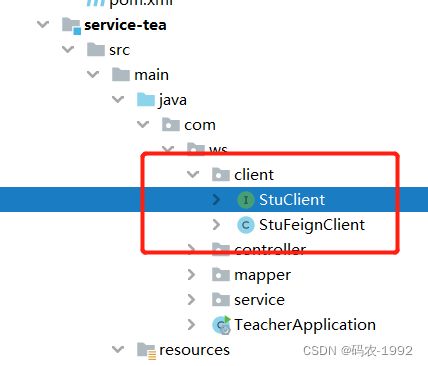
a.首先创建 StuClient 接口(查询老师信息的时候,同事查询出学生信息)
@Component
@FeignClient(name = "service-student",fallback = StuFeignClient.class)
public interface StuClient {

    //定义调用方法路径
    @GetMapping("student/queryAll")
    public List queryAllSchool();
}
b.实现查询老师信息的时候,同事查询出学生信息,如果调用service-student服务失败返回null
@Component
public class StuFeignClient implements StuClient {
    @Override
    public List queryAllSchool() {
        System.out.println("查询失败了 出错了!!!");
        return null;
    }
}
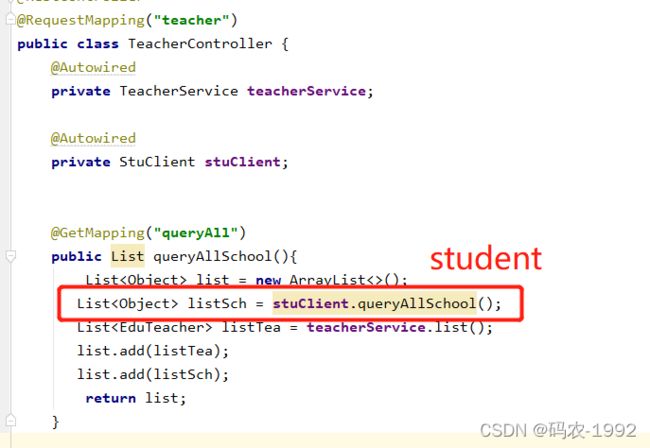
c.可以在service-teacher服务中调用service-student接口
附:
service下的pom文件
        com.ws
        springcloudnacos
        2.2.10.RELEASE

    4.0.0


    org.example
    service
    pom
    1.0-SNAPSHOT
    管理所有服务

        service-stu
        service-tea
        service-school


            com.alibaba.cloud
            spring-cloud-starter-alibaba-nacos-config
            2.2.5.RELEASE


            com.alibaba.cloud
            spring-cloud-starter-alibaba-nacos-discovery
            2.2.5.RELEASE


            org.springframework.cloud
            spring-cloud-starter-openfeign
            2.2.5.RELEASE


            com.alibaba.cloud
            spring-cloud-starter-alibaba-nacos-config
            2.2.5.RELEASE


            com.baomidou
            mybatis-plus-boot-starter
            3.3.2


            mysql
            mysql-connector-java
            8.0.27


                org.springframework.boot
                spring-boot-maven-plugin


                            org.projectlombok
                            lombok


