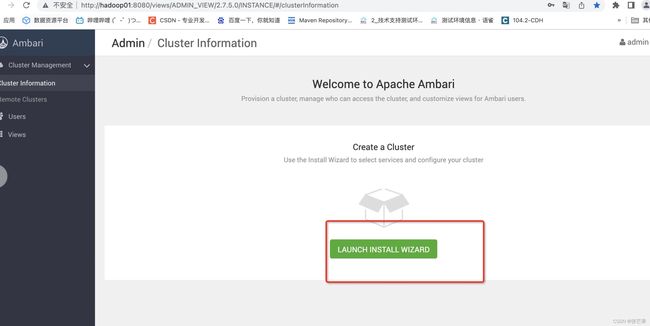
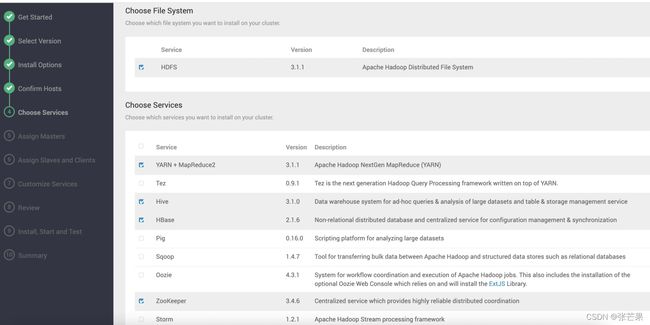
超全步骤——Ambari+HDP部署
Ambari 相关文档地址
Ambari 官方资料入口:
https://www.cloudera.com/products/open-source/apache-hadoop/apache-ambari.html
Ambari 相关 rpm 包:
https://docs.cloudera.com/HDPDocuments/Ambari-2.7.3.0/bk_ambari-installation/content/ambari_repositories.html
HDP 相关 rpm 包:
https://docs.cloudera.com/HDPDocuments/Ambari-2.7.3.0/bk_ambari-installation/content/hdp_31_repositories.html
Ambari 相关软件版本适配表:
https://supportmatrix.hortonworks.com/
本文采用的是3台节点的安装
硬件环境
操作系统: Centos-7
| 节点类型 | 主机名 |
|---|---|
| 主节点 | Hadoop01 |
| 从节点 | Hadoop02 |
| 从节点 | Hadoop03 |
软件环境
| 软件环境 | 版本号 |
|---|---|
| JdK | jdk1.8.0_321 |
| Mysql | 5.7.29 |
| Ambari | 2.7.5.0 |
| HDP | 3.1.5.0 |
修改主机名(三台主机分别修改主机名)
# 使用hostnamectl命令修改主机名,执行该命令后立即生效,但必须需要重启Xshell连接
# 以其中一台为例,代码如下
hostnamectl set-hostname hadoop01
# 其余的机器也使用hostnamectl命令修改主机名
...(略)
修改hosts文件
# 添加机器ip与主机名映射
vim /etc/hosts
关闭防火墙和selinux
# 查看防火墙状态
systemctl status firewalld
# 查看开机是否启动防火墙服务
systemctl is-enabled firewalld
# 关闭防火墙
systemctl stop firewalld
systemctl disable firewalld
# 再次查看防火墙状态和开机防火墙是否启动
systemctl status firewalld
systemctl is-enabled firewalld
禁用selinux
# 永久性关闭selinux(重启服务器生效)
sed -i 's/SELINUX=enforcing/SELINUX =disabled/' /etc/selinux/config
# 临时关闭selinux(立即生效,重启服务器失效)
setenforce 0
# 查看selinux状态
getenforce
# disabled为永久关闭,permissive为临时关闭,enforcing为开启
免密登陆
各个主机均执行以下操作:
## 生成密钥对
ssh-keygen -t rsa   ## 一路回车即可
## 进入.ssh目录,如果目录不存在则创建
cd ~/.ssh
## 将公钥导入至authorized_keys
cat id_rsa.pub >> authorized_keys
## 修改文件权限
chmod 700 ~/.ssh
chmod 600 authorized_keys
扔钥匙多主机免密这块就略过了
同时省略了 安装JDK和安装Mysql的步骤
登入Mysql
mysql -u root -p
新增ambari用户并增加权限
mysql -uroot -proot123
CREATE USER 'ambari'@'%' IDENTIFIED BY 'ambari';
GRANT ALL PRIVILEGES ON *.* TO 'ambari'@'%';
CREATE USER 'ambari'@'localhost' IDENTIFIED BY 'ambari';
GRANT ALL PRIVILEGES ON *.* TO 'ambari'@'localhost';
CREATE USER 'ambari'@'hadoop01' IDENTIFIED BY 'ambari';
GRANT ALL PRIVILEGES ON *.* TO 'ambari’@'hadoop01';  //本地主机名
FLUSH PRIVILEGES;
使用ambari用户登陆并创建数据库
mysql -uambari -pambari
CREATE DATABASE ambari;
exit;
安装httpd和wget服务
# 安装httpd
yum -y install httpd.x86_64
systemctl enable httpd.service
systemctl start httpd.service
# 安装wget
yum -y install wget
ambari和hdp包自行获取哈
然后把包放在/var/www/html/
新建repo文件
新建ambari.repo文件
[ambari]
name=ambari
baseurl=http://hadoop01/ambari/centos7/2.7.5.0-72/
enabled=1
gpgcheck=0
放入/etc/yum.repos.d/目录下。
在主节点安装ambari-server
安装
yum -y install ambari-server
将mysql-connector-java.jar包拷贝到/usr/share/java目录下
修改配置文件
echo server.jdbc.driver.path=/usr/share/java/mysql-connector-java.jar >> /etc/ambari-server/conf/ambari.properties
安装ambari-server
ambari-server setup
如下是打印输出:
[root@hadoop01 yum.repos.d]# ambari-server setup
Using python  /usr/bin/python
Setup ambari-server
Checking SELinux...
SELinux status is 'disabled'
Customize user account for ambari-server daemon [y/n] (n)? y
Enter user account for ambari-server daemon (root):
Adjusting ambari-server permissions and ownership...
Checking firewall status...
Checking JDK...
[1] Oracle JDK 1.8 + Java Cryptography Extension (JCE) Policy Files 8
[2] Custom JDK
==============================================================================
Enter choice (1): 2
WARNING: JDK must be installed on all hosts and JAVA_HOME must be valid on all hosts.
WARNING: JCE Policy files are required for configuring Kerberos security. If you plan to use Kerberos,please make sure JCE Unlimited Strength Jurisdiction Policy Files are valid on all hosts.
Path to JAVA_HOME: /opt/software/jdk1.8.0_321
Validating JDK on Ambari Server...done.
Check JDK version for Ambari Server...
JDK version found: 8
Minimum JDK version is 8 for Ambari. Skipping to setup different JDK for Ambari Server.
Checking GPL software agreement...
GPL License for LZO: https://www.gnu.org/licenses/old-licenses/gpl-2.0.en.html
Enable Ambari Server to download and install GPL Licensed LZO packages [y/n] (n)? y
Completing setup...
Configuring database...
Enter advanced database configuration [y/n] (n)? y
Configuring database...
==============================================================================
Choose one of the following options:
[1] - PostgreSQL (Embedded)
[2] - Oracle
[3] - MySQL / MariaDB
[4] - PostgreSQL
[5] - Microsoft SQL Server (Tech Preview)
[6] - SQL Anywhere
[7] - BDB
==============================================================================
Enter choice (1): 3
Hostname (localhost): hadoop03
Port (3306): 3306
Database name (ambari):
Username (ambari):
Enter Database Password (bigdata):
Re-enter password:
Configuring ambari database...
Configuring remote database connection properties...
WARNING: Before starting Ambari Server, you must run the following DDL directly from the database shell to create the schema: /var/lib/ambari-server/resources/Ambari-DDL-MySQL-CREATE.sql
Proceed with configuring remote database connection properties [y/n] (y)? y
Extracting system views...
ambari-admin-2.7.5.0.72.jar
....
Ambari repo file doesn't contain latest json url, skipping repoinfos modification
Adjusting ambari-server permissions and ownership...
Ambari Server 'setup' completed successfully.
[root@hadoop01 yum.repos.d]#
初始化mysql数据库
mysql -uambari -pambari
use ambari;
source /var/lib/ambari-server/resources/Ambari-DDL-MySQL-CREATE.sql
这里注意一下
卸载SmartSense包
HDP这边有个组件 是SmartSense 这个是一个收费的东西 HDP为了赚money的一个组件 我们要先给他干掉
首先把这些包查出来

删掉
rm -rf /var/lib/ambari-server/resources/stacks/HDP/2.1/services/SMARTSENSE
rm -rf /var/lib/ambari-server/resources/stacks/HDP/3.0/services/SMARTSENSE
rm -rf /var/lib/ambari-agent/cache/stacks/HDP/2.1/services/SMARTSENSE
rm -rf /var/lib/ambari-agent/cache/stacks/HDP/3.0/services/SMARTSENSE
ambari-server start
如果启动过程失败,可以去/var/log/ambari-server/ambari-server.log查看报错信息,一般是由于数据库配置不好导致ambari启动失败。
登陆浏览器访问: http://hadoop01:8080/,利用界面部署集群。
默认登陆账号/密码为:admin/admin。
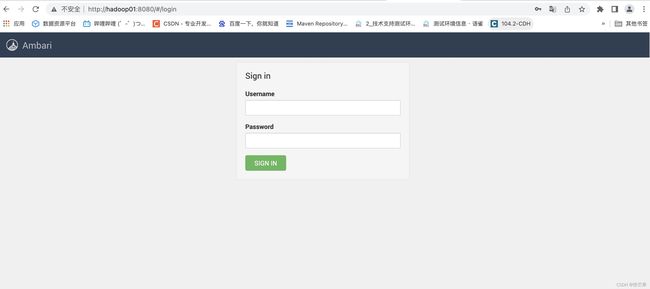
开始部署
Get started
Select Version
然后就是HDP的版本信息了
可以选择环境上的 也可以使用 默认的大版本 基本上一样

往下面划 选择使用本地的源
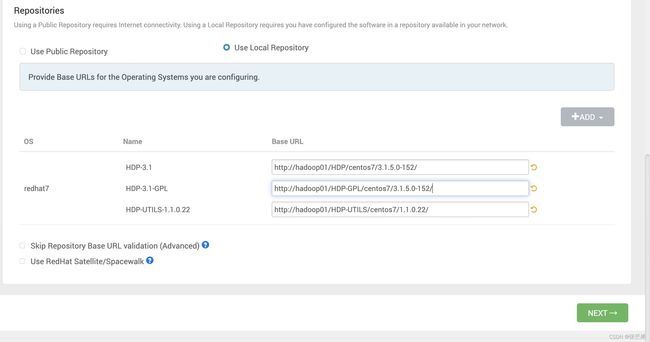
这里选择本地的源文件 (不要使用公共的存储库 会存在一些问题)
在安装的时候 他会把HDP、HDP-GPL、HDP-UTILS 写入mysql中的repo_definition.
我们可以看下:select * from repo_definition;
Install Options
下一步
1:输入主机名 cat /etc/hosts
2:输入私钥 cat ~/.ssh/id_rsa
也就是框的这一段
3:用户名以及端口 因为本文使用root 的 所以上面的私钥也是root 的。
Confirm Hosts
下一步

这里是在检测agent环境 很多异常错误 会在这里产生 (其实在这一步 你的ambari-agent就给你安装了)
大家也可以去看下

日志中就会有hostlist 也就是之前那里填写的那些

然后就会检查主机环境

我这边没有遇到什么错误 检查通过了 有问题的可以留言 我们可以一起看看的

Choose Services
Assign Masters
Assign Slaves and Clients
Customize Services
下一步 这里就是组件的一些相关信息了:(配置相关信息)
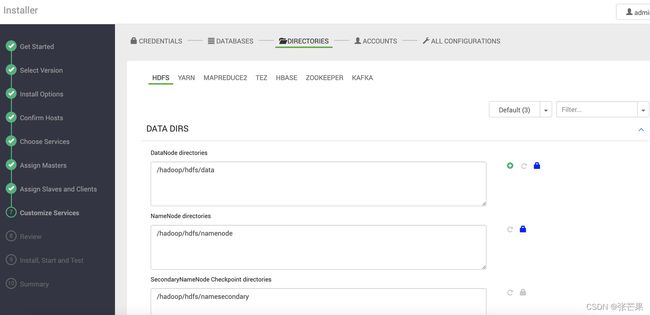
下一步 接下来就是更加详细的一些信息了

Review
Install,Start and Test
安装完成

点击完成
就可以看到界面啦(没有监控信息是因为没有安装Ambari Metrics)

安装了hdfs和yarn、Ambari Metrics。
因为安装了Ambari Metrics 所以可以看到监控了


