【CentOS7搭建lnmp环境】
文章目录
- Linux搭建lnmp环境
-
-
- 一、环境准备
-
- (1)、安装软件
- (2)、关闭防火墙SELINUX
- 二、配置yum源
- 三、安装NGINX
- 四、安装MySQL
-
- (1)、安装软件包
- (2)、启动MySQL并初始化
- (3)、设置MySQL字符串列表
- 五、PHP
-
- (1)、安装PHP
- (2)、配置NGINX
- (3)、配置PHP
-
Linux搭建lnmp环境
一、环境准备
安装软件包
关闭防火墙、SELINUX、iptables
(1)、安装软件
$ yum install wget vim net-tools bash* lrzsz tree nmapnc lsof telnet -y
$ source /usr/share/bash-completion/bash_completion
$ echo source /usr/share/bash-completion/bash_completion >> ~/.bashrc
$ yum -y install iptables-services && systemctl start iptables && systemctl enable iptables
(2)、关闭防火墙SELINUX
$ sed -i 's/SELINUX=enforcing/SELINUX=disabled/g' /etc/selinux/config
$ $ iptables -F && iptables -X && iptables -Z && service iptables save
$ setenforce 0
$ systemctl stop firewalld.service
$ systemctl disable firewalld.service

# 验证防火墙
[root@kvm01 ~]# firewall-cmd --state
not running

# 验证SELINUX
[root@kvm01 ~]# getenforce
Permissive

# 查看iptables
[root@kvm01 ~]# systemctl status iptables.service
● iptables.service - IPv4 firewall with iptables
   Loaded: loaded (/usr/lib/systemd/system/iptables.service; enabled; vendor preset: disabled)
   Active: inactive (dead) since 四 2022-12-22 21:41:40 CST; 16h ago
 Main PID: 8443 (code=exited, status=0/SUCCESS)

12月 22 16:42:53 kvm01 systemd[1]: Starting IPv4 firewall with iptables...
12月 22 16:42:53 kvm01 iptables.init[8443]: iptables: Applying firewall rules: [  确定  ]
12月 22 16:42:53 kvm01 systemd[1]: Started IPv4 firewall with iptables.
12月 22 21:41:40 kvm01 systemd[1]: Stopping IPv4 firewall with iptables...
12月 22 21:41:40 kvm01 systemd[1]: Stopped IPv4 firewall with iptables.
二、配置yum源
配置NGINX、MySQL、PHP源
# 添加Redhat扩展软件源
yum install epel* -y

# 下载NGINX源安装脚本
wget http://www.atomicorp.com/installers/atomic
sh ./atomic

# MySQL源
rpm -Uvh  http://dev.mysql.com/get/mysql57-community-release-el7-9.noarch.rpm

# PHP源
$ yum install -y \
https://repo.ius.io/ius-release-el7.rpm \
https://dl.fedoraproject.org/pub/epel/epel-release-latest-7.noarch.rpm

$ rpm -Uvh https://dl.fedoraproject.org/pub/epel/epel-release-latest-7.noarch.rpm
$ rpm -Uvh https://mirror.webtatic.com/yum/el7/webtatic-release.rpm

# 清除旧yum缓存并重新加载
yum clean all
yum makecache fast
yum repolist
卸载之前安装的软件包(如果系统为最小化安装可忽略)
yum remove httpd* php* -y
三、安装NGINX
# 查看当前仓库是否有NGINX的软件包
yum list | grep nginx

# 安装NGINX
yum install nginx -y

# 启动NGINX并设置开机自启动
systemctl start nginx && systemctl enable nginx

# 验证NGINX是否启动成功
curl 192.168.39.2:80
<!DOCTYPE html>
<html>
<head>
<title>Welcome to nginx!</title>
<style>
html { color-scheme: light dark; }
body { width: 35em; margin: 0 auto;
font-family: Tahoma, Verdana, Arial, sans-serif; }
</style>
</head>
<body>
<h1>Welcome to nginx!</h1>
<p>If you see this page, the nginx web server is successfully installed and
working. Further configuration is required.</p>

<p>For online documentation and support please refer to
<a href="http://nginx.org/">nginx.org</a>.<br/>
Commercial support is available at
<a href="http://nginx.com/">nginx.com</a>.</p>

<p><em>Thank you for using nginx.</em></p>
</body>
</html>
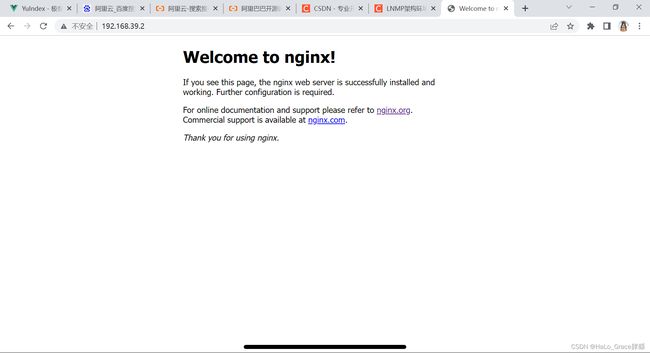
- 浏览器查看:
四、安装MySQL
(1)、安装软件包
$ yum -y install mysql-community-server --nogpgcheck

# 验证安装是否成功
[root@kvm01 ~]# mysql -V
mysql  Ver 14.14 Distrib 5.7.40, for Linux (x86_64) using  EditLine wrapper
(2)、启动MySQL并初始化
# 启动mysql
systemctl start mysqld && systemctl enable mysqld && systemctl daemon-reload

# 查看当前密码
$ grep 'temporary password' /var/log/mysqld.log
2022-12-22T11:27:06.475037Z 1 [Note] A temporary password is generated for root@localhost: f-iSa-_E&9ed

$ mysql_secure_installation
Enter password for user root:	# 输入:f-iSa-_E&9ed
New password: 		# 输入两次新密码

Re-enter new password: 	# 输入两次新密码

Change the password for root ? ((Press y|Y for Yes, any other key for No) : yes	# 是否修改当前的密码

Do you wish to continue with the password provided?(Press y|Y for Yes, any other key for No) : no # 是否使用提供的密码

Remove anonymous users? (Press y|Y for Yes, any other key for No) : yes	# 是否移除匿名用户

Disallow root login remotely? (Press y|Y for Yes, any other key for No) : no	# 不允许root用户远程登录

Remove test database and access to it? (Press y|Y for Yes, any other key for No) : yes	# 删除测试数据库

Reload privilege tables now? (Press y|Y for Yes, any other key for No) : yes	# 是否立刻刷新权限列表
(3)、设置MySQL字符串列表
$ vim /etc/my.cnf
[mysqld]
character-set-server=utf8

[client]
default-character-set=utf8

# 重启MySQL
systemctl start mysqld && systemctl enable mysqld && systemctl daemon-reload

# 开启MySQL的root用户远程连接
$ mysql -uroot -p
$ GRANT ALL PRIVILEGES ON *.* TO 'root'@'%' IDENTIFIED BY 'Admin@123' WITH GRANT OPTION;
$ FLUSH PRIVILEGES;
五、PHP
(1)、安装PHP
$ yum -y install php70w-devel php70w.x86_64 php70w-cli.x86_64 php70w-common.x86_64 php70w-gd.x86_64 php70w-ldap.x86_64 php70w-mbstring.x86_64 php70w-mcrypt.x86_64  php70w-pdo.x86_64   php70w-mysqlnd  php70w-fpm php70w-opcache php70w-pecl-redis php70w-pecl-mongodb

# 验证PHP环境是否安装成功
[root@kvm01 ~]# php -v
PHP 7.0.33 (cli) (built: Dec  6 2018 22:30:44) ( NTS )
Copyright (c) 1997-2017 The PHP Group
Zend Engine v3.0.0, Copyright (c) 1998-2017 Zend Technologies
    with Zend OPcache v7.0.33, Copyright (c) 1999-2017, by Zend Technologies
(2)、配置NGINX
# 备份NGINX配置文件
$ cp -rp /etc/nginx/nginx.conf{,.bak}

# 编辑NGINX文件
$ vim /etc/nginx/conf.d/default.conf

  8     location / {
  9         root   /usr/share/nginx/html;
 10         index index.php  index.html index.htm;	# 添加index.php
 11     }

# 去掉注释: 进入视图模式安装ctrl v,向下选中#,按d删除注释符
 30     location ~ \.php$ {
 31         root           html;
 32         fastcgi_pass   127.0.0.1:9000;
 33         fastcgi_index  index.php;
 34         fastcgi_param  SCRIPT_FILENAME  /usr/share/nginx/html$fastcgi_script_name;	# 修改目录
 35         include        fastcgi_params;
 36     }

 # 重启NGINX
 systemctl restart nginx.service
(3)、配置PHP
$ cp -rp /etc/php.ini{,.bak}
$ vim /etc/php.ini

# 文件末尾添加
cgi.fix_pathinfo = 1

# 重启生效
systemctl restart nginx.service
systemctl restart php-fpm.service

# 在NGINX网页目录中添加php文件测试
$ cat <<EOF >/usr/share/nginx/html/info.php

EOF
- 浏览器访问验证:

