Linux环境安装配置Elasticsearch7.17
1 环境
服务器环境为CentOS7.6,Elasticsearch版本为7.17.4
2 安装Es
2.1 下载
选择要安装的版本:下载地址
wget https://artifacts.elastic.co/downloads/elasticsearch/elasticsearch-7.17.4-linux-x86_64.tar.gz
解压到指定目录
tar -zxvf elasticsearch-7.17.4-linux-x86_64.tar.gz -C /opt/module
重命名为es
mv elasticsearch-7.17.4/ es
2.2 创建ES用户
Elasticsearch不允许用root身份启动,所以要新建一个用户并授予权限
useradd es
passwd es
chown -R es:es /opt/module/es
2.3 修改ES配置文件
修改ES的核心配置文件
vim /opt/module/es/config/elasticsearch.yml
在文件末尾添加以下几行
cluster.name: elasticsearch
node.name: node-1
network.host: 0.0.0.0
http.port: 9200
cluster.initial_master_nodes: ["node-1"]
修改内存参数配置
vim /opt/module/es/config/jvm.options
我的服务器是2核4G,这里更改为1g
温馨提示:修改此参数时请参考服务器的内存大小,否则一启动ES整个服务器直接卡死

2.4 修改系统配置文件
修改/etc/security/limits.conf
在末尾加入以下内容
# 每个进程可以打开的文件数限制
es soft nofile 65536
es hard nofile 65536
修改/etc/security/limits.d/20-nproc.conf
在末尾加入以下内容
# 每个进程可以打开的文件数限制
es soft nofile 65536
es hard nofile 65536
# 操作系统级别对每个用户创建的进程数的限制
* hard nproc 4096
修改/etc/sysctl.conf
在末尾加入以下内容
# 一个进程可以拥有的虚拟内存区域的数量
vm.max_map_count=655360
重新加载
sysctl -p
2.5 启动ES
启动Elasticsearch之前一定要切换到es用户,执行以下命令
# 切换用户
su es
# 切换到bin目录
cd /opt/module/es/bin
# 启动命令,加上-d为后台启动
./elasticsearch
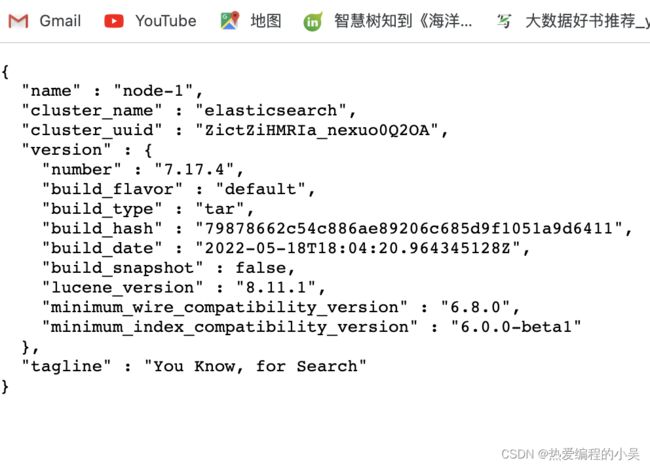
启动成功后通过浏览器访问http://服务器IP地址:9200查看,出现以下内容为启动成功

3 配置Elasticsearch的用户名密码
3.1 编辑配置文件
vim /opt/module/es/config/elasticsearch.yml
末尾处添加以下内容
http.cors.enabled: true
http.cors.allow-origin: "*"
http.cors.allow-headers: Authorization
xpack.security.enabled: true
xpack.security.transport.ssl.enabled: true
3.2 重启ES
前台运行通过Ctrl + C 终止程序
后台运行则查看进程id并杀死进程
# 查看进程
ps -ef|grep elastic
# 杀死进程
kill -9 id
启动命令见上文
3.3 设置用户名密码
/opt/module/es/bin/elasticsearch-setup-passwords interactive
根据提示输入密码即可
3.4 验证密码是否生效
默认用户名为elastic
密码为刚才设置的密码
4 注意事项
设置密码之前Elasticsearch需要启动一次,否则报错
ERROR: Elasticsearch keystore file is missing
设置密码时Elasticsearch必须处于启动状态,否则报错
ERROR: Failed to connect to elasticsearch at http://127.0.0.1:9200/_security/_authenticate?pretty
如果需要在SpringBoot项目中使用Elasticsearch且导入了以下依赖:
<dependency>
  <groupId>org.springframework.bootgroupId>
  <artifactId>spring-boot-starter-data-elasticsearchartifactId>
dependency>
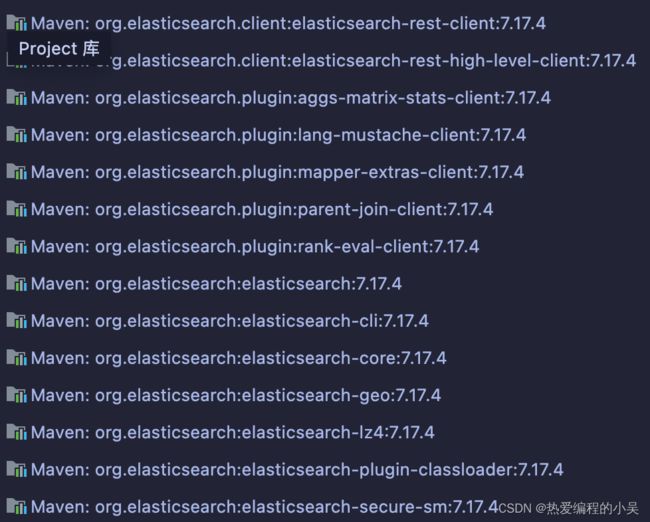
请确保项目中使用的Elasticsearch版本与安装的ES版本一致,可以在外部库中查看当前版本

如果该版本与安装的ES版本不同,可以在pom文件中指定ES版本,总之确保项目使用的ES版本与安装的一致
