SpringBoot+vue2 实战训练
实际项目搭建内容
VUE2前端框架简单搭建
vue和vue-cli安装及脚手架搭建
vue下载和问题解决
创建vue项目
安装好vue和vue-cli后
可以通过以下命令全局设置淘宝镜像,进行加速
npm config set registry httpe://registry.nom.taobao.org
在想要创建的文件夹目录输入cmd
1.执行以下命令创建vue的工程
vue create projectname
可能出现错误:
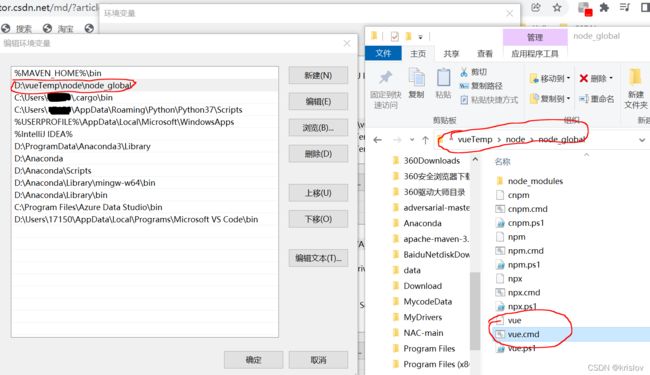
如果出现vue不是有效命令之类的报错,去系统高级设置检查是否配置环境变量
运行出现以下界面,并选择 Manually select features
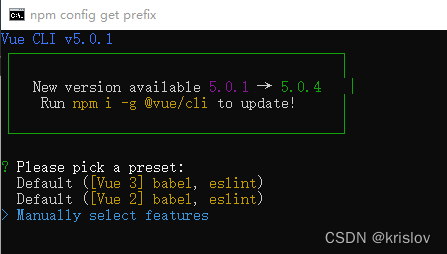
设置参数,然后回车创建项目

创建成功,运行项目
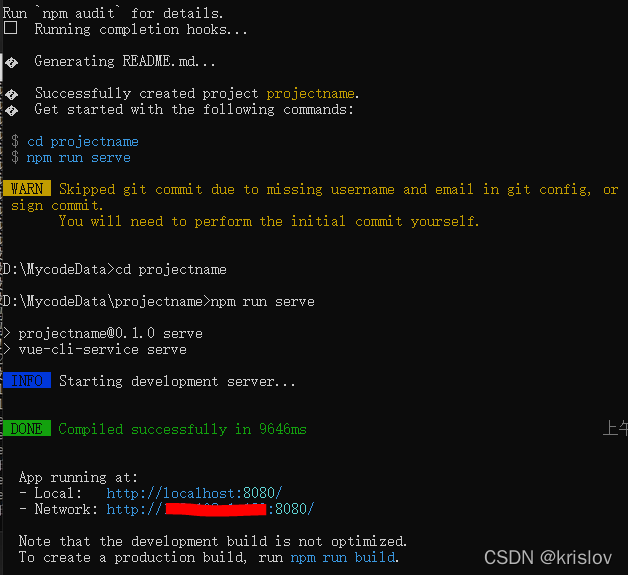
浏览器输入
http://localhost:8080/ 出现
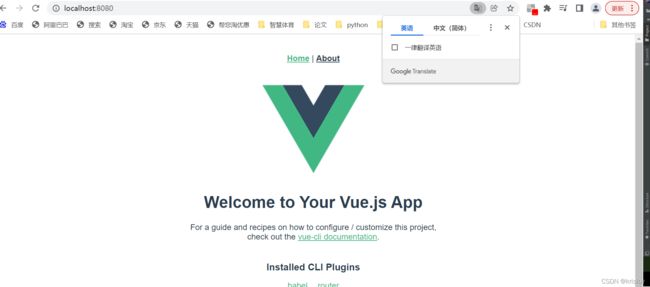
至此项目成功创建运行
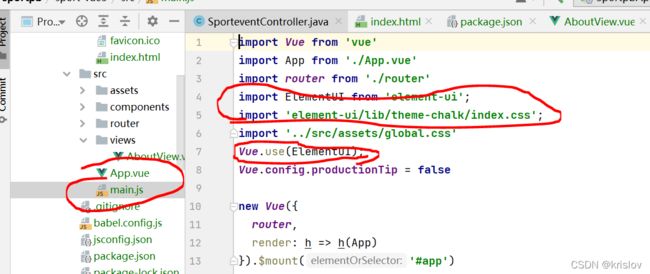
vue2集成ElementUI
1.ElementUI 安装
组件使用参考官方网站有详细代码,不会操作看官网
element-ui官网
我这里用的是Idea,所以在IDEA 的Terminal输入指令
npm i element-ui -s
成功安装,显示

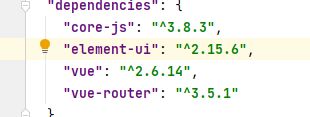
且在项目的 pakage.json 文件中可以看到element-ui的依赖
可能出现错误:
由于以上语句是基于vue2的element,所以如果前面配置选择vue3 这里可能因为版本不对应报错。
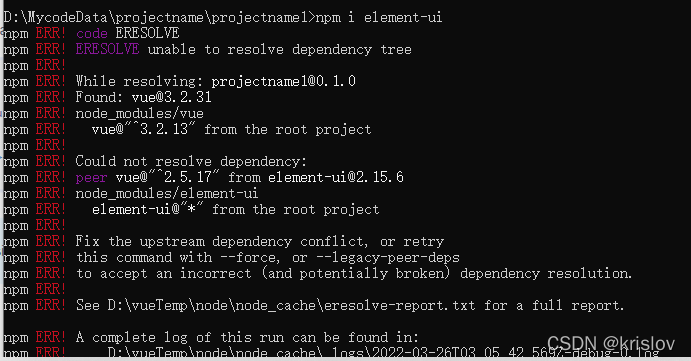
vue3 对应于element-plus,官网安装语句如下
# NPM
$ npm install element-plus --save
# Yarn
$ yarn add element-plus
# pnpm
$ pnpm install element-plus
后期可能会考虑用vue3写出vue3的相关步骤。
2.Element-vue前端简单实现
Vue2-Vue项目的目录结构和.vue文件的构成
界面效果
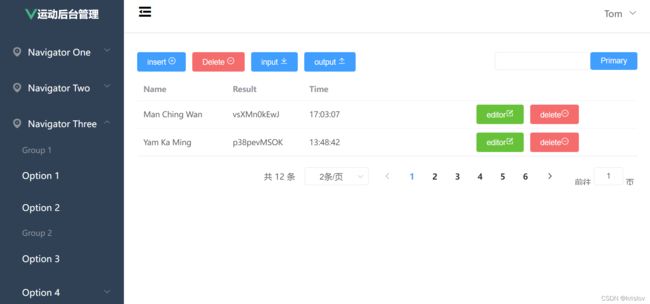
Vue3 前端
以下用前端界面和功能改用vue3 和 ant-design-vue 实现,结合typescript
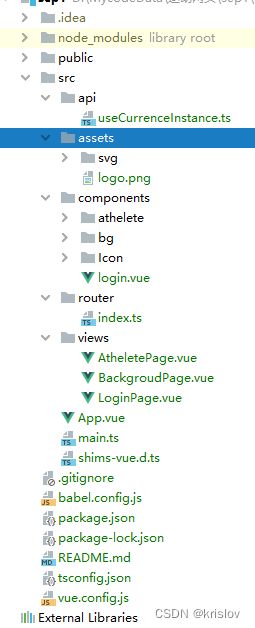
全局性或功能性文件
src/main.ts
import { createApp } from 'vue'
import App from './App.vue'
import router from './router'
import Antd from 'ant-design-vue'
import 'ant-design-vue/dist/antd.css'
import {message} from "ant-design-vue";
import axios from "axios";

const app=createApp(App).use(Antd).use(router)//全局注册 Antd Router 只有这样 ant组件样式才会生效 ,router路由跳转才会生效

//挂载全局对象
// 在setup里通过 getCurrentInstance() proxy 使用代替之前的this的功能
app.config.globalProperties.$Ajax=axios;
app.config.globalProperties.$message=message;

app.mount('#app')
//.use(Antd) 注册全部组件
src/api/userCurrenceInstance.ts
/**
用来解决 vue 没有this 需要通过 getCurrentInstance()获取全局proxy 来实现 全局变量的使用。
在后面 login.vue 和 PerDisTable.vue 文件都会用到
如果是用js写的话,可以不用这个文档,
但是如果用ts写,
const {proxy} =getCurrentInstance()
语句会报 没有proxy的错
*/

import { ComponentInternalInstance, getCurrentInstance } from 'vue'
export default function useCurrentInstance() {
    const { appContext } = getCurrentInstance() as ComponentInternalInstance
    const proxy = appContext.config.globalProperties
    return {
        proxy
    }
}
登录界面 LoginPage
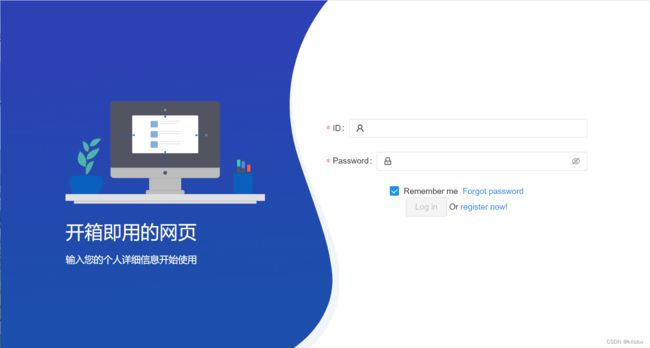
这个页面 由LoginPage 和组件login组成
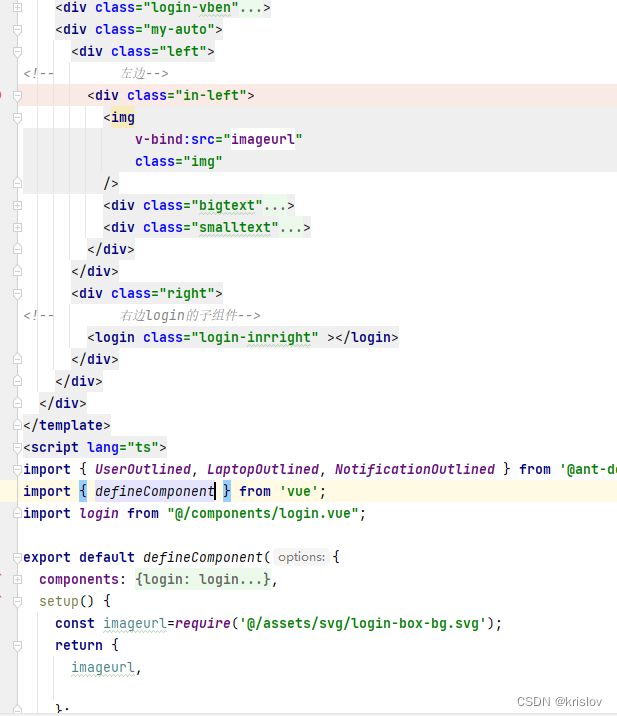
LoginPage的布局的css 参考vben的登录界面。主要是显示这个界面样式,主要登录跳转功能在login组件上。
主要界面布局代码如下:
src/views/LoginPage.vue
登录跳转功能实现,主要代码来源于以下链接的登录框
登录框
src/components/login.vue
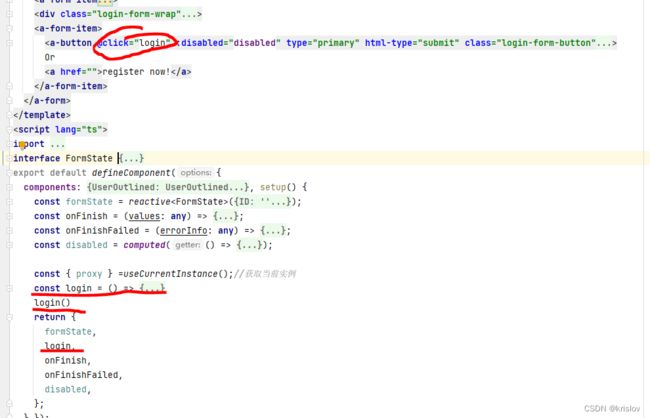
//此处只放script的代码,template中 只需要在login button 加一个点击事件的触发即刻
<script lang="ts">
import { defineComponent, reactive, computed} from 'vue';
import { UserOutlined, LockOutlined } from '@ant-design/icons-vue';
import router from '../router';
import {message} from "ant-design-vue";
import useCurrentInstance from '../api/useCurrenceInstance';
interface FormState {
  ID: string;
  password: string;
  remember: boolean;
}
export default defineComponent({
  components: {
    UserOutlined,
    LockOutlined,
  }, setup() {
    const formState = reactive<FormState>({
      ID: '',
      password: '',
      remember: true,
    });
    const onFinish = (values: any) => {
      console.log('Success:', values);
    };
    const onFinishFailed = (errorInfo: any) => {
      console.log('Failed:', errorInfo);
    };
    const disabled = computed(() => {
      return !(formState.ID && formState.password);
    });
/** 我在ant-design-vue 代码上添加的 start*/
    const { proxy } =useCurrentInstance();
    const login = () => {
     //post 获取服务器数据
     //这里的 proxy.$Ajax 参main.ts 文件
     proxy.$Ajax.post("http://localhost:****/athelete/login",{
          "atheleteid":formState.ID,
          "password":formState.password,
        })
         .then(res=>{
          if(res.data){
          //路由跳转
            router.push({name:"AtheletePage",params:{atheleteid:formState.ID}})
          }
        }
      ).catch(res=>{
           message.error(res.toString()+"用户名或密码错误")
         }

     )

    }


    login()
/** 我在ant-design-vue 代码上添加的 end*/
    return {
      formState,
      login,
      onFinish,
      onFinishFailed,
      disabled,
    };
  },});
  </script>
后台界面 BackgroudPage
主要由 BackGroudPage 和 PerDisTable、SportItemDisTable
由于 PerDisTable、SportItemDisTable 都是表格信息显示,这里只说PerDisTable 页面
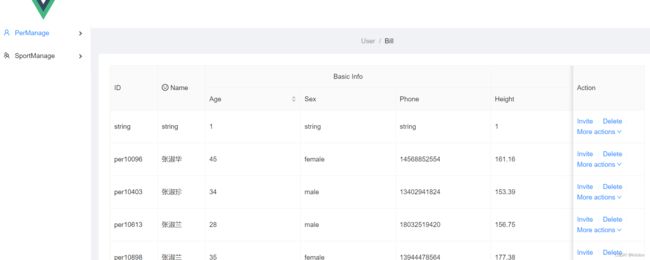
BackGroudPage 主要用于实现后台不同功能组件的切换
后台界面 侧边布局栏
src/views/BackGroudPage.vue
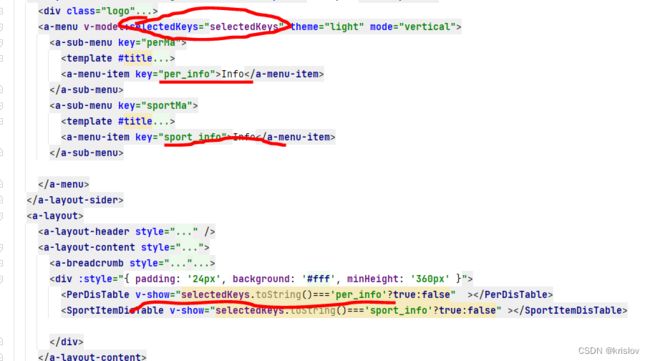
<template>
  <a-layout style="min-height: 100vh">
    <a-layout-sider theme="light" v-model:collapsed="collapsed" collapsible>
      <div class="logo">
        <a-image :width="50"
      src="https://aliyuncdn.antdv.com/vue.png">a-image>div>

      <a-menu v-model:selectedKeys="selectedKeys" theme="light" mode="vertical">
        <a-sub-menu key="perMa">
          <template #title>
            <span>
              <user-outlined />
              <span>PerManagespan>
            span>
          template>
          <a-menu-item key="per_info">Infoa-menu-item>
        a-sub-menu>
        <a-sub-menu key="sportMa">
          <template #title>
            <span>
              <team-outlined />
              <span>SportManagespan>
            span>
          template>
          <a-menu-item key="sport_info">Infoa-menu-item>
        a-sub-menu>

      a-menu>
    a-layout-sider>
    <a-layout>
      <a-layout-header style="background: #fff; padding: 0" />
      <a-layout-content style="margin: 0 16px">
        <a-breadcrumb style=" margin: 16px 0" >
          <a-breadcrumb-item>Usera-breadcrumb-item>
          <a-breadcrumb-item>Billa-breadcrumb-item>
        a-breadcrumb>
        <div :style="{ padding: '24px', background: '#fff', minHeight: '360px' }">

          <PerDisTable v-show="selectedKeys.toString()==='per_info'?true:false"  >PerDisTable>
          <SportItemDisTable v-show="selectedKeys.toString()==='sport_info'?true:false" >SportItemDisTable>

        div>
      a-layout-content>
      <a-layout-footer style="text-align: center">
        Ant Design ©2018 Created by Ant UED
      a-layout-footer>
    a-layout>
  a-layout>
template>
src/component/PerDisTable.vue
table组件
<template>
  <a-table
      :columns="columns"
      :data-source="tableDataRec.data"
      bordered
      size="middle"
      :scroll="{ x: 'calc(700px + 50%)' }"
  >
    <template #headerCell="{ column }">
      <template v-if="column.key === 'name'">
        <span>
          <smile-outlined />
          Name
        span>
      template>
    template>
    <template #bodyCell="{ column, record }">
      <template v-if="column.key === 'tags'">
        <span>
          <a-tag
              v-for="tag in record.tags"
              :key="tag"
              :color="tag === 'loser' ? 'volcano' : tag.length > 5 ? 'geekblue' : 'green'"
          >
            {{ tag.toUpperCase() }}
          a-tag>
        span>
      template>
      <template v-else-if="column.key === 'action'">
        <span>
          <a>Invite a>
          <a-divider type="vertical" />
          <a>Deletea>
          <a-divider type="vertical" />
          <a class="ant-dropdown-link">
            More actions
            <down-outlined />
          a>
        span>
      template>
    template>


  a-table>
template>
<script lang="ts">
import type { TableColumnsType } from 'ant-design-vue';
import {defineComponent, reactive} from 'vue';
import { SmileOutlined, DownOutlined } from '@ant-design/icons-vue';
// import axios from 'axios';
import useCurrentInstance from "../../../api/useCurrenceInstance";
// import useCurrentInstance from '/@/api/useCurrenceInstance';


/** 因为是 ant-design-vue 自动绑定数据,所以定义数据源和数据行的时候要对应好,且要和数据库里的数据对应,后期push数据或者修改的时候才不会出错或者不显示*/

//需要在表格中显示的数据 定义
type TableDataType = {
  key:number;
  id:string;
  name: string;


};
//数据实例化
let tabledata:TableDataType[]=[];
//表格头,列名与列相关信息设置
const columns: TableColumnsType = [
  {
    title: 'ID',
    dataIndex: 'id',
    key: 'id',
    width: 100,
    fixed: 'left',
  },
  {
    title: 'Name',
    dataIndex: 'name',
    key: 'name',
    width: 100,
    fixed: 'left',
    },

];

export default defineComponent({
  name:'PerDisTable',
  components:{
    SmileOutlined,
    DownOutlined
  },
  setup() {

    //push数据
    const Datacon = (datas: any): TableDataType[] => {
      for (let i=0;i<datas.length;i++) {
        // console.log(datas[i])
        tabledata.push({
          key:i+1,
          tag:'i',
          id:datas[i]['atheleteid'],
          name:datas[i]['atheletename'],

        })
      }
      return tabledata
    }
    //新建一个reactive对象,这里好像只有reactive,ref可以渲染到界面上
    let tableDataRec=reactive({
      data:[{
        key:0,
        id:'string',
        name: 'string',


      }]

    })
    const { proxy } =useCurrentInstance();
    /**
     * 用全局axios
     * */
    const insert = () =>{
      proxy.$Ajax.get("http://localhost:5894/athelete/张淑")
          .then((response: { data: any; }) => {
            let datas = response.data
            console.log(datas)
            for (let i = 0; i < datas.length; i++) {
              //直接push好像不好使,要转成对象然后push 才能渲染
              let basicd = Object.assign({}, Datacon(datas)[i])
              tableDataRec.data.push(basicd)
            }
          })

    }
    insert()


    /**原来的axios方法
    const insert = () =>{
      axios.get("http://localhost:5894/athelete/张淑")
          .then((response: { data: any; }) => {
            let datas = response.data
            console.log(datas)
            for (let i = 0; i < datas.length; i++) {
              //直接push好像不好使,要转成对象然后push 才能渲染
              let basicd = Object.assign({}, Datacon(datas)[i])
              tableDataRec.data.push(basicd)
            }
          })

    }
    insert()
    */

    return {
      tableDataRec,
      columns,
    };
  },
});
script>
SpringBoot
后台这里用的是IDEA,idea的下载安装自己上网找教程吧
springboot框架搭建
1.后台项目创建
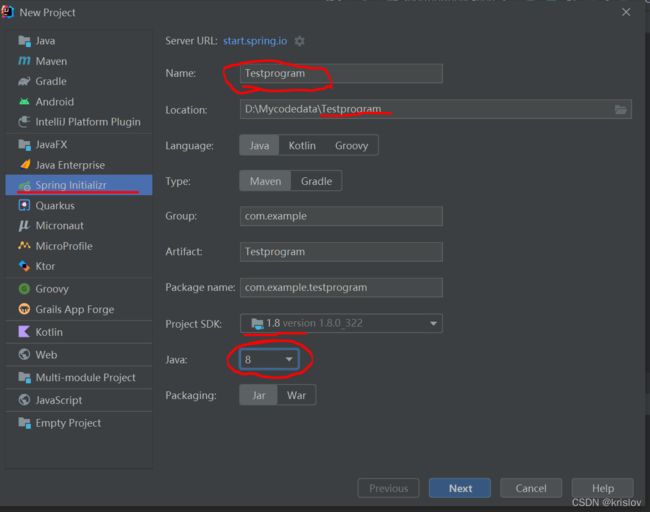
依赖我一般选 ,可以根据自己的配置来,springboot版本推荐小一点比如 2.5.9
Lombok
Spring Web
MySQL Driver
Mybatis Framework
JDBC API
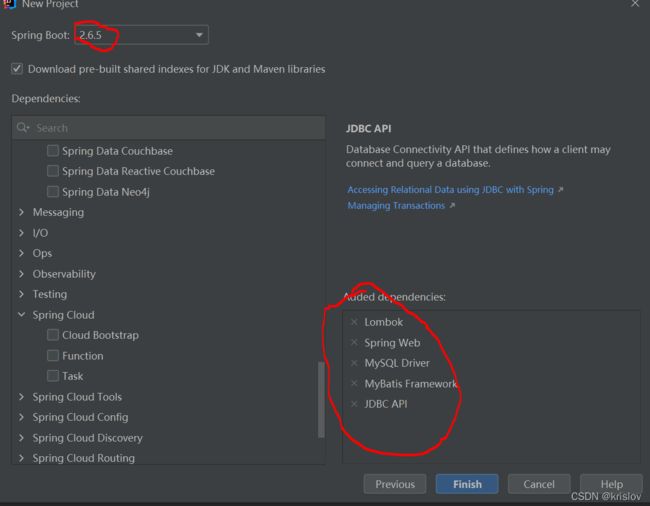
然后finish,一个项目就创建成功了。
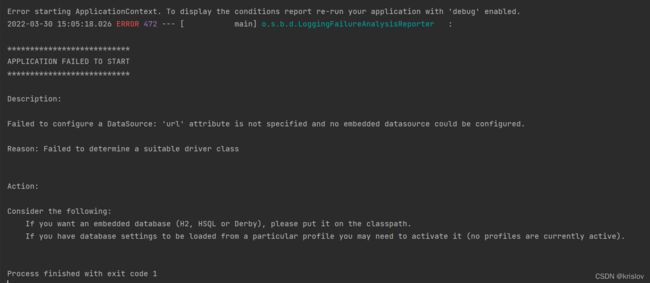
接下来就是一定会报且及其常见的错误
解决1:取消自动配置
在启动文件 就是 src->main->java->com.example.programname 下面的Application加上一句话
@SpringBootApplication(exclude={DataSourceAutoConfiguration.class, HibernateJpaAutoConfiguration.class}
)
解决2:设置数据源
迎来一个更常见的报错
无清晰映射
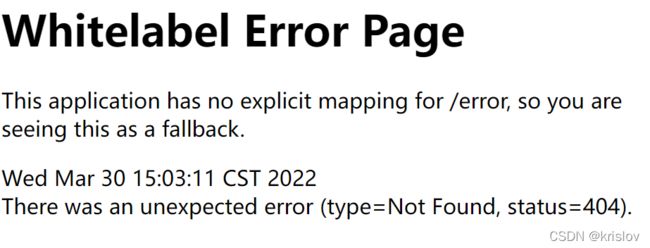
因为刚创建,没有controller,没有映射可访问
新建与Applicaiton文件同级的包controller ,注意目录结构不然还是会报错
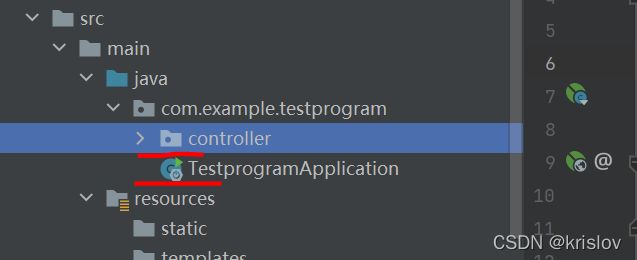
增加一个接口文件
文件里,@RestController 声明是个接口
@RequestMapping 设置映射路径
以上两个注解,和目录结构错了一个以上报错都无法解决。

以上就可以实现一个简单的网页显示
浏览器输入 http://localhost:8080,端口号看idea


MyBatis-Plus集成
MyBatis-Plus官网
不会操作看官网
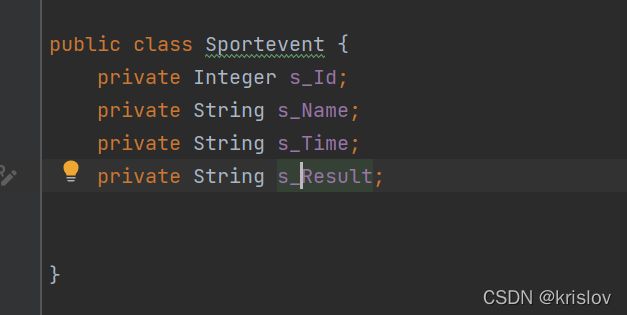
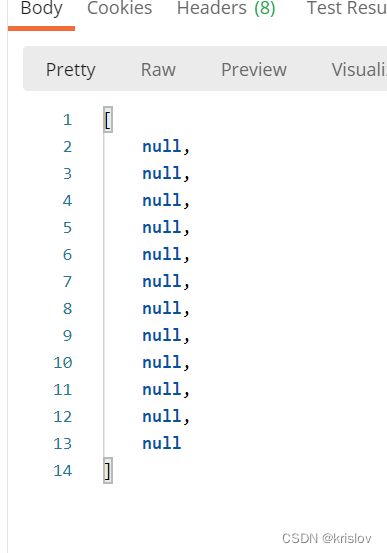
1.Mybatis-Plus可以查到数据但是返回为null
使用驼峰命名
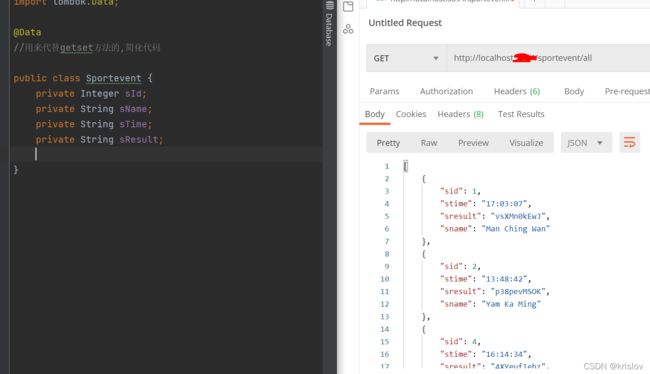
改数据的时候,记得把涉及到get()set()方法一起改了不然会报错。
我的实体类用的是@data注解所有getset是自带的
把实体类数据命名采用驼峰命名
下划线命名: sport_table_id
小驼峰命名:sportTableId
大驼峰命名:SportTableId
关于Mybatis-Plus的使用问题–明明可以查到数据,但是返回空!!
由于我这里实体类和数据库都比较小,所以我直接改我的实体类,如果项目数据量大的话,可以考虑另一种方法,写好Mapper.xml文件,用ResultMap声明好实体类和数据库的映射。不过这两个工作量都挺大的。
2.Mapper中各数据书写与命名
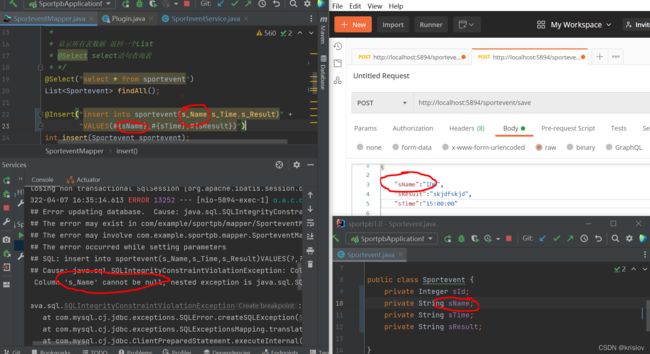
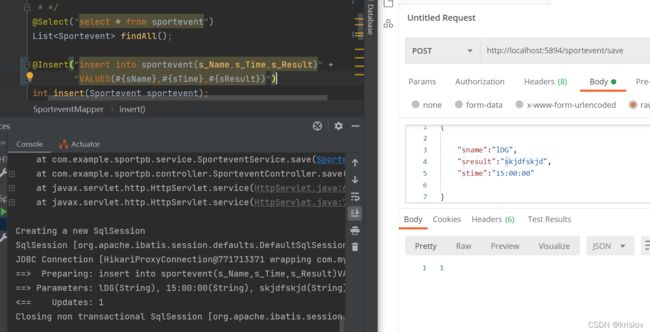
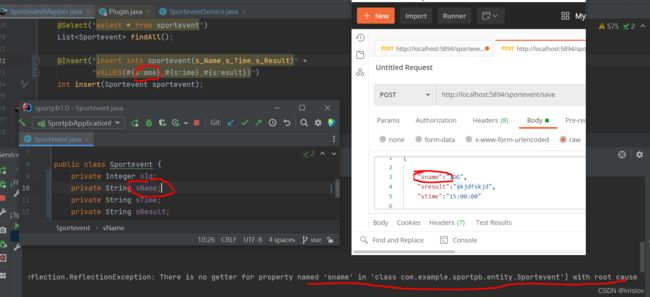
通过以上三张图得出结论:
首先 mapper获得的参数是sportevent 这一个对象
插入语句为
@Insert("insert into sportevent(s_Name,s_Time,s_Result)VALUES(#{sName},#{sTime},#{sResult})")
则sportevent()里面的数据项,对应数据库表的列名
而values() 里的#{} 对应实体类中的命名
由于Mybatis-plus采用驼峰命名,所以输入时要采用全小写,系统自动转为驼峰命名。
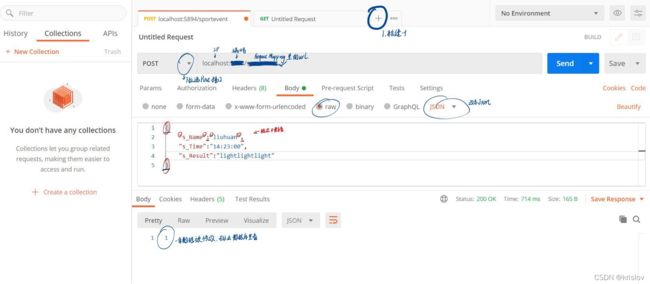
Postman测试新增
postman500 错误解决

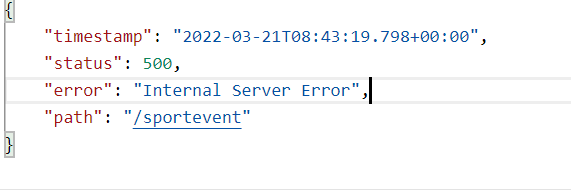
此处报错原因 没有配置mybatis的xml文件
在application.yml 文件加上mybatis配置
#配置mybatis
mybatis:
  mapper-location: classpath:mapper/*.xml #扫描所有mybatis的xml文件 xml里面写的动态sql
一直没有解决
后来还报别的错误,一直差错

一直改错一直配置XML文件,直到静下心把代码过了一遍看到一个错误提示,删掉空行后就正确运行了,真的无语自己
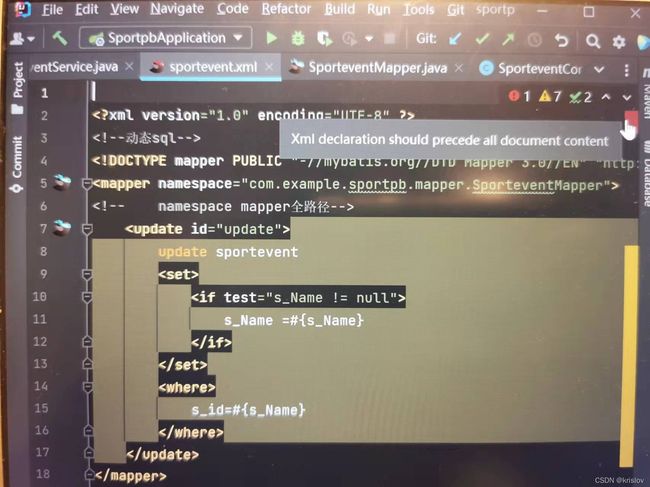
成功运行并查看一下日志
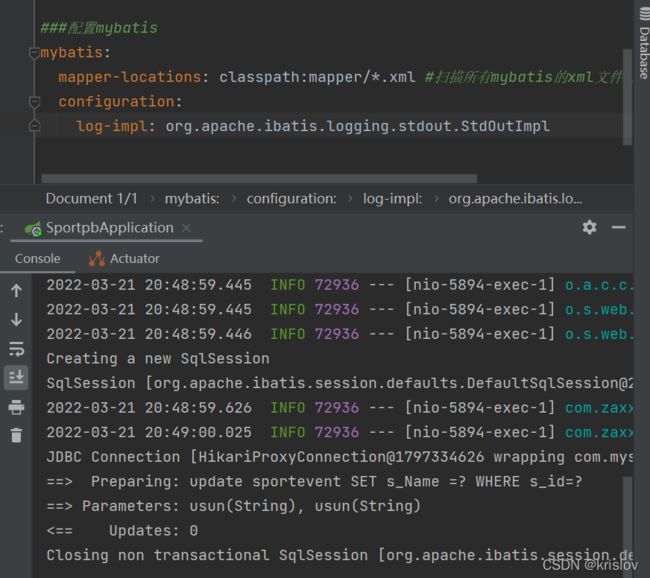
代码一直改不对的时候,沉下心来看每一个请添加图片描述
标点,拼写,空行,空格,检查清楚,比浪费时间百度三四个小时还没有结果来的快,不然就是浪费时间。
不要忽视每一个warming 和每一处代码标红
即使程序能跑起来
