Spring —— Spring简单的读取和存储对象 Ⅱ
|
|
JavaEE
Spring —— Spring 的创建与使用
Spring —— Spring简单的读取和存储对象Ⅰ
目录
- Spring 简单的读取和存储对象
-
- 获取 Bean 对象 (对象装配)
-
- 属性注入
- 构造方法注入
- Setter 注入
- @Resource 关键字
- 同⼀类型多个 @Bean 报错处理
Spring 简单的读取和存储对象
获取 Bean 对象 (对象装配)
获取 bean 对象也叫做对象装配,是把对象取出来放到某个类中,有时候也叫对象注⼊。
对象装配(对象注入)的实现方法以下 3 种:
- 属性注入
- 构造方法注入
Setter注入
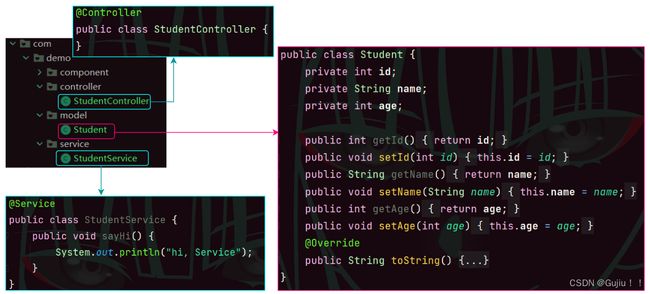
我们先创建如下几个包和几个类:
属性注入
属性注⼊是使⽤ @Autowired 实现的,将 Service 类注⼊到 Controller 类中.
@Controller
public class StudentController {
    // 1.使用属性注入的方式获取 Bean
    @Autowired
    private StudentService studentService;

    public void sayHi() {
        // 调用 service 方法
        studentService.sayHi();
    }
}

优点:
实现简单, 使用简单.
缺点:
-
功能性问题: 不能注入不可变 (
final) 对象.
在 Java 中 final 对象(不可变)要么直接赋值,要么在构造方法中赋值,所以当使用属性注入 final 对象时,它不符合 Java 中 final 的使用规范,所以就不能注入成功了。
-
通用性问题: 只能适应于
IoC容器. -
设计原则问题: 更容易违背单一设计原则. (针对对象是类)
单一设计原则:
- 针对于类级别
- 针对于方法级别
构造方法注入
从 Spring 4.x 之后, Spring 官方推荐使用构造方法注入的形式.
@Controller
public class StudentController {
    // 2.构造方法注入
    private StudentService studentService;

    // @Autowired 可省略
	@Autowired
    public StudentController(StudentService studentService) {
        this.studentService = studentService;
    }

    public void sayHi() {
        // 调用 service 方法
        studentService.sayHi();
    }
}
# 注意 #
@Autowired可省略.- 但是如果类中有多个构造⽅法,那么需要添加
@Autowired来明确指定到底使⽤哪个构造⽅法,否则程序会报错.
优点:
-
可注入不可变对象.

-
注入对象不会被修改.
- 加了
final修饰符. - 构造方法是随着类加载只执行一次的.
- 加了
-
注入对象会被完全初始化. (使用构造方法带来的优点)
-
通用性更好.
缺点:
没有属性注入实现简单.
Setter 注入
Setter 注⼊和属性的 Setter ⽅法实现类似,只不过在设置 set ⽅法的时候需要加上 @Autowired 注解.
@Controller
public class StudentController {
    // 3.setter 注入
    private StudentService studentService;

    @Autowired
    public void setStudentService(StudentService studentService) {
        this.studentService = studentService;
    }

    public void sayHi() {
        // 调用 service 方法
        studentService.sayHi();
    }
}
优点:
更加符合单一设计原则. (针对对象是方法级别)
缺点:
-
不能注入不可变对象 (
final修饰的对象). -
注入的对象可被修改.
set方法是普通 set 方法, 可以被重复调用, 有被修改的风险.
小结: 日常开发当中, 使用属性注入实现更简单的读取 Bean, 依然是主流的实现方式.
@Resource 关键字
在进⾏类注⼊时,除了可以使⽤ @Autowired 关键字之外,我们还可以使⽤ @Resource 进⾏注⼊.
@Controller
public class StudentController {
    @Resource
    private StudentService studentService;

    public void sayHi() {
        // 调用 service 方法
        studentService.sayHi();
    }
}
@Autowired 和 @Resource 的区别
相同点: 都是用来实现依赖注入的.
不同点:
- 功能支持不同:
@Autowired支持属性注入, setter 注入, 构造方法注入;@Resource只支持属性注入和 setter 注入, 不支持构造方法注入. - 出身不同:
@Autowired来自于 Spring 框架; 而@Resource来自于 JDK. - 参数支持不同:
@Resource支持更多的参数设置; 而@Autowired只支持 required 参数.
同⼀类型多个 @Bean 报错处理
当出现以下多个 Bean,返回同⼀对象类型时程序会报错

此时我们运行:
public class App {
    public static void main(String[] args) {
        ApplicationContext applicationContext =
                new ClassPathXmlApplicationContext("spring-config.xml");
        StudentController studentController =
                applicationContext.getBean("studentController", StudentController.class);
        studentController.func();
    }
}
# 注意 # 会报错, 报错的原因是,非唯一的 Bean 对象。
同⼀类型多个 Bean 报错处理
解决同⼀个类型,多个 Bean 的解决⽅案有以下两个:
- 使⽤
@Resource(name="student1")定义. - 使⽤
@Qualifier注解定义名称.
# 使⽤ @Resource(name="student1") 定义.
@Controller
public class StudentController {

    @Resource(name = "student2")
    private Student student;

    public void func() {
        System.out.println(student.toString());
    }
}
# 使⽤ @Qualifier 注解定义名称.
@Controller
public class StudentController {

    @Resource
    @Qualifier("student2")
    private Student student;

    public void func() {
        System.out.println(student.toString());
    }
}
# 如果我们想用 @Autowired 可以写成:
@Autowired
private Student student1;
// 存在有耦合性问题
|
|
以上就是今天要讲的内容了,希望对大家有所帮助,如果有问题欢迎评论指出,会积极改正!!