scrapy框架开发爬虫实战——爬取2019年的腾讯招聘信息(组件操作,MongoDB存储,json存储,托管到GitHub)
腾讯招聘网主页
搜索 | 腾讯招聘
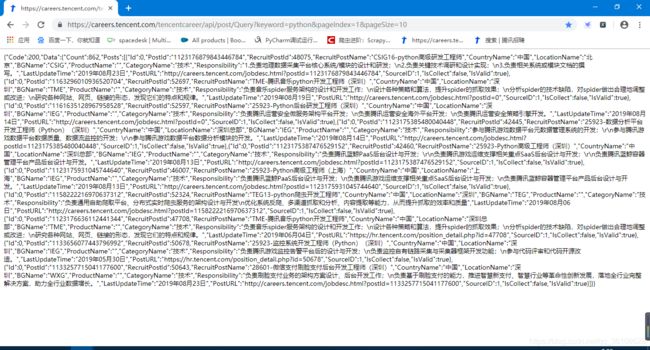
腾讯招聘的api
https://careers.tencent.com/tencentcareer/api/post/Query?keyword=python&pageIndex=1&pageSize=10
创建爬虫工程
#scrapy startproject 爬虫工程名
scrapy startproject TJ
创建爬虫
#scrapy genspider 爬虫名 域名
scrapy genspider s_tencent "careers.tencent.com"
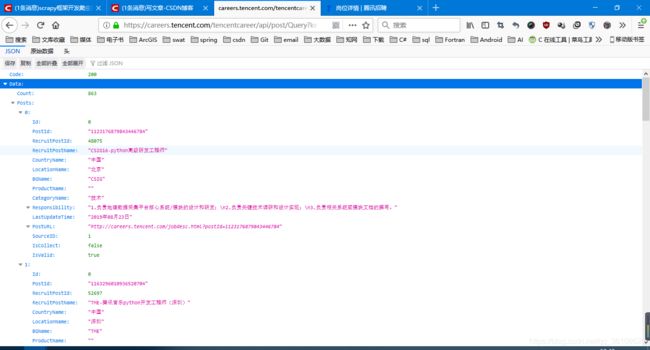
找接口URL
https://careers.tencent.com/tencentcareer/api/post/Query?keyword=python&pageIndex=1&pageSize=10
这是json解析的页面
访问URL
将URL存到start_urls列表中,逐个访问
start_urls = []  #起始链接
for page in range(1, 62):
    url = 'https://careers.tencent.com/tencentcareer/api/post/Query?keyword=python&pageIndex=%s&pageSize=10' % page   #构造URL
    start_urls.append(url)  #将URL添加到列表
解析数据并保存
content = response.body.decode('utf-8')
        data = json.loads(content)
        job_list = data['Data']['Posts']
        for job in job_list:
            name = job['RecruitPostName']
            country = job['CountryName']
            duty = job['Responsibility']
            # info=name+country+duty+'\n'
            info = {
                "name": name,
                "country": country,
                "duty": duty,
            }
            with open('job.txt', 'a', encoding='utf-8') as fp:
                fp.write(str(info)+'\n')
运行项目
#scrapy crawl 爬虫名
scrapy crawl s_tencent
完整代码【简洁版只有一个爬虫文件s_tencent.py】
# -*- coding: utf-8 -*-
import scrapy
import json

class STencentSpider(scrapy.Spider):
    name = 's_tencent'
    allowed_domains = ['careers.tencent.com']
    #开始链接
    start_urls = []
    #循环添加api链接
    for page in range(1,62):
        url = 'https://careers.tencent.com/tencentcareer/api/post/Query?keyword=python&pageIndex=%s&pageSize=10' % page
        start_urls.append(url)

    def parse(self, response):
        content=response.body.decode('utf-8')  #将response响应的数据存到content变量中
        data=json.loads(content)  #格式化为json数据
        job_list =data['Data']['Posts']
        for job in job_list:
            recruitPostId=job['RecruitPostId']
            recruitPostName=job['RecruitPostName']
            countryName=job['CountryName']
            locationName=job['LocationName']
            bGName=job['BGName']
            productName=job['ProductName']
            categoryName=job['CategoryName']
            responsibility=job['Responsibility']
            lastUpdateTime=job['LastUpdateTime']
            postURL=job['PostURL']
            info = {
                "RecruitPostId":recruitPostId,
                "RecruitPostName":recruitPostName,
                "CountryName":countryName,
                "LocationName":locationName,
                "BGName":bGName,
                "ProductName":productName,
                "CategoryName":categoryName,
                "Responsibility":responsibility,
                "LastUpdateTime":lastUpdateTime,
                "PostURL":postURL,
            }
            with open('job.txt', 'a', encoding='utf-8') as fp:
                fp.write(str(info) + '\n')
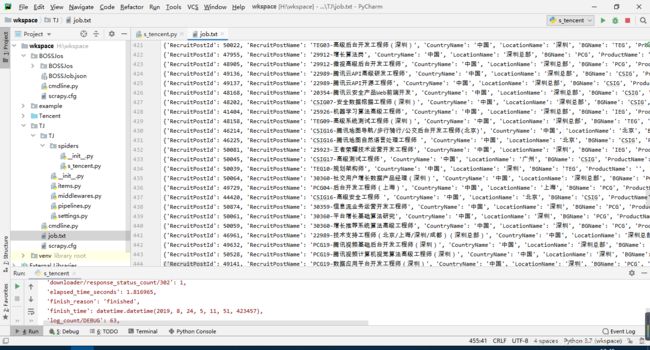
爬取的信息都存放在 job.txt 文件中,
以上是基础的代码,没有设计太多的组件。
>>>>>>>>>>>>>>>>>>>>>>>>>>>升级代码<<<<<<<<<<<<<<<<<<<<<<<<<<<<<
使用Item封装数据
创建,
复制,
使用,
完善后的items.py代码,
# -*- coding: utf-8 -*-

# Define here the models for your scraped items
#
# See documentation in:
# https://docs.scrapy.org/en/latest/topics/items.html

import scrapy


class TjItem(scrapy.Item):
    # define the fields for your item here like:
    # name = scrapy.Field()

    recruitPostId=scrapy.Field()

    recruitPostName=scrapy.Field()

    countryName=scrapy.Field()

    locationName=scrapy.Field()

    GName=scrapy.Field()

    productName=scrapy.Field()

    categoryName=scrapy.Field()

    responsibility=scrapy.Field()

    lastUpdateTime=scrapy.Field()

    postURL=scrapy.Field()
更新s_tencent.py爬虫代码,
# -*- coding: utf-8 -*-
import scrapy
import json
from TJ.items import TjItem

class STencentSpider(scrapy.Spider):
    name = 's_tencent'
    allowed_domains = ['careers.tencent.com']
    #开始链接
    start_urls = []
    #循环添加api链接
    for page in range(1,62):
        url = 'https://careers.tencent.com/tencentcareer/api/post/Query?keyword=python&pageIndex=%s&pageSize=10' % page
        start_urls.append(url)

    def parse(self, response):
        content=response.body.decode('utf-8')  #将response响应的数据存到content变量中
        data=json.loads(content)  #格式化为json数据
        job_list = data['Data']['Posts']
        for job in job_list:
            item=TjItem()  #创建item实例
            # 将数据存入item
            item['recruitPostId']=job['RecruitPostId']
            item['recruitPostName']=job['RecruitPostName']
            item['countryName']=job['CountryName']
            item['locationName']=job['LocationName']
            item['bGName']=job['BGName']
            item['productName']=job['ProductName']
            item['categoryName']=job['CategoryName']
            item['responsibility']=job['Responsibility']
            item['lastUpdateTime']=job['LastUpdateTime']
            item['postURL']=job['PostURL']
            #创建一个字典info
            info = {
                "RecruitPostId":item['recruitPostId'],
                "RecruitPostName":item['recruitPostName'],
                "CountryName":item['countryName'],
                "LocationName":item['locationName'],
                "BGName":item['bGName'],
                "ProductName":item['productName'],
                "CategoryName":item['categoryName'],
                "Responsibility":item['responsibility'],
                "LastUpdateTime":item['lastUpdateTime'],
                "PostURL":item['postURL'],
            }
            #传给pipeline
            yield item

            #将数据写入txt文本文件
            with open('job.txt', 'a', encoding='utf-8') as fp:
                fp.write(str(info) + '\n')
pipelines.py代码:
# -*- coding: utf-8 -*-

# Define your item pipelines here
#
# Don't forget to add your pipeline to the ITEM_PIPELINES setting
# See: https://docs.scrapy.org/en/latest/topics/item-pipeline.html

from scrapy.exceptions import DropItem
from scrapy.item import Item
import pymongo
import json


class TjPipeline(object):
    def process_item(self, item, spider):
        return item

# MongoDB
class MongoDBPipeline(object):

    # 读取MongoDB中的MONGO_DB_URI
    # 读取MongoDB中的MONGO_DB_NAME
    @classmethod
    def from_crawler(cls,crawler):
        cls.DB_URI=crawler.settings.get('MONGO_DB_URI')
        cls.DB_NAME=crawler.settings.get('MONGO_DB_NAME')
        return cls()

    def __init__(self):
        pass

    # 打开爬虫之前连接MongoDB
    def open_spider(self,spider):
        self.client=pymongo.MongoClient(self.DB_URI)
        self.db=self.client[self.DB_NAME]

    # 关闭爬虫时关闭数据库
    def close_spider(self,spider):
        self.client.close()

    def process_item(self,item,spider):
        collection = self.db[spider.name]  #设置MongoDB的表明为爬虫名
        post = dict(item) if isinstance(item,Item) else item  #以dict形式存入数据库
        collection.insert_one(post)  #插入数据
        return item  #返回item


# json格式
class JsonPipeline(object):

    #初始化
    def __init__(self):
        self.f=open("TJ.json","w")

    def open_spider(self,spider):
        pass

    def process_item(self,item,spider):
        content=json.dumps(dict(item),ensure_ascii=False)+",\n"
        self.f.write(content)
        return item

    def close_spider(self,spider):
        self.f.close()
开启pipelines.py
# -*- coding: utf-8 -*-

# Scrapy settings for TJ project
#
# For simplicity, this file contains only settings considered important or
# commonly used. You can find more settings consulting the documentation:
#
#     https://docs.scrapy.org/en/latest/topics/settings.html
#     https://docs.scrapy.org/en/latest/topics/downloader-middleware.html
#     https://docs.scrapy.org/en/latest/topics/spider-middleware.html

BOT_NAME = 'TJ'

SPIDER_MODULES = ['TJ.spiders']
NEWSPIDER_MODULE = 'TJ.spiders'


# Crawl responsibly by identifying yourself (and your website) on the user-agent
#USER_AGENT = 'TJ (+http://www.yourdomain.com)'

# Obey robots.txt rules
ROBOTSTXT_OBEY = True

# Configure maximum concurrent requests performed by Scrapy (default: 16)
#CONCURRENT_REQUESTS = 32

# Configure a delay for requests for the same website (default: 0)
# See https://docs.scrapy.org/en/latest/topics/settings.html#download-delay
# See also autothrottle settings and docs
#DOWNLOAD_DELAY = 3
# The download delay setting will honor only one of:
#CONCURRENT_REQUESTS_PER_DOMAIN = 16
#CONCURRENT_REQUESTS_PER_IP = 16

# Disable cookies (enabled by default)
#COOKIES_ENABLED = False

# Disable Telnet Console (enabled by default)
#TELNETCONSOLE_ENABLED = False

# Override the default request headers:
#DEFAULT_REQUEST_HEADERS = {
#   'Accept': 'text/html,application/xhtml+xml,application/xml;q=0.9,*/*;q=0.8',
#   'Accept-Language': 'en',
#}

# Enable or disable spider middlewares
# See https://docs.scrapy.org/en/latest/topics/spider-middleware.html
#SPIDER_MIDDLEWARES = {
#    'TJ.middlewares.TjSpiderMiddleware': 543,
#}

# Enable or disable downloader middlewares
# See https://docs.scrapy.org/en/latest/topics/downloader-middleware.html
#DOWNLOADER_MIDDLEWARES = {
#    'TJ.middlewares.TjDownloaderMiddleware': 543,
#}

# Enable or disable extensions
# See https://docs.scrapy.org/en/latest/topics/extensions.html
#EXTENSIONS = {
#    'scrapy.extensions.telnet.TelnetConsole': None,
#}

# Configure item pipelines
# See https://docs.scrapy.org/en/latest/topics/item-pipeline.html
ITEM_PIPELINES = {
    'TJ.pipelines.TjPipeline': 300,
    'TJ.pipelines.MongoDBPipeline':310,
    'TJ.pipelines.JsonPipeline':320,
}

# Enable and configure the AutoThrottle extension (disabled by default)
# See https://docs.scrapy.org/en/latest/topics/autothrottle.html
#AUTOTHROTTLE_ENABLED = True
# The initial download delay
#AUTOTHROTTLE_START_DELAY = 5
# The maximum download delay to be set in case of high latencies
#AUTOTHROTTLE_MAX_DELAY = 60
# The average number of requests Scrapy should be sending in parallel to
# each remote server
#AUTOTHROTTLE_TARGET_CONCURRENCY = 1.0
# Enable showing throttling stats for every response received:
#AUTOTHROTTLE_DEBUG = False

# Enable and configure HTTP caching (disabled by default)
# See https://docs.scrapy.org/en/latest/topics/downloader-middleware.html#httpcache-middleware-settings
#HTTPCACHE_ENABLED = True
#HTTPCACHE_EXPIRATION_SECS = 0
#HTTPCACHE_DIR = 'httpcache'
#HTTPCACHE_IGNORE_HTTP_CODES = []
#HTTPCACHE_STORAGE = 'scrapy.extensions.httpcache.FilesystemCacheStorage'

# 将MongoDB数据库的连接信息存到配置文件中
MONGO_DB_URI = 'mongodb://localhost:27017/'
MONGO_DB_NAME = 'lhf_jlu_scrapy_data'
MongoDB中存储的数据:
json格式存储的数据:
将代码传到GitHub
在GitHub上新建仓库Spider_TencentJobs
复制仓库链接,https://github.com/liuhf-jlu/Spider_TencentJobs.git
本地新建一个Git仓库文件夹GitRepo
进入GitRepo,打开Git Bash,克隆远程仓库
#git clone 远程仓库链接
git clone https://github.com/liuhf-jlu/Spider_TencentJobs.git
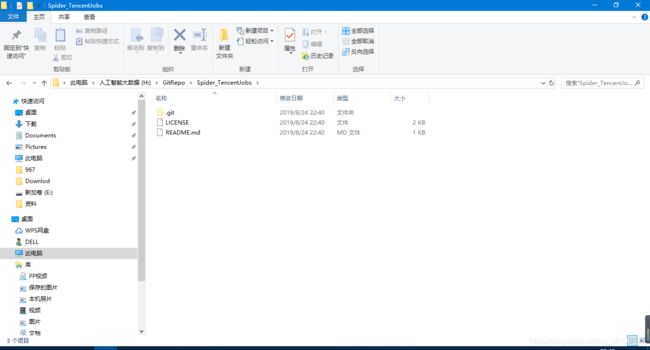
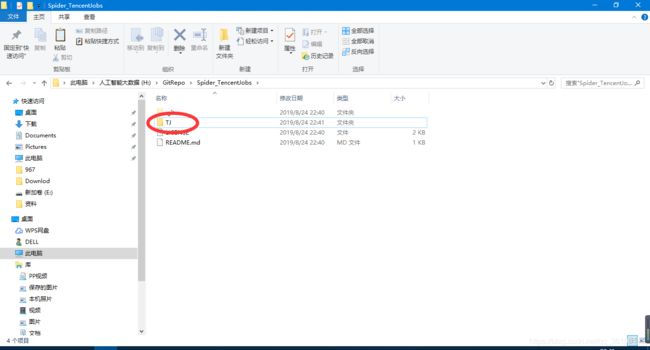
本地创建了仓库,
将项目复制到本地文件夹里,
进入Spider_TencentJobs文件夹
cd Spider_TencentJobs#查看本地仓库状态
git status红色部分为新加的文件。
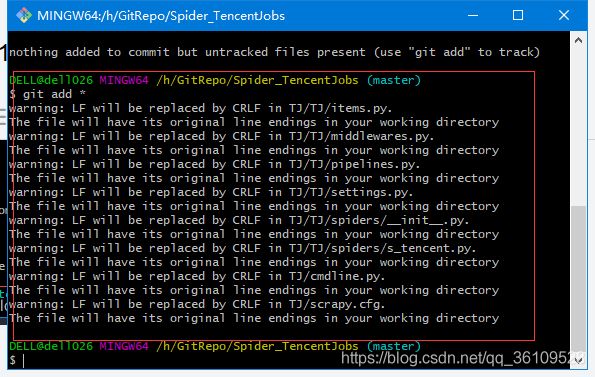
将新加的文件添加到本地仓风,
#将新添加的全部文件添加到本地仓库
git add *
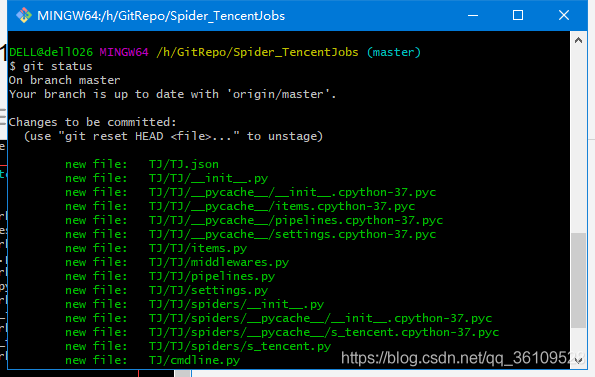
再次执行git status,绿色显示已经添加成功。
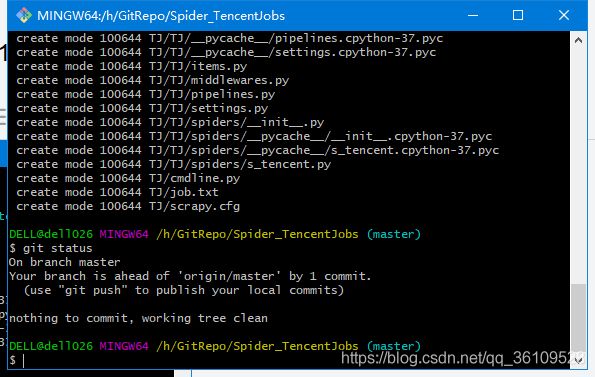
提交到本地仓库,
#提交代码
git commit -m '第一次提交代码'
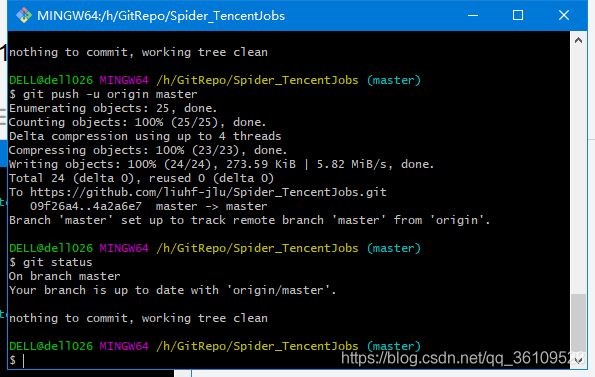
再次执行git statis
上传代码到远程仓库,
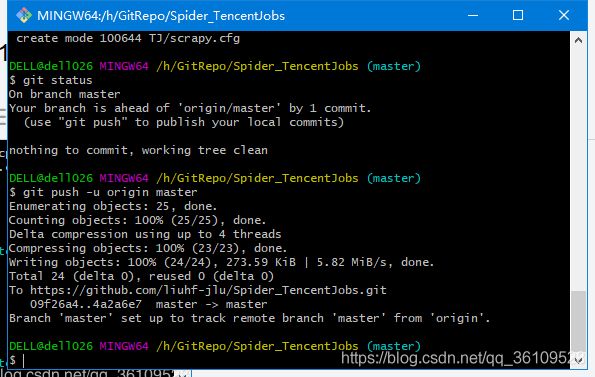
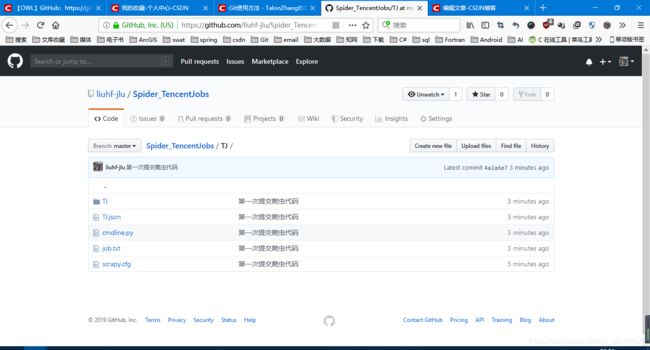
git push -u origin master重新进入到我们的远程仓库,发现新的内容已经添加。
项目的GitHub地址:Spider_TencentJobs/TJ at master · liuhf-jlu/Spider_TencentJobs · GitHub

