k8s 部署nginx 实现集群统一配置,自动更新nginx.conf配置文件 总结
k8s 部署nginx 实现集群统一配置,自动更新nginx.conf配置文件 总结
大纲
- 1 nginx镜像选择
- 2 创建configmap保存nginx配置文件
- 3 使用inotify监控配置文件变化
- 4 Dockerfile创建
- 5 调整镜像原地址使用阿里云
- 6 创建deploy部署文件部署nginx
- 7 测试使用nginx配置文件同步&nginx自动重启
直接使用https://hub.docker.com/_/nginx nginx镜像有几个问题
- 1 集群环境下需要手动的配置多个nginx.conf文件
- 2 集群环境下配置文件修改后需要 kubectl exec -it 到多个pod重启nginx
使用k8s configmap统一配置集群下所有nginx的配置,并使用inotify监听配置文件变化后自动重启
nginx镜像选择
nginx镜像地址 https://hub.docker.com/_/nginx 使用 nginx:1.23.3 作为基础镜像
此镜像的配置文件为 /etc/nginx/nginx.conf 可以看到配置文件会include /etc/nginx/conf.d 文件夹下的配置
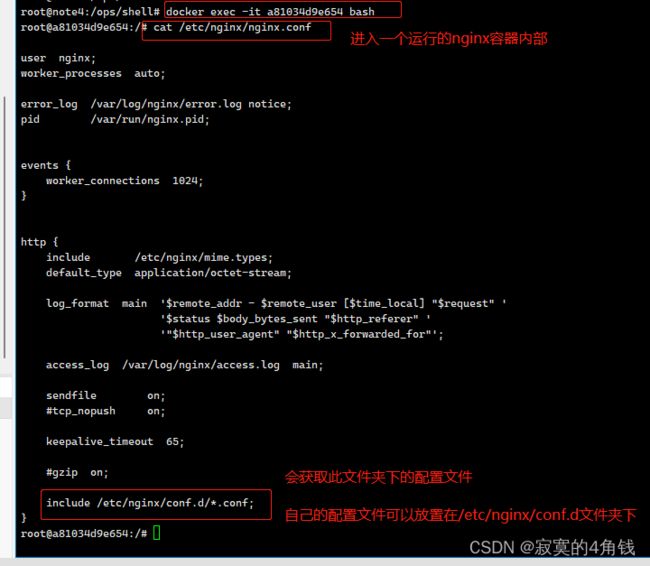
只需把此文件夹与configmap挂载就可以使用自己的配置信息了
创建configmap
创建一个configmap 用来保存nginx的配置文件
apiVersion: v1
kind: ConfigMap
metadata:
  name: nginx-config
data:
  nginx.conf: |

     server {
         listen 8080;
         charset utf-8;
         server_name  localhost;

         location / {
             root   /usr/share/nginx/html;
             index  index.html index.htm;
         }

     }
使用inotify监控配置文件变化
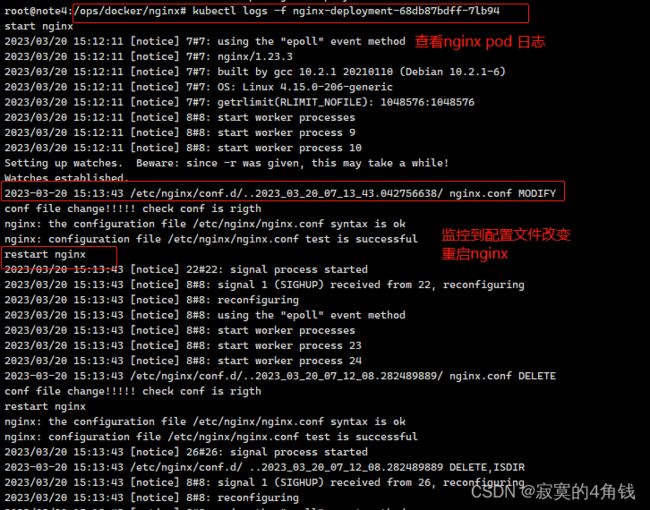
可以使用inotify 实现对配置文件夹的监控,当文件夹内有.conf文件创建,修改,删除后重新启动nginx
可以创建一个脚本,此脚本监控 /etc/nginx/conf.d 下文件的变化
#!/bin/bash
configfile='.conf$'

#监听文件夹修改,删除事件
inotifywait -e modify,delete -mr --timefmt '%Y-%m-%d %H:%M:%S' --format '%T %w %f %e'  /etc/nginx/conf.d | while read day time folder file event;
do
  #判断变化的文件是否是.conf结尾的文件 注意正则判断需要使用[[]]
  if [[ $file =~ $configfile ]]; then
     nginx -t
     # $?返回上一个命令的结束状态 0表示正常
     if [ $? == 0 ]; then
        nginx -s reload
     fi
  fi
done
再准备一个启动start.sh脚本用于启动nginx以及inotify监控
echo "start nginx"
# 启动nginx
nginx
# 启动监控 需要保持一个前台运行的程序 否则容器运行后就退出
./auto_reload.sh
inotify的使用可以参考 《linux-inotify工具监控文件状态变化总结》
Dockerfile创建
Dockerfile 内容如下,可以调整linux镜像源使用阿里云的镜像源
FROM nginx:1.23.3
VOLUME ["/data/service/logs","/docker/tmp","/data/service/store"]
WORKDIR "/data/service"
LABEL base.name="nginx-auto-reload"
LABEL base.desc="nginx-auto-reload"
#修改操作系统源地址 使用阿里云 可以不修改,但是由于网络原因会比较满
#注意 nginx:1.23.3 镜像使用的是debian 11.x (bullseye)
#需要使用对应的阿里云 镜像源 https://developer.aliyun.com/mirror/debian?spm=a2c6h.13651102.0.0.3e221b11W40Fzd
RUN echo "deb https://mirrors.aliyun.com/debian/ bullseye main non-free contrib" >/etc/apt/sources.list
RUN echo "deb-src https://mirrors.aliyun.com/debian/ bullseye main non-free contrib" >>/etc/apt/sources.list
RUN echo "deb https://mirrors.aliyun.com/debian-security/ bullseye-security main" >>/etc/apt/sources.list
RUN echo "deb-src https://mirrors.aliyun.com/debian-security/ bullseye-security main" >>/etc/apt/sources.list
RUN echo "deb https://mirrors.aliyun.com/debian/ bullseye-updates main non-free contrib" >>/etc/apt/sources.list
RUN echo "deb-src https://mirrors.aliyun.com/debian/ bullseye-updates main non-free contrib" >>/etc/apt/sources.list
RUN echo "deb https://mirrors.aliyun.com/debian/ bullseye-backports main non-free contrib" >>/etc/apt/sources.list
RUN echo "deb-src https://mirrors.aliyun.com/debian/ bullseye-backports main non-free contrib" >>/etc/apt/sources.list
RUN apt-get update
RUN apt-get install inotify-tools -y
ADD auto_reload.sh auto_reload.sh
RUN ln -snf /usr/share/zoneinfo/Asia/Shanghai /etc/localtime && echo 'Asia/Shanghai' >/etc/timezone
COPY ["auto_reload.sh","start.sh","./"]
RUN chmod 711 auto_reload.sh && chmod 711 start.sh
CMD ["./start.sh"]
需要使用对应的阿里云 镜像源 https://developer.aliyun.com/mirror/debian?spm=a2c6h.13651102.0.0.3e221b11W40Fzd
创建镜像后推送到阿里云私库,用于后续的使用
docker build -t nginx-auto-reload .
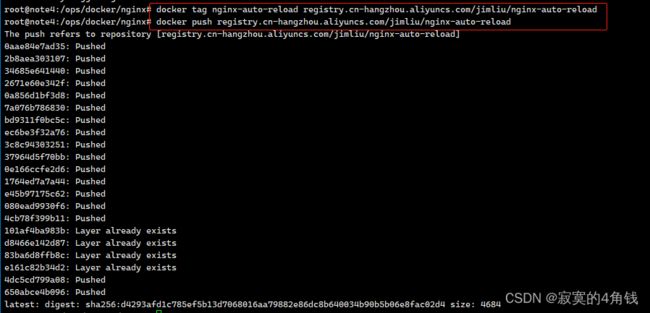
docker tag nginx-auto-reload registry.cn-hangzhou.aliyuncs.com/jimliu/nginx-auto-reload
docker push registry.cn-hangzhou.aliyuncs.com/jimliu/nginx-auto-reload
创建deploy部署文件部署nginx
部署deploy.yaml 内容如下
apiVersion: apps/v1
kind: Deployment
metadata:
  name: nginx-deployment
spec:
  replicas: 1
  selector:
    matchLabels:
      app: nginx-auto-reload
  template:
    metadata:
      labels:
        app: nginx-auto-reload
    spec:
    # 容器配置
      imagePullSecrets:
        - name: myaliyunsecret
      hostname: nginx-host
      subdomain: nginx-inner-domain
      containers:
        - image: registry.cn-hangzhou.aliyuncs.com/jimliu/nginx-auto-reload:latest
          name: nginx-containers
          # 挂载文件夹
          volumeMounts:
            - mountPath: "/etc/nginx/conf.d/"
              name: config-volume
      volumes:
        - name: config-volume
          configMap:
            name: nginx-config


---
# 外部访问的接口
apiVersion: v1
kind: Service
metadata:
  name: nginx-auto-reload-service
spec:
  ports:
    - protocol: TCP
      port: 18080
      targetPort: 8080
      nodePort: 18080
      name: http8080
      #暴露两个接口用于测试 nginx重启
    - protocol: TCP
      port: 18081
      targetPort: 8081
      nodePort: 18081
      name: http8081
  selector:
    app: nginx-auto-reload
部署nginx并测试
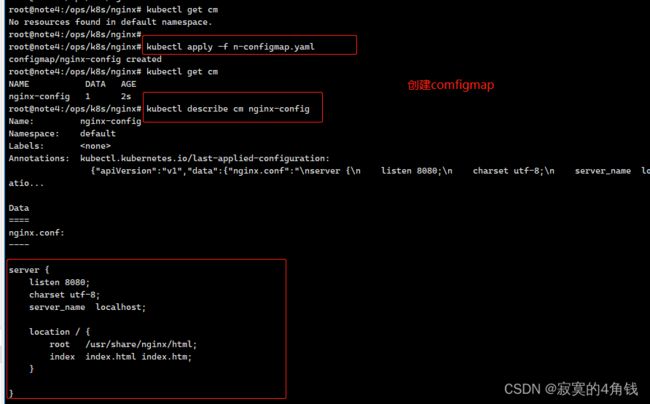
创建configmap
部署nginx
kubectl apply -f n-deployment.yaml
此步 nginx部署完成 service创建成功
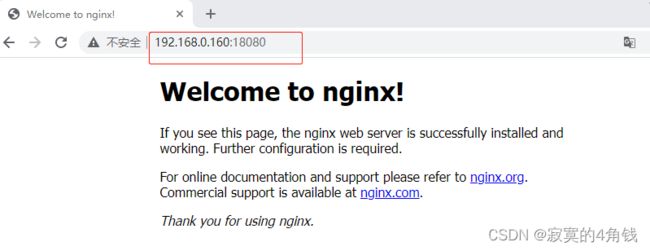
测试nginx
8080端口访问成功
8081端口还无法访问
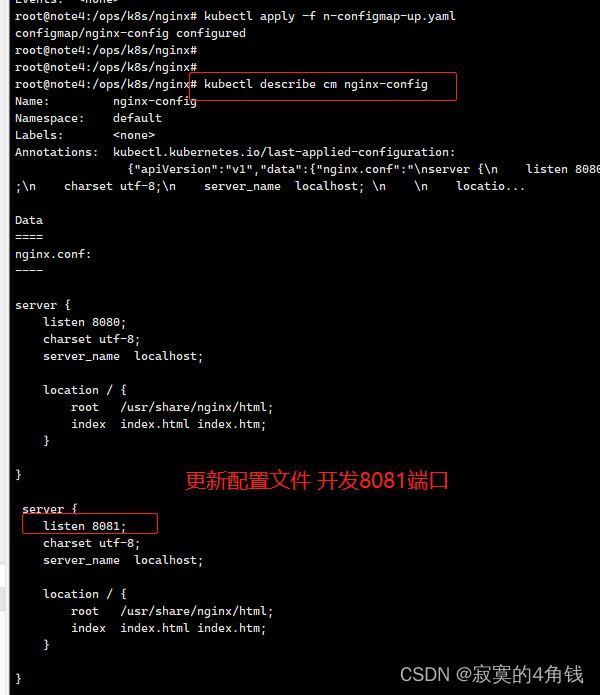
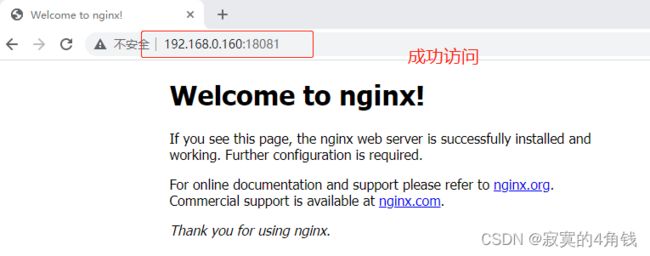
修改configmap中nginx配置文件 开放8081端口
等待configmap同步更新nginx pod中的配置文件

