简单的一键部署LNMP架构shell脚本

两种部署方式:
一、 手工搭建
分析:最终效果,通过Nginx搭建两个网站blog和zh,通过域名访问。在lnmp的基础上,域名访问,要么搭建DNS服务器,要么修改主机hosts文件。
1、安装Nginx:
进入yum目录配置网络源,Nginx官网、清华源均可,以清华源为例。

添加以下内容:
[base]
name=CentOS-\$releasever - Base
baseurl=https://mirrors.tuna.tsinghua.edu.cn/centos/\$releasever/os/\$basearch/
enabled=1
gpgcheck=0

#released updates
[updates]
name=CentOS-\$releasever - Updates
baseurl=https://mirrors.tuna.tsinghua.edu.cn/centos/\$releasever/updates/\$basearch/
#baseurl=https://mirrors.aliyun.com/centos/\$releasever/updates/\$basearch/
#mirrorlist=http://mirrorlist.centos.org/?release=\$releasever&arch=\$basearch&repo=updates
enabled=1
gpgcheck=0

#additional packages that may be useful

[centosplus]
name=CentOS-\$releasever - Plus
baseurl=https://mirrors.tuna.tsinghua.edu.cn/centos/\$releasever/centosplus/\$basearch/
#baseurl=https://mirrors.aliyun.com/centos/\$releasever/centosplus/\$basearch/
#mirrorlist=http://mirrorlist.centos.org/?release=\$releasever&arch=\$basearch&repo=centosplus
enabled=1
gpgcheck=0

[cloud]
name=CentOS-\$releasever - Cloud
baseurl=https://mirrors.tuna.tsinghua.edu.cn/centos/\$releasever/cloud/\$basearch/openstack-train/
#baseurl=https://mirrors.aliyun.com/centos/\$releasever/cloud/\$basearch/openstack-train/
enabled=1
gpgcheck=0

[paas]
name=CentOS-\$releasever - paas
baseurl=https://mirrors.tuna.tsinghua.edu.cn/centos/\$releasever/paas/\$basearch/openshift-origin13/
#baseurl=https://mirrors.aliyun.com/centos/\$releasever/paas/\$basearch/openshift-origin13/
enabled=1
gpgcheck=0

[kvm]
name=CentOS-\$releasever - kvm
baseurl=https://mirrors.tuna.tsinghua.edu.cn/centos/\$releasever/virt/\$basearch/kvm-common/
#baseurl=https://mirrors.aliyun.com/centos/\$releasever/virt/\$basearch/kvm-common/
enabled=1
gpgcheck=0

[extras]
name=CentOS-\$releasever - extras
baseurl=https://mirrors.tuna.tsinghua.edu.cn/centos/\$releasever/extras/\$basearch/
#baseurl=https://mirrors.aliyun.com/centos/\$releasever/extras/\$basearch/
enabled=1
gpgcheck=0

[epel]
name=Extra Packages for Enterprise Linux 7 - $basearch
baseurl=https://mirrors.tuna.tsinghua.edu.cn/epel/7/$basearch
#mirrorlist=https://mirrors.fedoraproject.org/metalink?repo=epel-7&arch=$basearch
failovermethod=priority
enabled=1
gpgcheck=0

[epel-debuginfo]
name=Extra Packages for Enterprise Linux 7 - $basearch - Debug
baseurl=https://mirrors.tuna.tsinghua.edu.cn/epel/7/$basearch/debug
#mirrorlist=https://mirrors.fedoraproject.org/metalink?repo=epel-debug-7&arch=$basearch
failovermethod=priority
enabled=1
gpgcheck=0

[epel-source]
name=Extra Packages for Enterprise Linux 7 - $basearch - Source
baseurl=https://mirrors.tuna.tsinghua.edu.cn/epel/7/SRPMS
#mirrorlist=https://mirrors.fedoraproject.org/metalink?repo=epel-source-7&arch=$basearch
failovermethod=priority
enabled=1
gpgcheck=0
![]()
2、使用第三方扩展epel源安装PHP7.2:
rpm -Uvh https://dl.fedoraproject.org/pub/epel/epel-release-latest-7.noarch.rpm
rpm -Uvh https://mirror.webtatic.com/yum/el7/webtatic-release.rpm
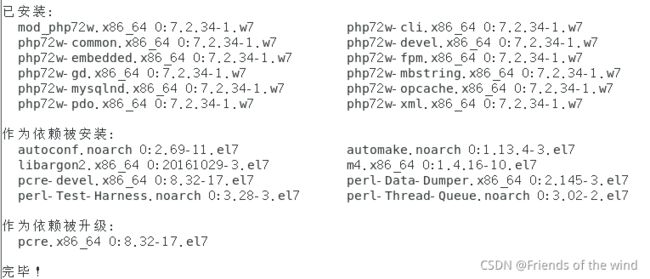
安装 php72 版本
yum -y install php72w php72w-cli php72w-common php72w-devel php72w-embedded php72w-gd php72w-mbstring php72w-pdo php72w-xml php72w-fpm php72w-mysqlnd php72w-opcache
报错:
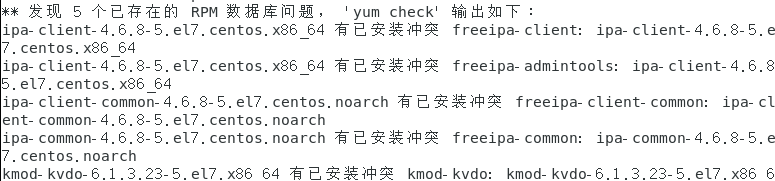
解决方案:更换网络yum源。
换成上图的。
成功如下图:
3、安装mysql(mariadb):
上传下载好的mysql文件到指定目录:
![]()
![]()
启动:lnmp
systemctl start nginx php-fpm mysqld
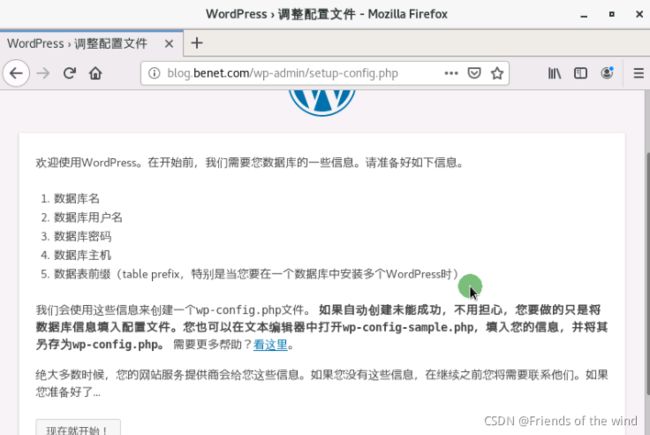
4.应用1:搭建wordpress
(1)下载wordpress源码包
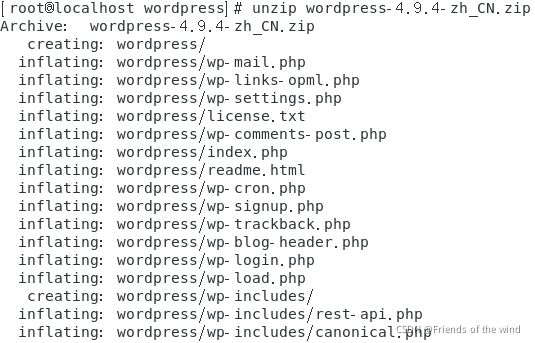
(2)复制wordpress安装包,到虚拟机/,解压并赋权
unzip wordpress-4.9.4-zh_CN.zip
chmod -R 777 /wordpress
(3)创建虚拟主机配置文件
vim /etc/nginx/conf.d/blog.conf
添加:
server {
    listen 80;
    server_name blog.benet.com;
    root /wordpress;
    index index.php index.html;

    location ~ \.php$ {
            root /wordpress;
            fastcgi_pass 127.0.0.1:9000;
            fastcgi_index index.php;
            fastcgi_param SCRIPT_FILENAME $document_root$fastcgi_script_name;
            include fastcgi_params;
    }
}
保存退出
systemctl reload nginx
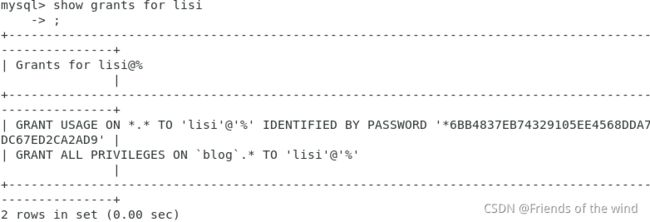
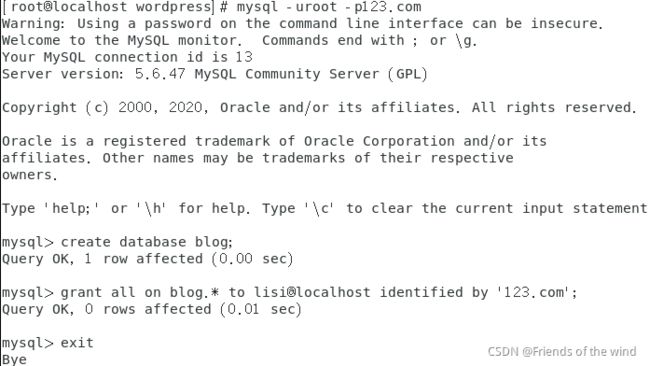
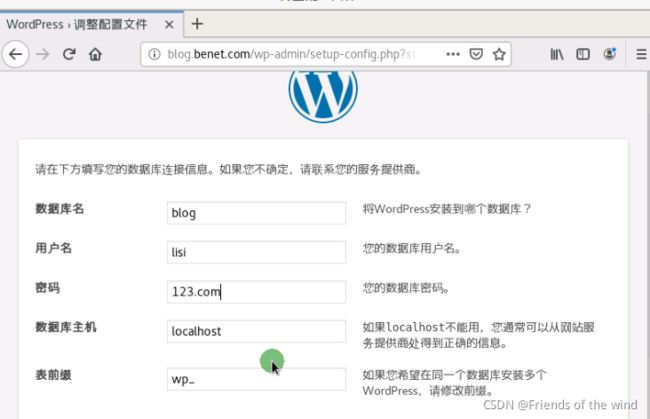
(4)创建blog数据库和管理用户
登录数据库:mysql -uroot -p123.com
创建数据库:create database blog;
设置管理用户及密码:grant all on blog.* to lisi@localhost identified by ‘123.com’;
(5)客户端通过域名访问blog,安装并配置
安装DNS服务器:
yum -y install bind bind-chroot
编辑主配置:
备份默认主配置文件:
cd /etc/
mv named.conf named.conf.bak
创建配置文件:
vim named.conf
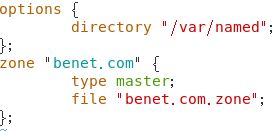
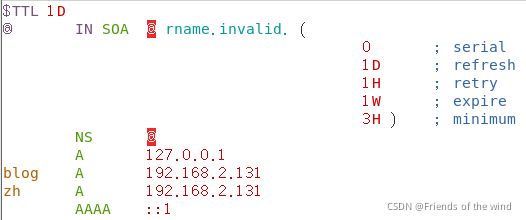
创建区域文件:
cd /var/named/
cp -p named.localhost benet.com.zone
将需要解析的域名与对应的IP填入
启动DNS服务:
systemctl start named
安装:
报错:
一、打不开下图页面,本地测试提示502
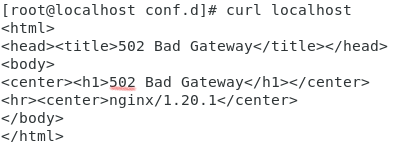
定位错误焦点:PHP配置
必须写web节点服务器的真实ip,填any,也不行,应该是所有都可吧!但还是报错
![]()
如果是分布式安装,填写php服务器地址(默认是localhost)
![]()
二:
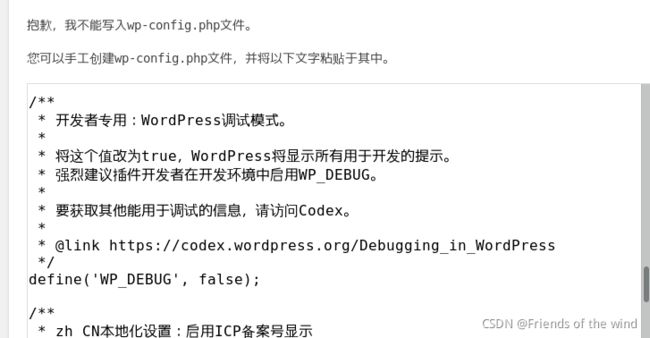
解决方案:根据提示拷贝框内文本,编辑vim /wordpress/wp-config.php
粘贴,赋予执行权限,点击下一步即可!

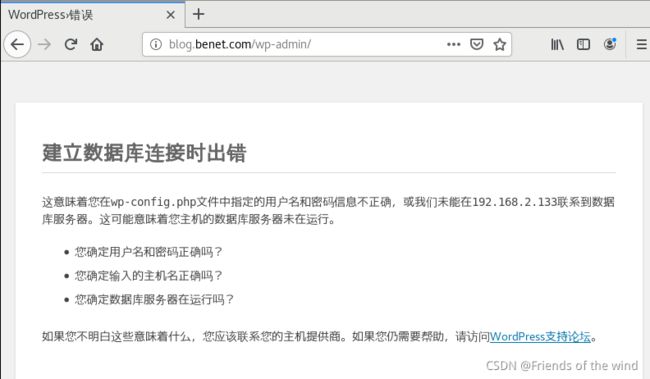
三、建立数据库连接出错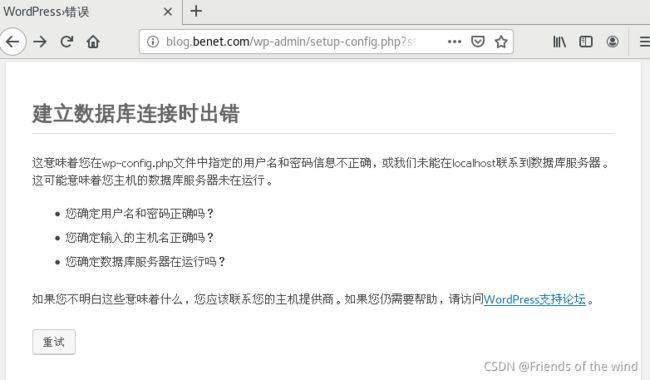
1)使用mysql账号密码在另一台主机登录,排除myslq错误;
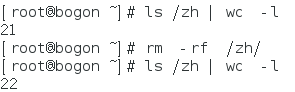
2)定位PHP的文件错误,查找wp-config.php文件,找不到,证明解压缺少配置文件。
删除Nginx及php的网页目录/wordpress/
重新解压拷贝,赋权,刷新,解决问题
完成访问http://blog.benet.com
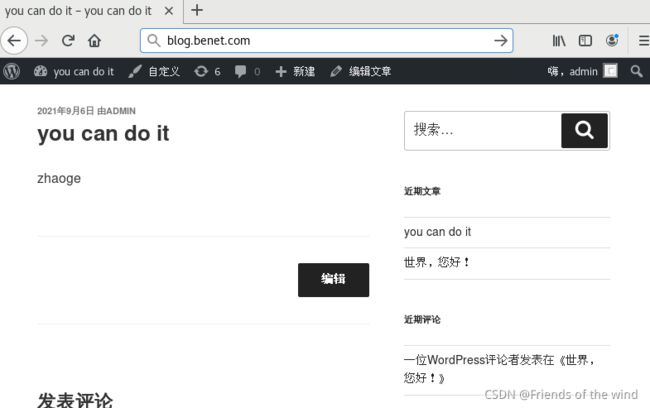
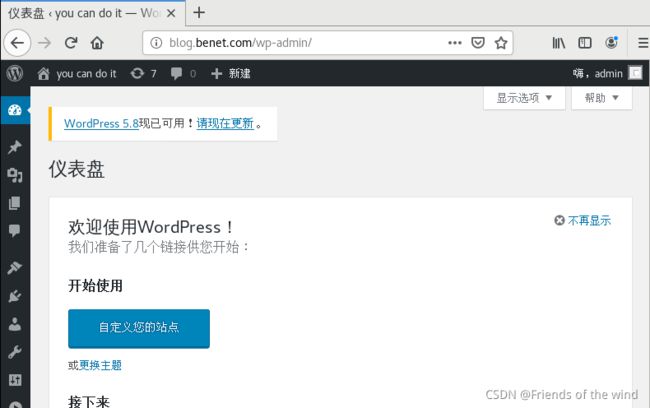
 登录后台
http://blog.benet.com/wp-admin
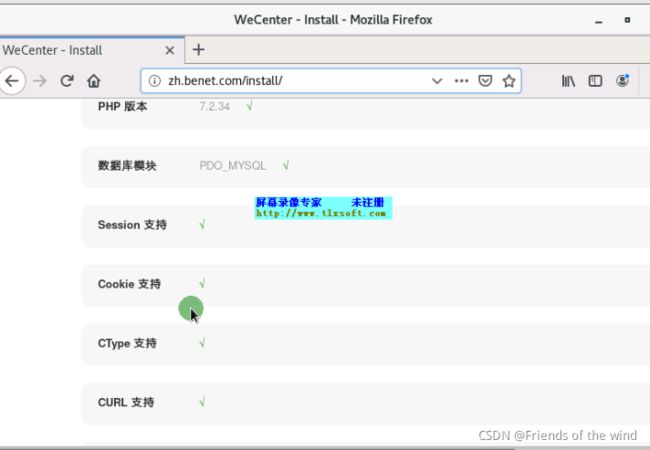
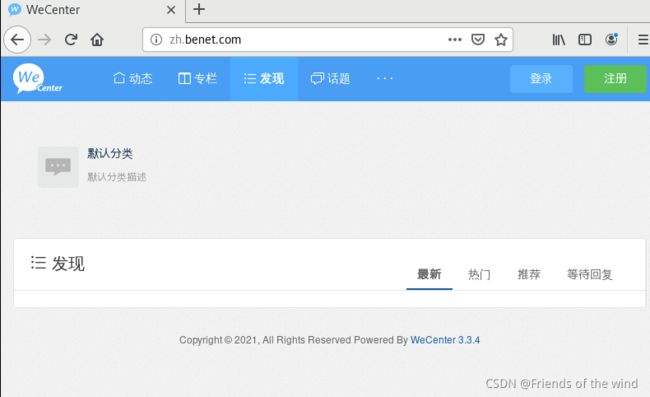
应用2:搭建知乎wecenter
(1)下载wecenter源码包
(2)复制wecenter安装包,到虚拟机/zh目录下,赋权,并复制/zh目录到php服务器
建议断开网络,否则会连接官网加载东西,耗费时间。
cd /zh //建议创建,根目录/zh,它解压完是没有主目录,零散的。
unzip Wecenter_3-3-4.zip
chmod -R 777 /zh
(3)创建虚拟主机配置文件
vim /etc/nginx/conf.d/zh.conf
添加:
    server {
    listen 80;
    server_name zh.benet.com;
    root /zh;
    index index.php index.html;

    location ~ \.php$ {
            root /zh;
            fastcgi_pass 127.0.0.1:9000;
            fastcgi_index index.php;
            fastcgi_param SCRIPT_FILENAME $document_root$fastcgi_script_name;
            include fastcgi_params;
    }
}
保存退出
systemctl reload nginx
(4)创建blog数据库和管理用户
登录数据库:mysql -uroot -p123.com
创建数据库:create database zh;
设置管理用户及密码:grant all on zh.* to wangwu@localhost identified by '123.com';
(5)客户端通过域名访问zh,安装并配置
执行下一步,报错:数据库连接失败!
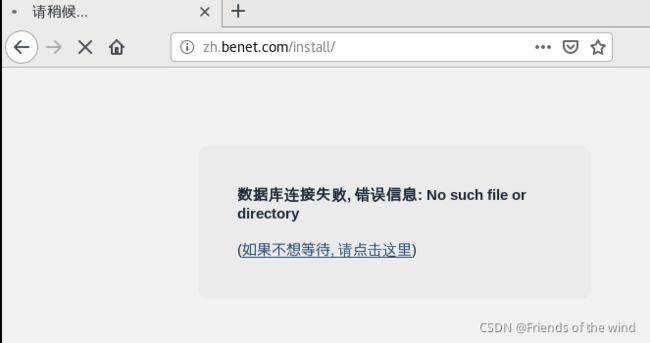
解决方案:用其他主机以创建的zh账号登录mysql,成功;排除mysql账户密码错误问题;
还是解压/zh,缺少文件,别问为什么?命令没错,解压再三丢失文件;删除web1的/zh目录,重新解压,并拷贝一份到php服务器,对比确实少一个文件。;
再次尝试,还是这个错误,发现问题:分布式安装,默认选项localhost,必须改成真实ip;解决问题。
报错:
解决方案:mysql数据库地址更改,只更改主配置文件,而wp-config.php不会自动更改,所以手动更改正确地址即可!

创建管理账号:
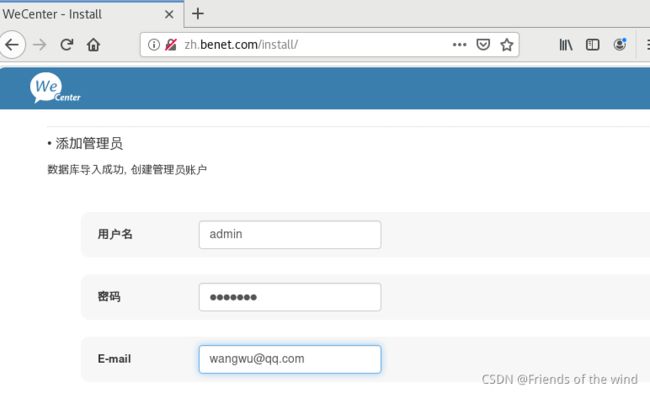
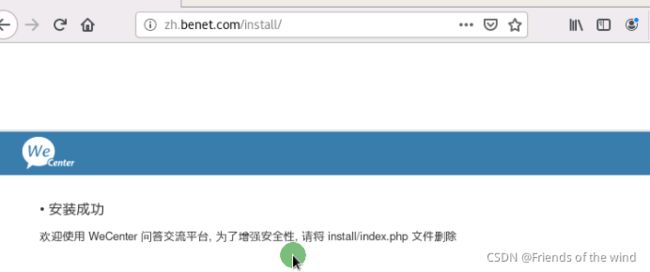
http://zh.benet.com
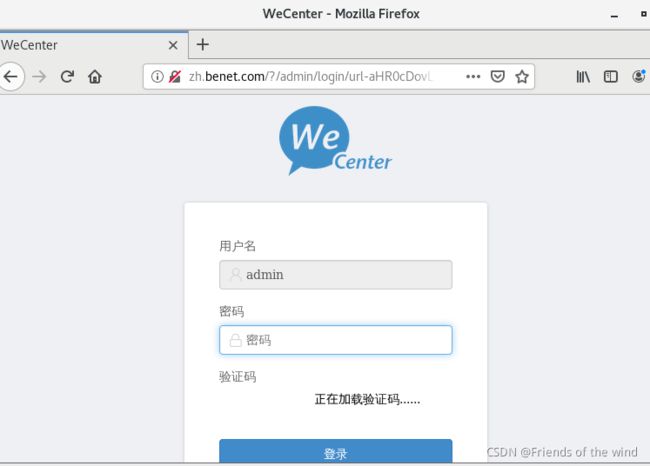
登录后台
http://zh.benet.com/?/admin
二、 脚本自动搭建(可以有好多种形式的脚本,给大家介绍一个相对复杂,但功能更完善的脚本)
分析:LNMP是这个架构的基础,保障能更好的运行,加入keepalived,实现高可用。比如:一台Nginx服务器故障,keepalived可以自动切换到另一台Nginx服务器,保障业务不中断;expect是实现免交互的一个服务,调用expect做免密登录,同时部署多台服务器,WordPress是一种使用PHP语言开发的博客平台,用户可以在支持PHP和MySQL数据库的服务器上架设属于自己的网站;当然,好比造一辆高端的车,比造一台普通的车,难度高,我的另一个教程没这两个服务,部署相对简单,需要可看玩转Linux系统之shell脚本轻松搭建LNMP平台架构
脚本及注释如下图:
#!/bin/bash
echo "关闭防火墙,关闭SELinux,开启ens33"
systemctl stop firewalld && setenforce 0 && ifup ens33
echo " = = = = = = = = = = = = = = = = 免密交互 = = = = = = = = = = = = = = = = "
  cat > /root/ip.txt << E
192.168.2.2 root 123456
192.168.2.3 root 123456
E
  echo " = = = = = = = = = = = = = = = = expect正在安装 = = = = = = = = = = = = = = = = "
  rm -rf /var/run/yum.pid && yum -y install expect  &> /dev/null     //删除yum的进程id文件,并安装expect
  echo " = = = = = = = = = = = = = = = = expect已安装 = = = = = = = = = = = = = = = = "
  if [ ! -f /root/.ssh/id_rsa ];then   //如果id_rsa文件不存在,则生成文件
  ssh-keygen -t rsa -P "" -f ~/.ssh/id_rsa
mv /root/.ssh/id_rsa.pub /root/.ssh/authorized_keys  //重命名为authorized_keys
 echo "id_rsa已创建成功"
  else
mv /root/.ssh/id_rsa.pub /root/.ssh/authorized_keys
 echo "id_rsa已存在"
  fi
while read line      //依次读取ip.txt文件的值赋给变量line
 do
   user=`echo $line | cut -d " " -f 2`
   ip=`echo $line | cut -d " " -f 1`
   passwd=`echo $line | cut -d " " -f 3`
expect  <<EOF
        set     timeout 10
        spawn   scp     -r /root/.ssh $ip:/root
        expect  {
        "yes/no" { send "yes\n";exp_continue }
        "password" { send "$passwd\n" }
        }
        expect "password" { send "$passwd\n" }
EOF
        done < ip.txt
echo " = = = = = = = = = = = = = = = = 所有节点正在安装nginx = = = = = = = = = = = = = = = = "
while read -r line
  do
  nip1=`echo $line | cut -d " " -f 1`
scp -rp /root/qrl/nginx-rpm root@${nip1}:/root
ssh $nip1 << hhh
rm -rf /var/run/yum.pid
cd nginx-rpm/
yum -y localinstall *.rpm
hhh
done < ip.txt
echo " = = = = = = = = = = = = = = = = 所有配置web节点 = = = = = = = = = = = = = = = = "
cat ip.txt | cut -d " " -f 1 |awk ' NR==1 { print $1 }' >> aa.txt //截取ip.txt文件,以空格分隔第一列,第一行,重定向到aa.txt文件
cat ip.txt | cut -d " " -f 1 |awk ' NR==2 { print $1 }' >> aa.txt
ccip=`cat ip.txt | cut -d " " -f 1 |awk ' NR==1 { print $1 }'` //定义变量ccip,并赋值为
hostip=`ifconfig ens33 | awk ' NR==2 { print $2 }'`  //定义变量ccip,并赋值为查看网卡信息,过滤出的第二行
while read -r line
  do
nip2=`echo $line | cut -d " " -f 1`
scp -rp /root/qrl/wordpress-4.9.4-zh_CN.zip root@$nip2:/
ssh $nip2 << nnn
rm -f /etc/nginx/conf.d/*
cat > /etc/nginx/conf.d/blog.conf << aaa
server {
        listen 80;
        server_name blog.benet.com;
        root /wordpress;
        index index.php index.html;

        location ~ \.php$ {
                root /wordpress;
                fastcgi_pass ${hostip}:9000;
                fastcgi_index index.php;
                fastcgi_param SCRIPT_FILENAME ?document_root?fastcgi_script_name;
                include fastcgi_params;
        }
    }

aaa
sed -i 's/?/$/g' /etc/nginx/conf.d/blog.conf
cd /
unzip wordpress-4.9.4-zh_CN.zip
chmod -R 777 /wordpress
chown -R nginx:nginx /wordpress
cd
systemctl start nginx
if [ $? -eq 0 ];then
echo " = = = = = = = = = = = = = web节点nginx启动成功 = = = = = = = = = = = = = "
else
echo " = = = = = = = = = = = = = web节点nginx启动失败 = = = = = = = = = = = = = "
fi
nnn
done < aa.txt
echo " = = = = = = = = = = = = = = = = 正在配置lb节点 = = = = = = = = = = = = = = = = "
scp -rp /wordpress/ root@$ccip:/
cat ip.txt | cut -d " " -f 1 |awk ' NR==3 { print $1 }' >> bb.txt  //截取ip.txt文件,以空格分隔第一列,第一行,重定向到bb.txt文件
cat ip.txt | cut -d " " -f 1 |awk ' NR==4 { print $1 }' >> bb.txt
ngip1=`cat aa.txt | cut -d " " -f 1 |awk ' NR==1 { print $1 }'`   //截取aa.txt文件,以空格分隔第一列,第一行
ngip2=`cat aa.txt | cut -d " " -f 1 |awk ' NR==2 { print $1 }'`
read -p "请输入你当前属于几网段" wd
while read  line
  do
nip3=`echo $line | cut -d " " -f 1`
ssh $nip3 << ggg
rm -f rm -f /etc/nginx/conf.d/*
cat > /etc/nginx/conf.d/lb${nip3}.conf << aaa  //自动修改配置文件
upstream web_cluster {
        server ${ngip1}:80;
        server ${ngip2}:80;
}

server {
        listen 80;
        server_name blog.benet.com;

        location / {
                proxy_pass http://web_cluster;
                include nginx_params;
        }

}
aaa
cat > /etc/nginx/nginx_params << yyy
proxy_set_header Host ?http_host;
proxy_set_header X-Real-IP ?remote_addr;
proxy_set_header X-Forwarded-For ?proxy_add_x_forwarded_for;

proxy_connect_timeout 30;
proxy_send_timeout 60;
proxy_read_timeout 60;

proxy_buffering on;
proxy_buffer_size 32k;
proxy_buffers 4 128k;
yyy
sed -i 's/?/$/' /etc/nginx/nginx_params
systemctl start nginx
rm -rf /etc/keepalived/keepalived.conf
rm -rf /var/run/yum.pid && yum -y install keepalived
cat > /etc/keepalived/keepalived.conf << kkk
global_defs {
   router_id lb$nip3
}
vrrp_script check_nginx_proxy {
        script “/sh/check_nginx_proxy.sh”
        interval 2
        weight 5
        }
vrrp_instance VI_1 {
    state MASTER
    interface ens33
    virtual_router_id 51
    priority 100
    advert_int 1
    authentication {
        auth_type PASS
        auth_pass 1111
    }
    virtual_ipaddress {
        192.168.${wd}.254
    }
}
  track_script {
        check_nginx_proxy
    }
}
kkk
systemctl start nginx   //启动nginx
if [ $? -eq 0 ];then
echo " = = = = = = = = = = = = = lb节点nginx启动成功 = = = = = = = = = = = = = "
else
echo " = = = = = = = = = = = = = lb节点nginx启动失败 = = = = = = = = = = = = = "
fi
mkdir /sh
cat > /sh/check_nginx_proxy.sh << sss    //编辑检查nginx脚本
#!/bin/bash
killall  -0  nginx
if  [ $? -ne 0 ];then
  systemctl stop keepalived
fi
sss
chmod +x /sh/check_nginx_proxy.sh
systemctl start keepalived
if [ $? -eq 0 ];then
echo " = = = = = = = = = = = = = keepalived启动成功 = = = = = = = = = = = = = "
else
echo " = = = = = = = = = = = = = keepalived启动失败 = = = = = = = = = = = = = "
fi
ggg
done < bb.txt
gpzip=`cat bb.txt |cut -d " " -f 1 | awk ' NR==2 { print $1 }'`
ssh $gpzip << ppp
sed -i 's/100/99/' /etc/keepalived/keepalived.conf
sed -i 's/MASTER/BACKUP/' /etc/keepalived/keepalived.conf  //把MASTER替换成BACKUP
systemctl restart keepalived
ppp
echo " = = = = = = = = = = = = = = = = 安装配置mysql,php = = = = = = = = = = = = = = = = "
cd mysql5.6-rpm/
yum -y localinstall *.rpm //安装以.rpm结尾的程序
cd /root/qrl/php-rpm/
yum -y localinstall *.rpm
systemctl start mysql
if [ $? -eq 0 ];then
echo " = = = = = = = = = = = = = mysql启动成功 = = = = = = = = = = = = = "
else
echo " = = = = = = = = = = = = = mysql启动失败 = = = = = = = = = = = = = "
fi
mysql -e "create database blog;"  //执行mysql命令,创建数据库blog
mysql -e "grant all on blog.* to lisi@'%' identified by '123456';"  //授权lisi用户以123456登录管理blog数据库,具有所有权限
echo "192.168.${wd}.254 blog.benet.com" >> /etc/hosts //将主机ip与域名重定向到hosts文件
sed -i "s/listen = 127.0.0.1:9000/listen = "$hostip":9000/" /etc/php-fpm.d/www.conf  //替换listen行内容
sed -i "[email protected]_clients = [email protected]_clients = "$ngip1","$ngip2"@" /etc/php-fpm.d/www.conf
systemctl start php-fpm   //启动php-fpm守护进程
if [ $? -eq 0 ];then
echo " = = = = = = = = = = = = = php启动成功 = = = = = = = = = = = = = "
else
echo " = = = = = = = = = = = = = php启动失败 = = = = = = = = = = = = = "
fi
目标四:
提示:执行脚本前,必须先部署环境
部署环境
1、拷贝所需文件到master服务器,并为其设置权限
![]()
2、保障网络连通,(配置好yum仓库,略)
3、 执行脚本
#!/bin/bash
echo "关闭防火墙,关闭SELinux"
systemctl stop firewalld && setenforce 0
echo " = = = = = = = = = = = = = = = = 免密交互 = = = = = = = = = = = = = = = = "
cat > /root/ip.txt << E
192.168.2.136 root 123456
E
yum -y install expect
if [ ! -f /root/.ssh/id_rsa ];then
	ssh-keygen -t rsa -P "" -f ~/.ssh/id_rsa
	mv /root/.ssh/id_rsa.pub /root/.ssh/authorized_keys
	echo "id_rsa创建成功"
else
	mv /root/.ssh/id_rsa.pub /root/.ssh/authorized_keys
	echo "id_rsa已存在"
fi
while read line
 do
   user=`echo $line | cut -d " " -f 2`
   ip=`echo $line | cut -d " " -f 1`
   passwd=`echo $line | cut -d " " -f 3`
expect  <<EOF
        set     timeout 10
        spawn   scp     -r /root/.ssh $ip:/root
        expect  {
        "yes/no" { send "yes\n";exp_continue }
        "password" { send "$passwd\n" }
        }
        expect "password" { send "$passwd\n" }

EOF
        done < /root/ip.txt

echo " = = = = = = = = = = = = = = = = 免密交互完成 = = = = = = = = = = = = = = = = "

echo " = = = = = = = = = = = = = = = = 所有节点正在安装nginx = = = = = = = = = = = = = = = = "
while read line
do
	nip1=`echo $line | cut -d " " -f 1`
	scp -rp /root/qrl/    root@${nip1}:/root
	ssh $nip1 << E
	rm -f /var/run/yum.pid
	rm -f /etc/yum.repos.d/*
	cd /root/qrl/
	mv yum.repo /etc/yum.repos.d/
	cd /root/qrl/nginx-rpm/
	yum -y localinstall *.rpm
E

done	< /root/ip.txt

echo " = = = = = = = = = = = = = nginx安装成功 = = = = = = = = = = = = = = = = = ="

echo " = = = = = = = = = = = = = = = = 所有配置web节点 = = = = = = = = = = = = = = = = "
cat ip.txt | cut -d " " -f 1 |awk ' NR==1 { print $1 }' >> aa.txt
cat ip.txt | cut -d " " -f 1 |awk ' NR==2 { print $1 }' >> aa.txt
ccip=`echo ip.txt | cut -d " " -f 1 |awk ' NR==1 { print $1 }'`
hostip=`ifconfig ens33 | awk ' NR==2 { print $2 }'`
while read -r line
  do
nip2=`echo $line | cut -d " " -f 1`
scp -rp /root/qrl/wordpress-4.9.4-zh_CN.zip root@$nip2:/
ssh $nip2 << nnn
rm -f /etc/nginx/conf.d/*
cat > /etc/nginx/conf.d/blog.conf << aaa
server {
        listen 80;
        server_name blog.benet.com;
        root /wordpress;
        index index.php index.html;

        location ~ \.php$ {
                root /wordpress;
                fastcgi_pass ${hostip}:9000;
                fastcgi_index index.php;
                fastcgi_param SCRIPT_FILENAME ?document_root?fastcgi_script_name;
                include fastcgi_params;
        }
    }

aaa
sed -i 's/?/$/g' /etc/nginx/conf.d/blog.conf
cd /
unzip wordpress-4.9.4-zh_CN.zip
chmod -R 777 /wordpress
cd
systemctl start nginx
if [ $? -eq 0 ];then
echo " = = = = = = = = = = = = = web节点nginx启动成功 = = = = = = = = = = = = = "
else
echo " = = = = = = = = = = = = = web节点nginx启动失败 = = = = = = = = = = = = = "
fi
nnn
done < aa.txt
echo " = = = = = = = = = = = = = = = = 正在配置lb节点 = = = = = = = = = = = = = = = = "
scp -rp root@$ccip:/wordpress /
cat ip.txt | cut -d " " -f 1 |awk ' NR==3 { print $1 }' >> bb.txt
cat ip.txt | cut -d " " -f 1 |awk ' NR==4 { print $1 }' >> bb.txt
ngip1=`cat aa.txt | cut -d " " -f 1 |awk ' NR==1 { print $1 }'`
ngip2=`cat aa.txt | cut -d " " -f 1 |awk ' NR==2 { print $1 }'`
read -p "请输入你当前属于几网段" wd
while read  line
  do
nip3=`echo $line | cut -d " " -f 1`
ssh $nip3 << ggg
rm -f rm -f /etc/nginx/conf.d/*
cat > /etc/nginx/conf.d/lb${nip3}.conf << aaa
upstream web_cluster {
        server ${ngip1}:80;
        server ${ngip2}:80;
}

server {
        listen 80;
        server_name blog.benet.com;

        location / {
                proxy_pass http://web_cluster;
                include nginx_params;
        }

}
aaa
cat > /etc/nginx/nginx_params << yyy
proxy_set_header Host ?http_host;
proxy_set_header X-Real-IP ?remote_addr;
proxy_set_header X-Forwarded-For ?proxy_add_x_forwarded_for;

proxy_connect_timeout 30;
proxy_send_timeout 60;
proxy_read_timeout 60;

proxy_buffering on;
proxy_buffer_size 32k;
proxy_buffers 4 128k;
yyy
sed -i 's/?/$/' /etc/nginx/nginx_params
systemctl start nginx
rm -rf /etc/keepalived/keepalived.conf
rm -rf /var/run/yum.pid && yum -y install keepalived
cat > /etc/keepalived/keepalived.conf << kkk
global_defs {
   router_id lb$nip3
}
vrrp_script check_nginx_proxy {
        script “/sh/check_nginx_proxy.sh”
        interval 2
        weight 5
        }
vrrp_instance VI_1 {
    state MASTER
    interface ens33
    virtual_router_id 51
    priority 100
    advert_int 1
    authentication {
        auth_type PASS
        auth_pass 1111
    }
    virtual_ipaddress {
        192.168.${wd}.254
    }
}
  track_script {
        check_nginx_proxy
    }
}
kkk
systemctl start nginx
if [ $? -eq 0 ];then
echo " = = = = = = = = = = = = = lb节点nginx启动成功 = = = = = = = = = = = = = "
else
echo " = = = = = = = = = = = = = lb节点nginx启动失败 = = = = = = = = = = = = = "
fi
mkdir /sh
cat > /sh/check_nginx_proxy.sh << sss
#!/bin/bash
killall  -0  nginx
if  [ $? -ne 0 ];then
  systemctl stop keepalived
fi
sss
chmod +x /sh/check_nginx_proxy.sh
systemctl start keepalived
if [ $? -eq 0 ];then
echo " = = = = = = = = = = = = = keepalived启动成功 = = = = = = = = = = = = = "
else
echo " = = = = = = = = = = = = = keepalived启动失败 = = = = = = = = = = = = = "
fi
ggg
done < bb.txt
gpzip=`cat bb.txt |cut -d " " -f 1 | awk ' NR==2 { print $1 }'`
ssh $gpzip << ppp
sed -i 's/100/99/' /etc/keepalived/keepalived.conf
sed -i 's/MASTER/BACKUP/' /etc/keepalived/keepalived.conf
systemctl restart keepalived
ppp
echo " = = = = = = = = = = = = = = = = 安装配置mysql,php = = = = = = = = = = = = = = = = "
cd mysql5.6-rpm/
yum -y localinstall *.rpm
cd /root/qrl/php-rpm/
yum -y localinstall *.rpm
systemctl start mysql
if [ $? -eq 0 ];then
echo " = = = = = = = = = = = = = mysql启动成功 = = = = = = = = = = = = = "
else
echo " = = = = = = = = = = = = = mysql启动失败 = = = = = = = = = = = = = "
fi
mysql -e "create database blog;"
mysql -e "grant all on blog.* to lisi@'%' identified by '123456';"
echo "192.168.${wd}.254 blog.benet.com" >> /etc/hosts
sed -i "s/listen = 127.0.0.1:9000/listen = "$hostip":9000/" /etc/php-fpm.d/www.conf
sed -i "[email protected]_clients = [email protected]_clients = "$ngip1","$ngip2"@" /etc/php-fpm.d/www.conf
systemctl start php-fpm
if [ $? -eq 0 ];then
echo " = = = = = = = = = = = = = php启动成功 = = = = = = = = = = = = = "
else
echo " = = = = = = = = = = = = = php启动失败 = = = = = = = = = = = = = "
fi
4、常见报错处理:
免密交互,报错:连接被拒绝
![]()
解决方案:
重启目标服务器sshd服务,等几秒钟测试
![]()
出现以下提示,证明已经解决此问题

避免报错:
做完一部分,进行验证,将错误锁定在很小的范围内,出现错误,先将问题简化,再对定位的焦点,做解决方案。
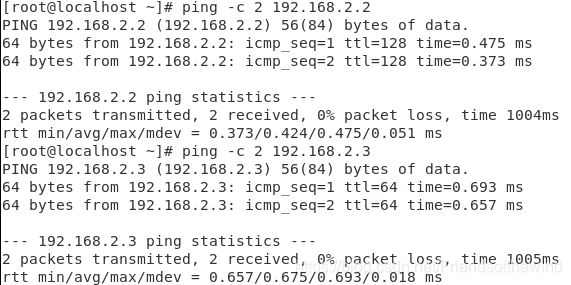
验证:mysql步骤是否成功