Spring boot 基于注解方式配置datasource
Spring boot 基于注解方式配置datasource
Xml配置
我们先来回顾下,使用xml配置数据源。
步骤:
先加载数据库相关配置文件;
配置数据源;
配置sqlSessionFactory,注入数据源
具体如下:
一:设置数据配置信息文件
classpath:dbconfig.properties
classpath:redis.properties
二:配置datasorce相关信息
2.1:数据库信息配置
2.2:sqlsessionFactroy配置:
有了大致的思路后,我们再来看看spring boot基于注解方式怎么配置数据源。
注解配置
先要知道几个注解:
@Configuration:此注解看用理解为spring的一个xml文件
@PropertySource:对应原xml中设置配置文件的
@MapperScan:就是xml中扫描的基包;
sqlSessionFactoryRef:就是注入sqlSessionFactory的
@Bean:这个注解就是原xml中bean标签的。
先了解这几个注解之后,我们就可以开始写代码了(在文章最后,凯哥会把xml和注解的对应关系列出来,方便大家理解)。
一:加载数据库配置文件
二:配置datasorce相关信息
2.1:数据库信息配置
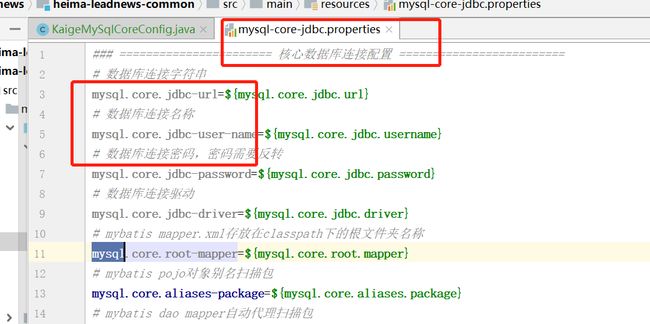
我们先来看看数据库配置文件怎么配置的:
在看看代码中怎么获取到这些值的:
说明:
通过上面注解之后,启动服务后,属性:jdbcUrl这个属性的值就会在classpath下的mysql-core-jdbc.properties文件中查找前缀为mysql.core的后面为:jdbc-url这个可以。从而就可以获取到数据库连接的url了。
数据库连接信息获取到了,接下来,我们来配置datasource信息:
说明:
通过这个bean注解之后,就可以获取到dataSource对象了。
2.2:sqlsessionFactroy配置:
这样就可以获取到sqlSessionFactory对象了。
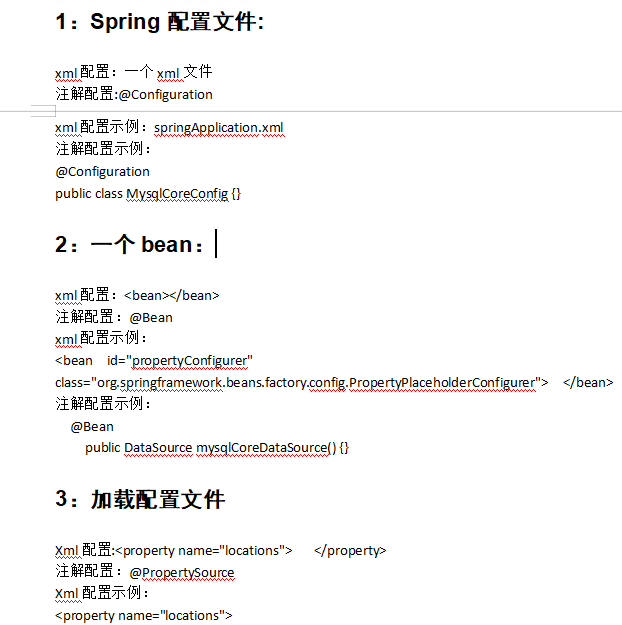
XML配置和注解配置比较:
1:Spring配置文件:
xml配置:一个xml文件
注解配置:@Configuration
xml配置示例:springApplication.xml
注解配置示例:
@Configuration
public class MysqlCoreConfig {}
2:一个bean:
xml配置:
注解配置:@Bean
xml配置示例:
class=“org.springframework.beans.factory.config.PropertyPlaceholderConfigurer”> 注解配置示例: @Bean public DataSource mysqlCoreDataSource {} Xml配置: 注解配置:@PropertySource Xml配置示例: classpath:dbconfig.properties 注解配置示例:@PropertySource(“classpath:mysql-core-jdbc.properties”) import lombok.Data; import org.mybatis.spring.SqlSessionFactoryBean; import org.mybatis.spring.annotation.MapperScan; import org.springframework.beans.factory.annotation.Qualifier; import org.springframework.boot.context.properties.ConfigurationProperties; import org.springframework.context.annotation.Bean; import org.springframework.context.annotation.Configuration; import org.springframework.context.annotation.PropertySource; import org.springframework.core.io.support.PathMatchingResourcePatternResolver; import javax.sql.DataSource; /** */ @Data @Configuration @ConfigurationProperties(prefix = “mysql.core”) @PropertySource(“classpath:mysql-core-jdbc.properties”) @MapperScan(basePackages =“com.kaigejava.model.mappers” ,sqlSessionFactoryRef = “kaigeMysqlDataSource”) public class KaigeMySqlCoreConfig { private String jdbcUrl; private String jdbcUserName; private String jdbcPassword; private String jdbcDriver; private String rootMapper; //mapper文件再classpath下存放的根路径 private String aliasesPackage; //别名包 /** 配置连接池信息 @return */ @Bean public DataSource kaigeMysqlCreateDataSource{ HikariDataSource dataSource = new HikariDataSource; //添加数据库访问url dataSource.setJdbcUrl(getJdbcUrl); dataSource.setUsername(getJdbcUserName); dataSource.setPassword(getJdbcPassword); dataSource.setDriverClassName(getJdbcDriver); //配置最大 最小连接数量 dataSource.setMinimumIdle(50); dataSource.setMinimumIdle(10); return dataSource; } /** 获取sqlSessionFactory @return */ public SqlSessionFactoryBean kaigeMysqlCoreSqlSessionFactory(@Qualifier(“kaigeMysqlDataSource”) DataSource kaigeMysqlDataSource) throws Exception{ SqlSessionFactoryBean sqlSessionFactoryBean = new SqlSessionFactoryBean; sqlSessionFactoryBean.setDataSource(kaigeMysqlDataSource); //处理mapper位置的 PathMatchingResourcePatternResolver resourcePatternResolver = new PathMatchingResourcePatternResolver; sqlSessionFactoryBean.setMapperLocations(resourcePatternResolver.getResources(getMapperFileRealPath)); sqlSessionFactoryBean.setTypeAliasesPackage(getAliasesPackage); org.apache.ibatis.session.Configuration mybatisConfig = new org.apache.ibatis.session.Configuration; mybatisConfig.setMapUnderscoreToCamelCase(true); sqlSessionFactoryBean.setConfiguration(mybatisConfig); return sqlSessionFactoryBean; } /** 拼接mapper文件地址的 @return */ public String getMapperFileRealPath{ return new StringBuffer.append(“classpath:”).append(getRootMapper).append(“/**/*.xml”).toString; } }3:加载配置文件
完整代码:


