::before和::after伪元素
::before和::after伪元素
一、定义
伪元素是指由CSS生成的而不是由DOM结构生成的元素,语法是在元素后紧跟双冒号,然后再跟伪元素关键词,如div::before表示div元素的::before伪元素。有时你会见到单冒号的写法,如div:before,虽然也可以正常渲染,但规范中提到,单冒号用于伪类(例如 :hover,当鼠标悬浮在元素上方时,向元素添加样式),双冒号用于伪元素,所以我们还是向规范靠拢,使用双冒号的写法。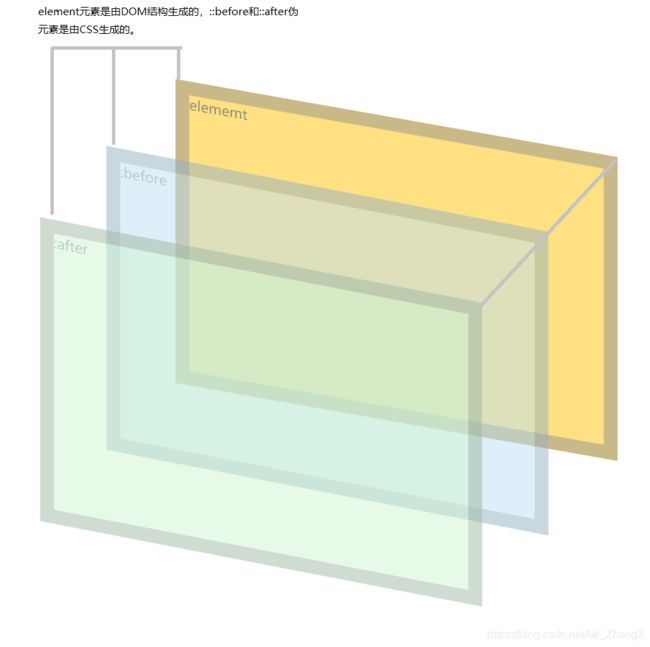
二、content属性
所有伪元素都必须要用content属性声明引用内容,引用内容是文本类型,没有任何文本内容,其值为空字符串,需要注意的是,没有引用内容,也不能省略content属性。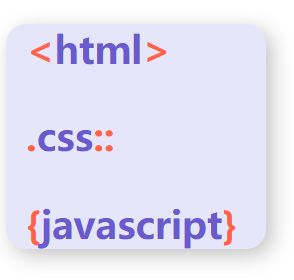
<html>
	<head>
		<title>title>
	head>

	<body>
		<div class="web-development">
			<p class="html">htmlp>
			<p class="css">cssp>
			<p class="js">javascriptp>
		div>
	body>

	<style>
		.web-development {
			width: 11em;
			padding: 0 1em;
			border-radius: 1em;
			background-color: lavender;
			box-shadow: 0.3em 0.3em 1em hsla(0, 0%, 70%, 0.8);
		}
		.web-development p {
			font-size: 30px;
			font-family: sans-serif;
			font-weight: bold;
			color: slateblue;
		}
		.web-development P::before,
		.web-development P::after {
			color: tomato;
		}
		.web-development .html::before {
			content: "<";
		}
		.web-development .html::after {
			content: ">";
		}
		.web-development .css::before {
			content: ".";
		}
		.web-development .css::after {
			content: "::";
		}
		.web-development .js::before {
			content: "{";
		}
		.web-development .js::after {
			content: "}";
		}
	style>
html>
三、实战应用:绘制小怪兽
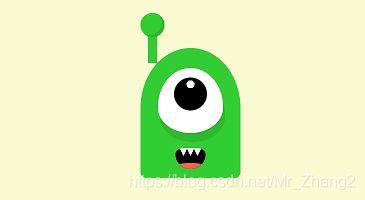
1、定义DOM结构如下:.monster表示怪兽的头部;.ear表示耳朵,有两个 .ear 元素表示两只耳朵,左耳和右耳再分别用 .left和 .right 样式来区分;.eye 表示眼睛;.mouth表示嘴,它的子元素==.teeth==表示嘴里的牙齿。
<html>
	<head>
		<title>title>
	head>

	<body>
		<figure class="monster">
			<div class="ear left">div>
			<div class="ear right">div>
			<div class="eye">div>
			<div class="mouth">
				<div class="teeth">div>
			div>
		figure>
	body>

	<style>

	style>
html>
2、 设置页面的背景色,令 body 的子元素,也就是 .monster居于页面正中。
body {
	margin: 0;
	height: 100vh;
	display: flex;
	align-items: center;
	justify-content: center;
	background-color: lightgoldenrodyellow;
}
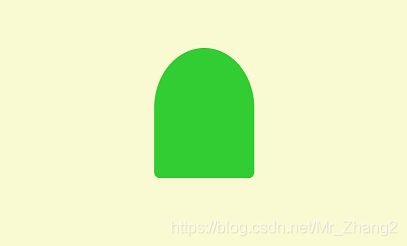
3、定义==.monster== 的尺寸,通过圆角属性把容器的上半部绘制成拱形,容器本身采用相对定位,那么后续采用绝对定位的子元素,将以容器的左上角为起始坐标。另外,此处并没有直接为 background-color 属性指定色值,而是先把 color 定义为绿色,然后把 currentColor 定义为背景色,这是为了后续仍能借 currentColor 引用 color 的色值而设。
.monster {
	width: 10em;
	height: 13em;
	color: limegreen;
	background-color: currentcolor;
	border-radius: 5em 5em 5% 5% / 6em 6em 5% 5%;
	position: relative;
}
4、绘制出眼睛的轮廓,眼底用白色,用圆角把元素调整为胖胖的水滴状,再加上阴影增强立体感,box-shadow 里的色值 hsla(0,0%,0%,0.1) 表示大部分透明的黑色,也就是淡淡的阴影。

.eye {
	position: absolute;
	width: 6.5em;
	height: 6.5em;
	background: white;
	border-radius: 77% 77% 77% 77% / 92% 92% 60% 60%;
	top: 2em;
	left: calc((10em - 6.5em) / 2);
	box-shadow: 0.2em 0.9em 0 hsla(0, 0%, 0%, 0.1);
}
5、细化眼睛,用两个径向渐变分别画出黑色的眼珠和白色的瞳孔,left 属性中的 10em 是父容器的宽度, 6.5em 是元素自身的宽度,整个 left 属性的意思是让元素在父元素中水平居中。
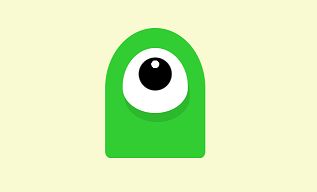
.eye {
	position: absolute;
	width: 6.5em;
	height: 6.5em;
	background:
		radial-gradient(
			circle at 50% 25%,
			white 0.4em,
			transparent 0.4em
		),
		radial-gradient(
			circle at 50% 40%,
			black 1.6em,
			transparent 1.7em
		),
		white;
	border-radius: 77% 77% 77% 77% / 92% 92% 60% 60%;
	top: 2em;
	left: calc((10em - 6.5em) / 2);
	box-shadow: 0.2em 0.9em 0 hsla(0, 0%, 0%, 0.1);
}
6、绘制出嘴巴的轮廓,同样用圆角来塑形,用left 属性让元素水平居中。
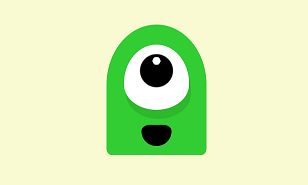
.mouth {
	position: absolute;
	width: 3em;
	height: 2.1em;
	background-color: black;
	bottom: 0.9em;
	left: calc((10em - 3em) / 2);
	border-radius: 70% 70% 3.5em 3.5em;
}
7、用伪元素绘制出舌头,伪元素同时也是主元素的子元素,所以舌头的主元素,也就是嘴,用overflow:hidden 隐藏了超出嘴以外的舌头部分。
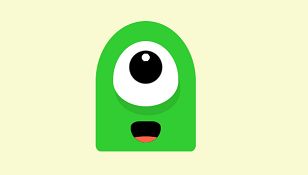
.mouth {
	overflow: hidden;
}
.mouth::before {
	content: '';
	position: absolute;
	width: inherit;
	height: 0.6em;
	background-color: tomato;
	border-radius: 50% 50% 0 0;
	bottom: 0;
}
.mouth .teeth {
	content: '';
	position: absolute;
	border-top: 0.8em solid white;
	border-left: 0.4em solid transparent;
	border-right: 0.4em solid transparent;
	left: 1.1em;
}
9、 为了再多画两颗牙齿,于是令两个伪元素与主元素共享造型代码,然后把伪元素绘制的牙齿定位到左右两侧,这样就有三颗牙齿了。
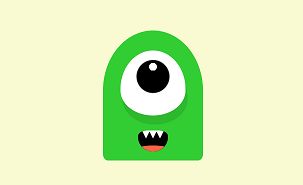
.mouth .teeth,
.mouth .teeth::before,
.mouth .teeth::after {
	content: '';
	position: absolute;
	border-top: 0.8em solid white;
	border-left: 0.4em solid transparent;
	border-right: 0.4em solid transparent;
	left: 1.1em;
}
.mouth .teeth::before {
	top: -0.8em;
	left: -1.1em;
}
.mouth .teeth::after {
	top: -0.8em;
	left: 0.3em;
}
10、接下来绘制耳朵,.ear主元素本身不参加绘图,只是定义一个容器范围,还定义了接下来的子元素要水平居中。
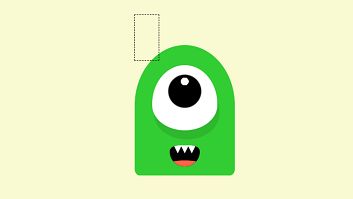
.ear {
	position: absolute;
	width: 2.4em;
	height: 4.5em;
	top: -3em;
	display: flex;
	justify-content: center;
	outline: 1px dashed black;  /** 增加虚线轮廓显示用 */
}
11、初始化伪元素的共享属性,然后绘制出耳朵的下半部的长条形,注意,此时虽然只能看到一只耳朵的下半部,但其实是绘制出了两只耳朵的下半部,只是它们重叠在一起了。
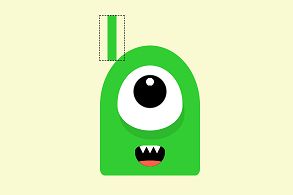
.ear::before,
.ear::after {
	content: '';
	position: absolute;
	background-color: currentcolor;
}
.ear::before {
	width: 0.9em;
	height: inherit;
}
.ear::after {
	width: 2.4em;
	height: 2.4em;
	border-radius: 50%;
	top: -0.5em;
	box-shadow: inset -0.3em -0.2em 0 hsla(0, 0%, 0%, 0.1);
}
13、至此,一只耳朵画完,但它还没有长在头顶上,通过定位让两只耳朵分开,分别位于两侧。
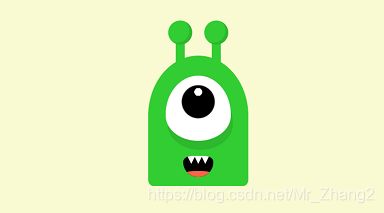
.ear.left {
	left: 2em;
}
.ear.right {
	right: 2em;
}
14、最后,让两只耳朵分别向两侧旋转,旋转的中心是耳朵底部,所以两只耳朵呈现出向两侧叉开的效果。
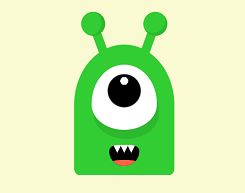
.ear {
	transform-origin: bottom;
}
.ear.left {
	left: 2em;
	transform: rotate(-20deg);
}
.ear.right {
	right: 2em;
	transform: rotate(20deg);
}
至此,可爱的怪兽全部绘制完成。完整代码:
<html>
	<head>
		<title>title>
	head>

	<body>
		<figure class="monster">
			<div class="ear left">div>
			<div class="ear right">div>
			<div class="eye">div>
			<div class="mouth">
				<div class="teeth">div>
			div>
		figure>
	body>

	<style>
		body {
			margin: 0;
			height: 100vh;
			display: flex;
			align-items: center;
			justify-content: center;
			background-color: lightgoldenrodyellow;
		}
		.monster {
			width: 10em;
			height: 13em;
			color: limegreen;
			background-color: currentColor;
			border-radius: 5em 5em 5% 5% / 6em 6em 5% 5%;
			position: relative;
		}
		.eye {
			position: absolute;
			width: 6.5em;
			height: 6.5em;
			background:
				radial-gradient(
					circle at 50% 25%,
					white 0.4em,
					transparent 0.4em
				),
				radial-gradient(
					circle at 50% 40%,
					black 1.6em,
					transparent 1.7em
				),
				white;
			border-radius: 77% 77% 77% 77% / 92% 92% 60% 60%;
			top: 2em;
			left: calc((10em - 6.5em) / 2);
			box-shadow: 0.2em 0.9em 0 hsla(0, 0%, 0%, 0.1);
		}
		.mouth {
			position: absolute;
			width: 3em;
			height: 2.1em;
			background-color: black;
			bottom: 0.9em;
			left: calc((10em - 3em) / 2);
			border-radius: 70% 70% 3.5em 3.5em;
			overflow: hidden;
		}
		.mouth::before {
			content: '';
			position: absolute;
			width: inherit;
			height: 0.6em;
			background-color: tomato;
			border-radius: 50% 50% 0 0;
			bottom: 0;
		}
		.mouth .teeth,
		.mouth .teeth::before,
		.mouth .teeth::after {
			content: '';
			position: absolute;
			border-top: 0.8em solid white;
			border-left: 0.4em solid transparent;
			border-right: 0.4em solid transparent;
			left: 1.1em;
		}
		.mouth .teeth::before {
			top: -0.8em;
			left: -1.1em;
		}
		.mouth .teeth::after {
			top: -0.8em;
			left: 0.3em;
		}
		.ear {
			position: absolute;
			width: 2.4em;
			height: 4.5em;
			top: -3em;
			display: flex;
			justify-content: center;
			transform-origin: bottom;
		}
		.ear::before,
		.ear::after {
			content: '';
			position: absolute;
			background-color: currentcolor;
		}
		.ear::before {
			width: 0.9em;
			height: inherit;
		}
		.ear::after {
			width: 2.4em;
			height: 2.4em;
			border-radius: 50%;
			top: -0.5em;
			box-shadow: inset -0.3em -0.2em 0 hsla(0, 0%, 0%, 0.1);
		}
		.ear.left {
			left: 2em;
			transform: rotate(-20deg);
		}
		.ear.right {
			right: 2em;
			transform: rotate(20deg);
		}
	style>
html>
参考:《CSS3艺术 网页设计案例实战》
