centos7安装单机版elasticsearch+es-head+kibana+filebeat
单机版的elk安装及使用
- 1. elasticsearch的安装
- 2. es-head的安装
- 3. kibana的安装
-
- 3.1 安装
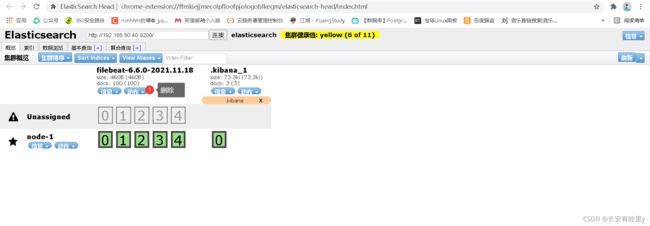
- 3.2 假如我们删除了es-head的.kibana_1
- 4. filebeat的安装
-
- 4.1 安装:
- 4.2 使用filebeat进行nginx的日志收集
- 4.3 filebeat的配置文件的配置
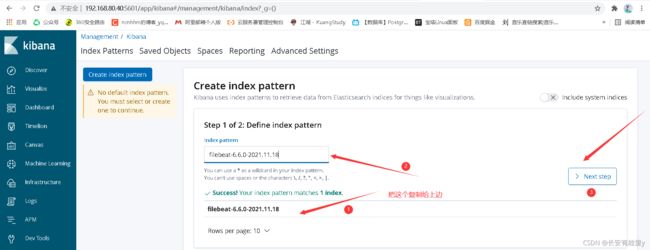
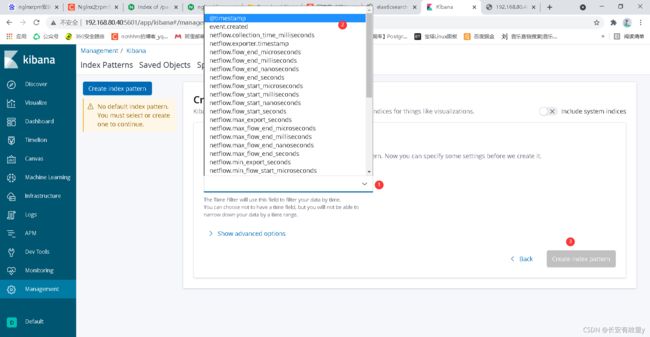
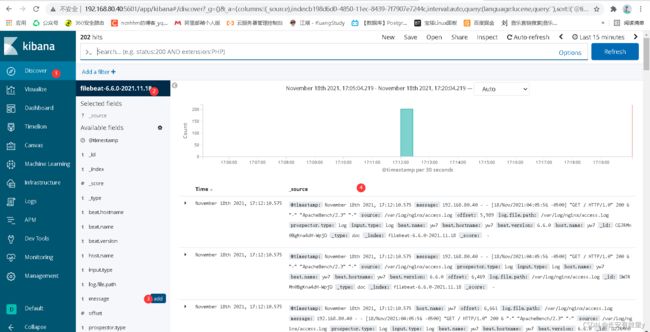
- 4.4 这个时候我们在kibana里边就可以添加filebeat获取到的数据
- 4.5 filebeat的加载数据的原理
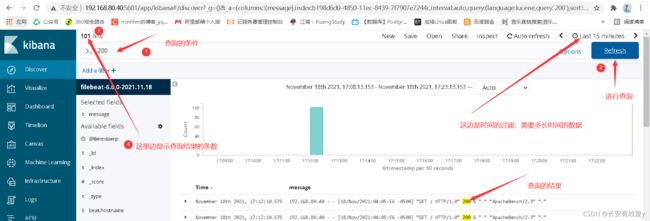
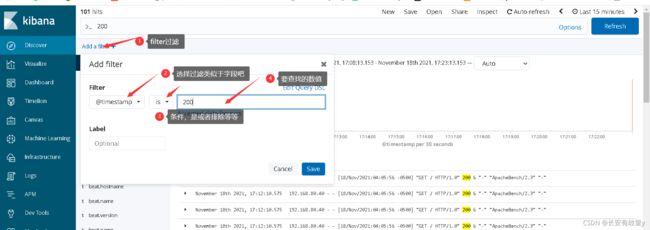
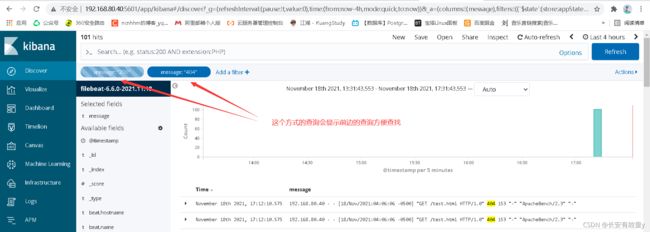
- 5. kibana对日志信息进行过滤
-
- 5.1 方式一
- 5.2 方式二
- 6. 搭建好以后的优化
-
- 6.1 问题1:传过来的是日志数据,是一个完整的message
- 6.2 除了上边的问题,还是会有许多默认的配置数据会出现在kibana,数据的名称是默认的,我们进行更改
-
- 6.2.1 index版本的区别参数不同,一定要查看官网
- 6.3 收集更加完整的数据
注意自己使用不同软件的版本最好是匹配的,不匹配我也没有试过,可能会出错误
单机的内存最好2G以上,3G最好,应为所有的都在一台机器上比较的吃内存消耗,太低的内存服务启动不起来
1. elasticsearch的安装
下载地址
https://www.elastic.co/cn/downloads/elasticsearch
安装步骤
1.安装软件
yum install -y java-1.8.0-openjdk.x86_64
rpm -ivh elasticsearch-6.6.0.rpm

2.修改配置文件

cat /etc/elasticsearch/elasticsearch.yml
node.name: node-1
path.data: /data/elasticsearch
path.logs: /var/log/elasticsearch
bootstrap.memory_lock: true
network.host: 192.168.80.40,127.0.0.1
http.port: 9200


锁定内存的更改
vim jvm.options
-Xms512m
-Xmx512m
默认是1g根据自己的内存大小进行更改

3.修改内存锁定
systemctl edit elasticsearch
添加
[Service]
LimitMEMLOCK=infinity

4.创建数据目录并授权
mkdir /data/elasticsearch
chown -R elasticsearch:elasticsearch /data/elasticsearch/

5.重启服务
systemctl daemon-reload
systemctl start elasticsearch

6.查看日志和端口
tail -f /var/log/elasticsearch/Linux.log
netstat -lntup:grep 9200
2. es-head的安装
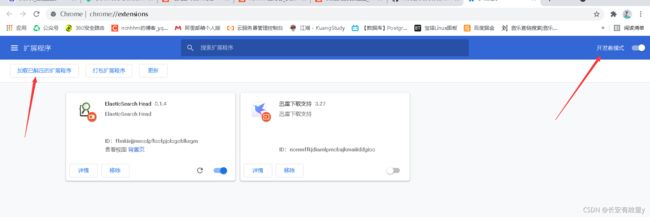
网址:
https://github.com/mobz/elasticsearch-head
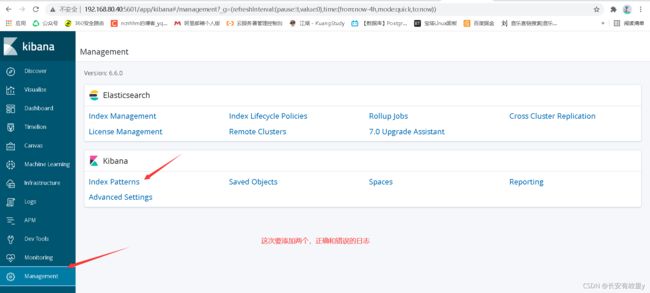
3. kibana的安装
下载地址:
https://www.elastic.co/cn/downloads/kibana
3.1 安装
我们下载rpm包的方式进行安装
上传到虚拟机
也可使用wget
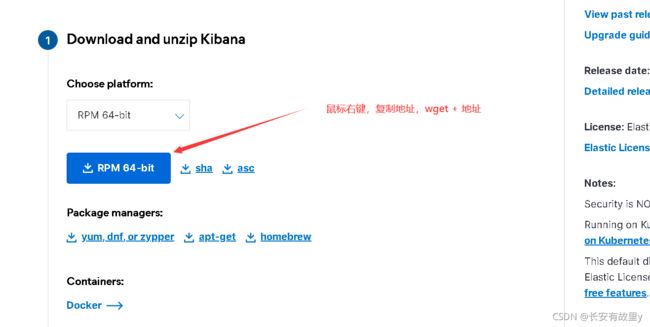
wget https://artifacts.elastic.co/downloads/kibana/kibana-7.15.2-x86_64.rpm
rpm -ivh kibana-6.6.0-x86_64.rpm
配置文件
vim /etc/kibana/kibana.yml
server.port: 5601
server.host: "192.168.80.40"
elasticsearch.hosts: ["http://localhost:9200"]
kibana.index: ".kibana
grep '^[a-z]' /etc/kibana/kibana.yml
server.port: 5601
server.host: "192.168.80.40"
elasticsearch.hosts: ["http://localhost:9200"]
kibana.index: ".kibana"
启动:
systemctl start kibana
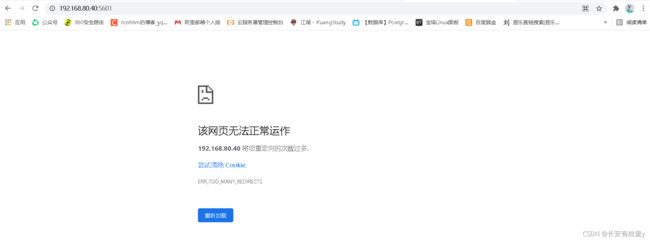
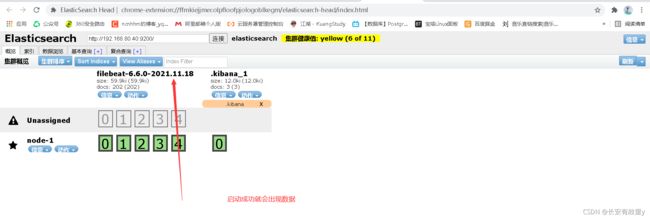
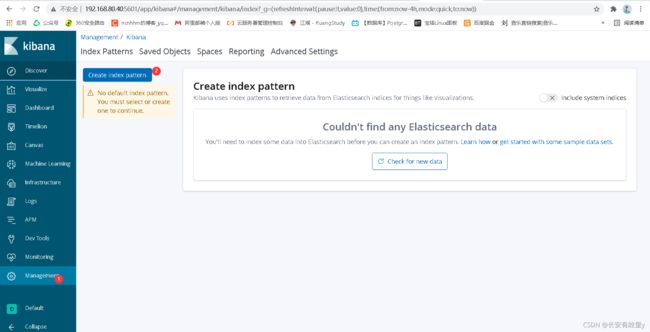
3.2 假如我们删除了es-head的.kibana_1
访问就会出错
192.168.80.40:5601
systemctl restart kibana
4. filebeat的安装
下载地址
https://www.elastic.co/cn/downloads/beats/filebeat
4.1 安装:
rpm -ivh filebeat-6.6.0-x86_64.rpm
4.2 使用filebeat进行nginx的日志收集
nginx的安装
添加yum源
vim /etc/yum.repos.d/nginx.repo
[nginx-stable]
name=nginx stable repo
baseurl=http://nginx.org/packages/centos/$releasever/$basearch/
gpgcheck=1
enabled=1
gpgkey=https://nginx.org/keys/nginx_signing.key
module_hotfixes=true

[nginx-mainline]
name=nginx mainline repo
baseurl=http://nginx.org/packages/mainline/centos/$releasever/$basearch/
gpgcheck=1
enabled=0
gpgkey=https://nginx.org/keys/nginx_signing.key
module_hotfixes=true

yum -y install nginx

启动
systemctl start nginx
访问
192.168.80.40
yum -y install httpd-tools
访问次数测试
ab -c 10 -n 100 192.168.80.40/
ab -c 10 -n 100 192.168.80.40/test.html

查看日志
tail -f /var/log/nginx/access.log
4.3 filebeat的配置文件的配置
简单的基础配置
vim /etc/filebeat/filebeat.yml

filebeat.inputs:
- type: log
  enabled: true
  paths:
    - /var/log/nginx/access.log
output.elasticsearch:
  hosts: ["localhost:9200"]
这里配置文件和ansible的剧本的书有这严格的要求
input进来的日志
output类似于输出的
我们启动一下看一下
systemctl start filebeat
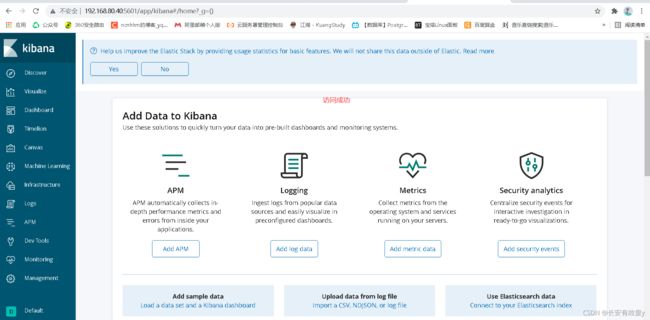
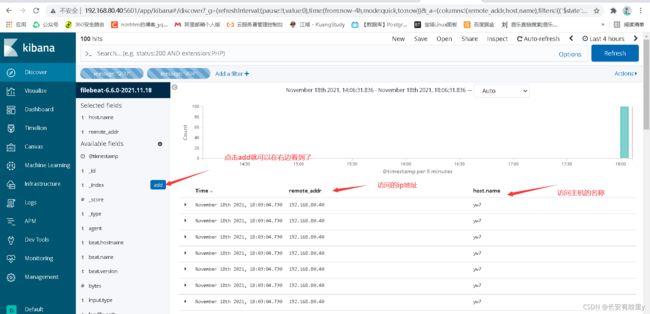
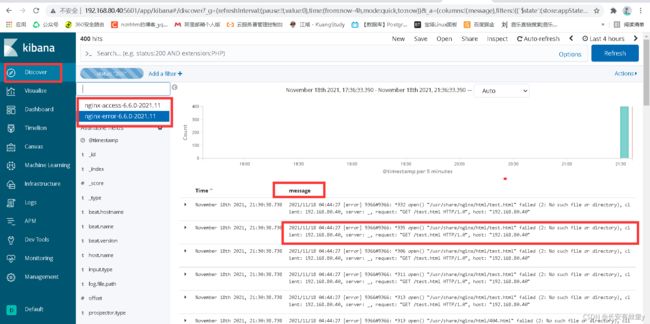
4.4 这个时候我们在kibana里边就可以添加filebeat获取到的数据
4.5 filebeat的加载数据的原理
在/var/lib/filebeat/*
下边记录了上一次日志收集的位置
假若停止了,有新的数据产生,再次开启,就会从上一次记录的
最后的位置进行

所以删除了es上的数据之后有两种办法
1.删了es数据并且删除了记录的位置,就会重新全部加载
2.删了es的数据,重新生成,只加载新加入的
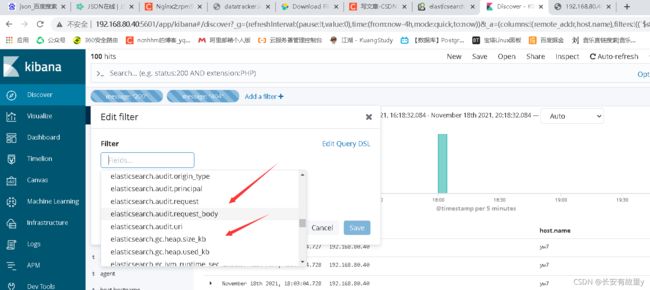
5. kibana对日志信息进行过滤
5.1 方式一
5.2 方式二
6. 搭建好以后的优化
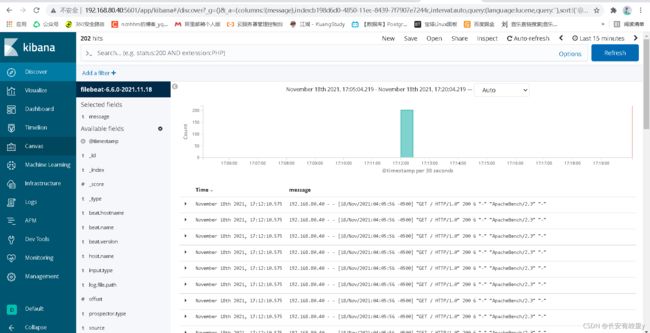
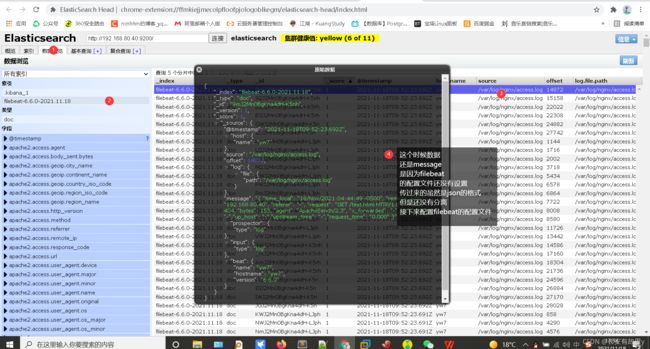
6.1 问题1:传过来的是日志数据,是一个完整的message
"message": "192.168.80.40 - - [18/Nov/2021:04:05:56 -0500]
 "GET / HTTP/1.0" 200 6 "-" "ApacheBench/2.3" "-"",
不利于查看,也不利于kibana上边的查看
首先我们更改nginx的日志格式,因为es的数据格式是json的格式,所以我们先配置nginx的日志格式
http://nginx.org/en/docs/http/ngx_http_log_module.html#access_log
vim /etc/nginx/nginx.conf

 log_format json  '{ "time_local": "$time_local", '
                           '"remote_addr": "$remote_addr", '
                           '"referer": "$http_referer", '
                           '"request": "$request", '
                           '"status": $status, '
                           '"bytes": $body_bytes_sent, '
                           '"agent": "$http_user_agent", '
                           '"x_forwarded": "$http_x_forwarded_for", '
                           '"up_addr": "$upstream_addr",'
                           '"up_host": "$upstream_http_host",'
                           '"upstream_time": "$upstream_response_time",'
                           '"request_time": "$request_time"'
    ' }';

    access_log  /var/log/nginx/access.log  json;
清空日志
> /var/log/nginx/access.log
systemctl  restart nginx
访问:
ab -c 10 -n 100 192.168.80.40/
ab -c 10 -n 100 192.168.80.40/test.html
这个时候日志的格式就变了
{ "time_local": "18/Nov/2021:04:44:49 -0500", "remote_addr": "192.168.80.40", "referer": "-", "request": "GET /test.html HTTP/1.0", "status": 404, "bytes": 153, "agent": "ApacheBench/2.3", "x_forwarded": "-", "up_addr": "-","up_host": "-","upstream_time": "-","request_time": "0.000" }
使用json解析器
https://www.sojson.com/
{
	"time_local": "18/Nov/2021:04:44:49 -0500",
	"remote_addr": "192.168.80.40",
	"referer": "-",
	"request": "GET /test.html HTTP/1.0",
	"status": 404,
	"bytes": 153,
	"agent": "ApacheBench/2.3",
	"x_forwarded": "-",
	"up_addr": "-",
	"up_host": "-",
	"upstream_time": "-",
	"request_time": "0.000"
}
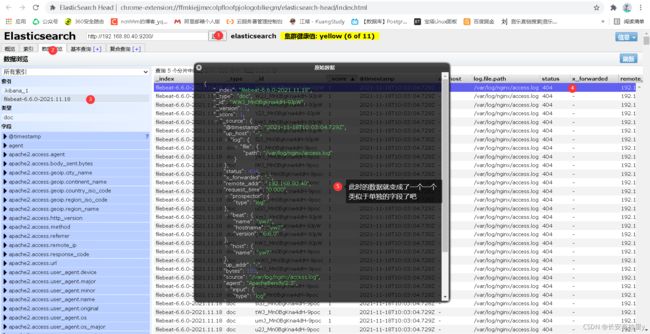
我们查看es上边的数据变化
systemctl stop filebeat
rm -f /var/lib/filebeat/*
systemctl start  filebeat
filebeat的文件配置
cd /etc/filebeat
注意filebeat配置文件的yml的格式书写

vim filebeat.yml

filebeat.inputs:
- type: log
  enabled: true
  paths:
    - /var/log/nginx/access.log
  json.keys_under_root: true
  json.overwrite_keys: true
output.elasticsearch:
  hosts: ["localhost:9200"]


==================================
就是添加了inputs
json.keys_under_root: true
json.overwrite_keys: true
方式一:只会导入重新生成的log
1.删除es-head 上的数据
2.重启,
添加数据测试即可
ab -c 10 -n 100 192.168.80.40/
方式二:该方法会重新导入所有的log,
重新启动
1.删除es上边的数据es-head
2.删除filebeat记录访问的数据日志的位置
3.重启
4.es-head查看数据
6.2 除了上边的问题,还是会有许多默认的配置数据会出现在kibana,数据的名称是默认的,我们进行更改
https://www.elastic.co/guide/en/beats/filebeat/6.6/elasticsearch-output.html
vim filebeat.yml

filebeat.inputs:
- type: log
  enabled: true
  paths:
    - /var/log/nginx/access.log
  json.keys_under_root: true
  json.overwrite_keys: true
setup.kibana:
  host: "192.168.80.40:5601"
output.elasticsearch:
  hosts: ["localhost:9200"]
  index: "nginx-%{[beat.version]}-%{+yyyy.MM}"
setup.template.name: "nginx"
setup.template.pattern: "nginx-*"
setup.template.enabled: false
setup.template.overwrite: true


kibana的主机
setup.kibana:
  host: "192.168.80.40:5601"

日志的格式
每月进行分割     yyyy.MM.dd每天
index: "nginx-%{[beat.version]}-%{+yyyy.MM}"
名字,下边的四个缺一不可
setup.template.name: "nginx"
setup.template.pattern: "nginx-*"
setup.template.enabled: false
setup.template.overwrite: true
6.2.1 index版本的区别参数不同,一定要查看官网
6.6上边:beat.version
https://www.elastic.co/guide/en/beats/filebeat/6.6/elasticsearch-output.html
output.elasticsearch:
  hosts: ["https://localhost:9200"]
  index: "filebeat-%{[beat.version]}-%{+yyyy.MM.dd}"
  ssl.certificate_authorities: ["/etc/pki/root/ca.pem"]
  ssl.certificate: "/etc/pki/client/cert.pem"
  ssl.key: "/etc/pki/client/cert.key"
7.15版本:agent.version
https://www.elastic.co/guide/en/beats/filebeat/current/elasticsearch-output.html
output.elasticsearch:
  hosts: ["http://localhost:9200"]
  index: "%{[fields.log_type]}-%{[agent.version]}-%{+yyyy.MM.dd}"
方式一:只会导入重新生成的log
1.删除es-head 上的数据
2.重启,
添加数据测试即可
ab -c 10 -n 100 192.168.80.40/
方式二:该方法会重新导入所有的log,
重新启动
1.删除es上边的数据es-head
2.删除filebeat记录访问的数据日志的位置 /var/lib/filebeat/*
3.重启
4.es-head查看数据
6.3 收集更加完整的数据
按月份分
vim filebeat.yml

filebeat.inputs:
- type: log
  enabled: true
  paths:
    - /var/log/nginx/access.log
  json.keys_under_root: true
  json.overwrite_keys: true
  tags: ["access"]
- type: log
  enabled: true
  paths:
    - /var/log/nginx/error.log
  tags: ["error"]
setup.template.settings:
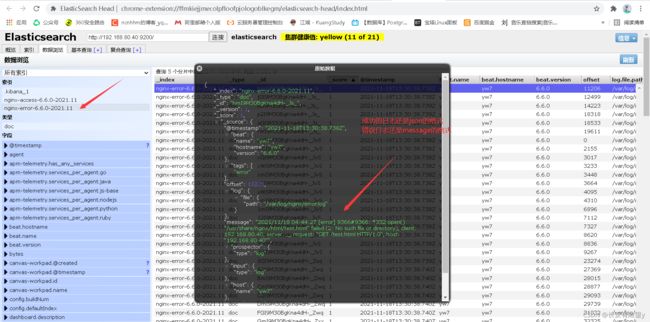
  index.number_of_shards: 3
setup.kibana:
  host: "192.168.80.40:5601"
output.elasticsearch:
  hosts: ["localhost:9200"]
  indices:
    - index: "nginx-access-%{[beat.version]}-%{+yyyy.MM}"
      when.contains:
        tags: "access"
    - index: "nginx-error-%{[beat.version]}-%{+yyyy.MM}"
      when.contains:
        tags: "error"
setup.template.name: "nginx"
setup.template.pattern: "nginx-*"
setup.template.enabled: false
setup.template.overwrite: true
天天
"nginx_error-%{[beat.version]}-%{+yyyy.MM.dd}"
方式一:只会导入重新生成的log
1.删除es-head 上的数据
2.重启,
添加数据测试即可
ab -c 10 -n 100 192.168.80.40/
