vs code c语言断点调试window版解决方案
序:
1、这一步不懂劝退多少人,博主搜到了多少博文都是mac的,结果发现都对不上!
先看最终效果演示
接下去我每个步骤,你都仔细看,漏看一个环境都对不上!
正文
1、先去看博主的c/c++运行环境配置图解(window篇)_雪狼之夜的博客-CSDN博客
你要是自己安装完了,你要记下MinGW的路径后面要用(关键点!!!)
2、先安装插件Code Runner和C/C++ Extension Pack
3、安装完后别管其他的,跟我下面一步一步来
4、新建一个test.c的文件,然后用vs打开这个文件所在目录代码如下
#include

int main(){
	int a=1;
    int b=2;
    printf("2222222");
}
5、vscode 菜单->设置-把下面那三个先勾起来,保存
6、先运行,看看能不能动的了
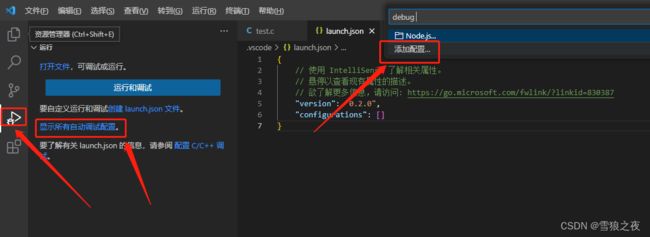
7、安装c调试@category:debuggers C
这时候你的目录下多了一个文件/.vscode/tasks.json, 注意 ,先别管他!!!
多了一个文件
点他
{
    // 使用 IntelliSense 了解相关属性。
    // 悬停以查看现有属性的描述。
    // 欲了解更多信息,请访问: https://go.microsoft.com/fwlink/?linkid=830387
    "version": "0.2.0",
    "configurations": [
        {
            "name": "(gdb) 启动",
            "type": "cppdbg",
            "request": "launch",
            "program": "输入程序名称,例如 ${workspaceFolder}/a.exe",
            "args": [],
            "stopAtEntry": false,
            "cwd": "${fileDirname}",
            "environment": [],
            "externalConsole": false,
            "MIMode": "gdb",
            "miDebuggerPath": "/path/to/gdb",
            "setupCommands": [
                {
                    "description": "为 gdb 启用整齐打印",
                    "text": "-enable-pretty-printing",
                    "ignoreFailures": true
                },
                {
                    "description": "将反汇编风格设置为 Intel",
                    "text": "-gdb-set disassembly-flavor intel",
                    "ignoreFailures": true
                }
            ]
        }

    ]
}好这里开始别动!,注意!!!!!!!你的MinGW的路径 就是正文1第一步提的那个!!!!!!复制一下
"miDebuggerPath": "F:/MinGW/bin/gdb.exe","program": "${workspaceFolder}/test.exe",然后来你回来test.c,运行
上面你跑通了,我们在继续
打开launch.json 修改下保存
"program": "${workspaceFolder}/${fileBasenameNoExtension}.exe", "preLaunchTask": "tast gcc" //修改此项在打开tasks.json
1、注释掉// "-fdiagnostics-color=always",
2、修改label
"label": "tast gcc",{
"tasks": [
{
"type": "cppbuild",
"label": "tast gcc",
"command": "F:\\MinGW\\bin\\gcc.exe",
"args": [
// "-fdiagnostics-color=always",
"-g",
"${file}",
"-o",
"${fileDirname}\\${fileBasenameNoExtension}.exe"
],
"options": {
"cwd": "${fileDirname}"
},
"problemMatcher": [
"$gcc"
],
"group": {
"kind": "build",
"isDefault": true
},
"detail": "调试器生成的任务。"
}
],
"version": "2.0.0"
}保存!!!
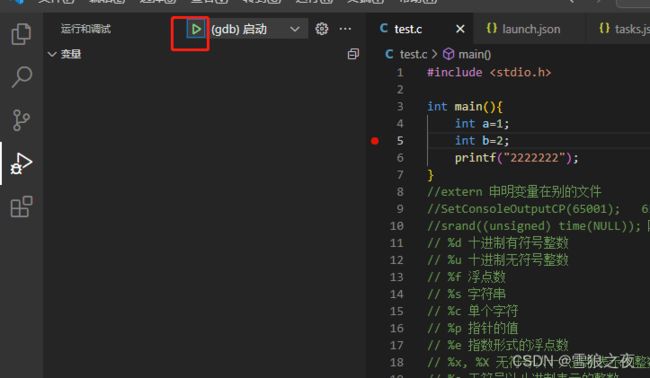
好了,这下,我们回到test.c调试


